Learn about AI for accountingJoin live workshops

Ask the support agent

Just ask a direct question or search related articles from the Knowledge Base.

Support Center / Workpaper Agent / Studio

Configure labels and views

New

Add labels to Workpaper Agent templates and workpapers, show label groups as columns, filter by labels, and save client-level views for reuse. Labels created in Settings are shared across the client account.

Workflow

Step 1

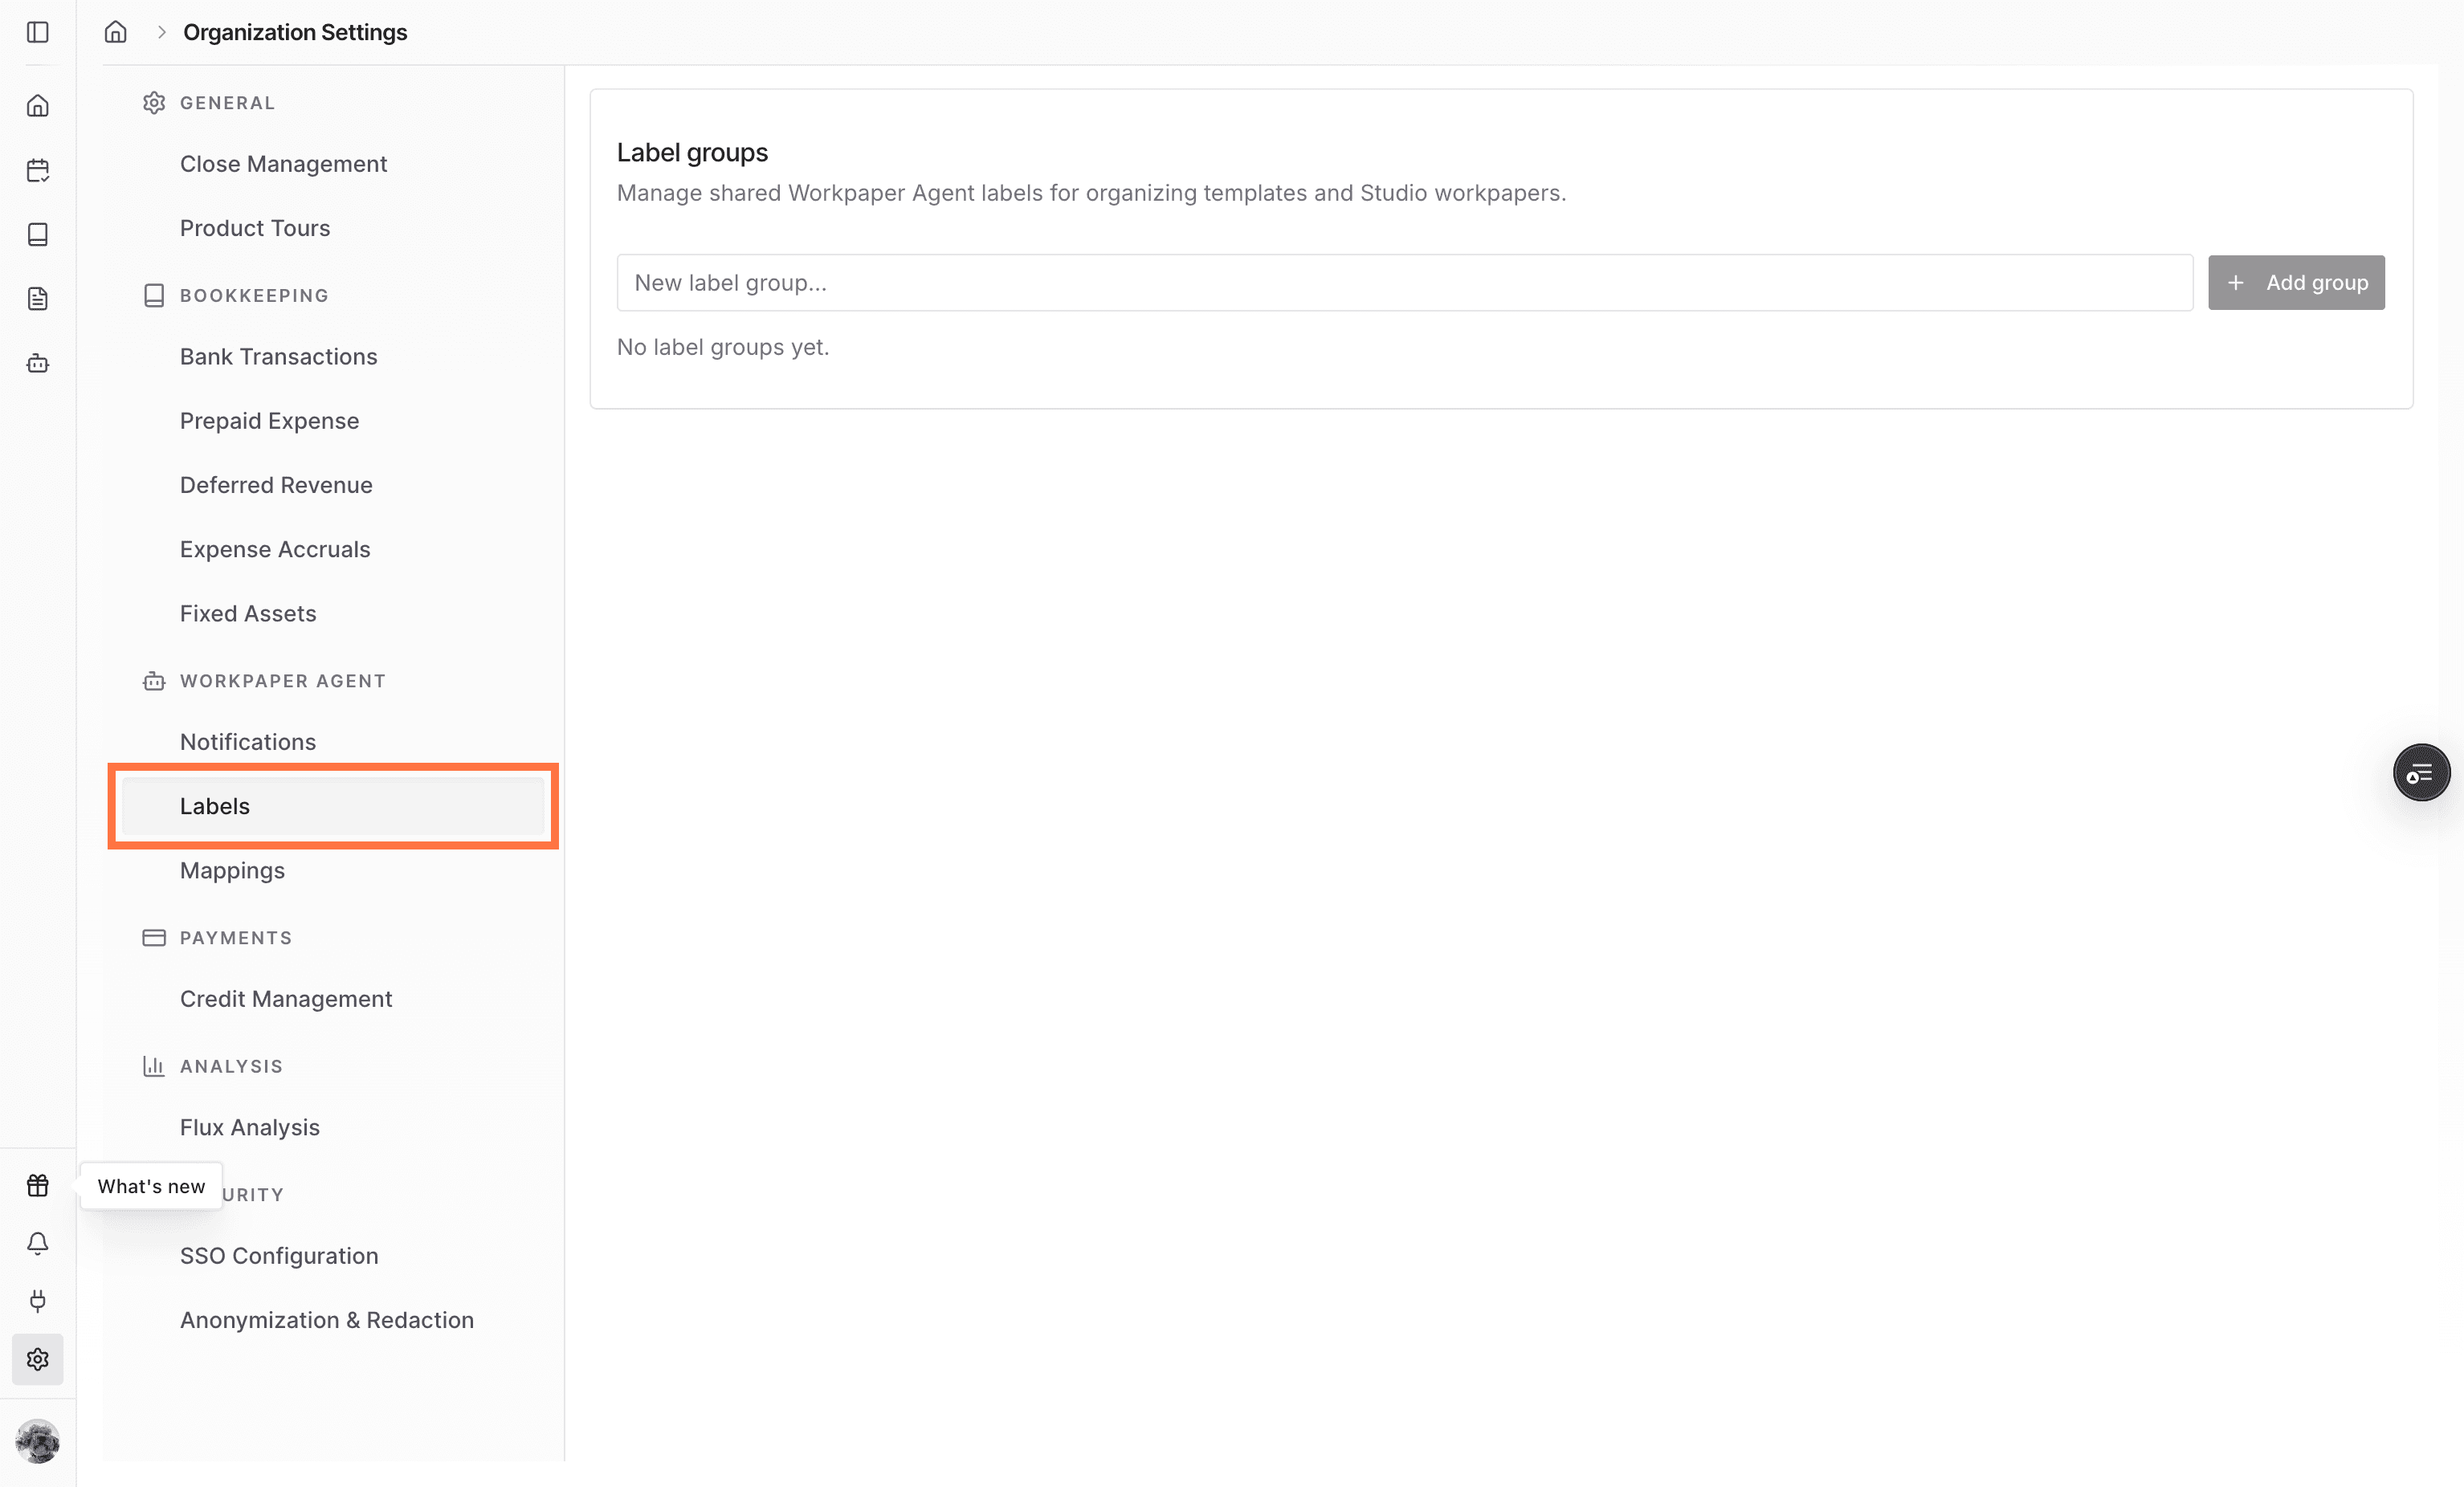
Open Labels

Go to Settings, then open Labels to manage the label groups available for Workpaper Agent templates and workpapers. Label groups and labels are saved at the client account level, so all users assigned to that account can see and edit them.

Screenshot showing the Labels option in Settings

Step 2

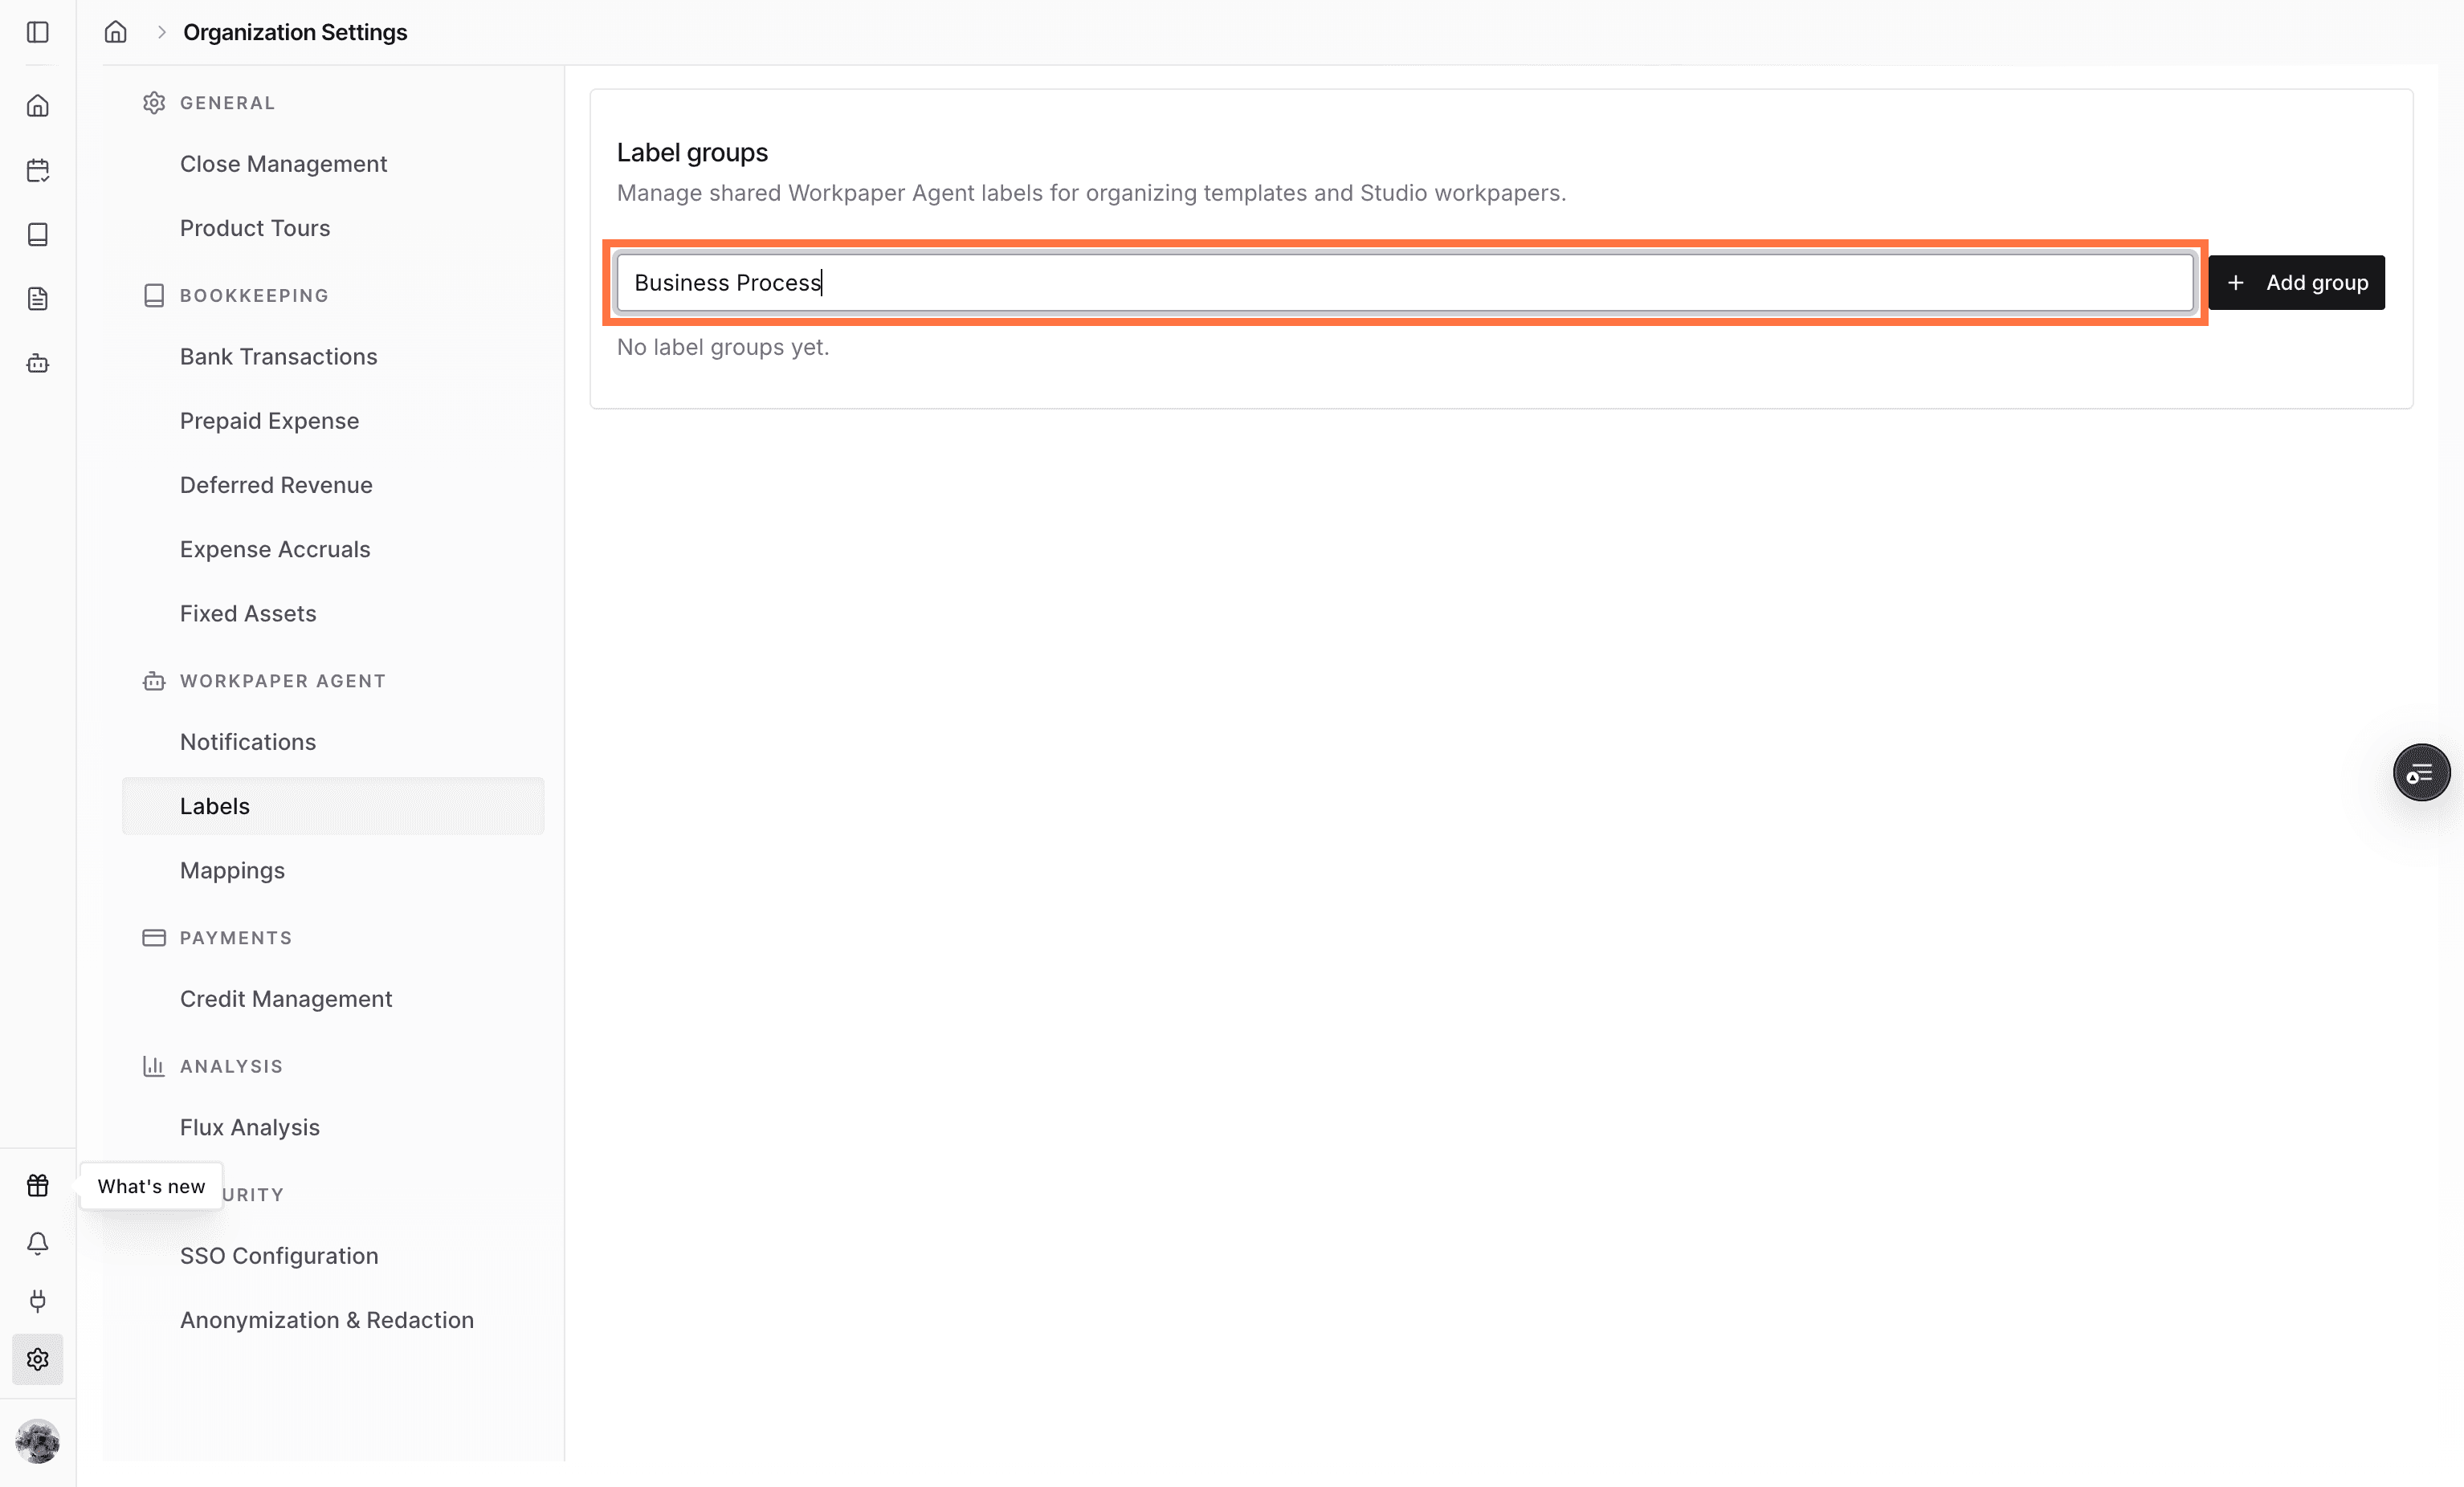
Name the label group

Enter the label group name, such as Business Process, to define the category of labels your team will apply.

Screenshot showing the new label group name field

Step 3

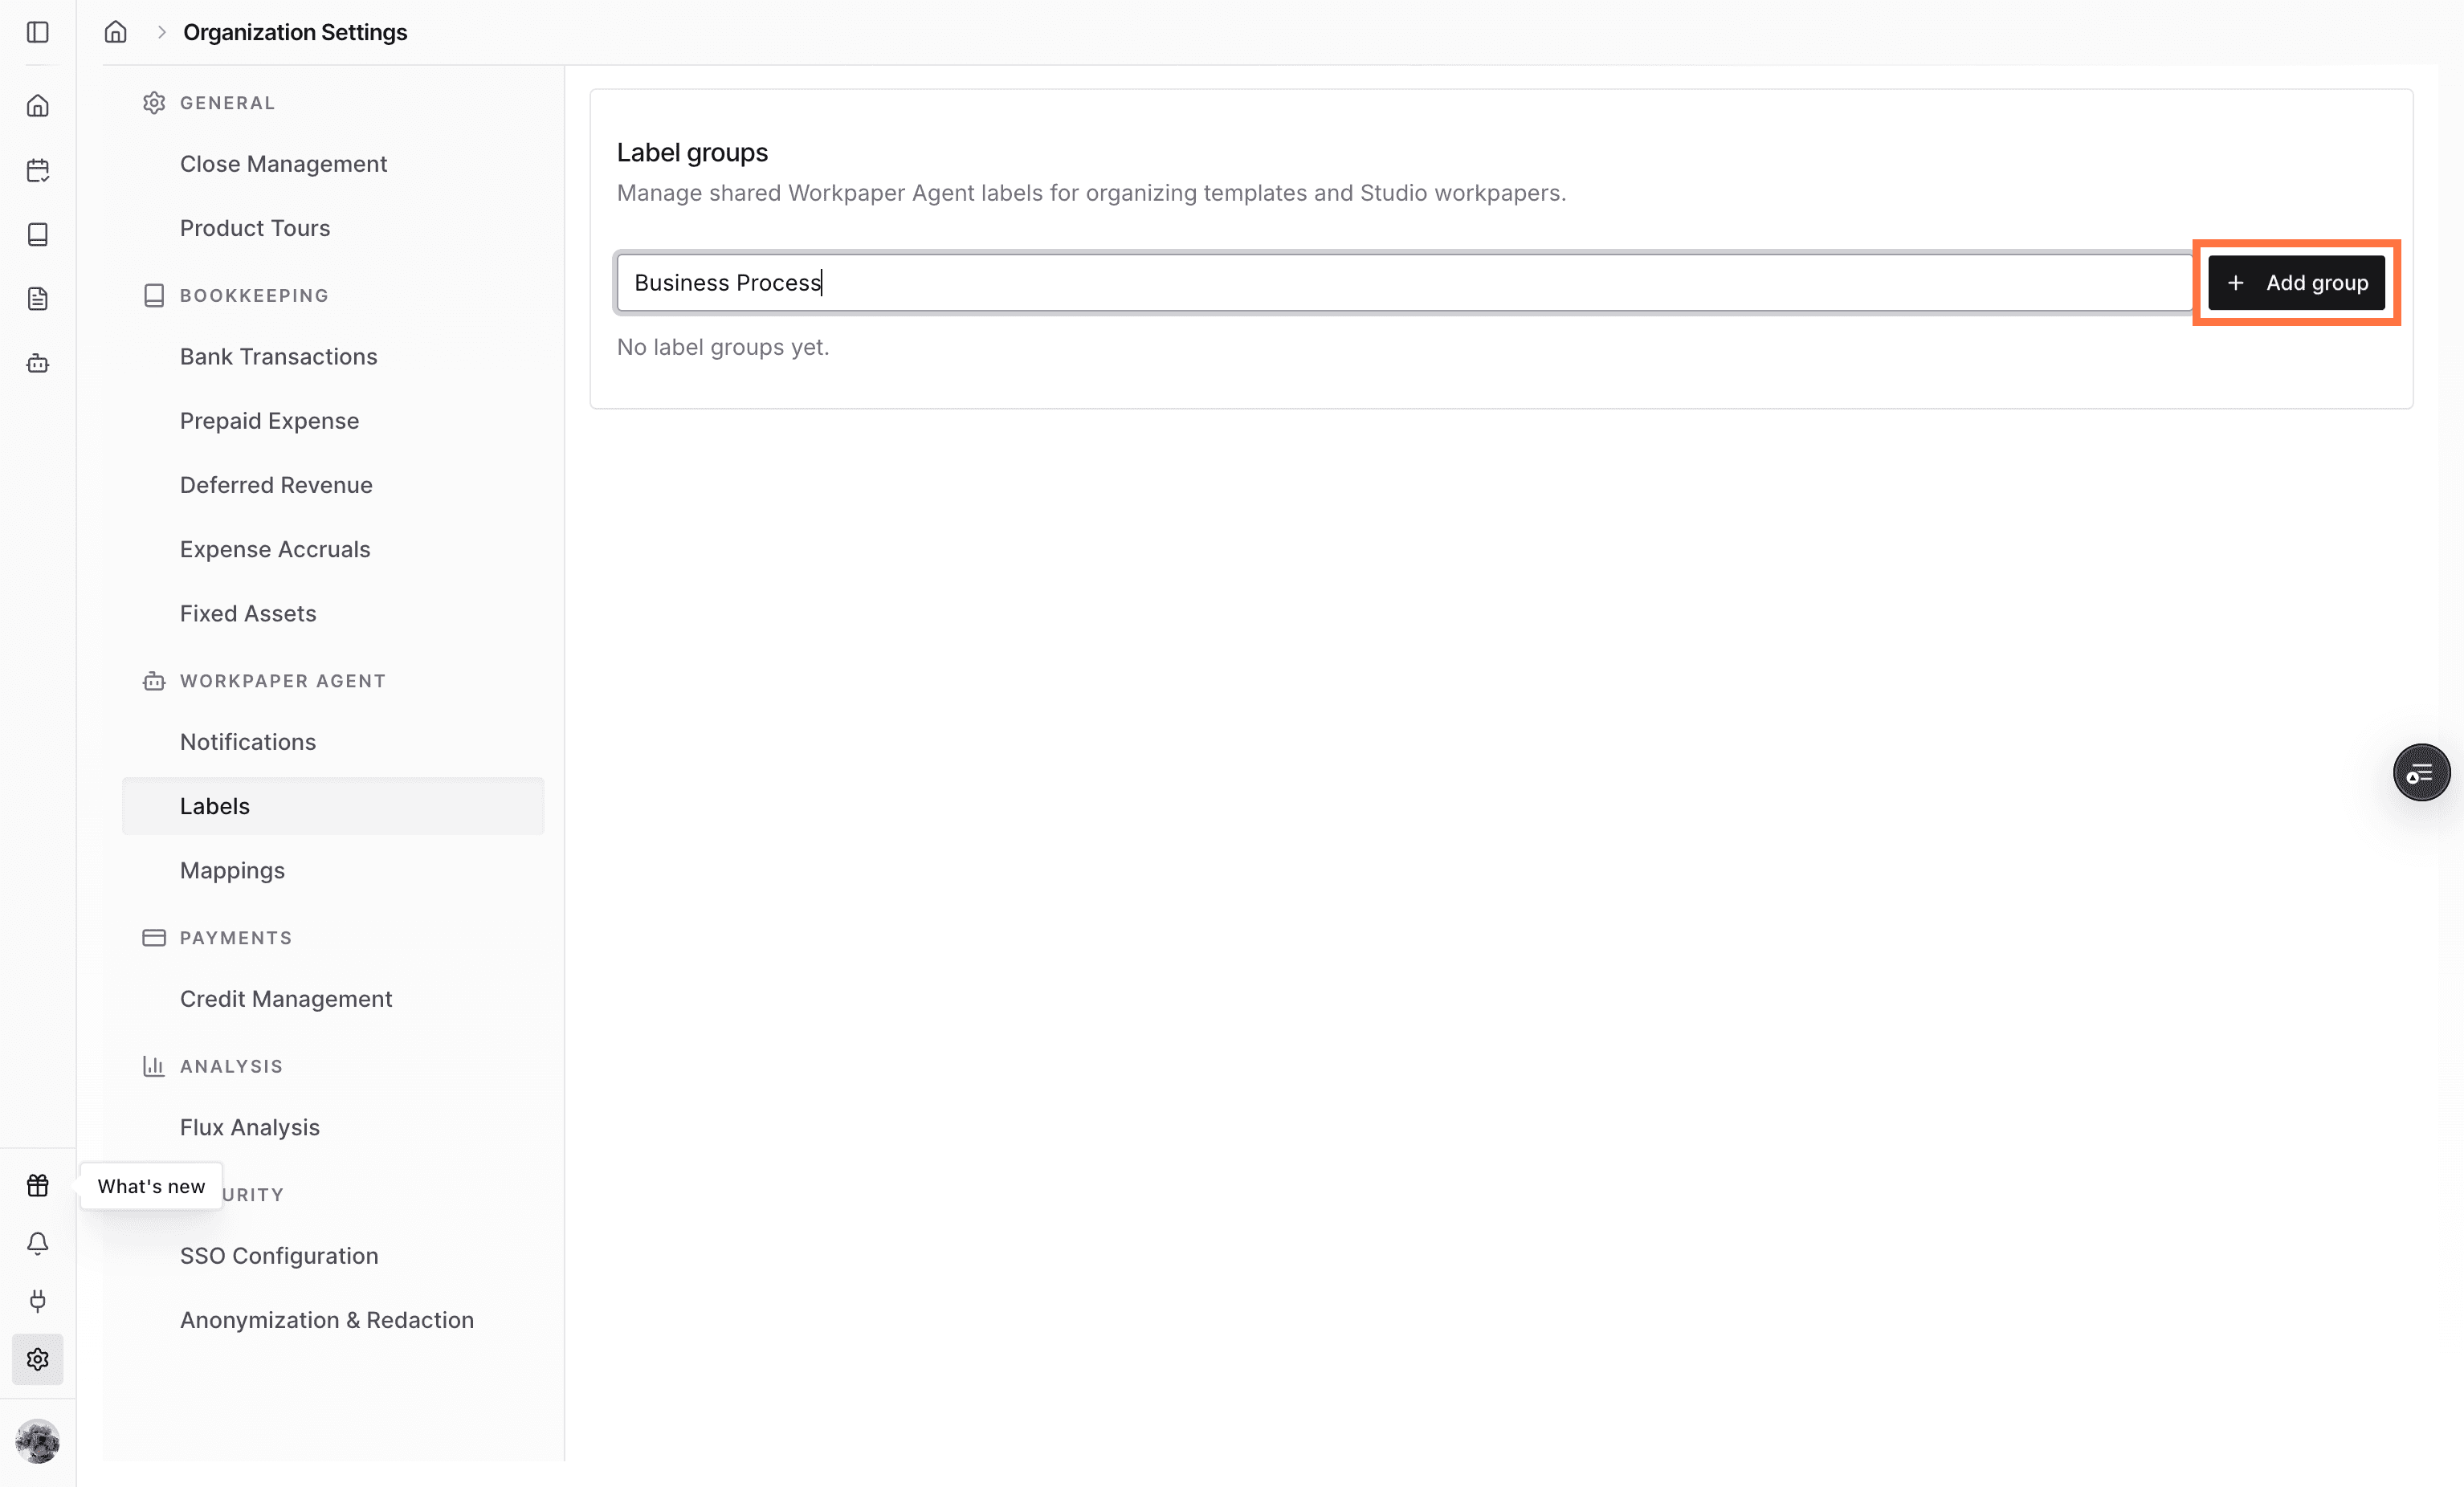
Add the group

Save the new label group so labels can be created under it.

Screenshot showing the Add group action

Step 4

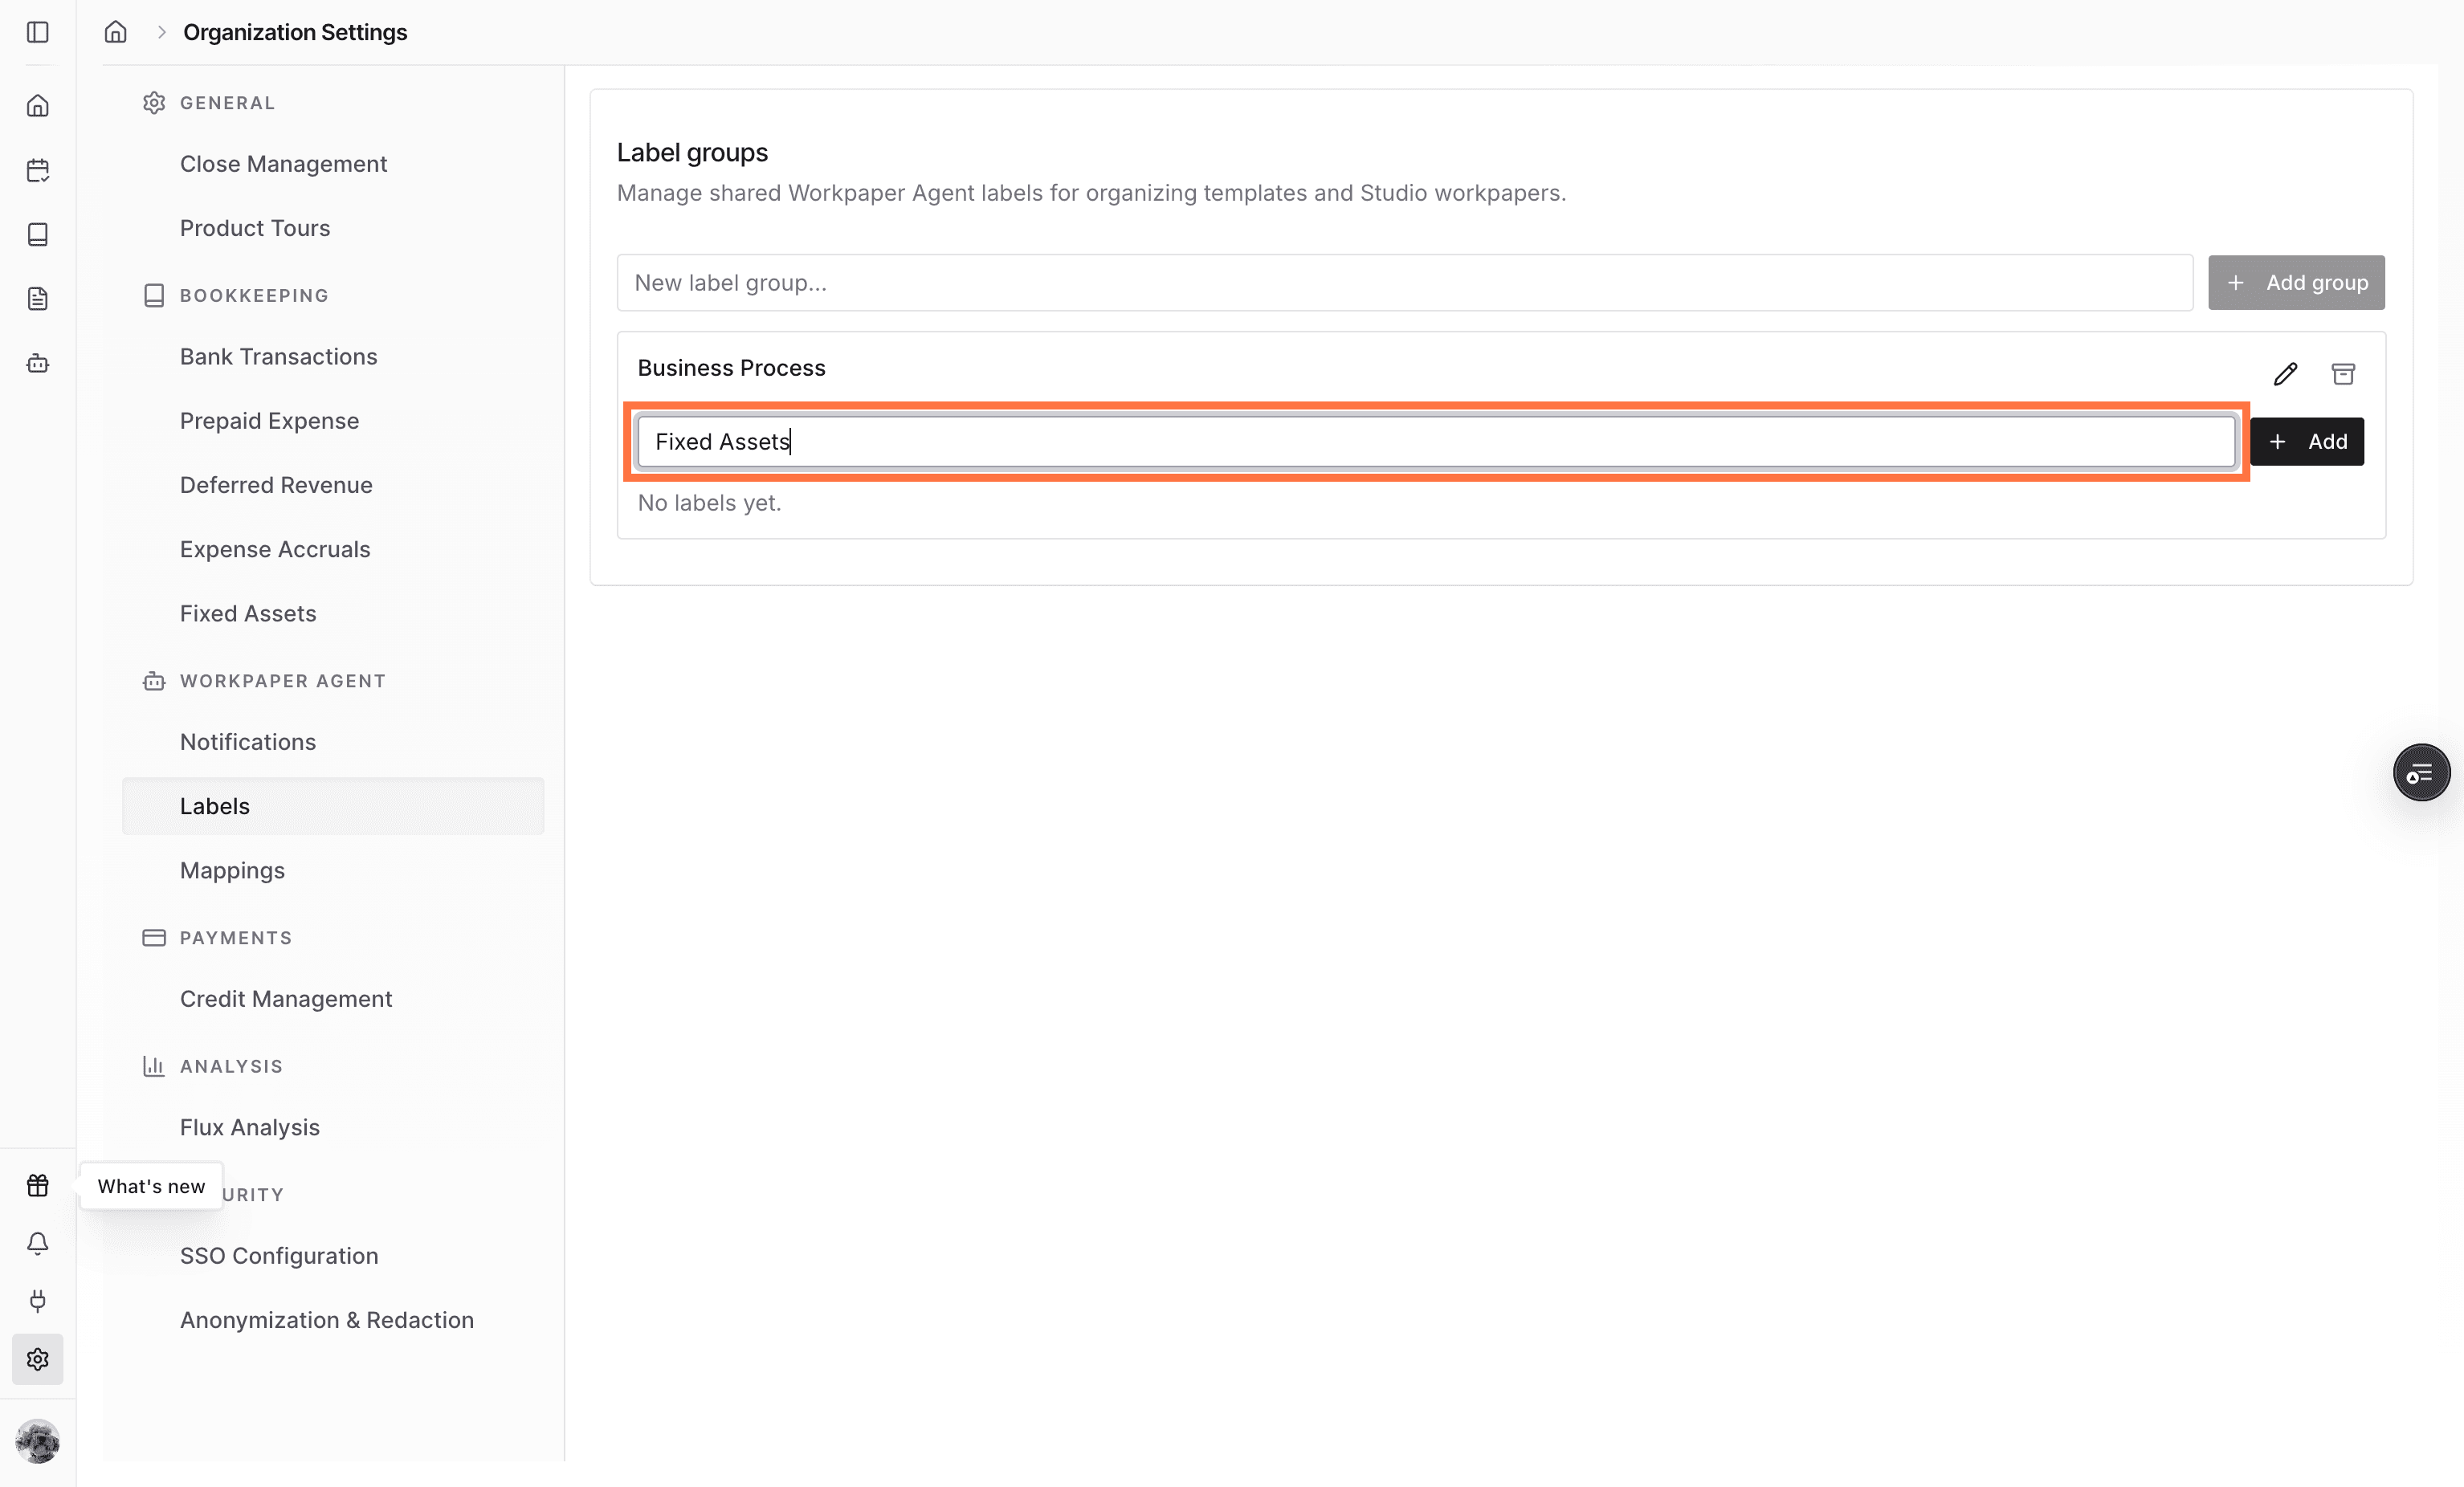
Name the label

Add a label inside the group, such as Prepaid Expenses, Brokerage, or another business process your team uses to organize workpapers.

Screenshot showing the new label field under the label group

Step 5

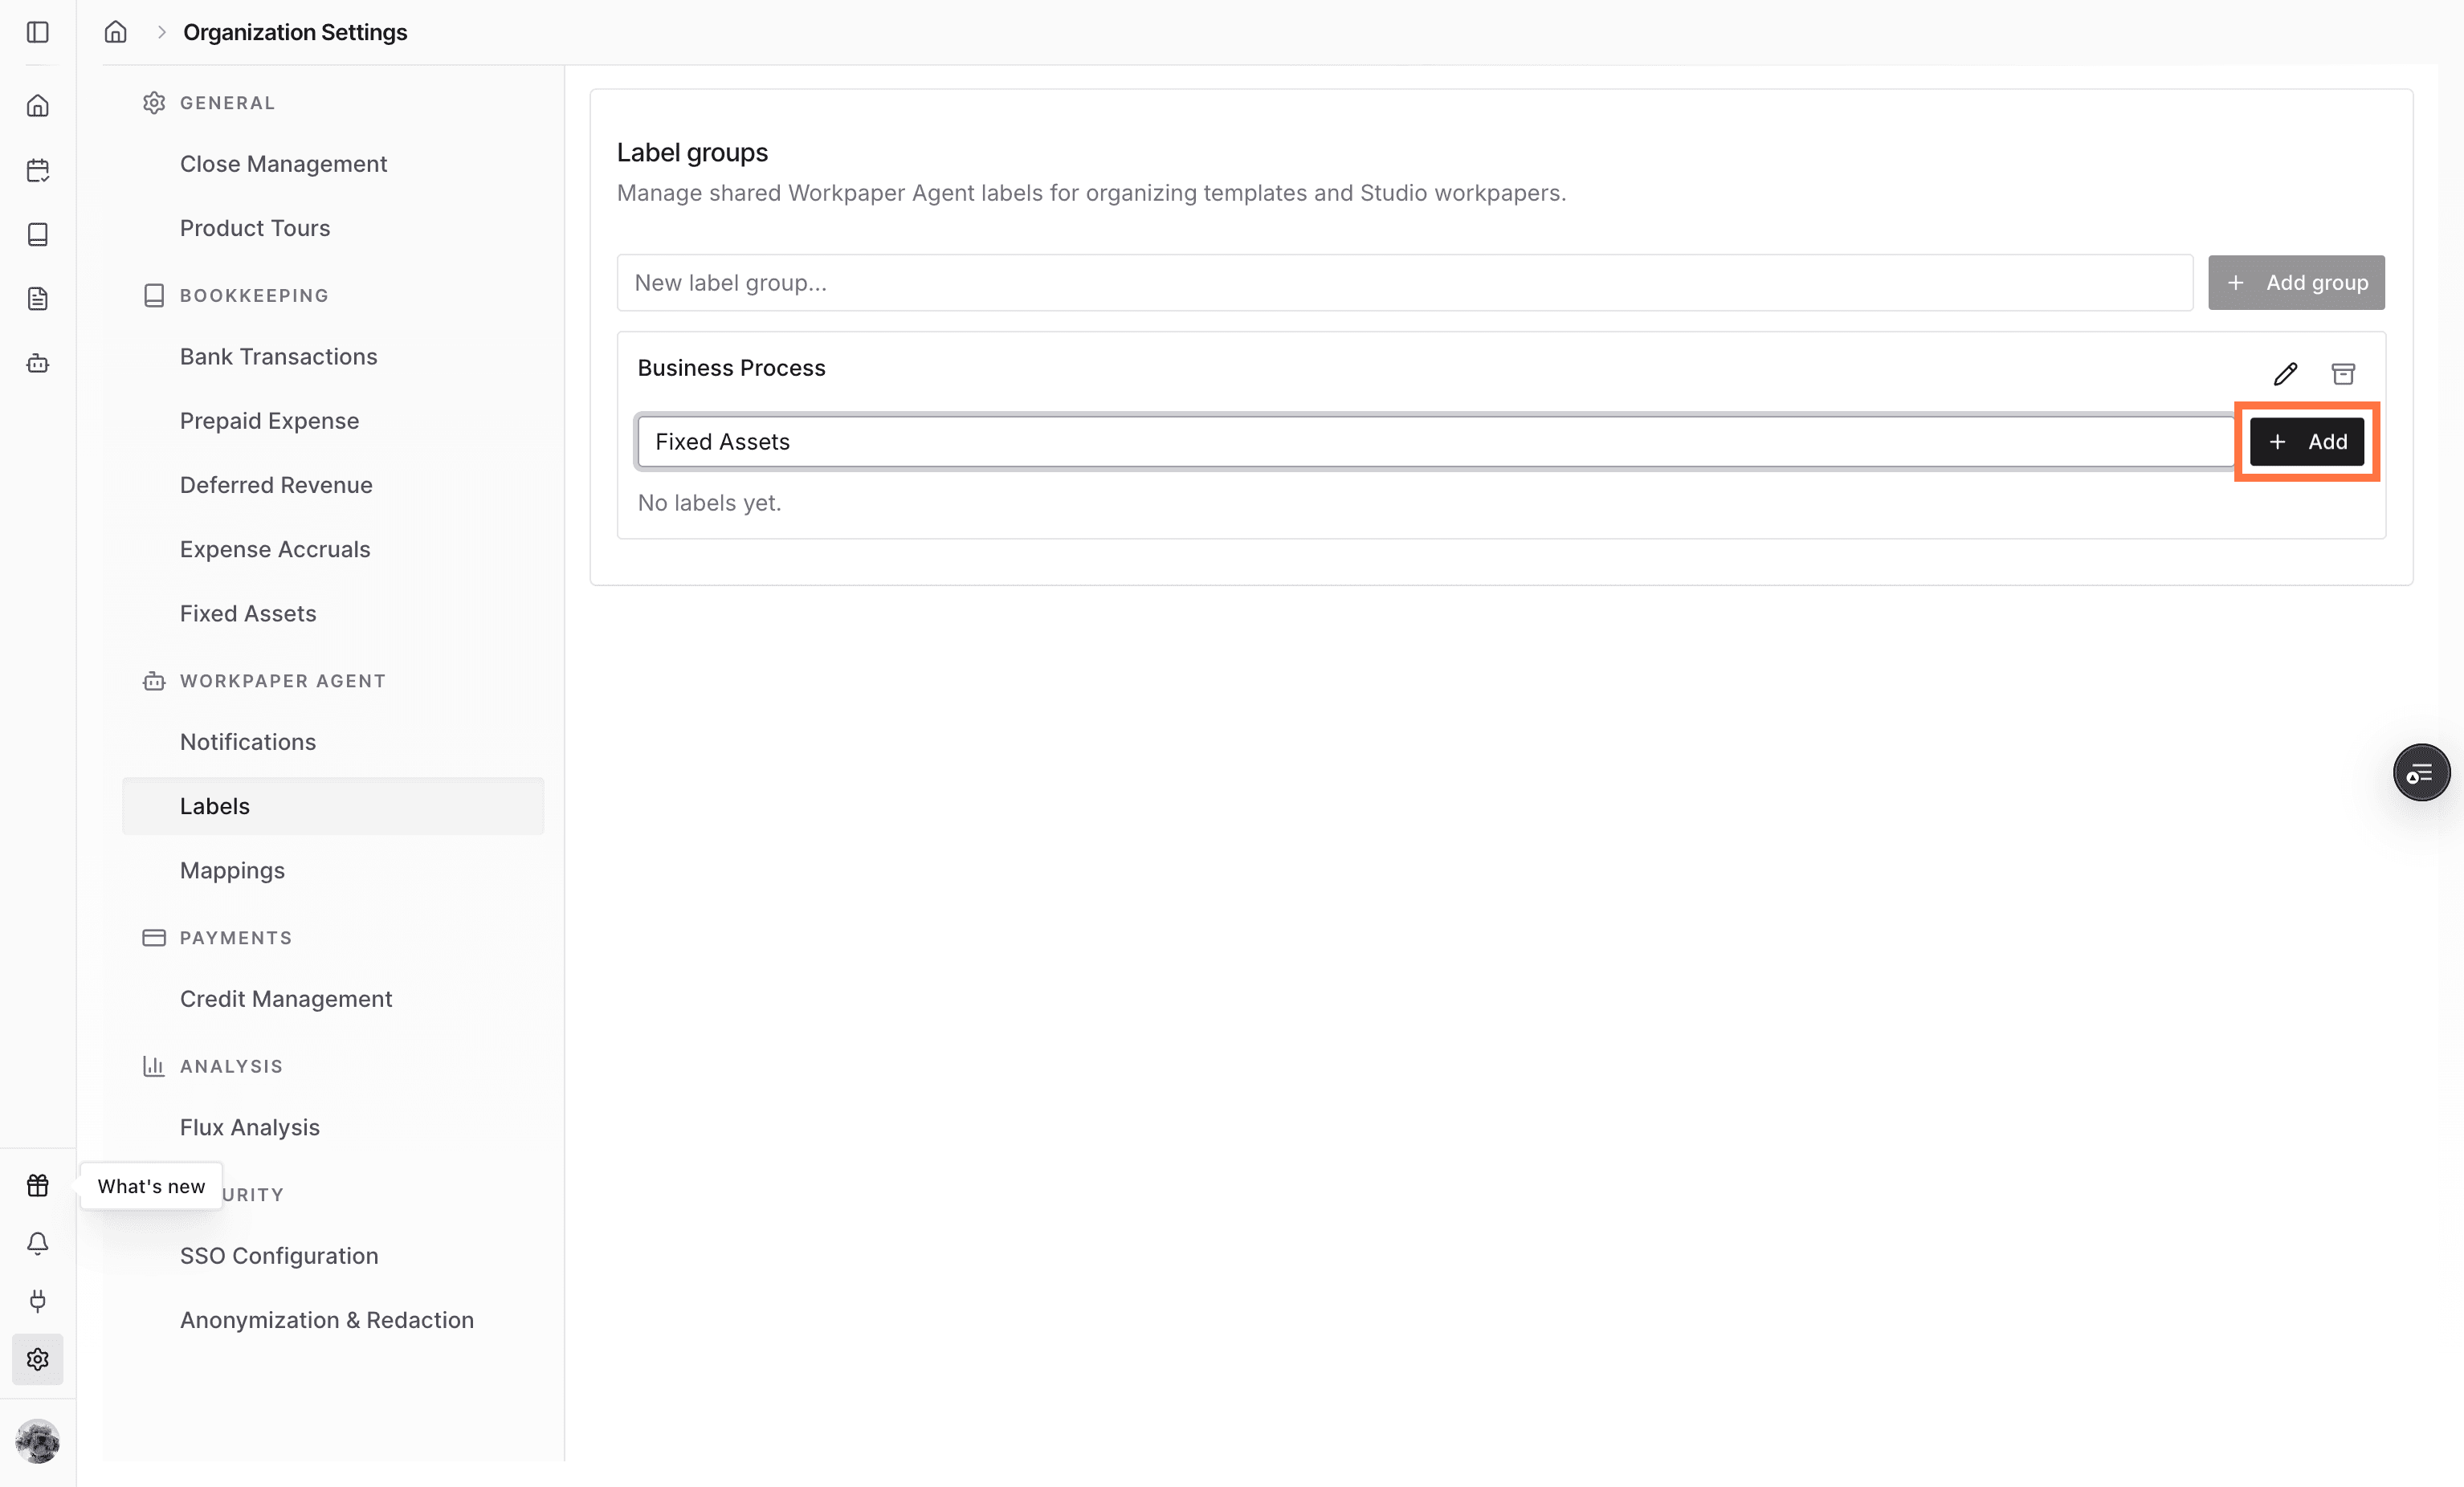
Add the label

Save the label so it becomes available when assigning labels to templates or workpapers.

Screenshot showing the Add action for a new label

Step 6

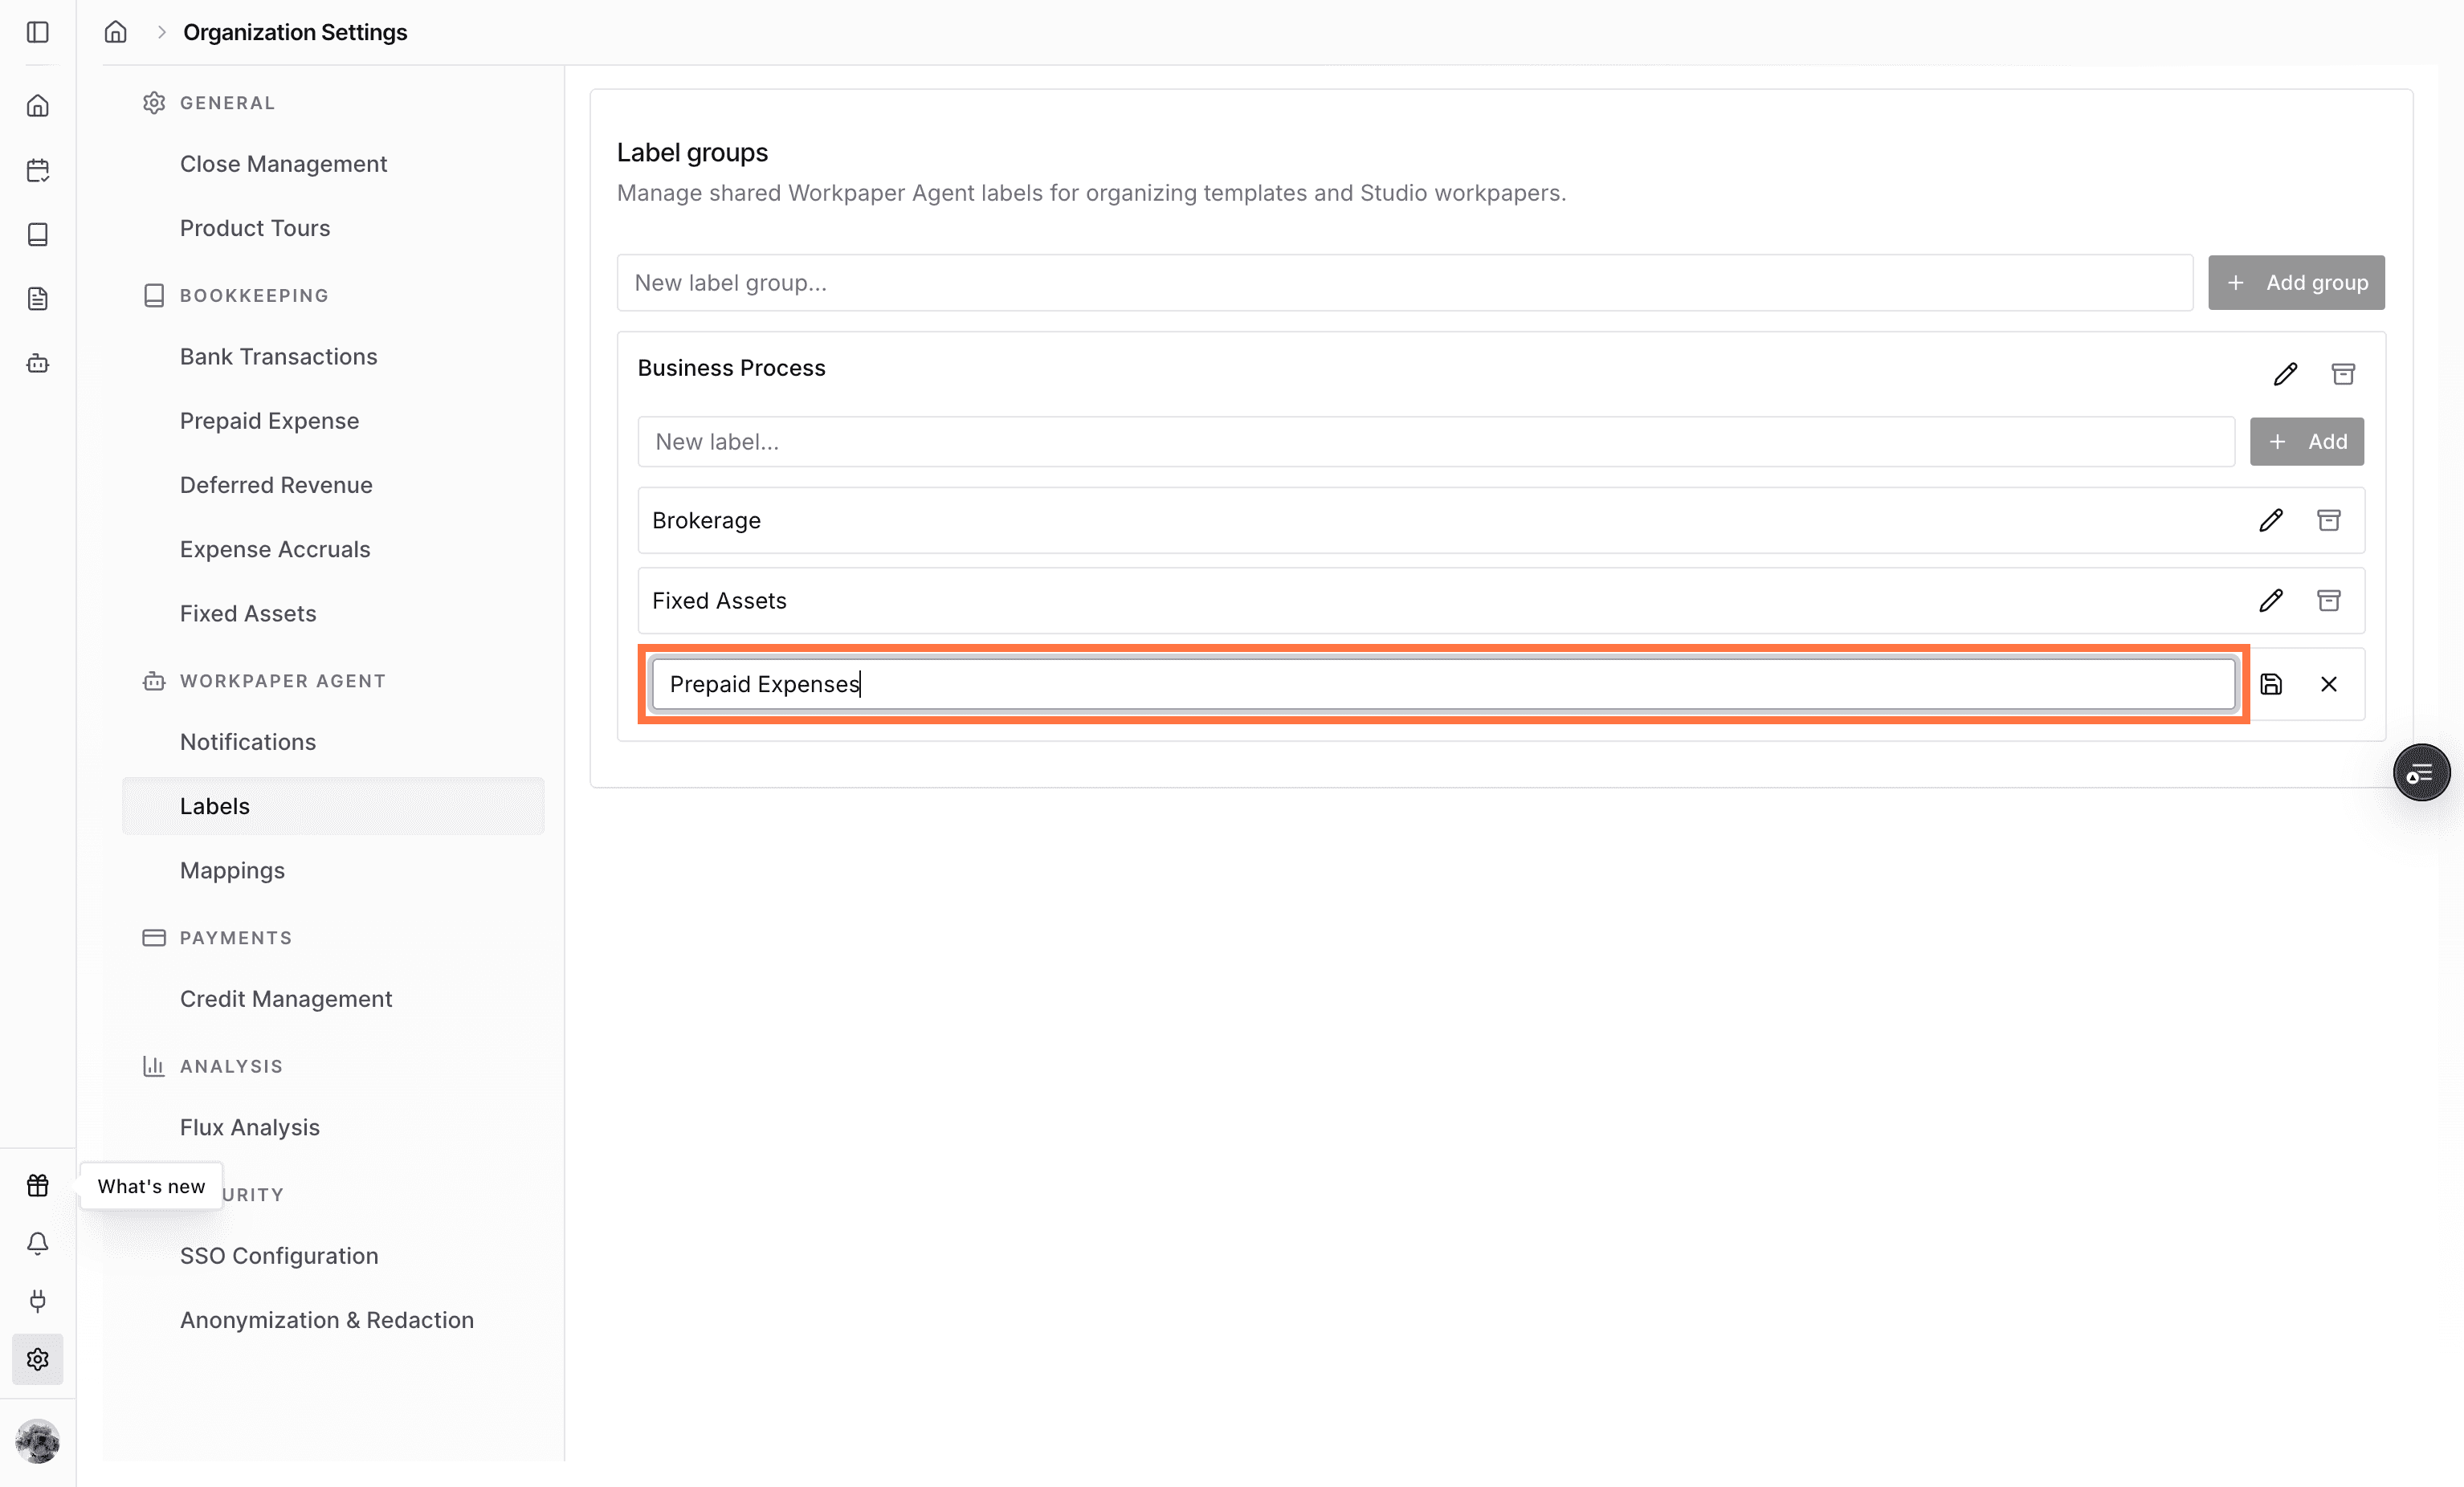
Rename a label

Use the label row to rename an existing label when the label wording needs to match your team's naming convention.

Screenshot showing a label being renamed

Step 7

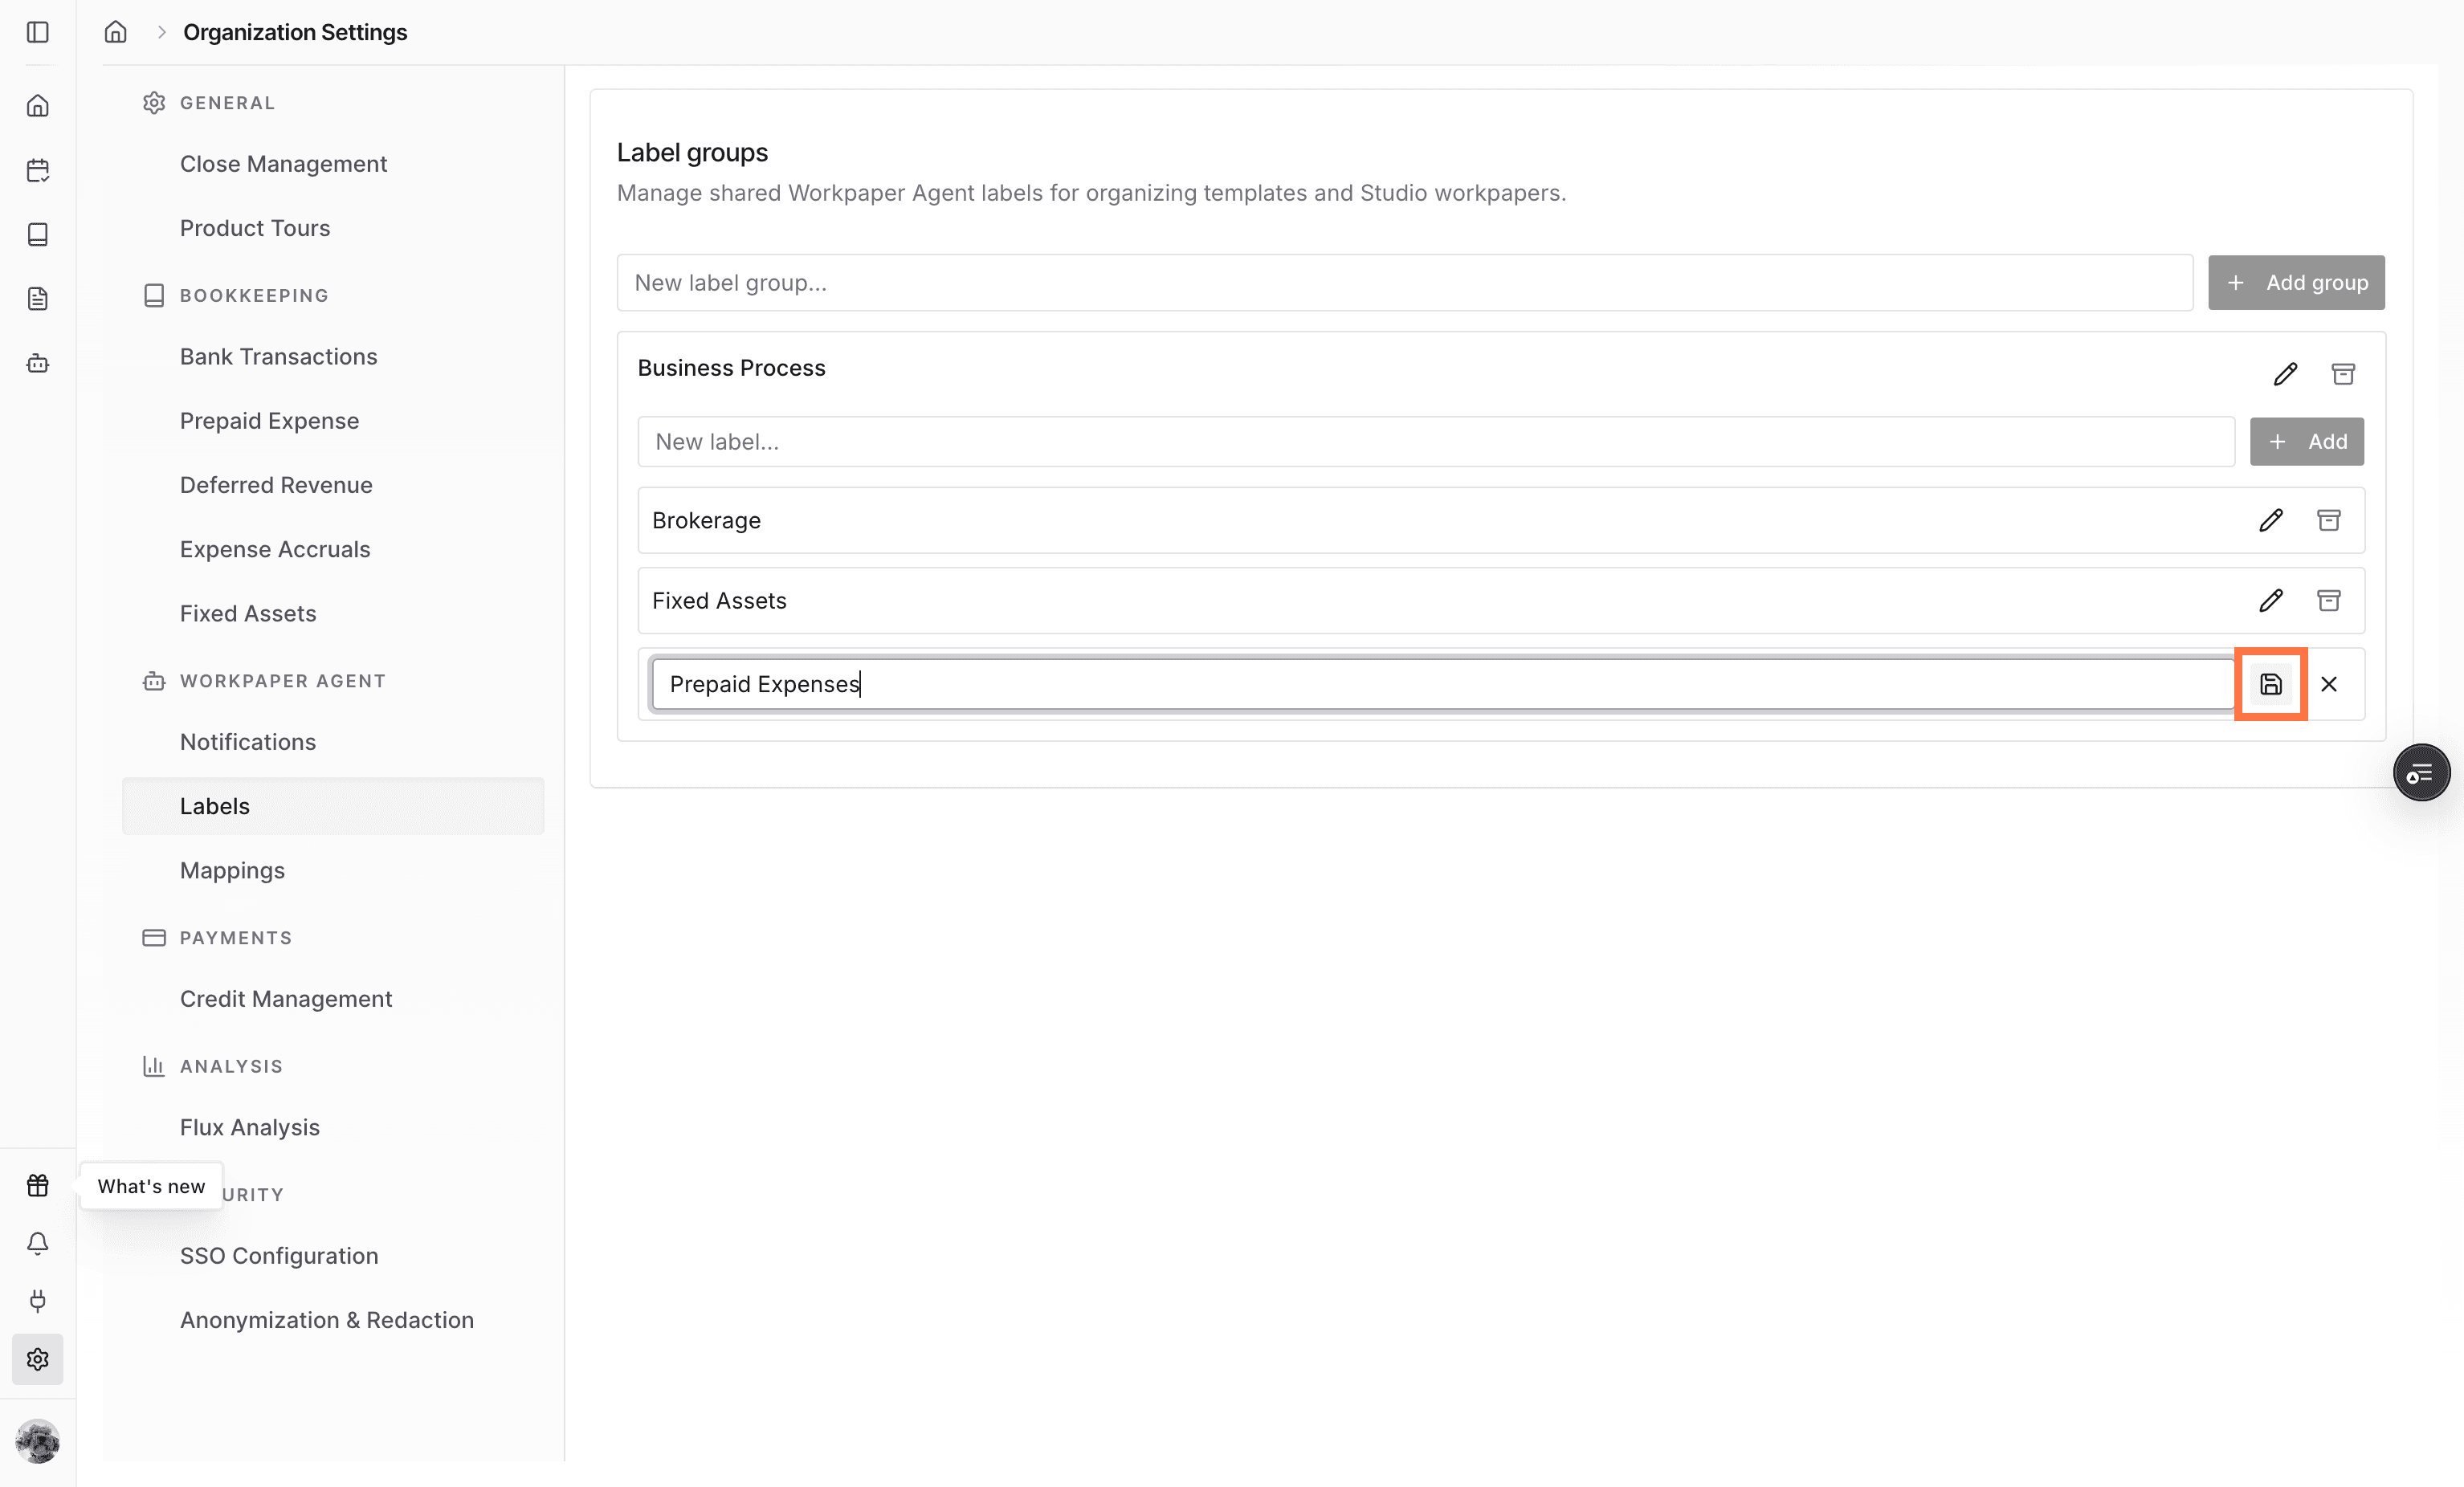
Save the label

Confirm the renamed label so the updated name is available across the Workpaper Agent label picker.

Screenshot showing the save action for a renamed label

Step 8

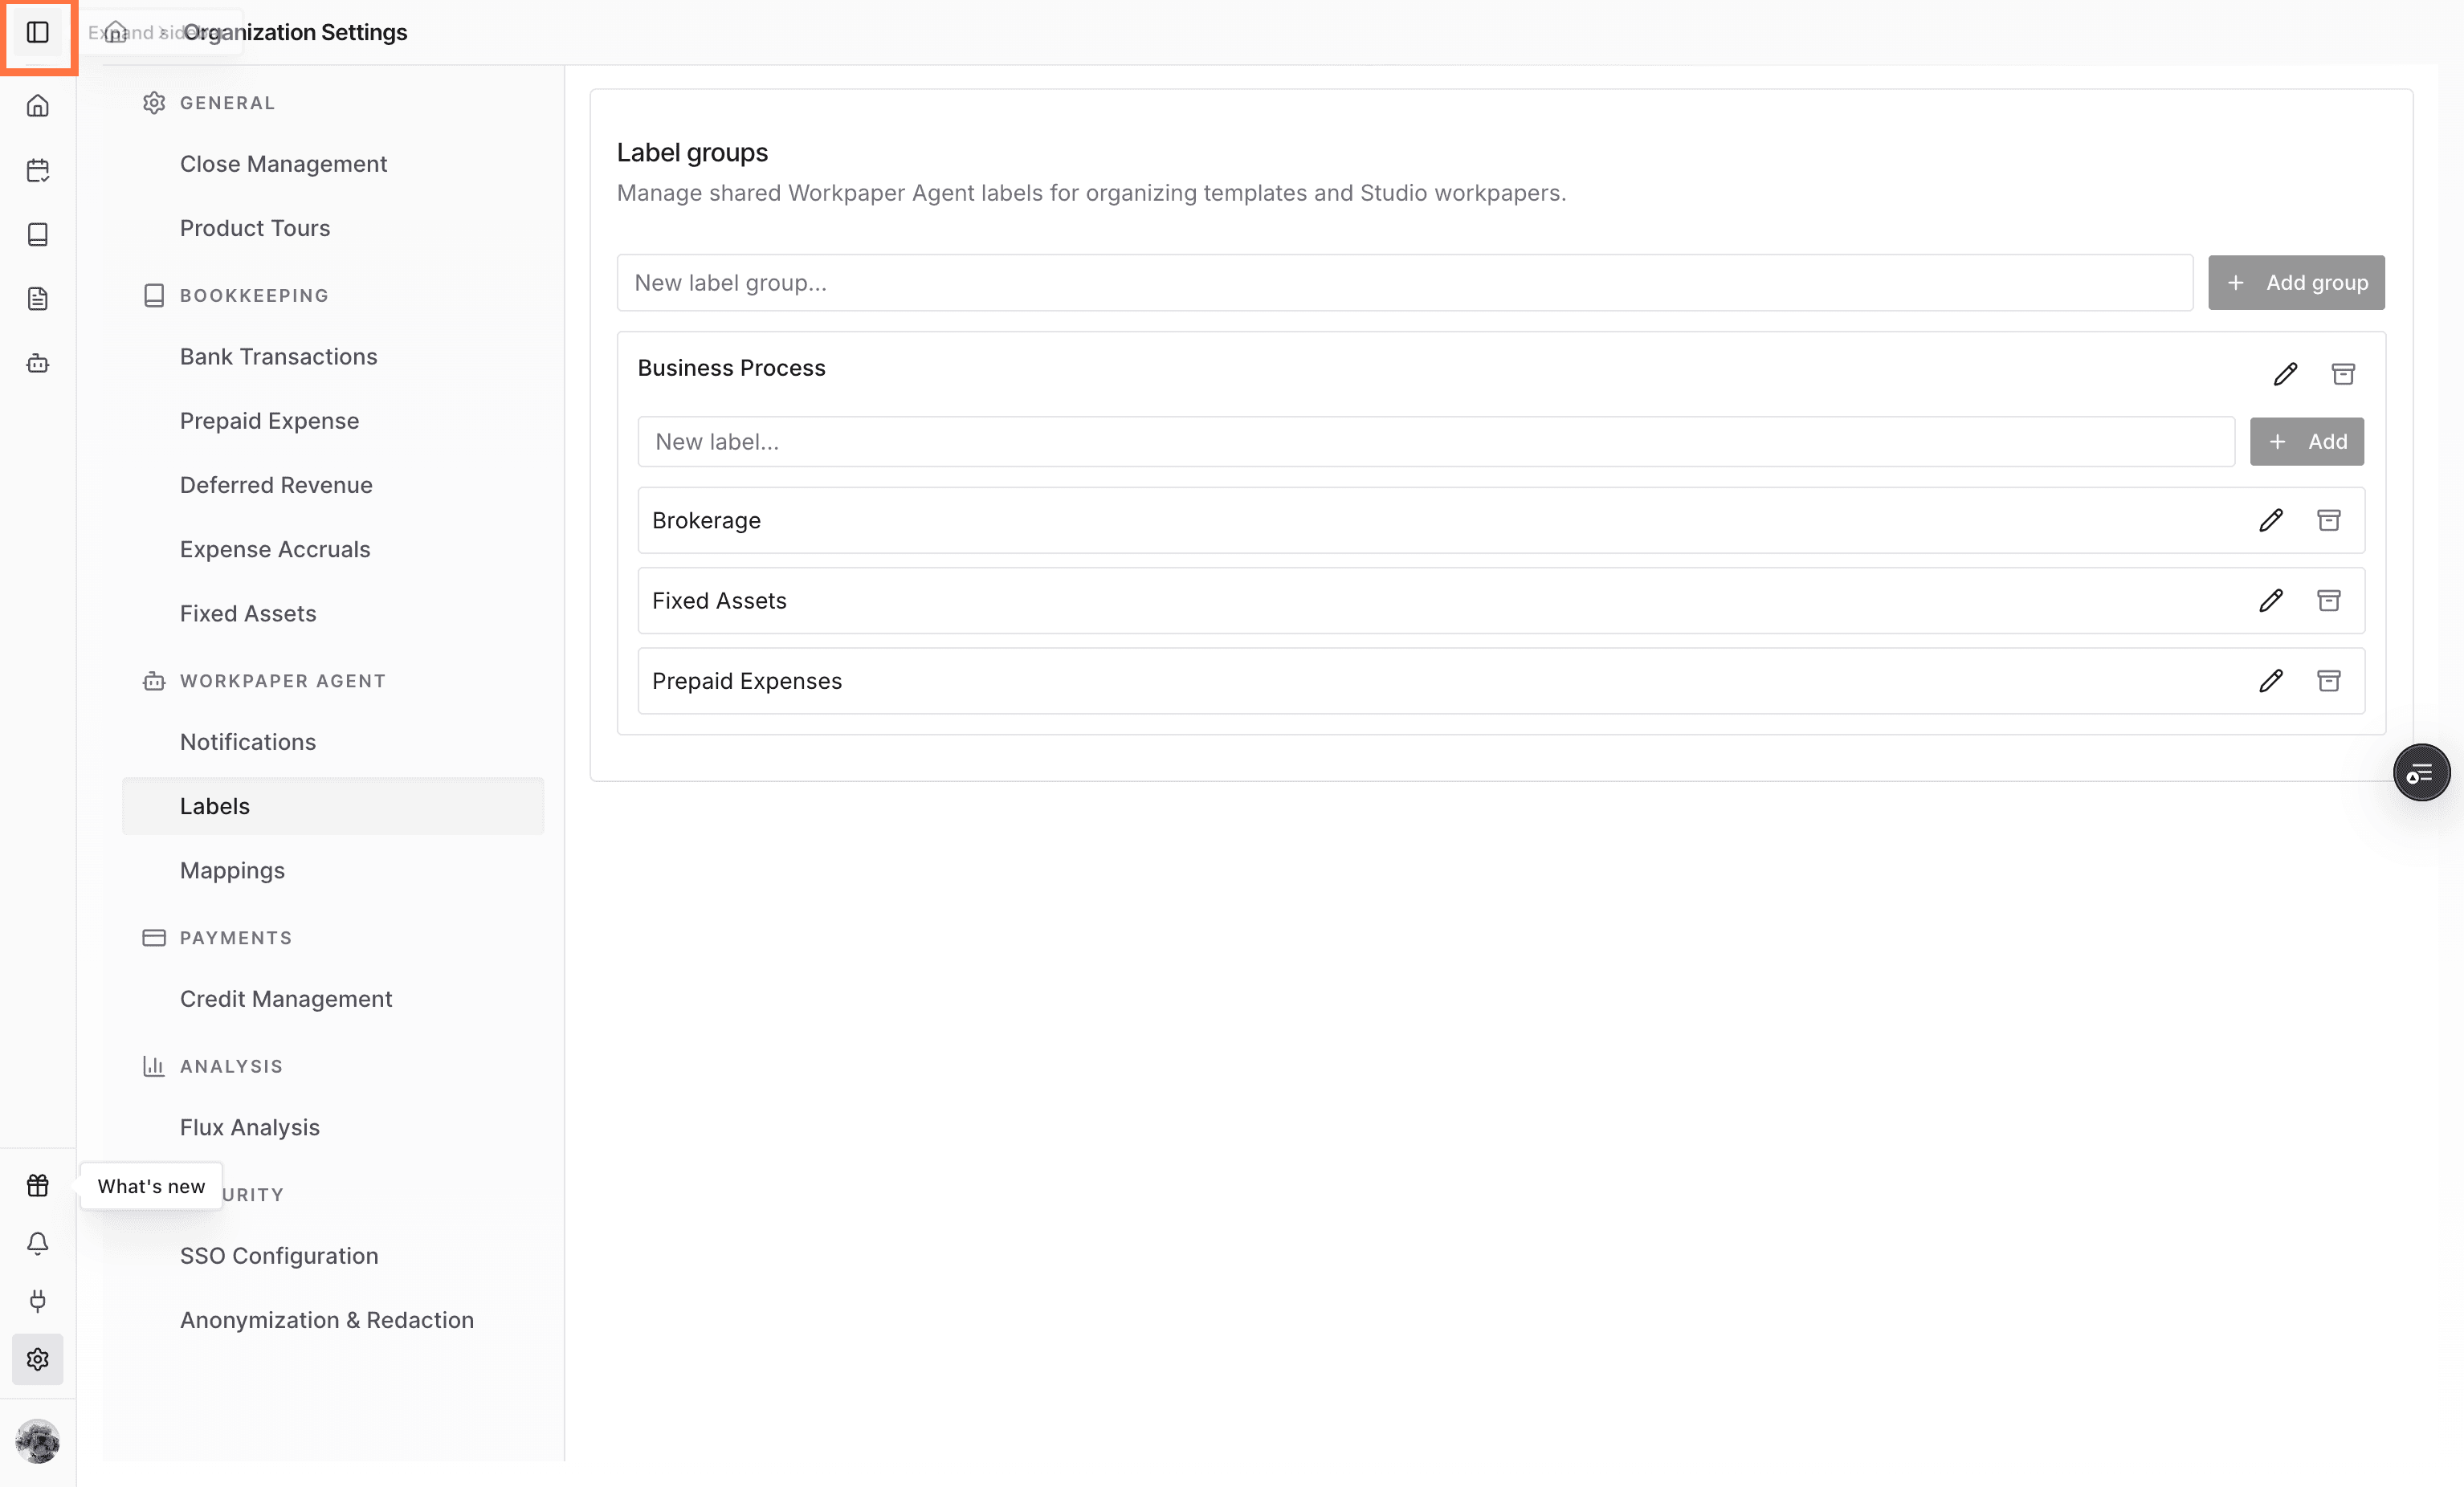
Open the sidebar

Expand the sidebar when you need to navigate back to the Workpaper Agent template list.

Screenshot showing the sidebar toggle

Step 9

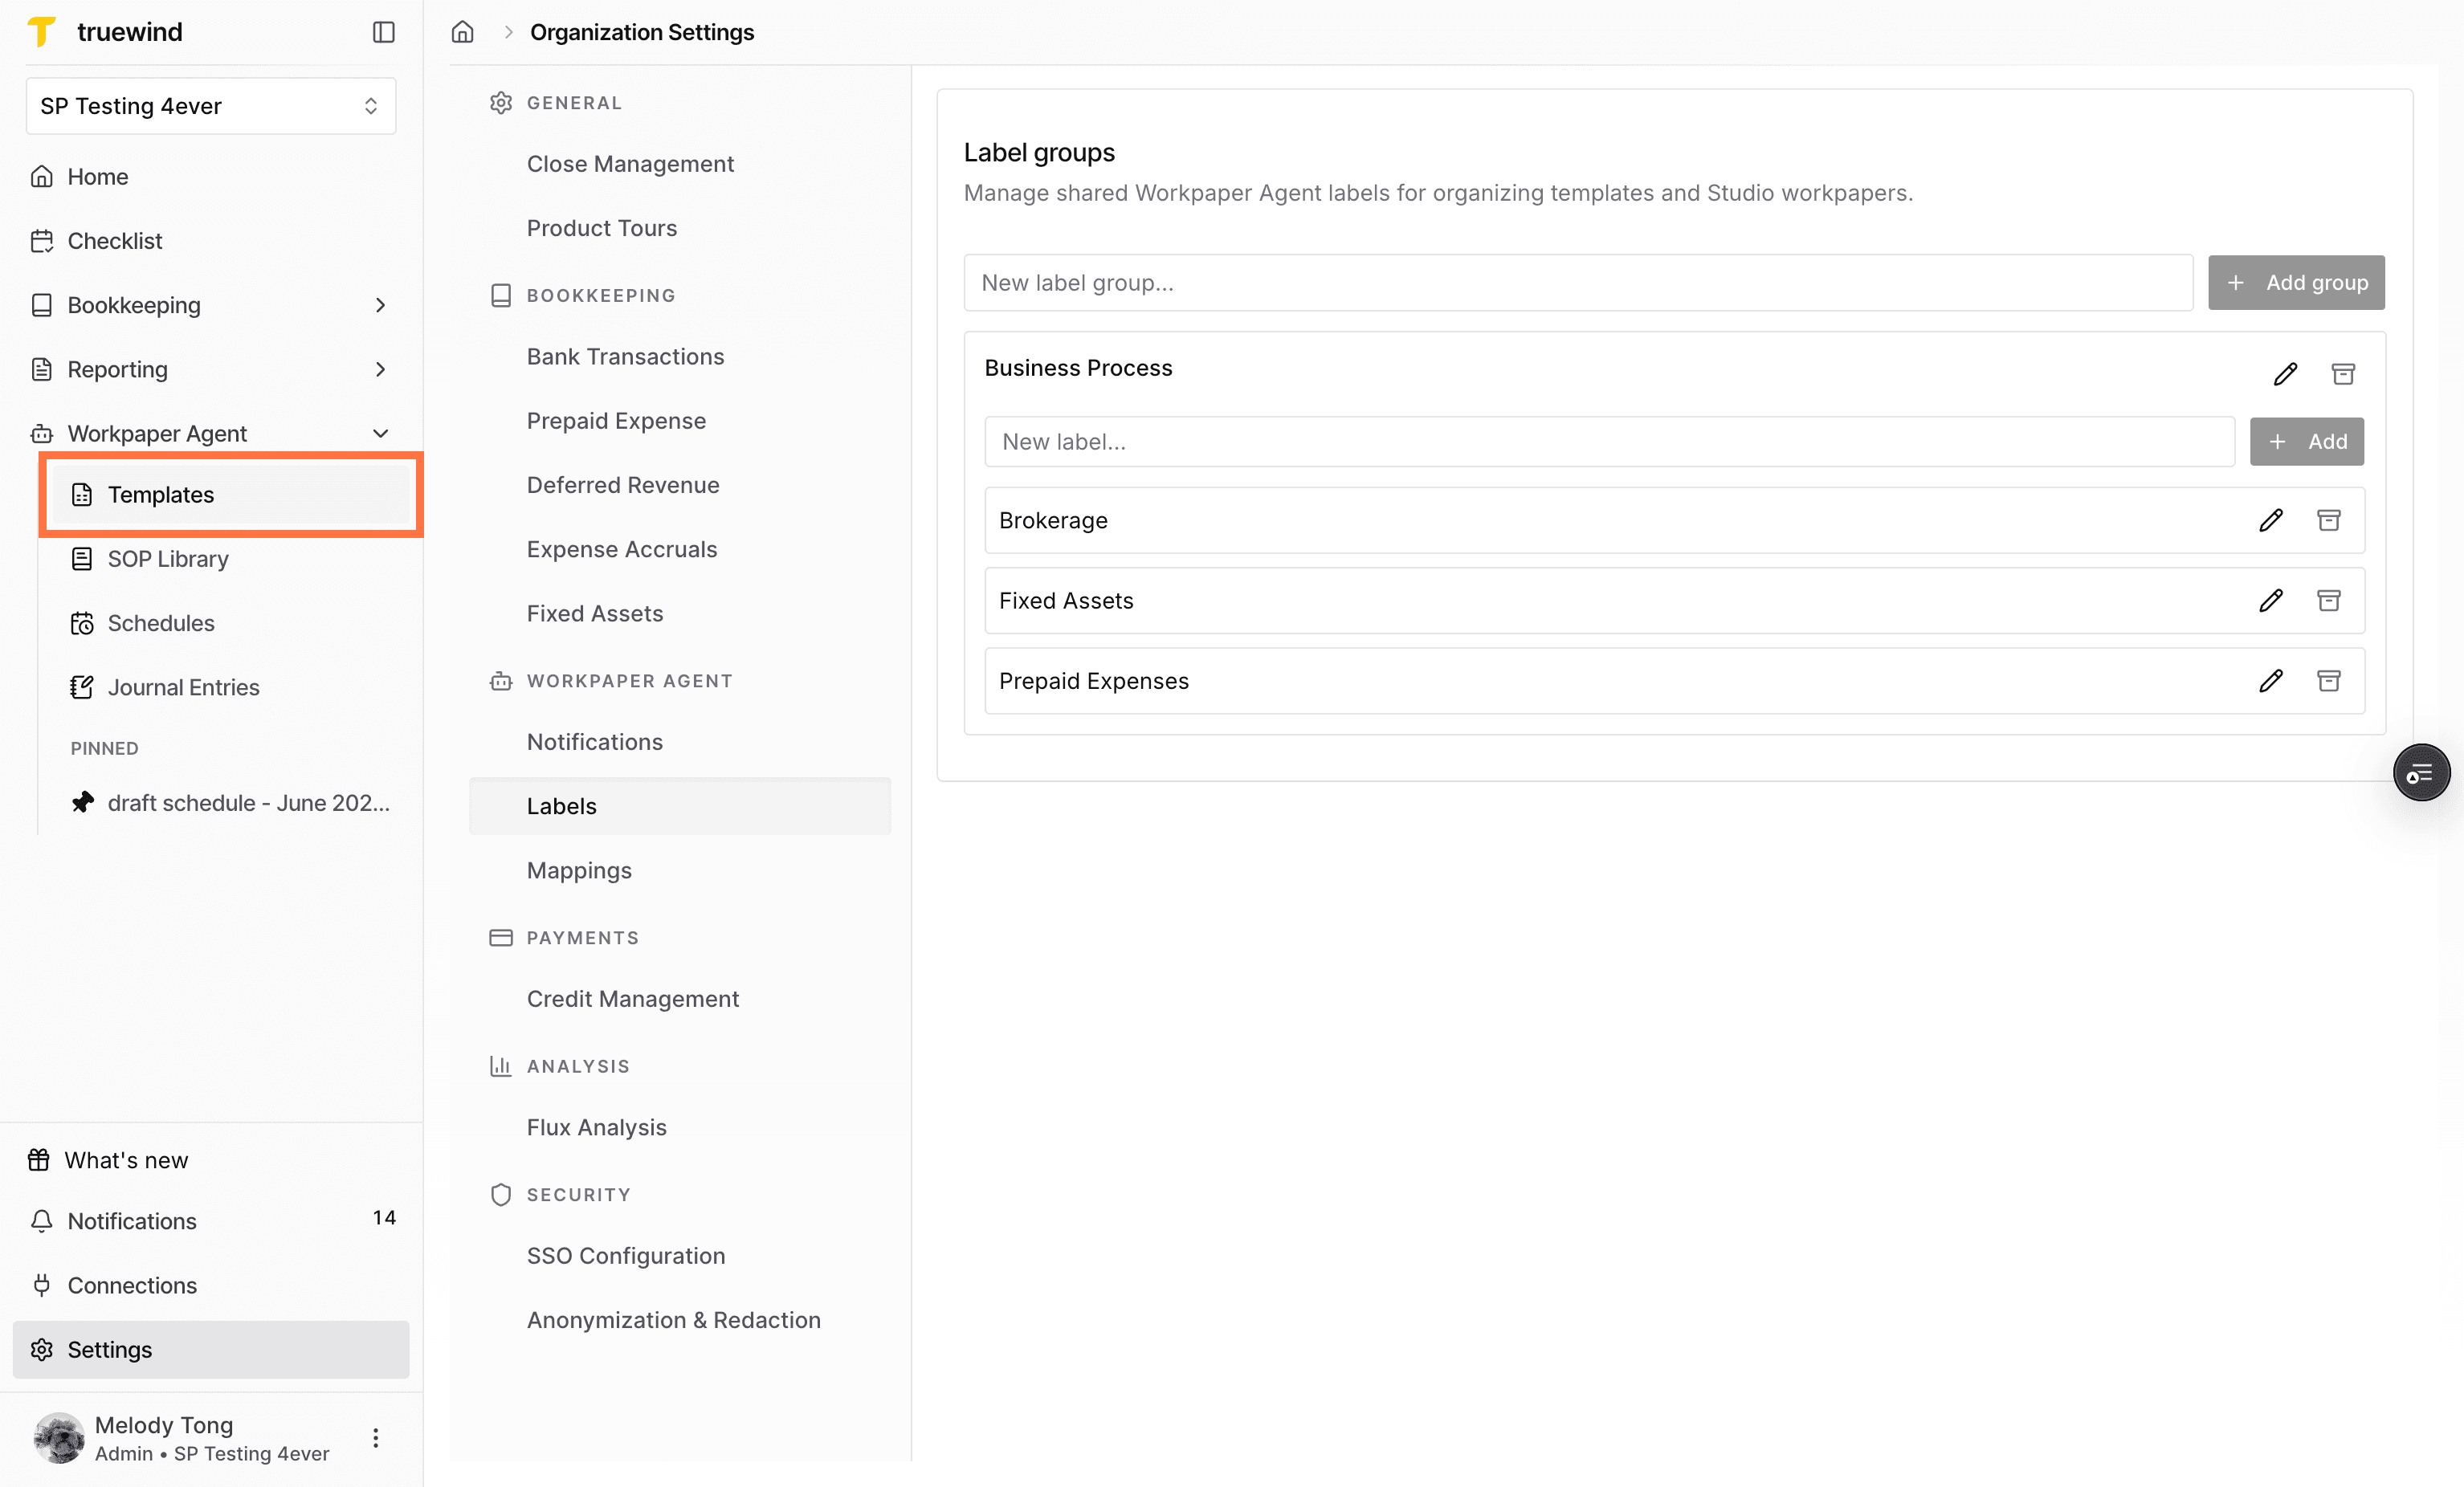
Open Templates

Go to Templates to apply labels to existing Workpaper Agent templates or workpapers.

Screenshot showing the Templates navigation item

Step 10

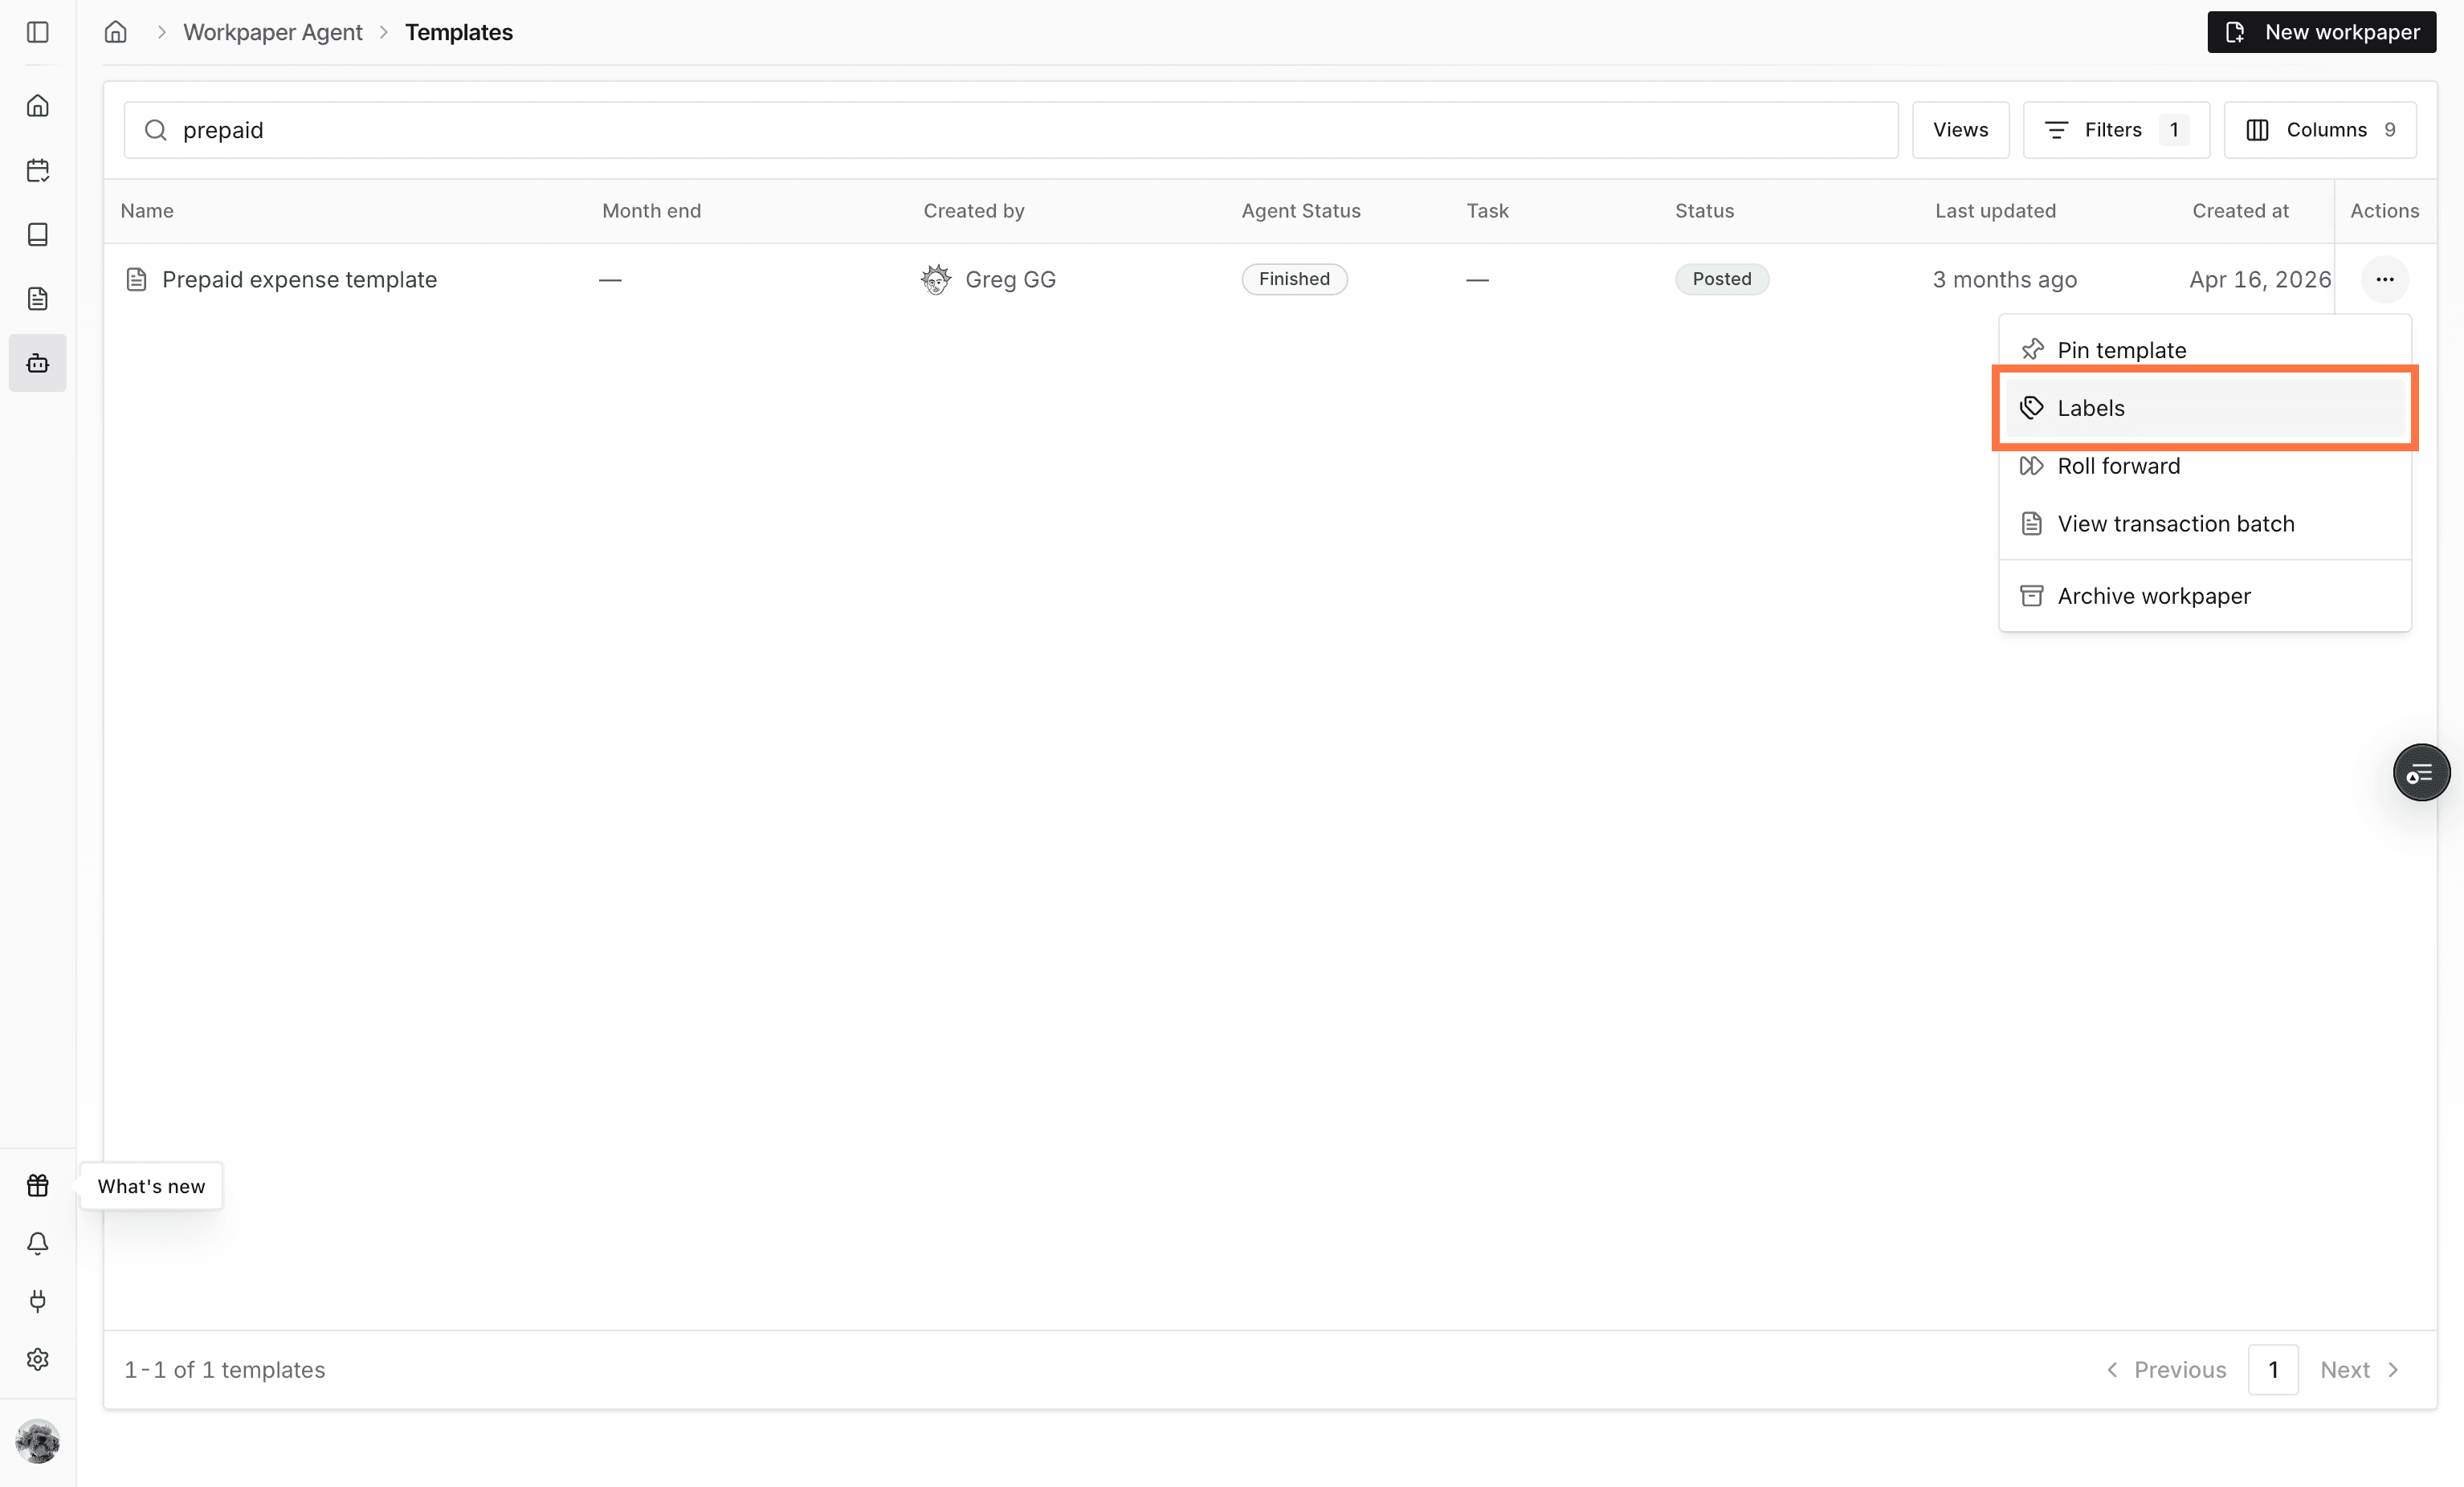
Open template labels

Use the template actions menu, then choose Labels to assign a label directly from the template list.

Screenshot showing the Labels action in the template actions menu

Step 11

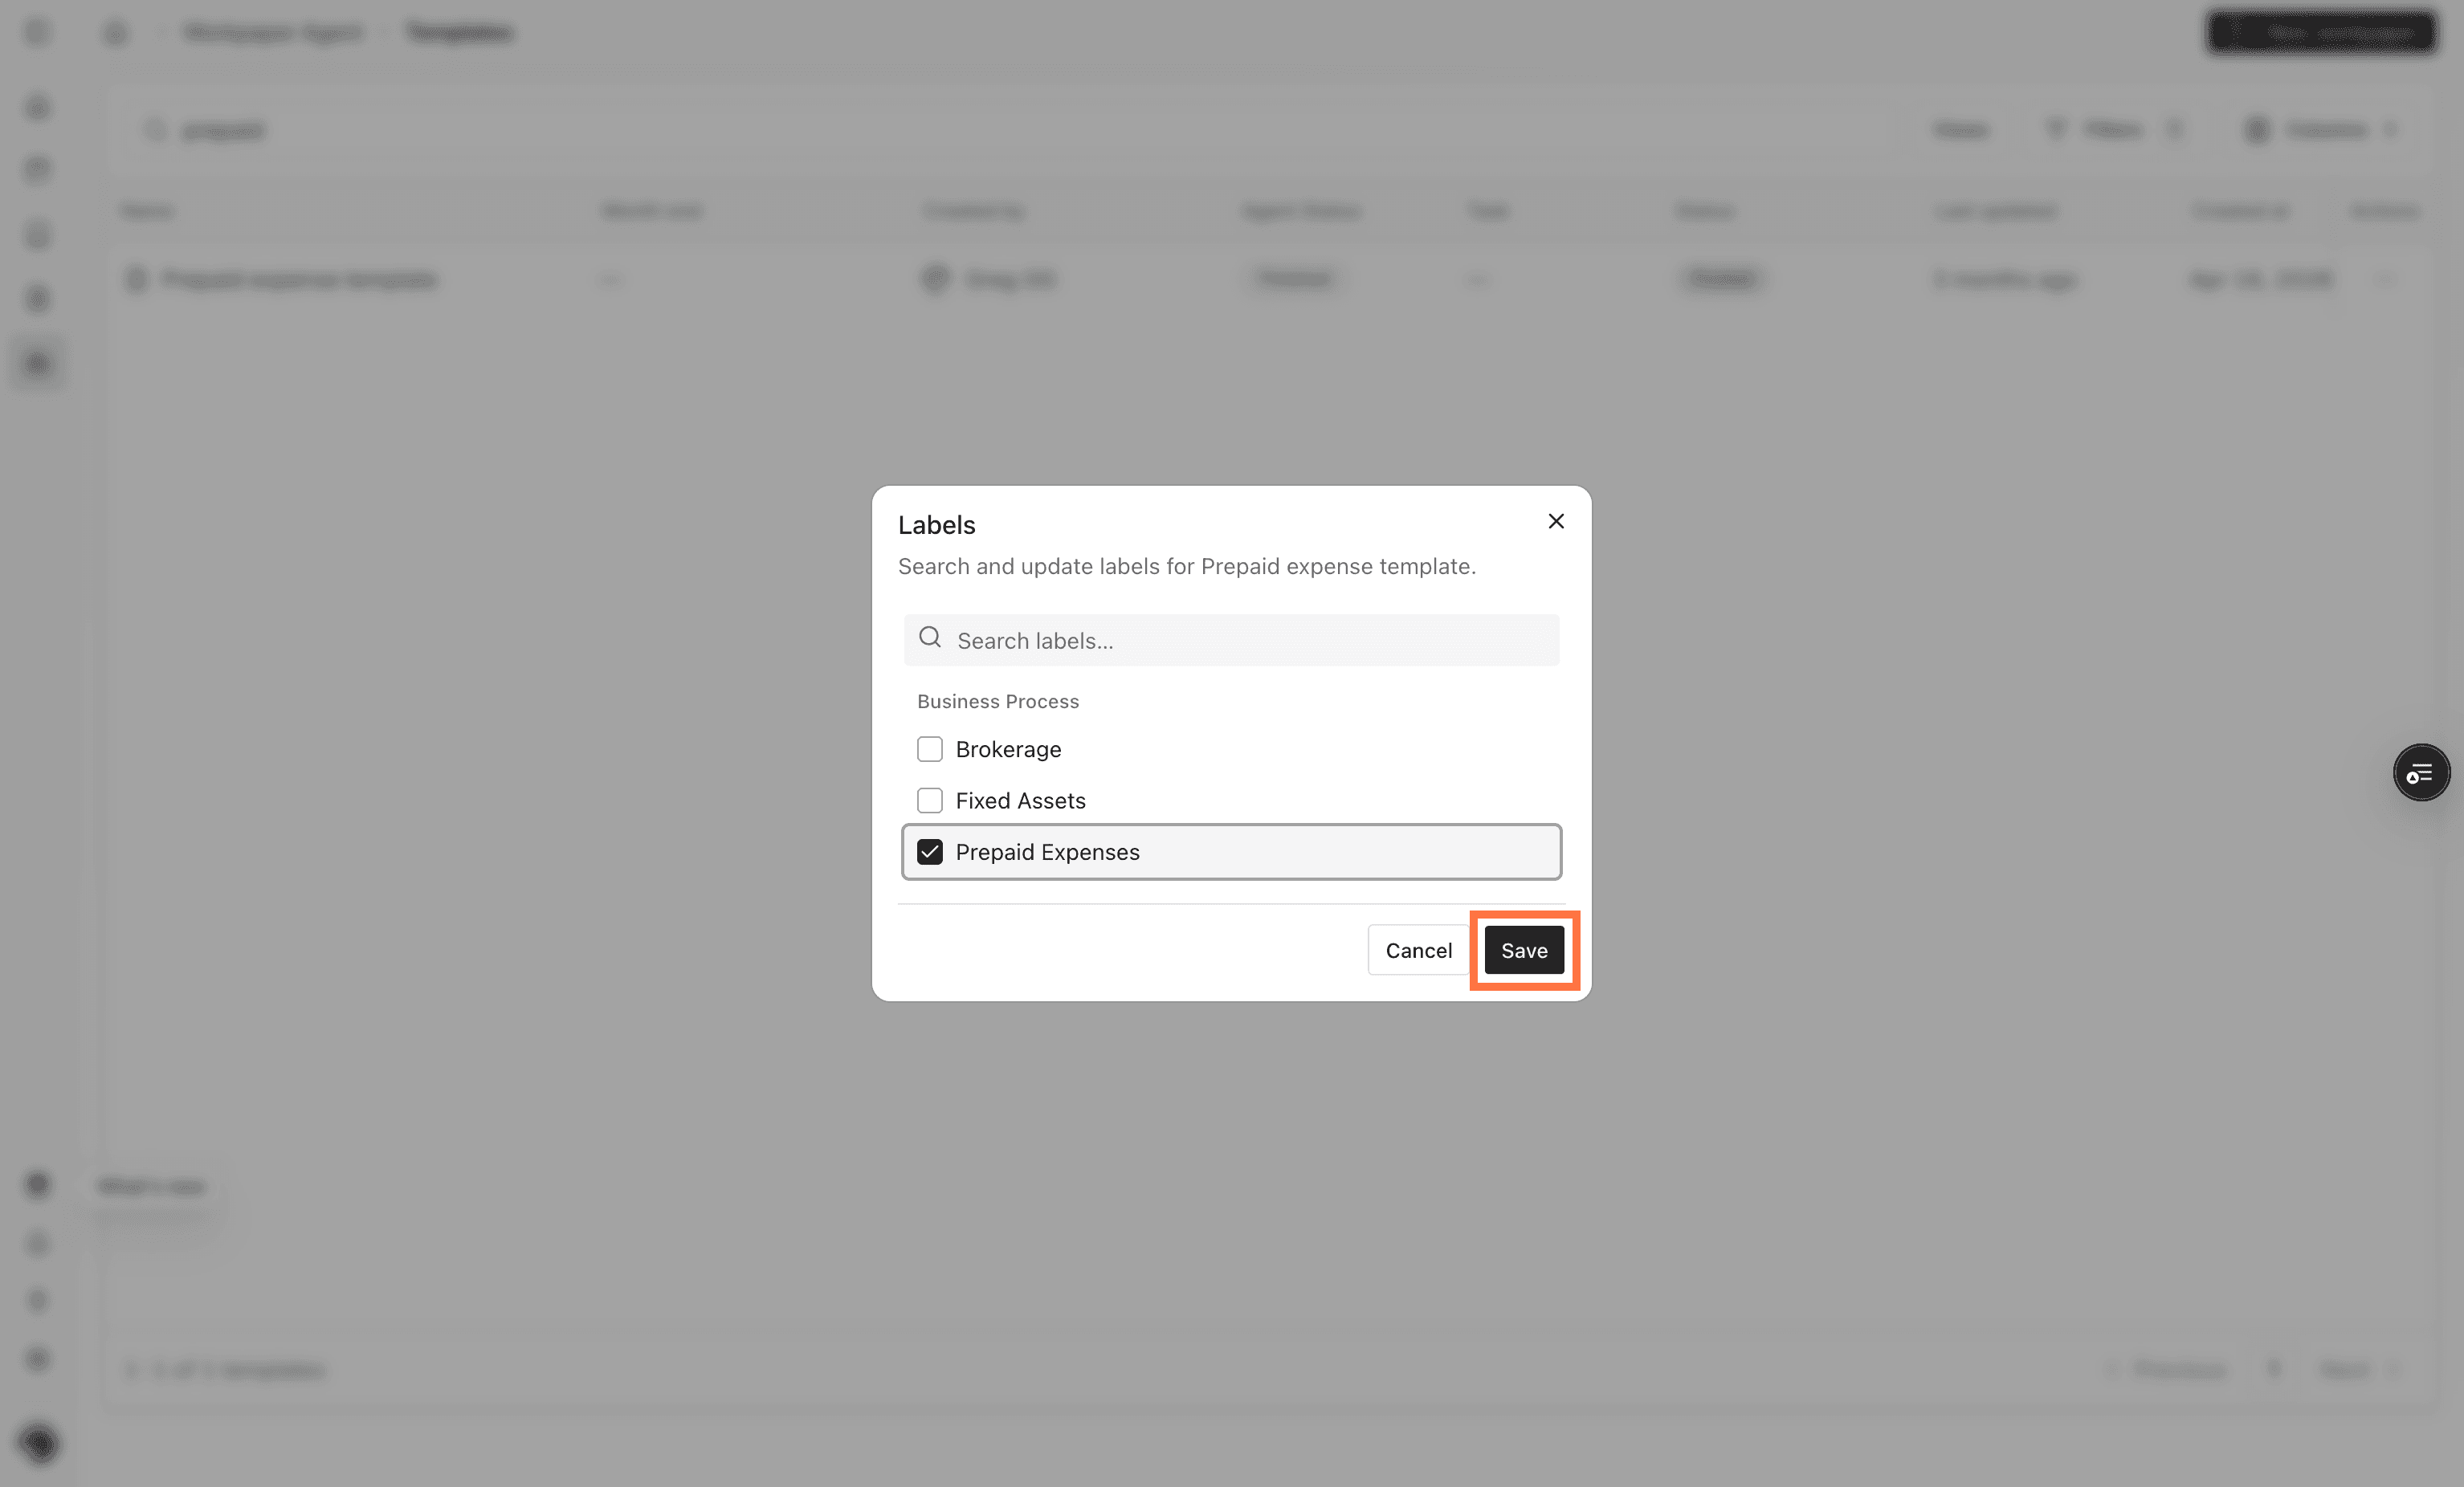
Assign a label

Select the label that applies to the template, then save the label assignment.

Screenshot showing a selected label and the Save action

Step 12

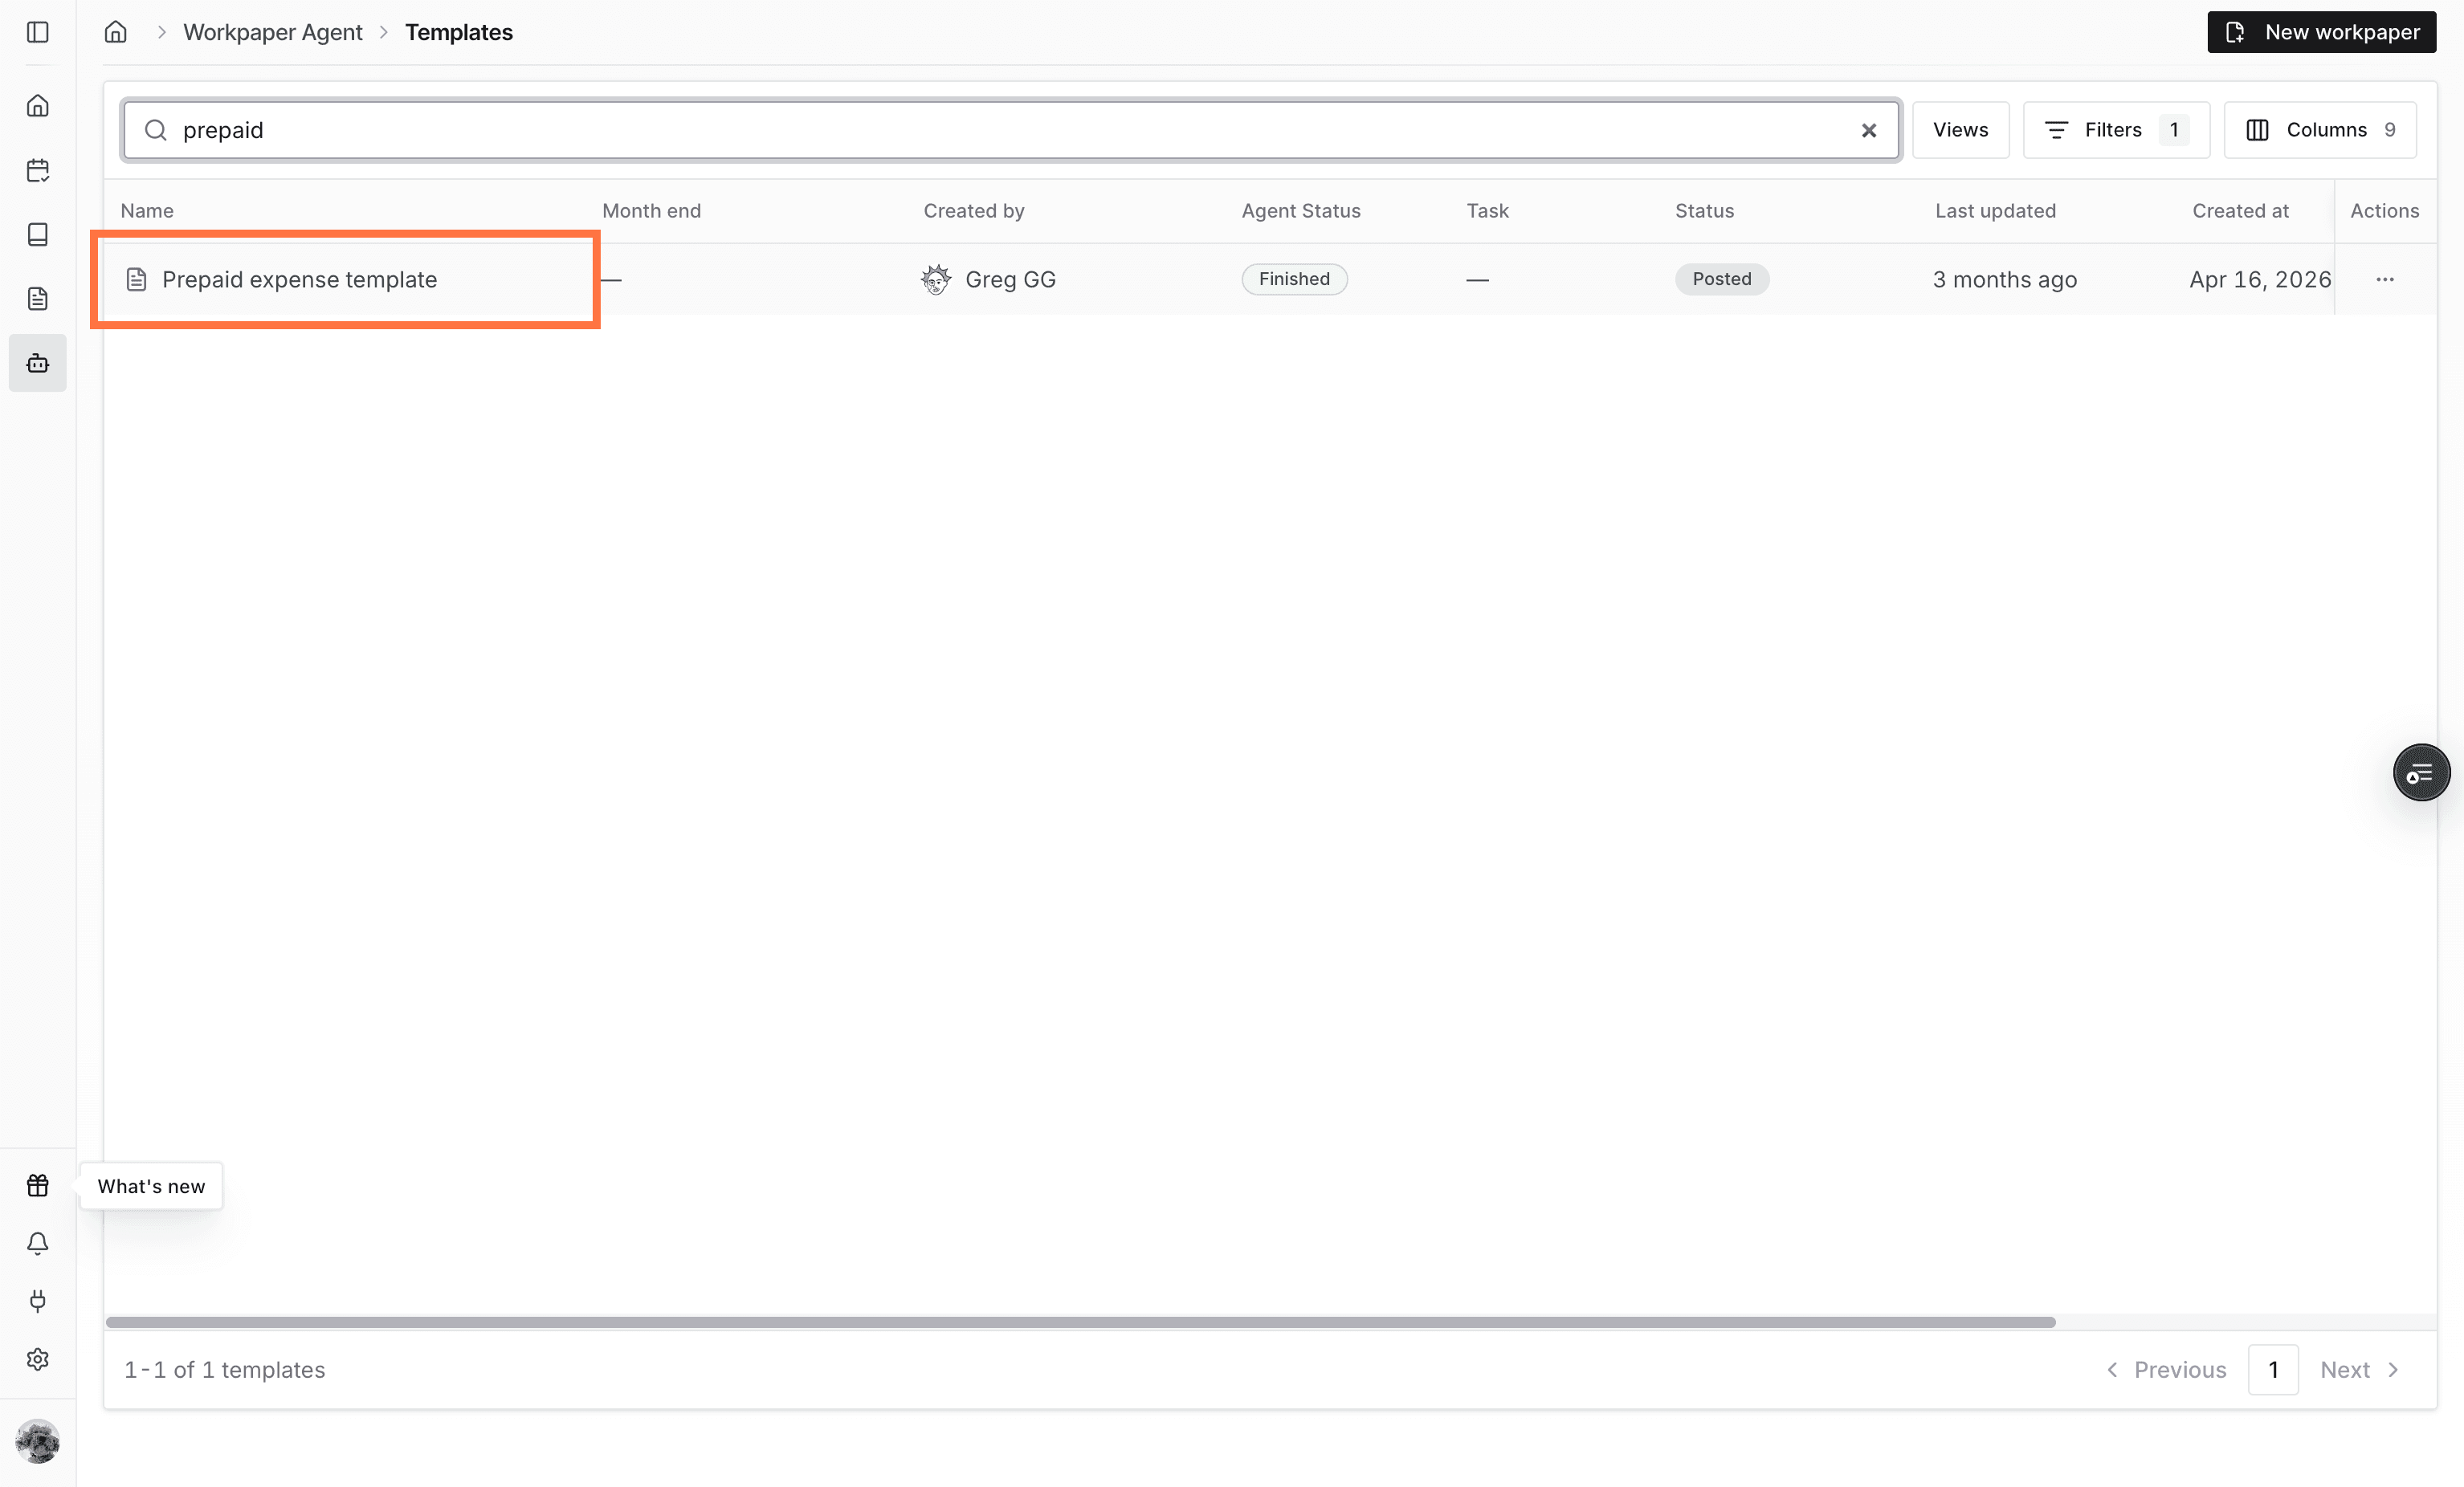
Open a template

You can also open a template or workpaper from Studio before assigning or editing labels.

Screenshot showing a Workpaper Agent template in Studio

Step 13

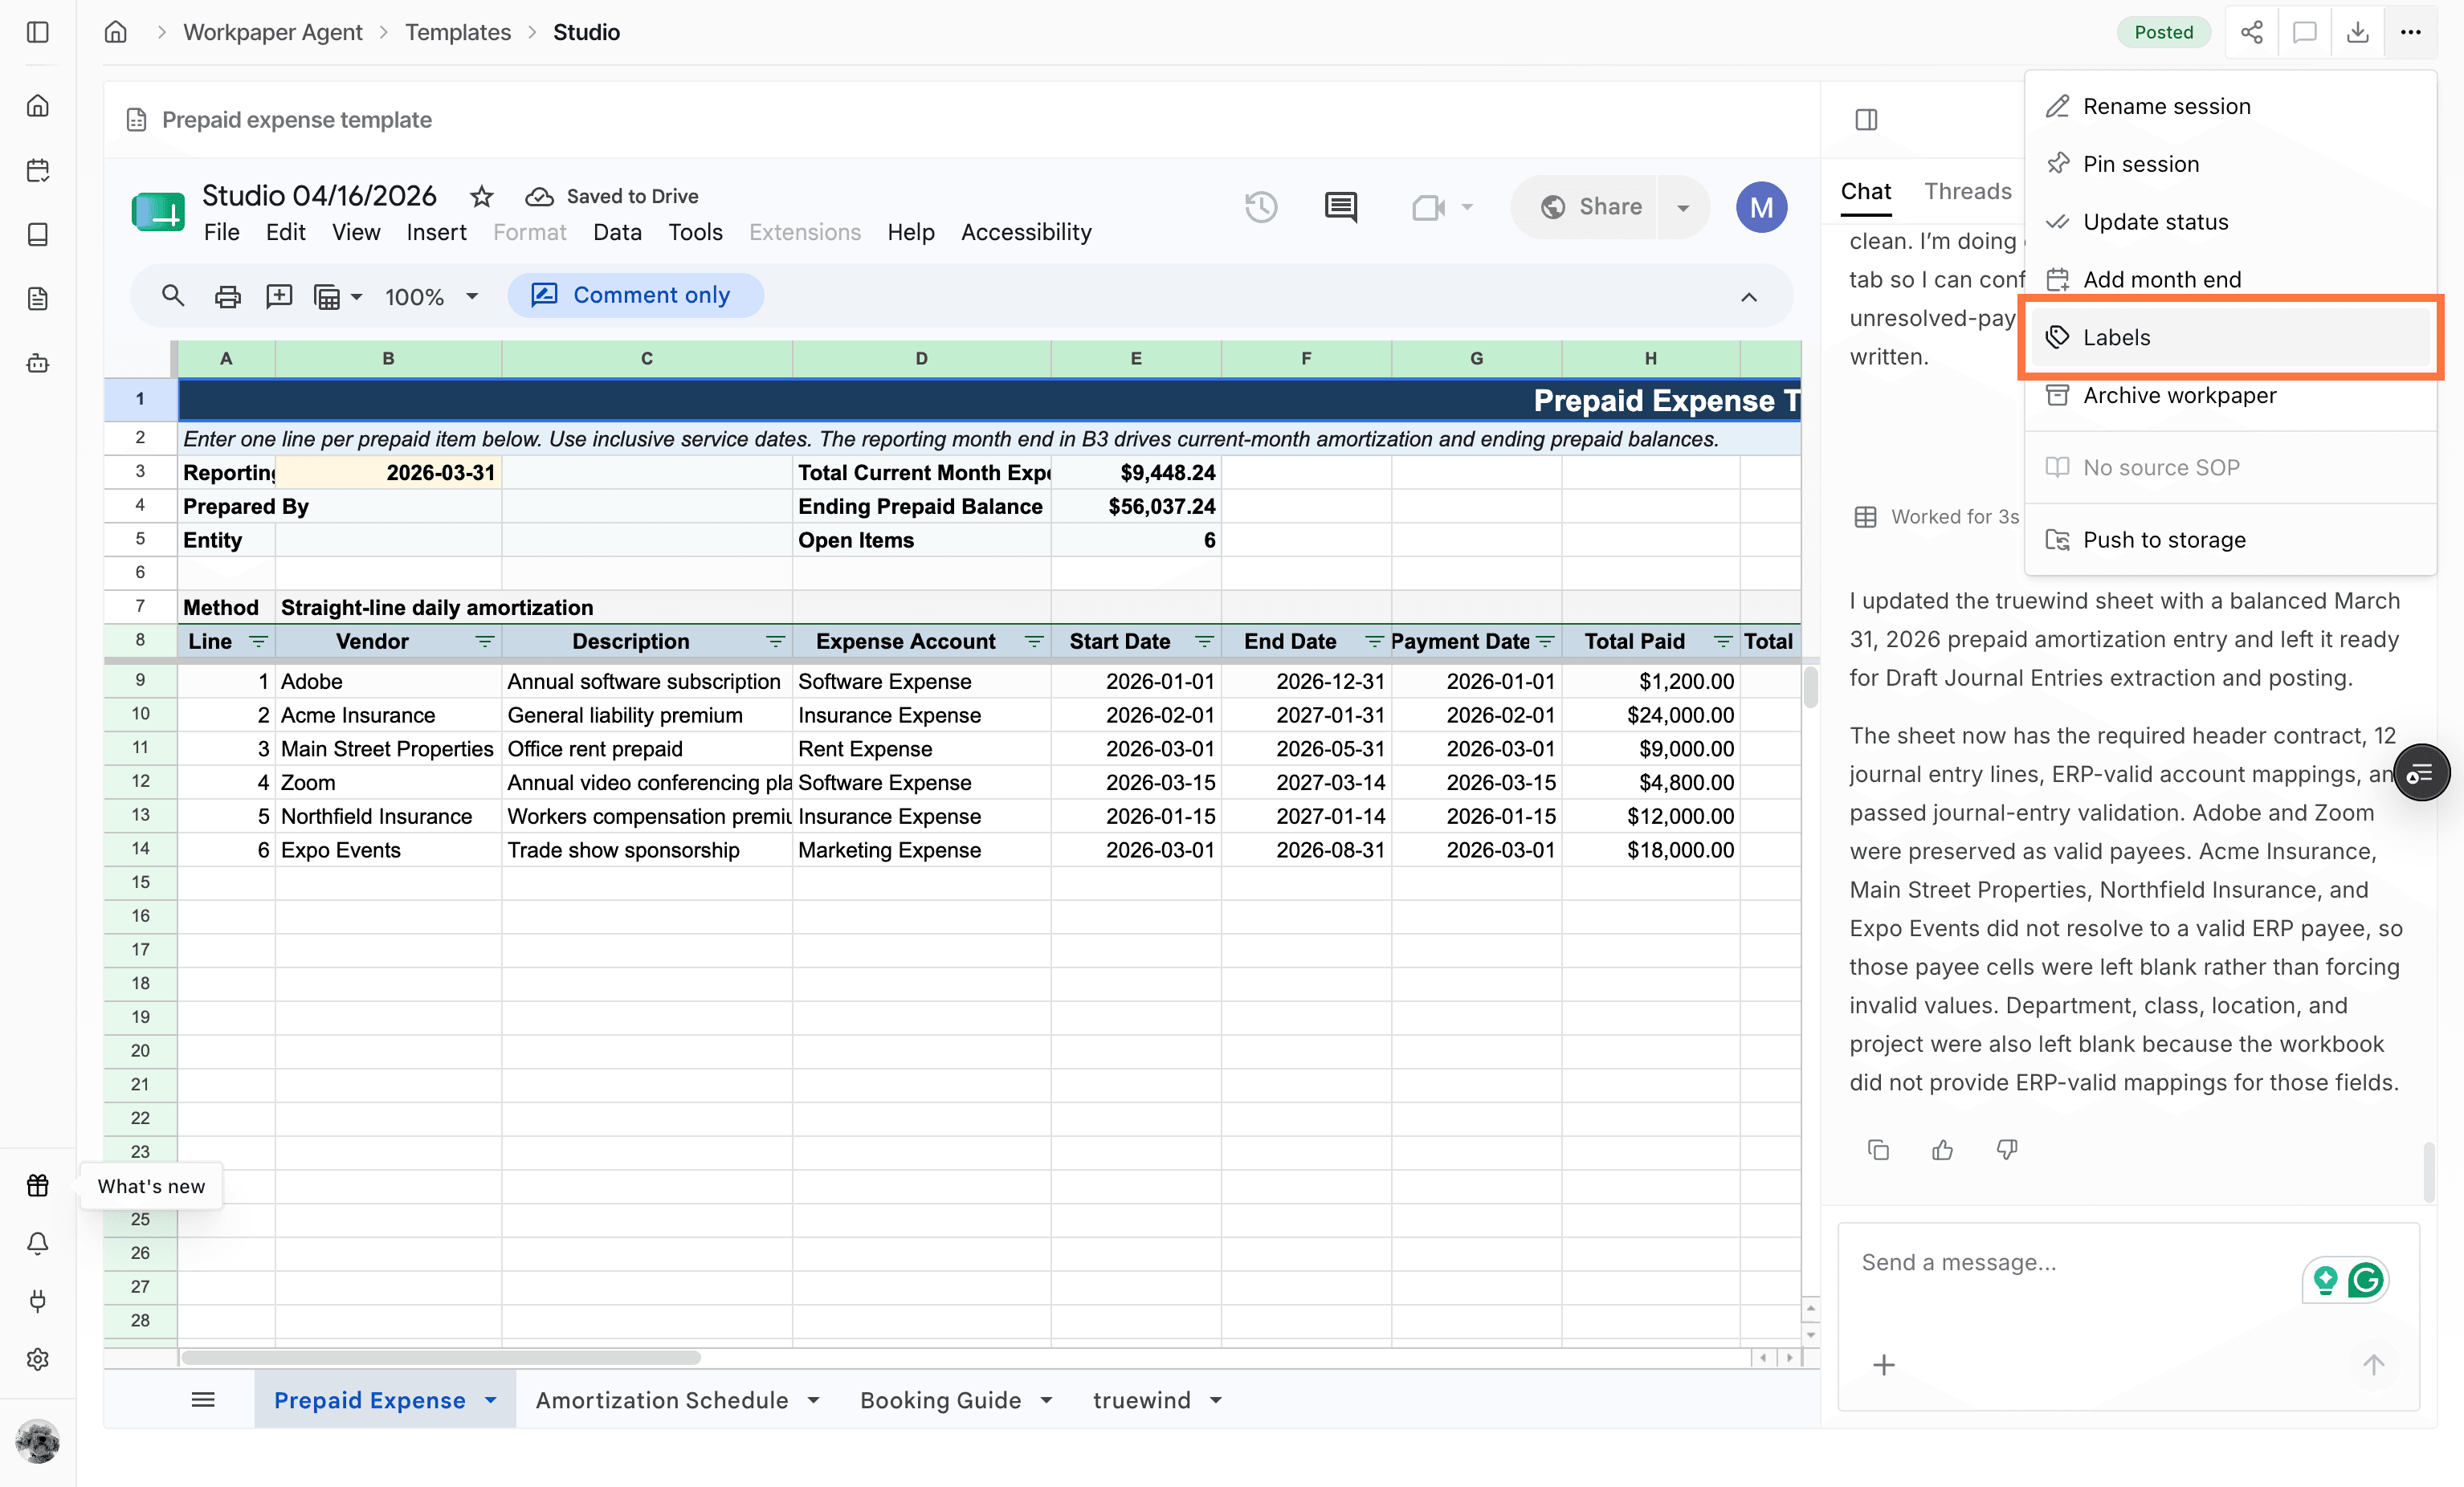
Open workpaper labels

From the workpaper actions menu, choose Labels to apply or update labels while viewing the workpaper.

Screenshot showing the Labels option in the workpaper actions menu

Step 14

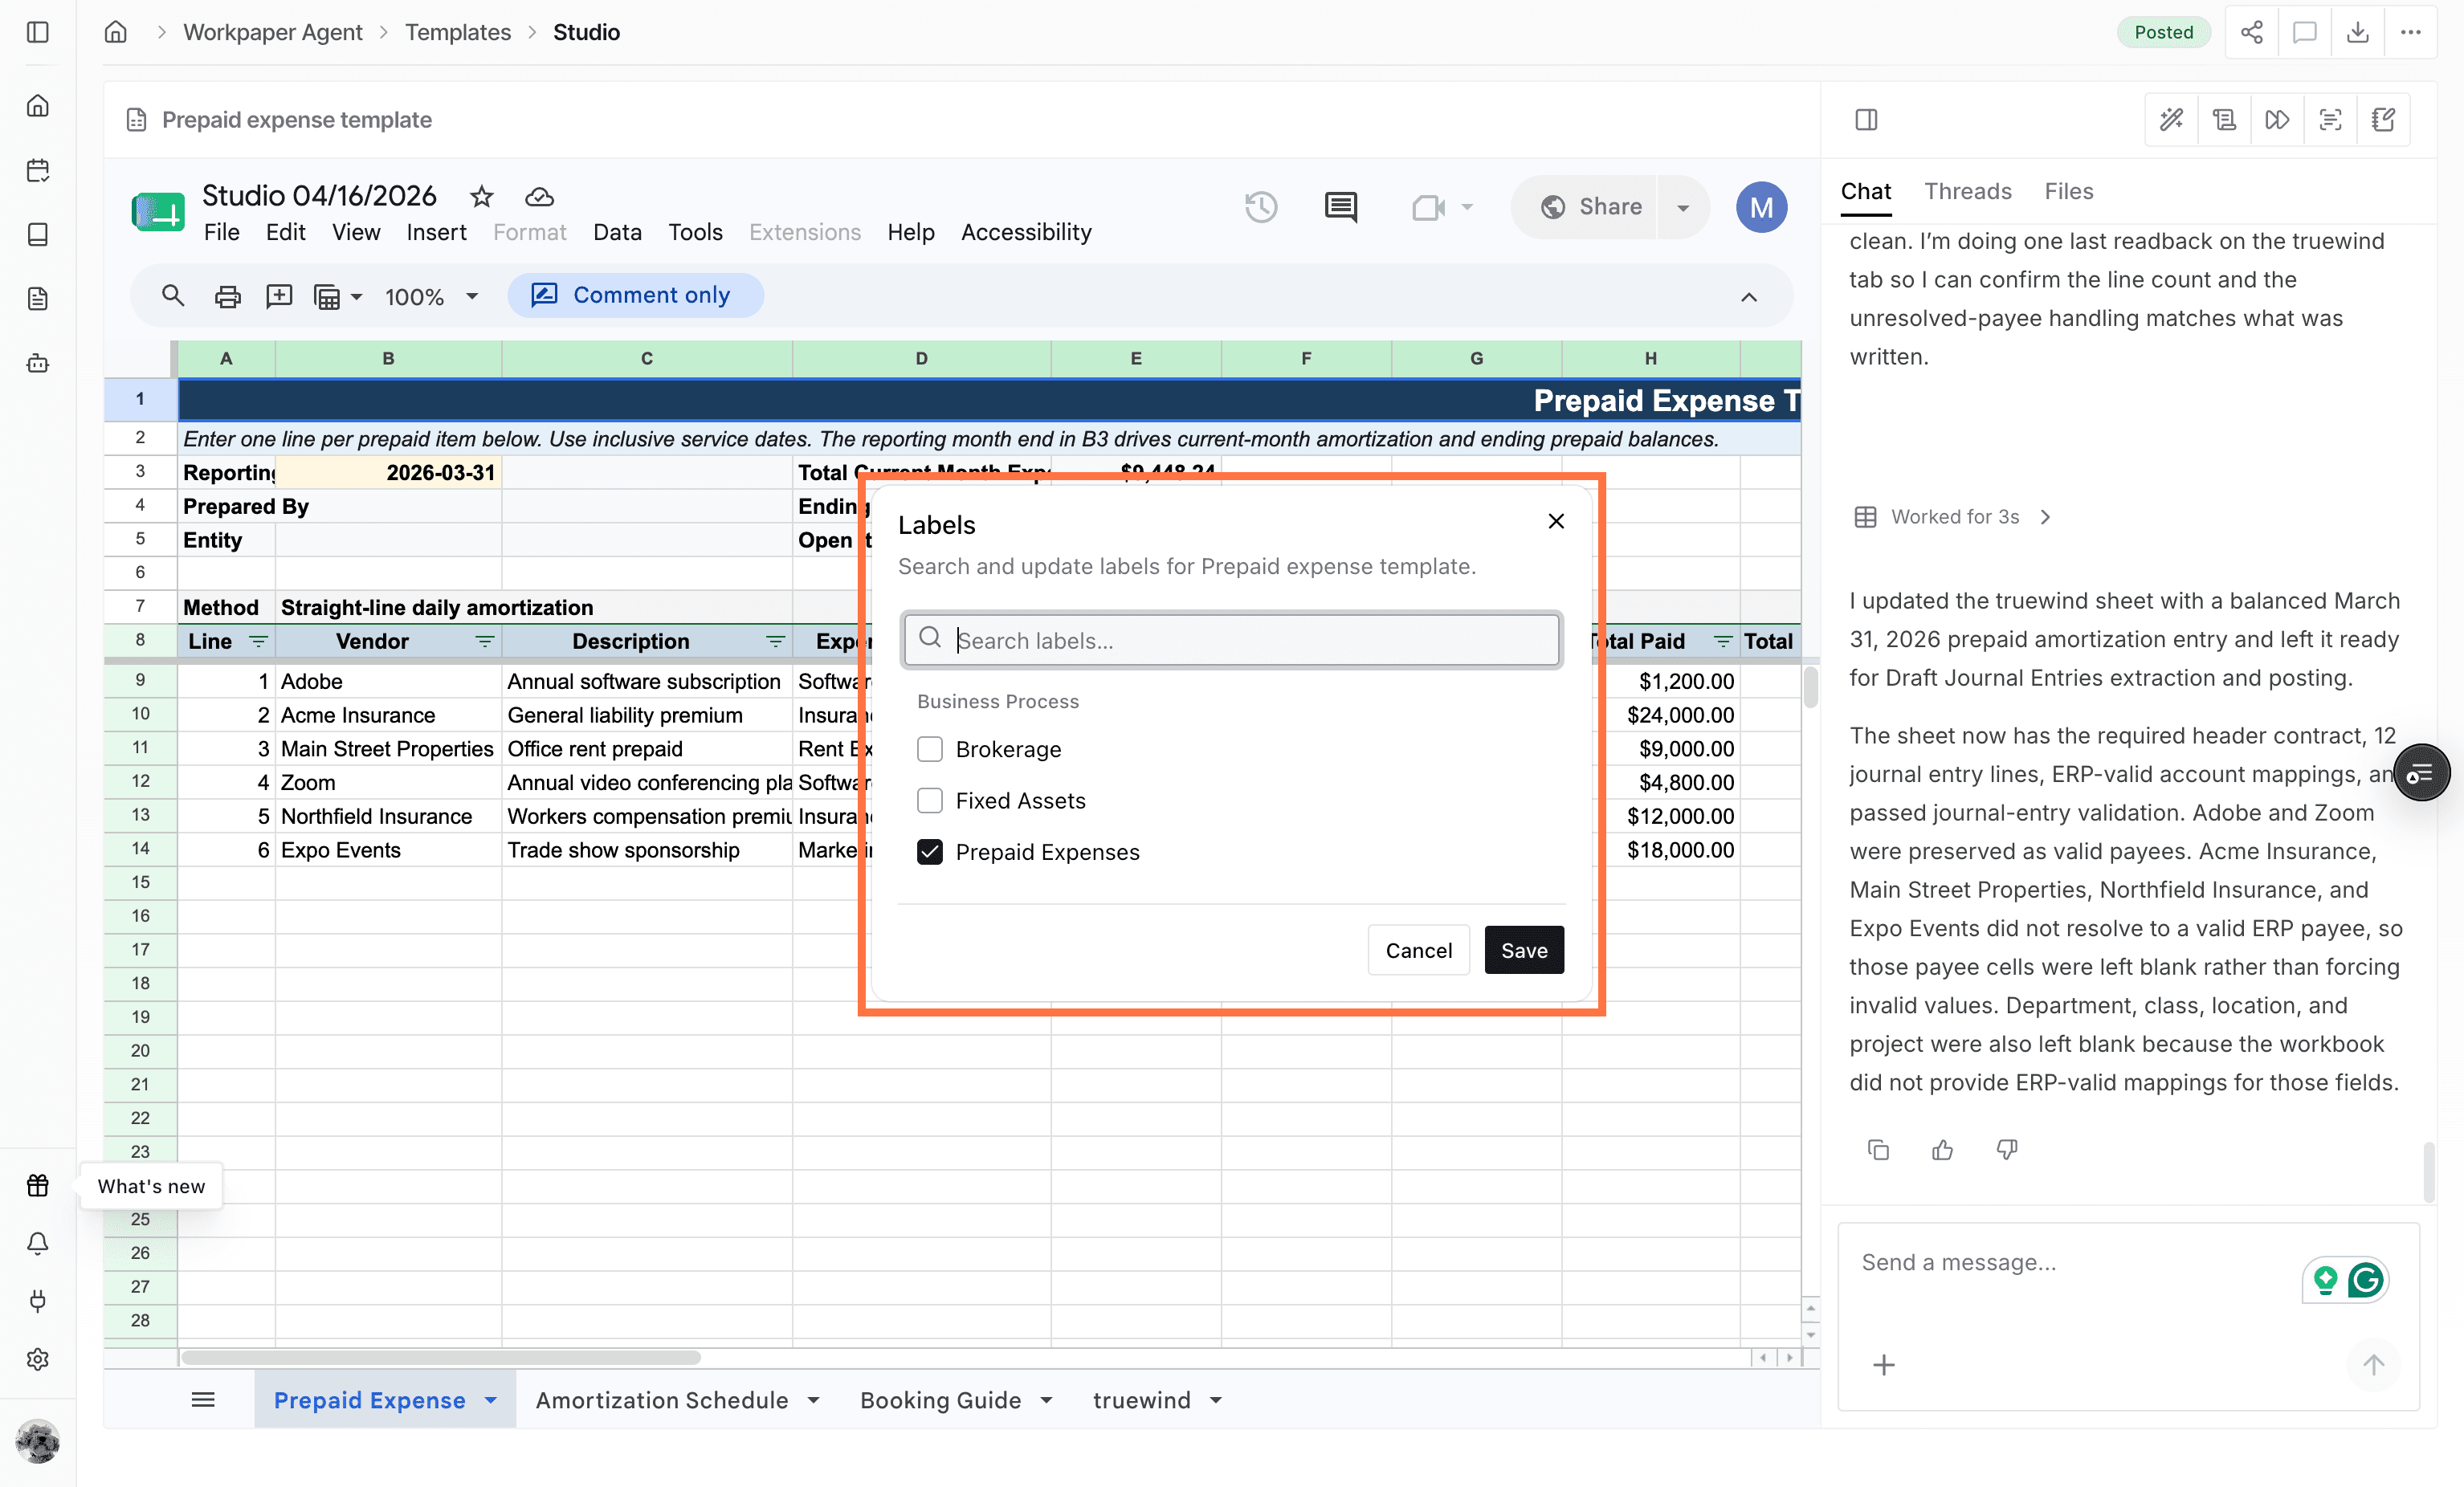
Review labels

Confirm the available label groups and labels before closing or saving the label picker.

Screenshot showing the labels picker for a workpaper

Step 15

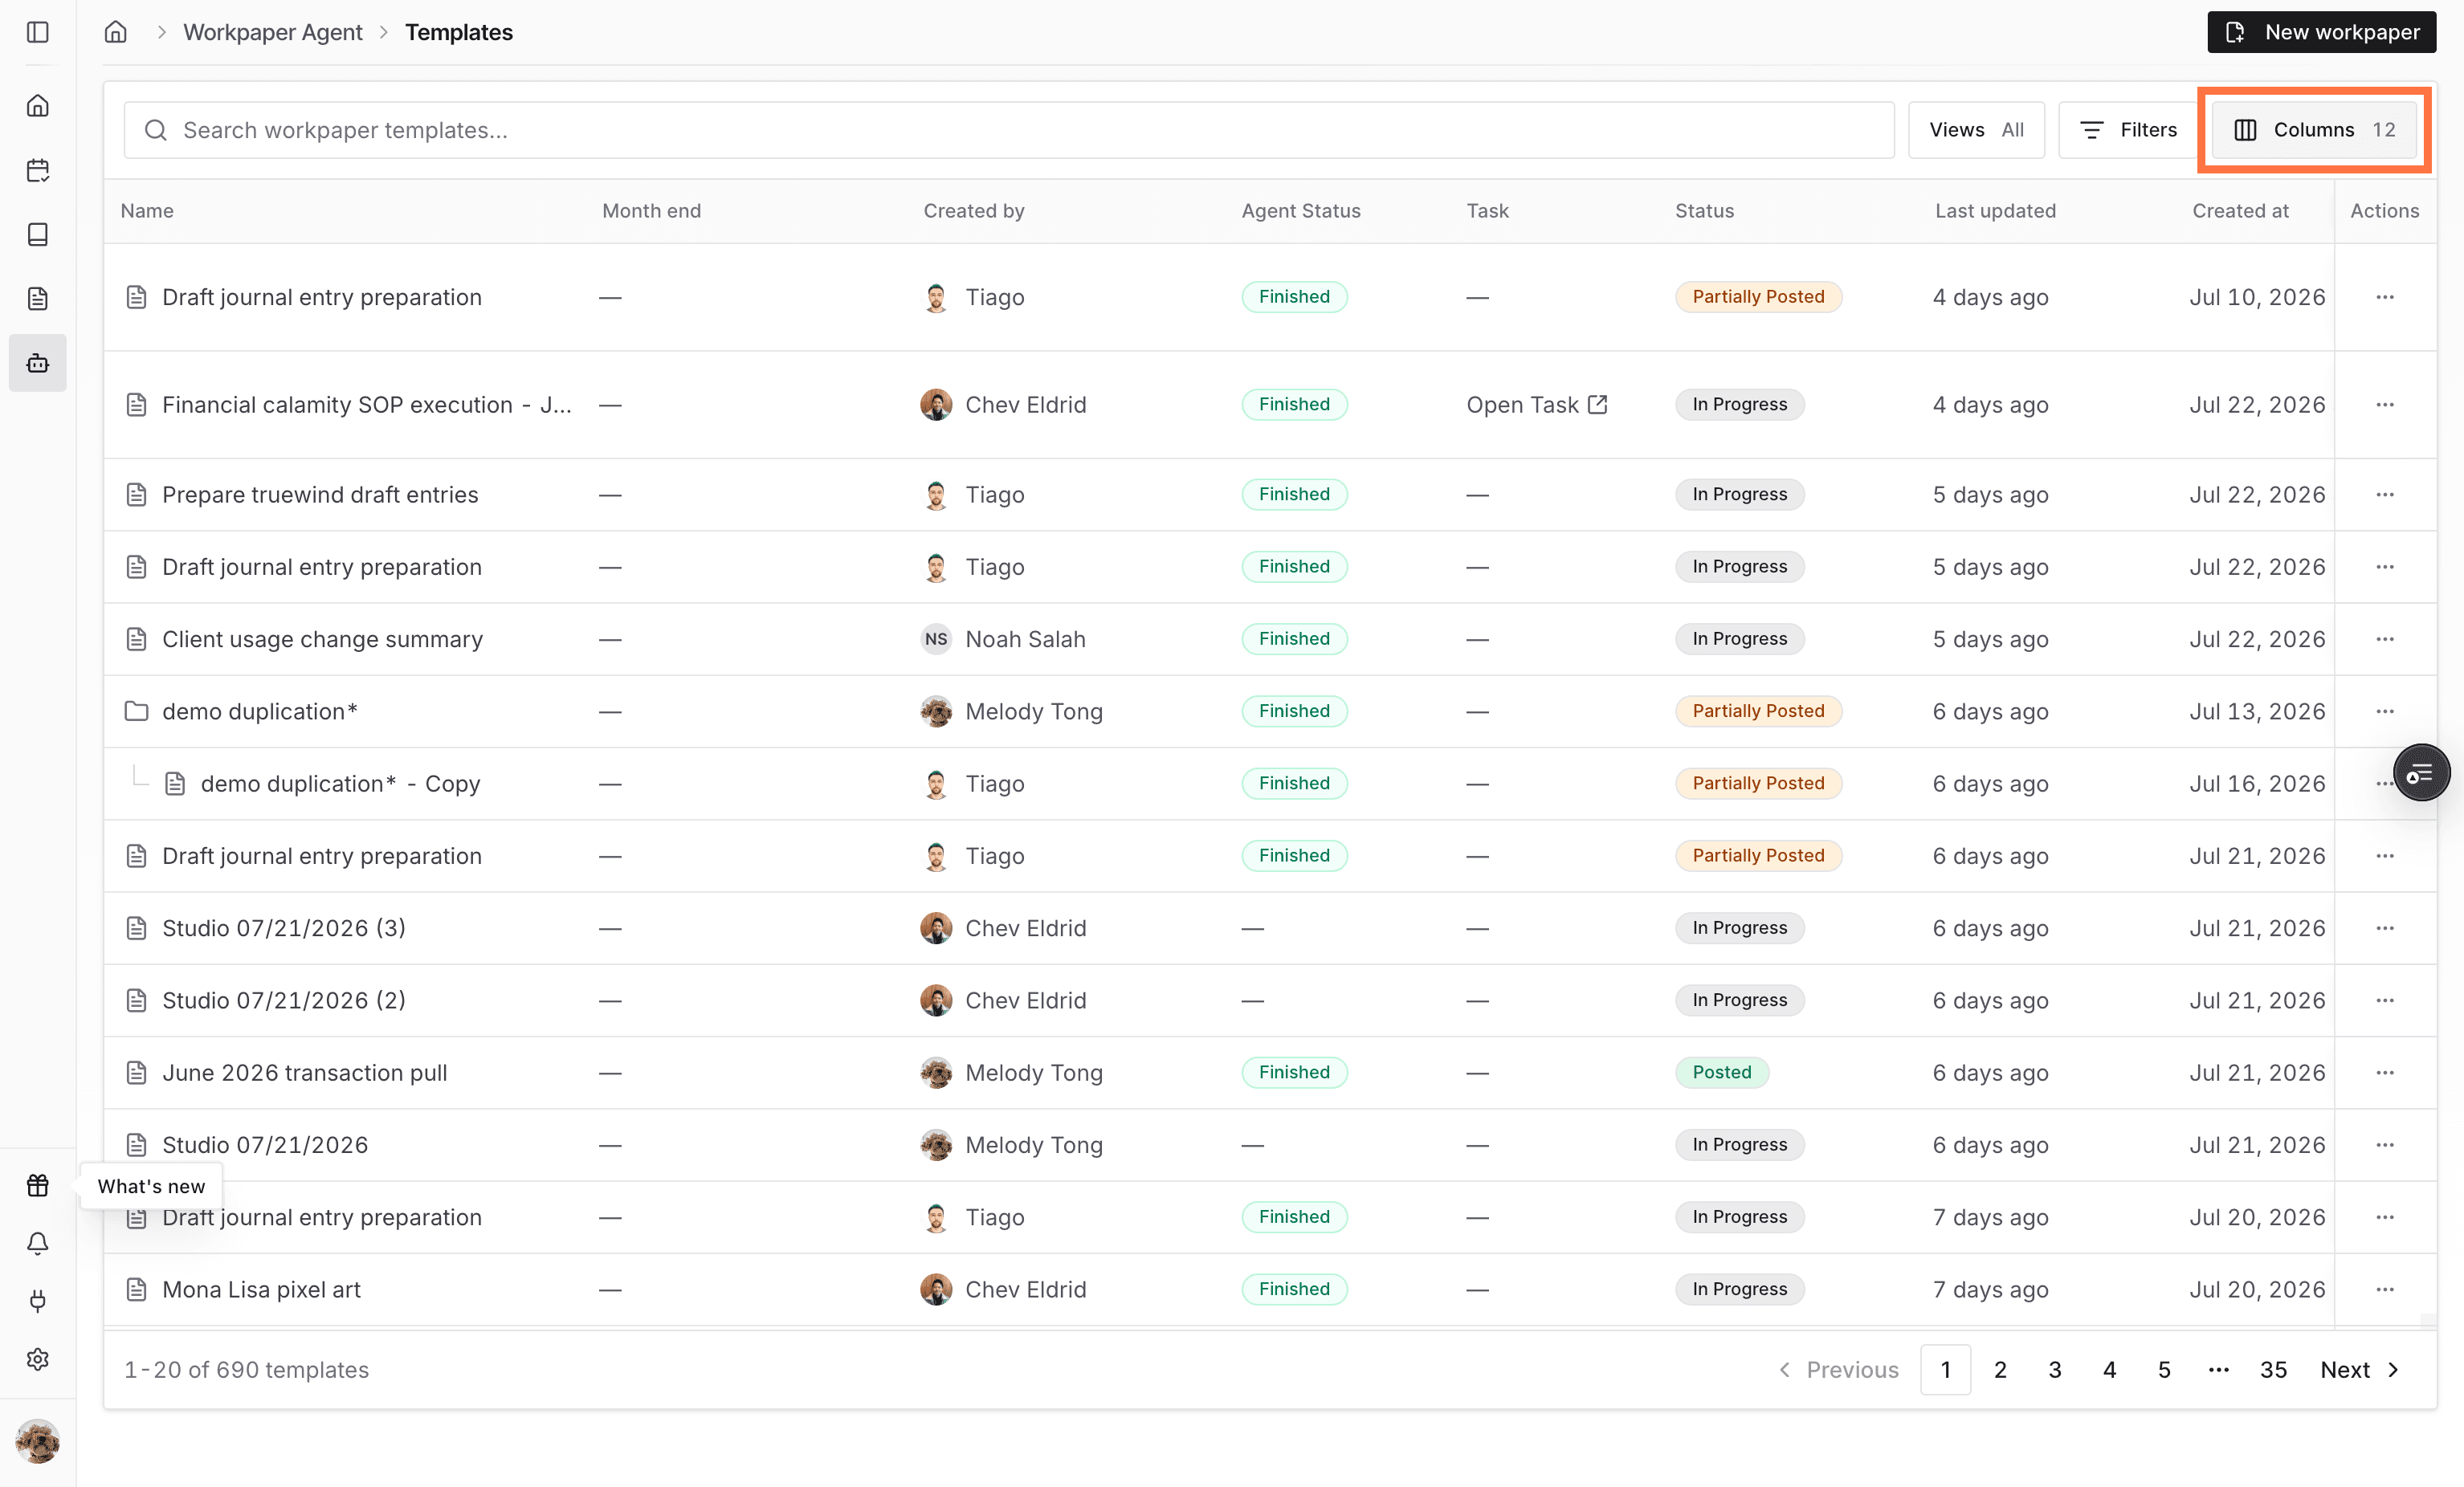
Open Columns

Use Columns on the template list when you want label groups to appear as visible columns.

Screenshot showing the Columns action in the template list

Step 16

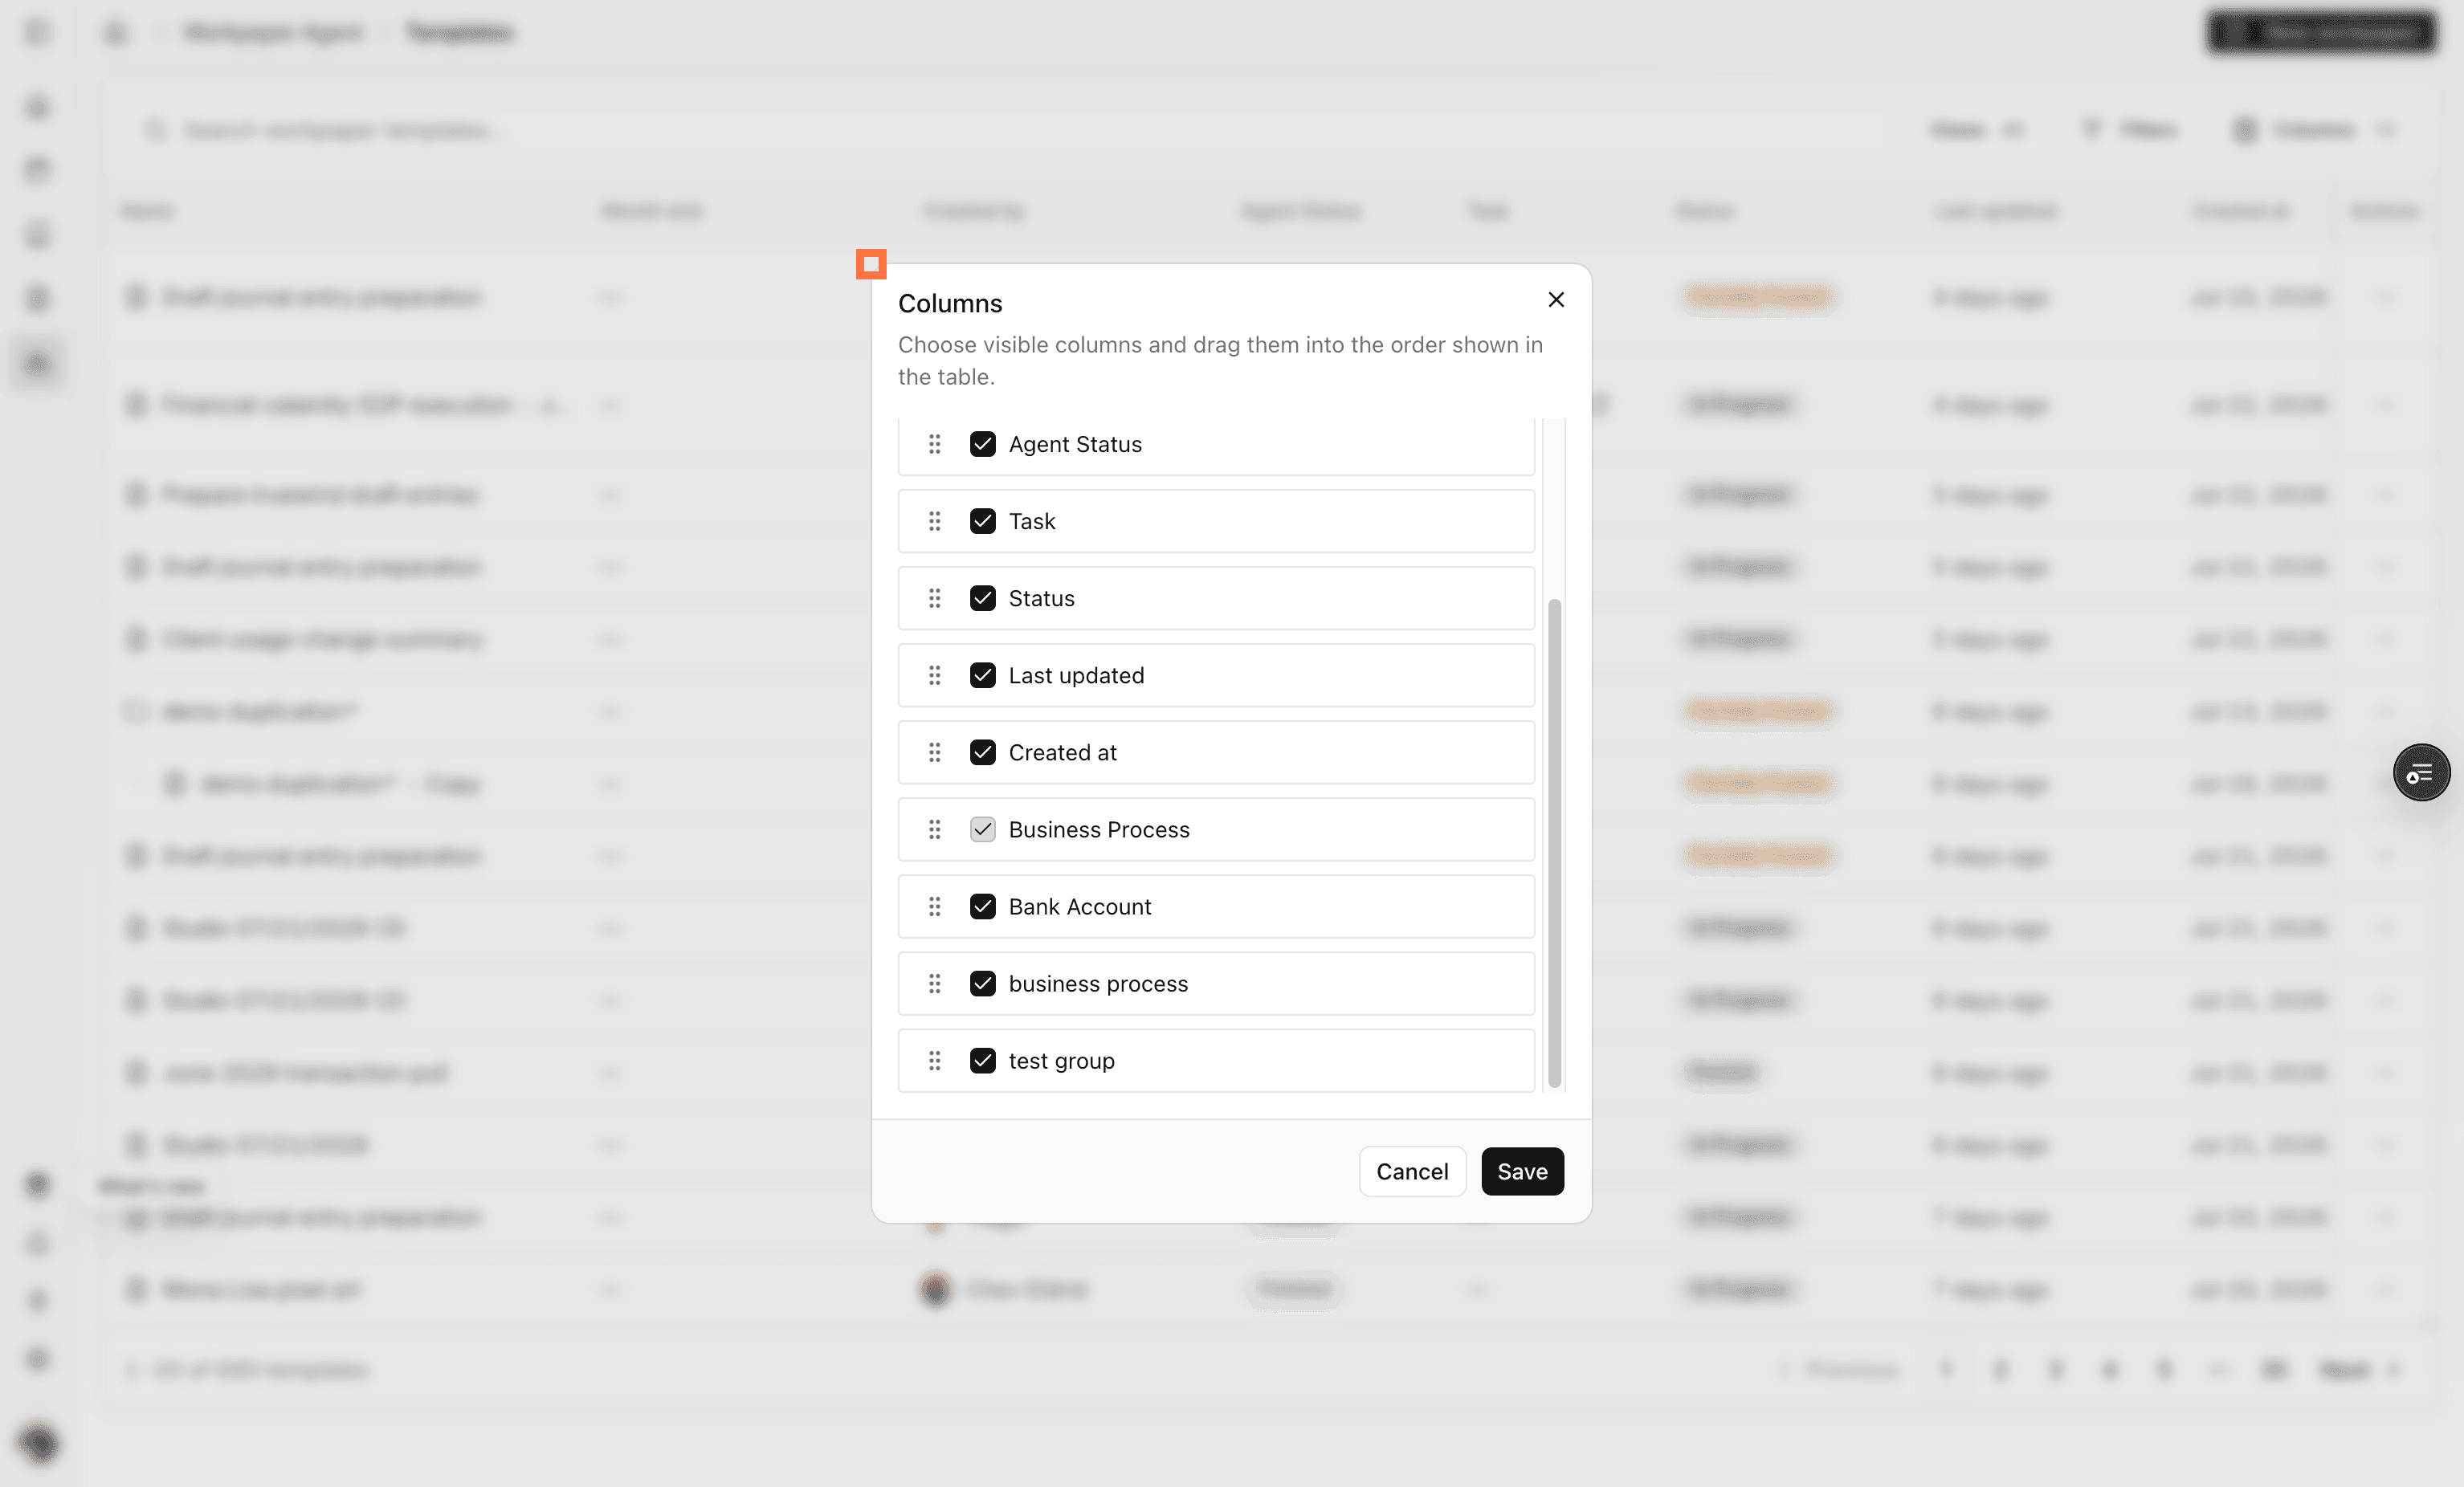
Select label columns

Choose the label groups that should appear in the list, such as Business Process, so users can scan labels without opening each workpaper.

Screenshot showing label group checkboxes in the column picker

Step 17

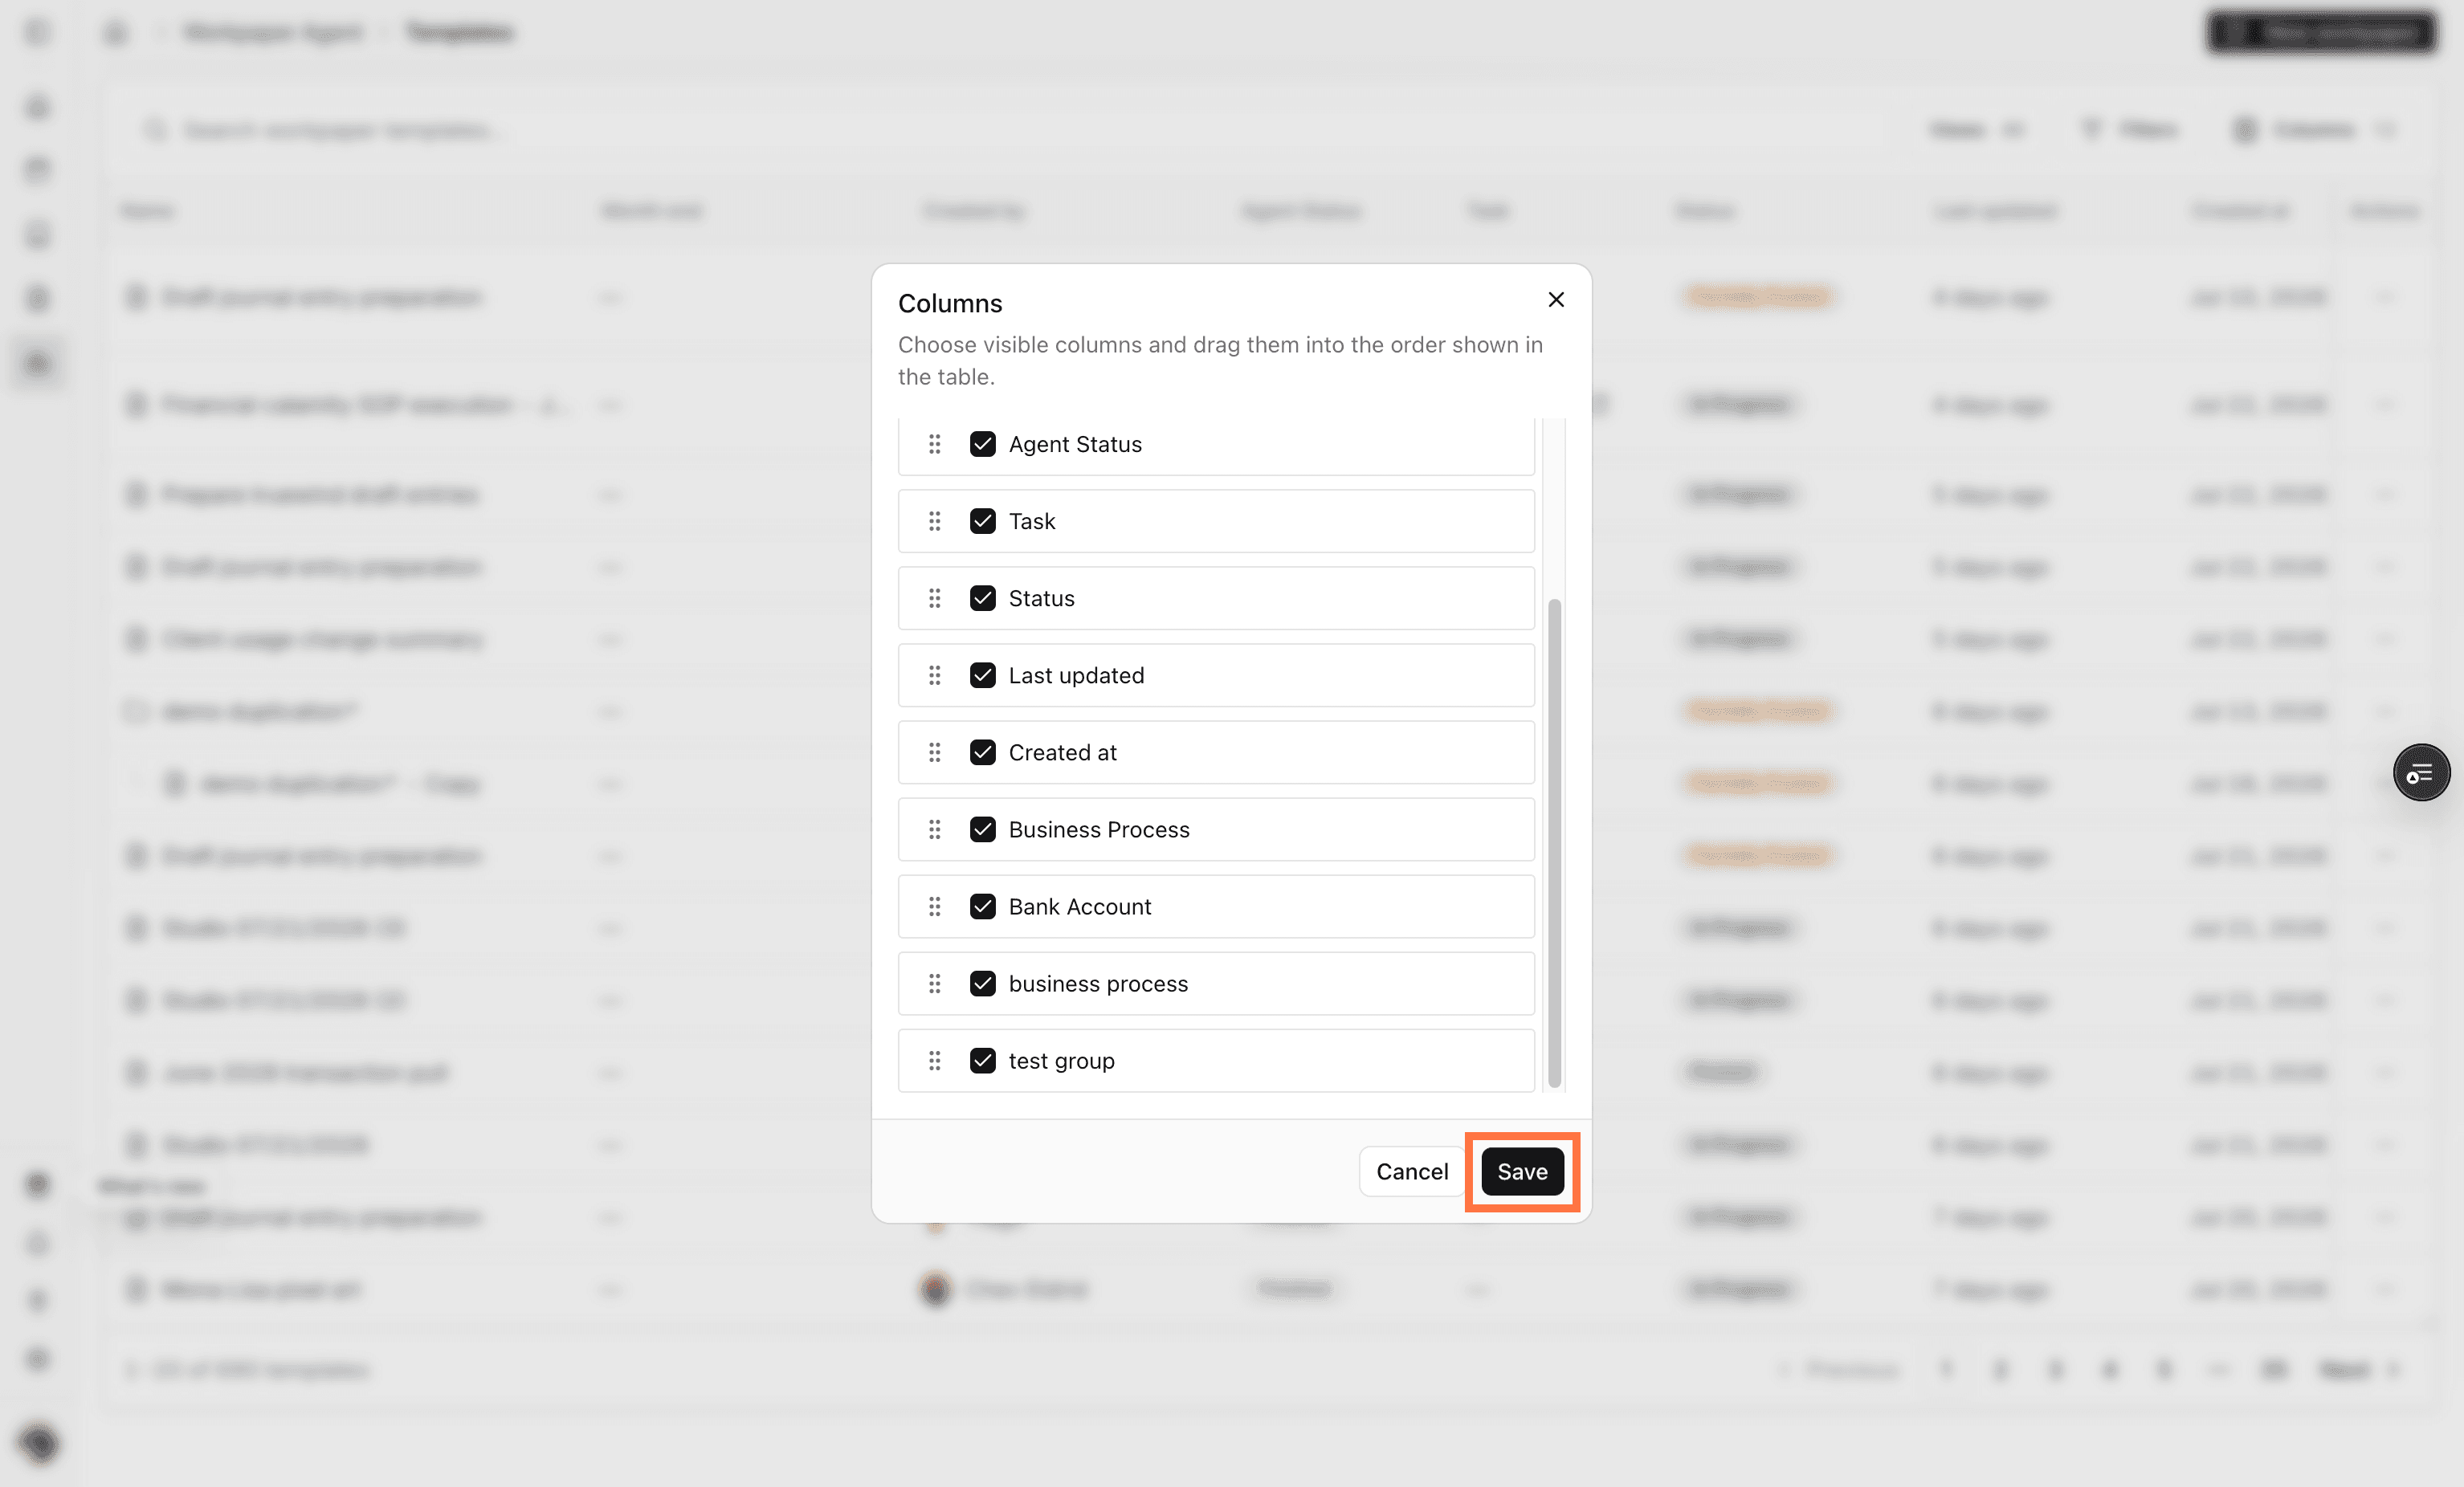
Save columns

Save the column selection to update the template list layout.

Screenshot showing the Save action in the column picker

Step 18

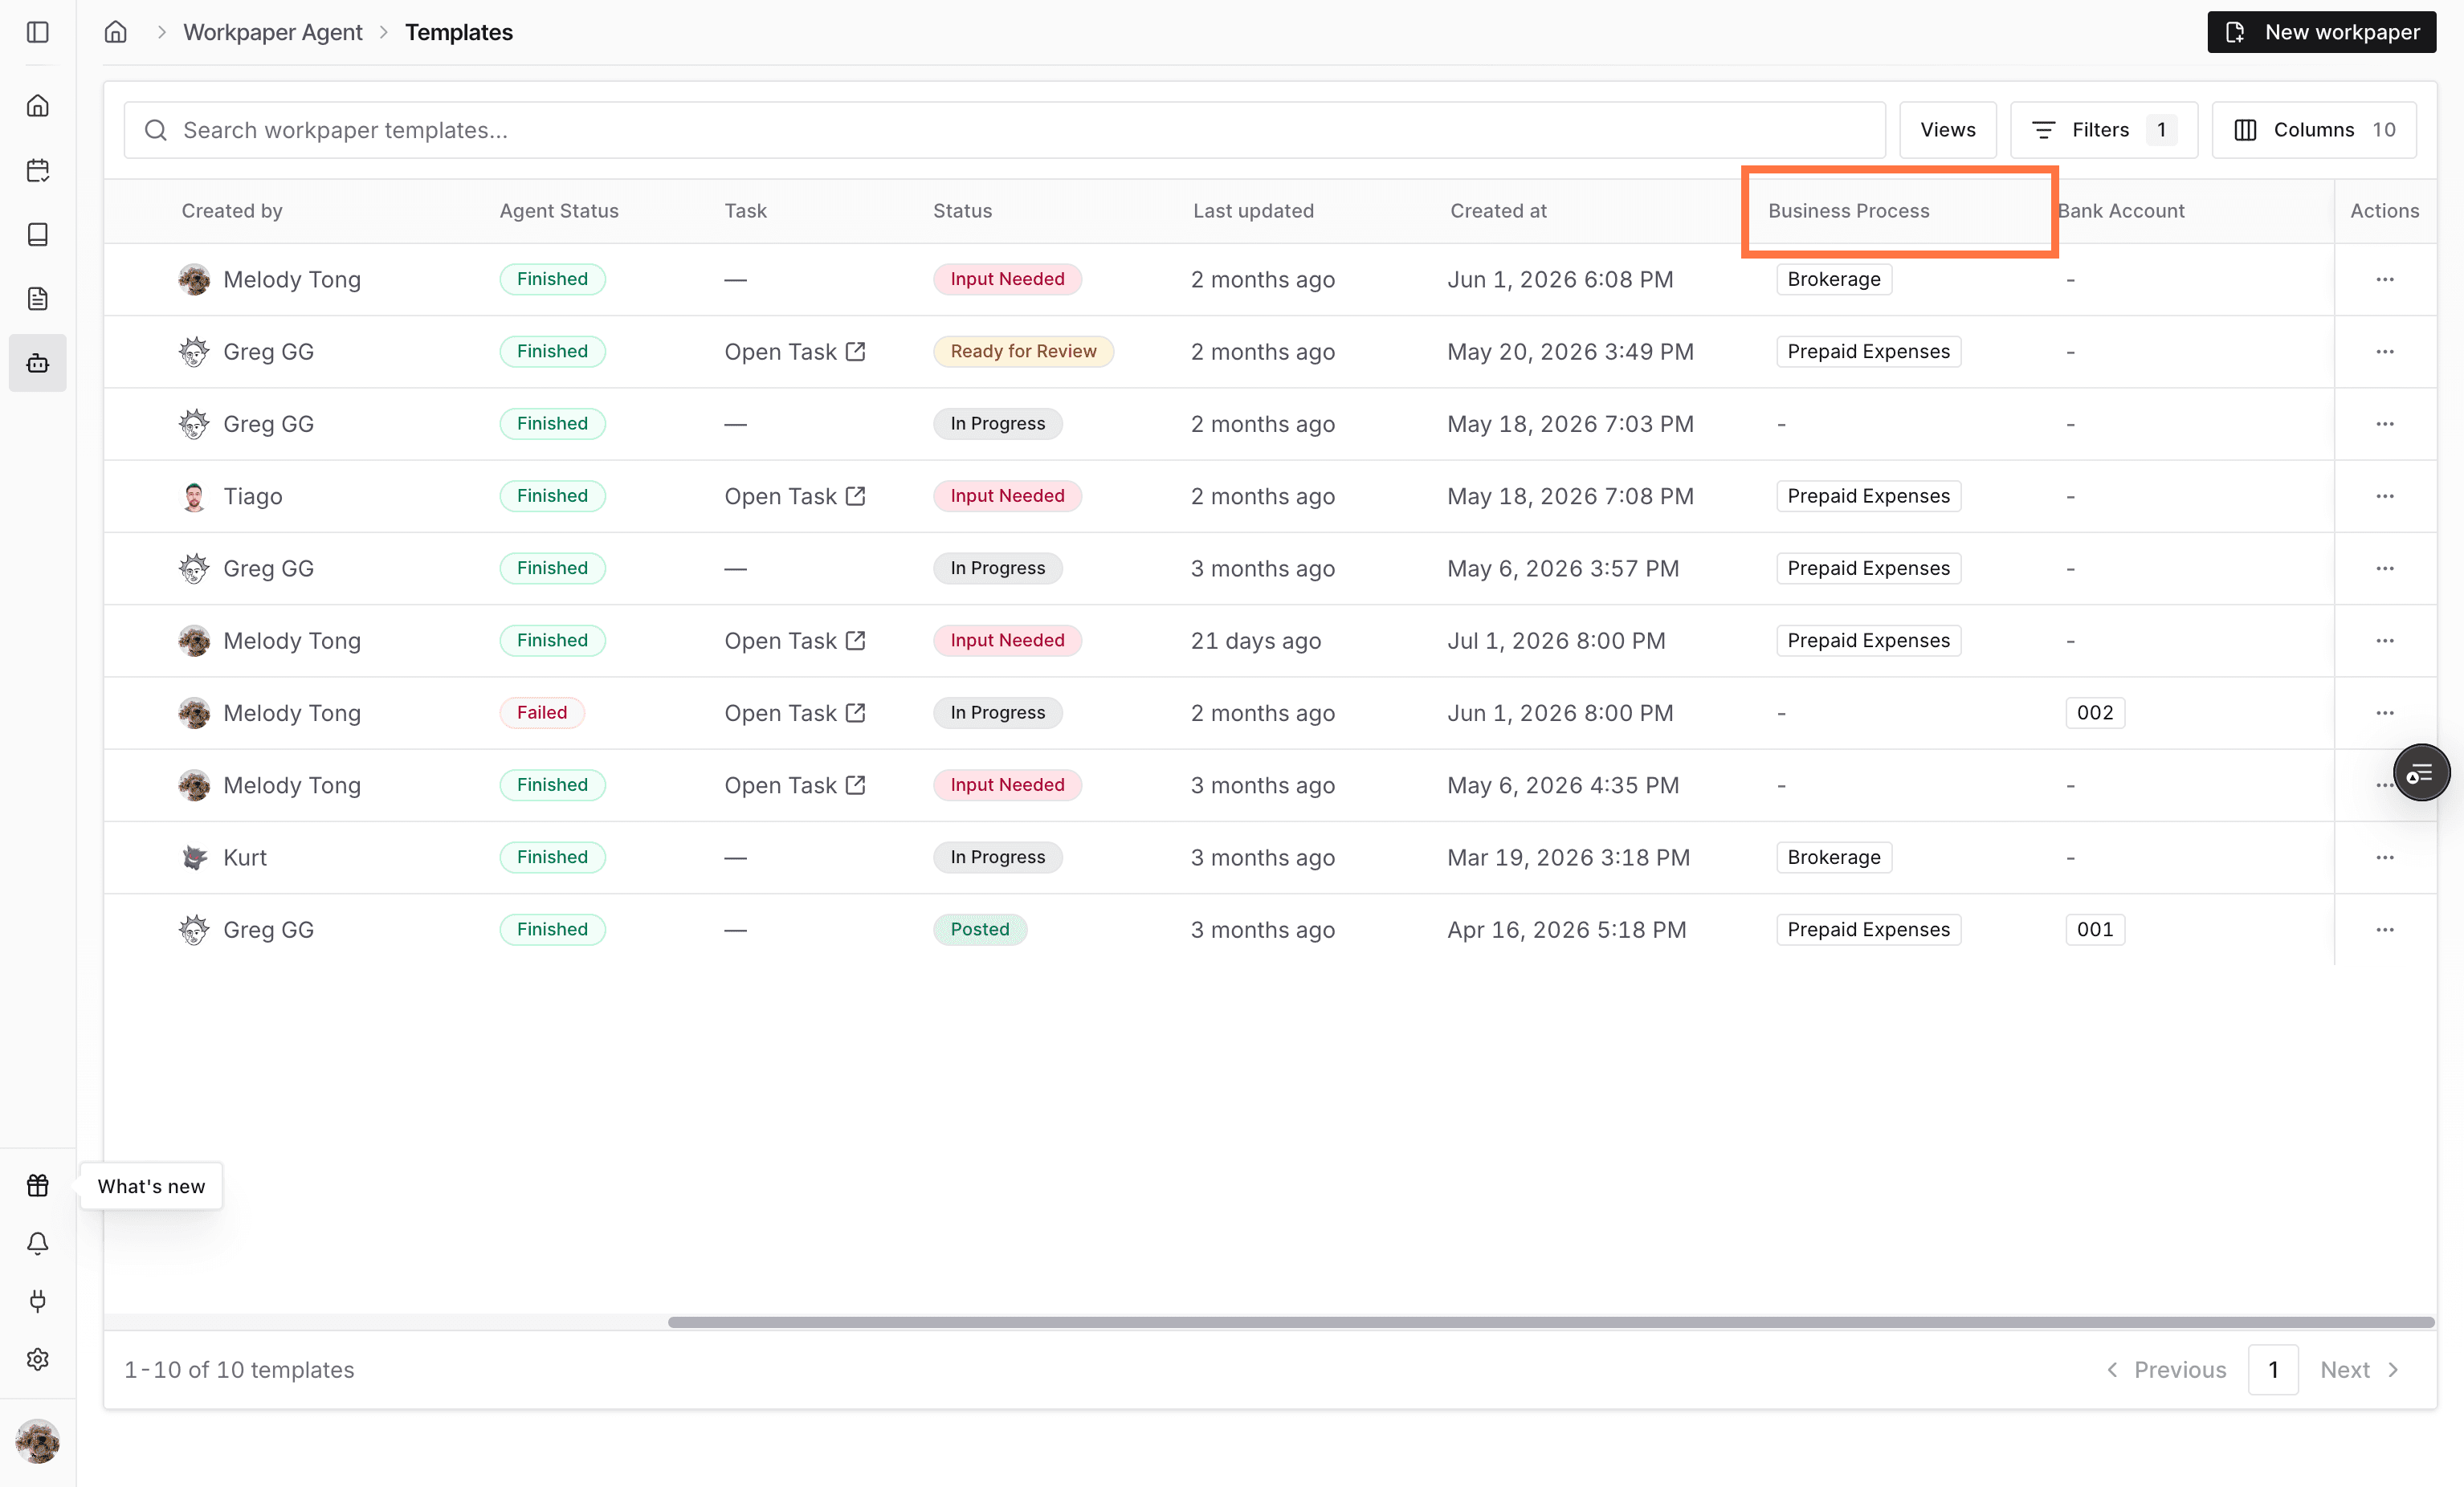
Review the column

Confirm the label group appears as a column in the list, such as Business Process.

Screenshot showing the Business Process label column in the template list

Step 19

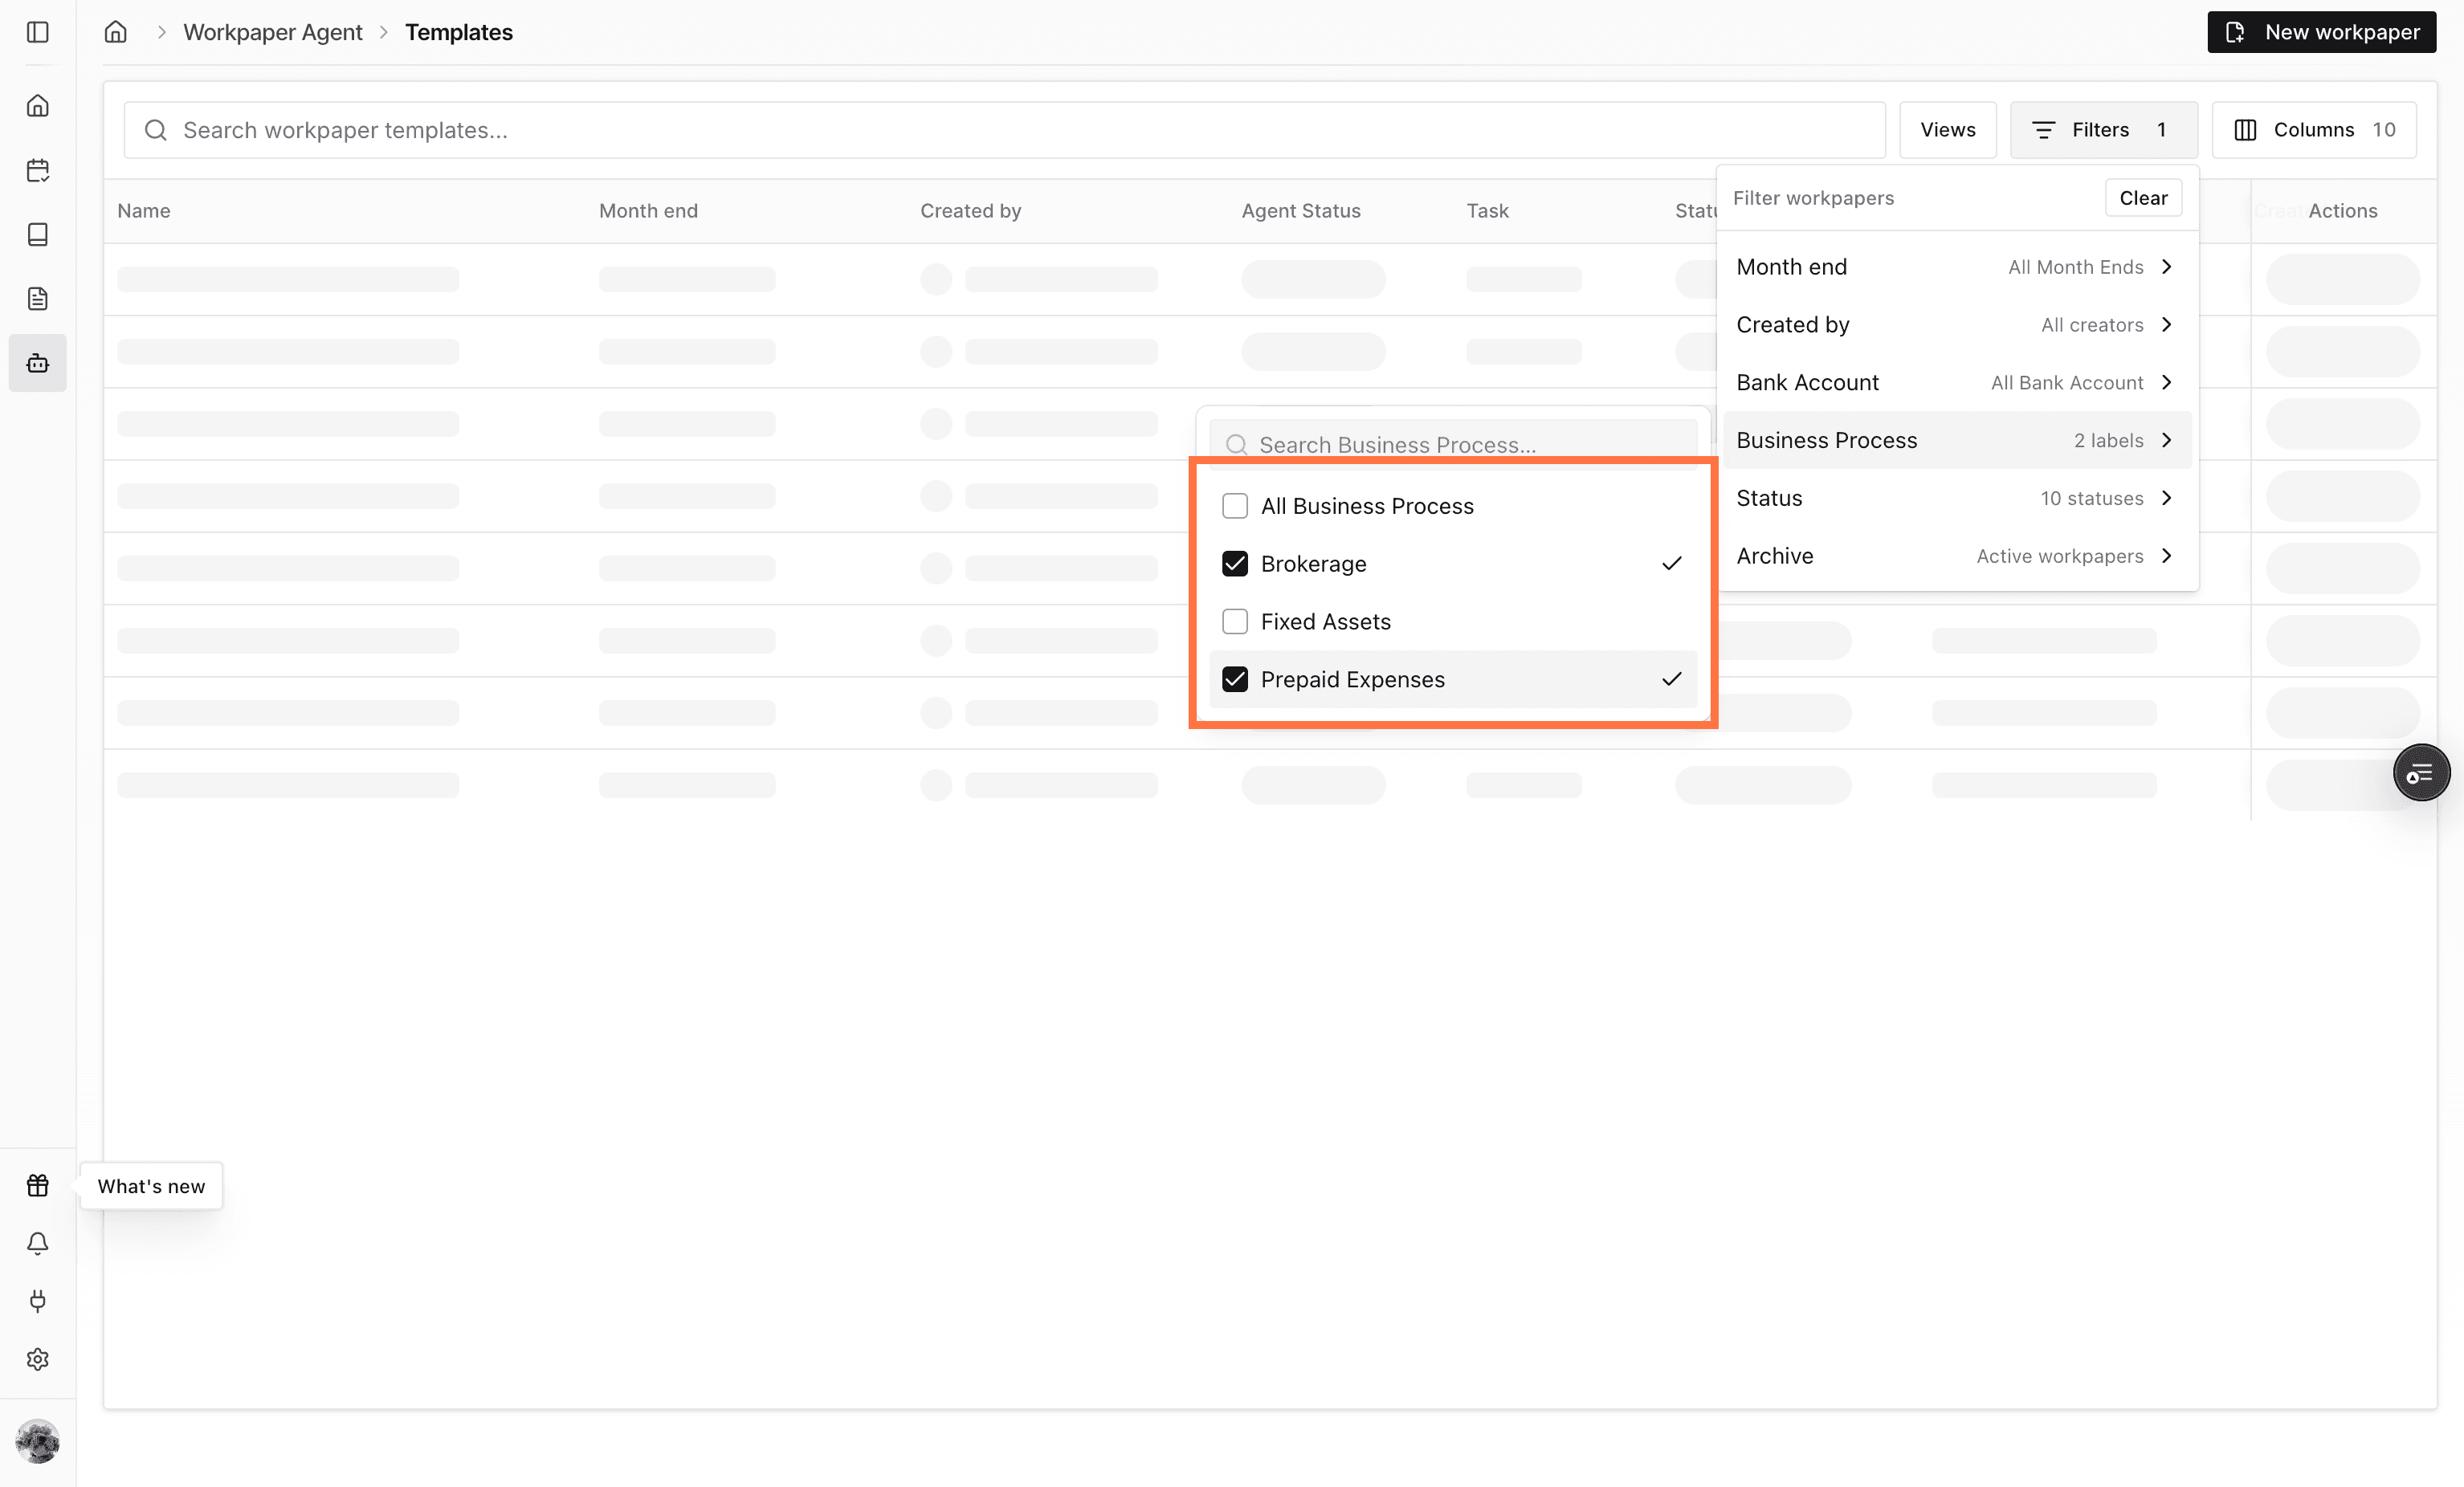
Filter by label

Use Filters and select the relevant label values. This creates the filtered list you can later save as a reusable view for the client account.

Screenshot showing label filters selected in the filter menu

Step 20

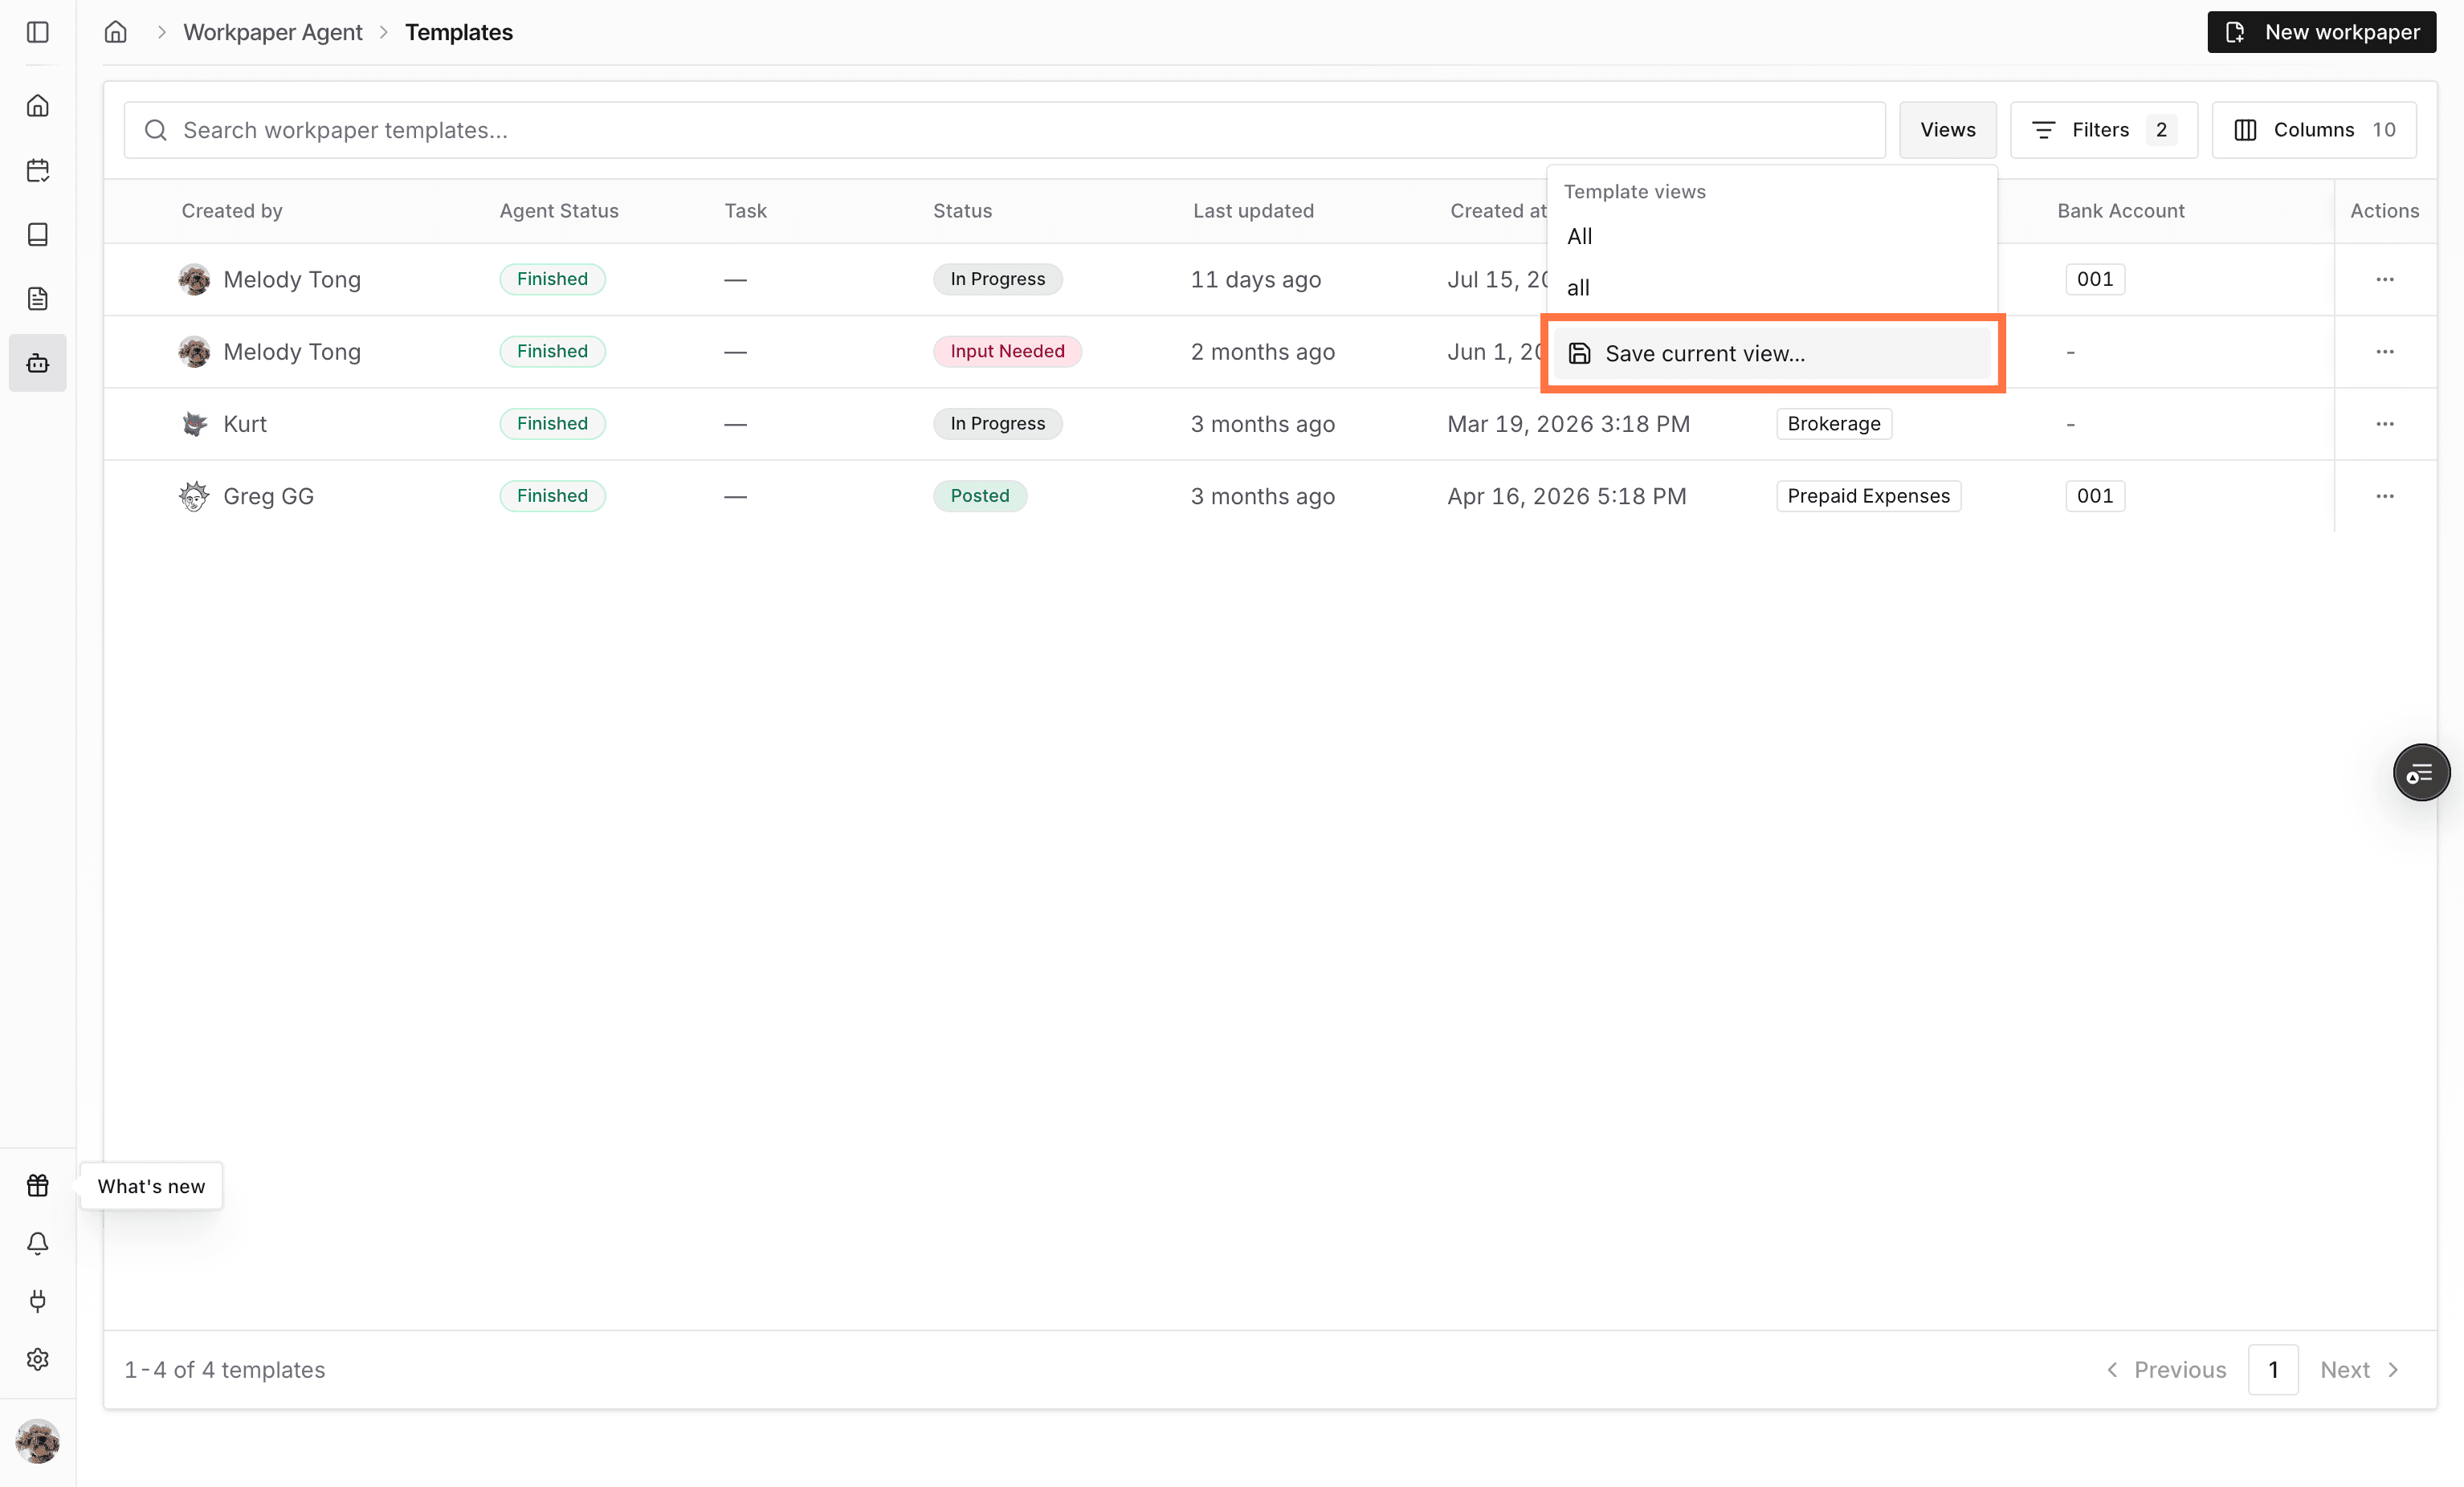
Save the view

Open Views, then choose Save current view to store the current filters and columns.

Screenshot showing the Save current view action

Step 21

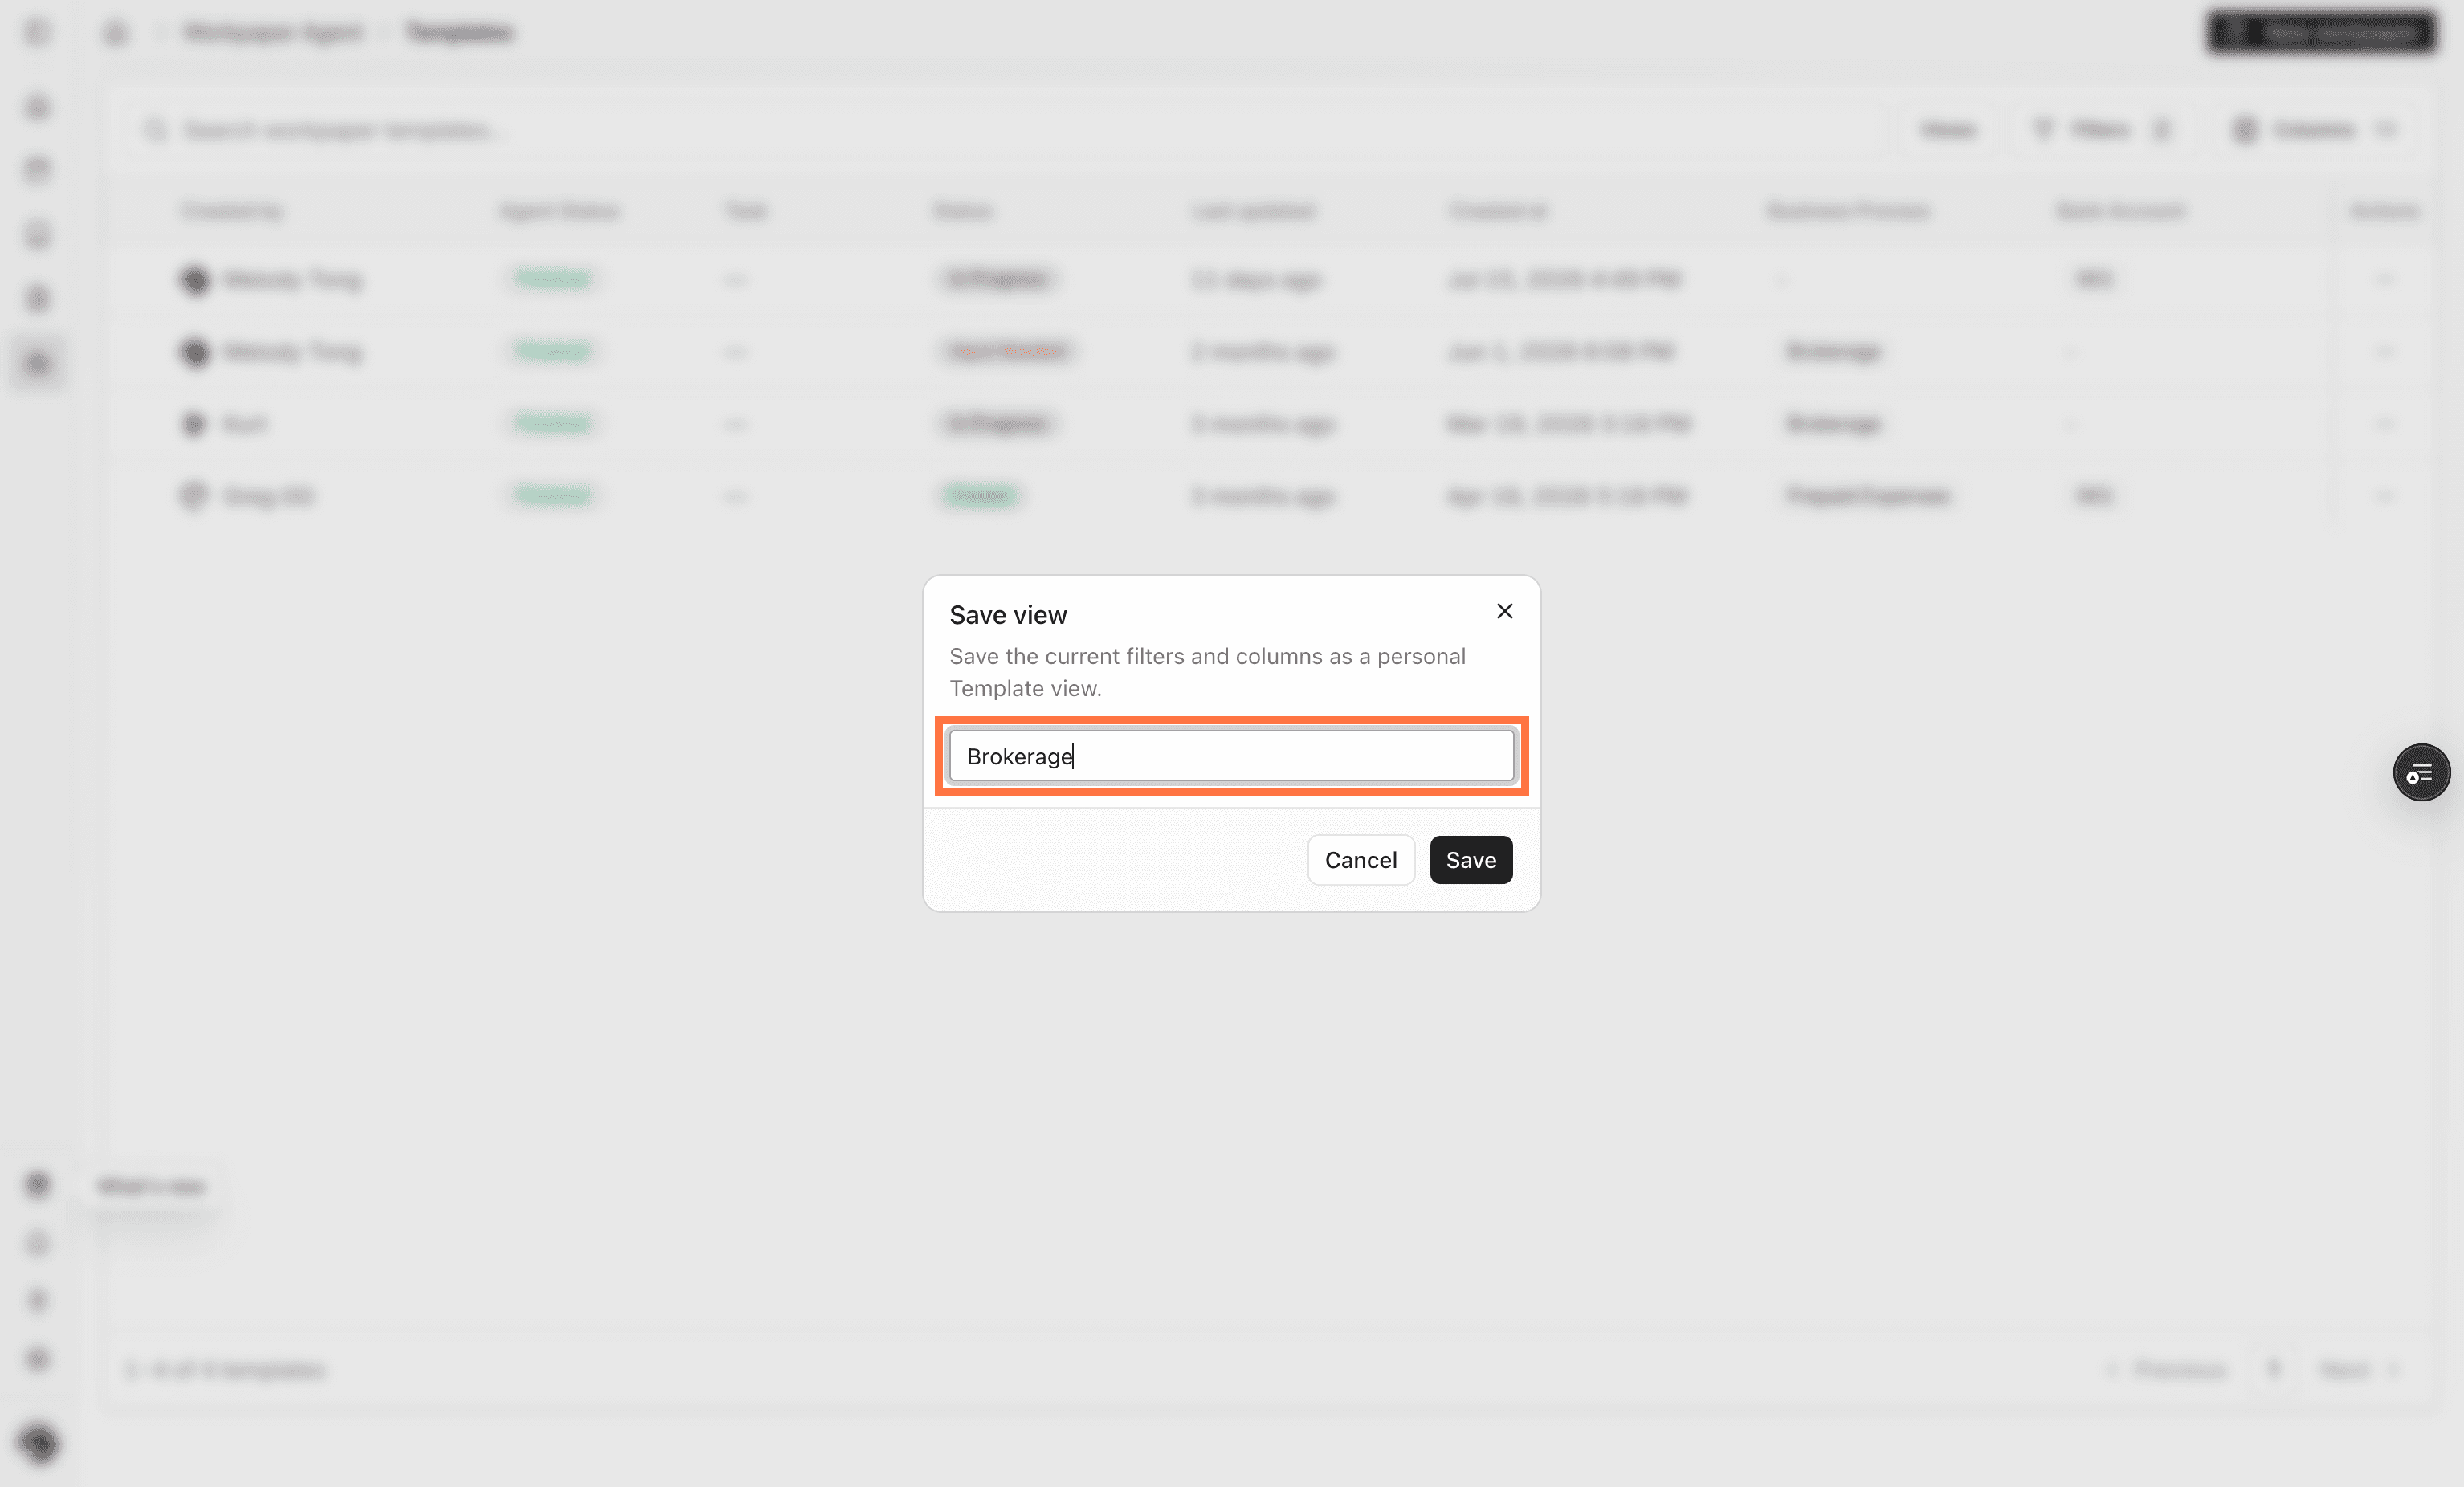
Name the view

Enter a clear view name so the team can recognize the filtered list later.

Screenshot showing the view name field

Step 22

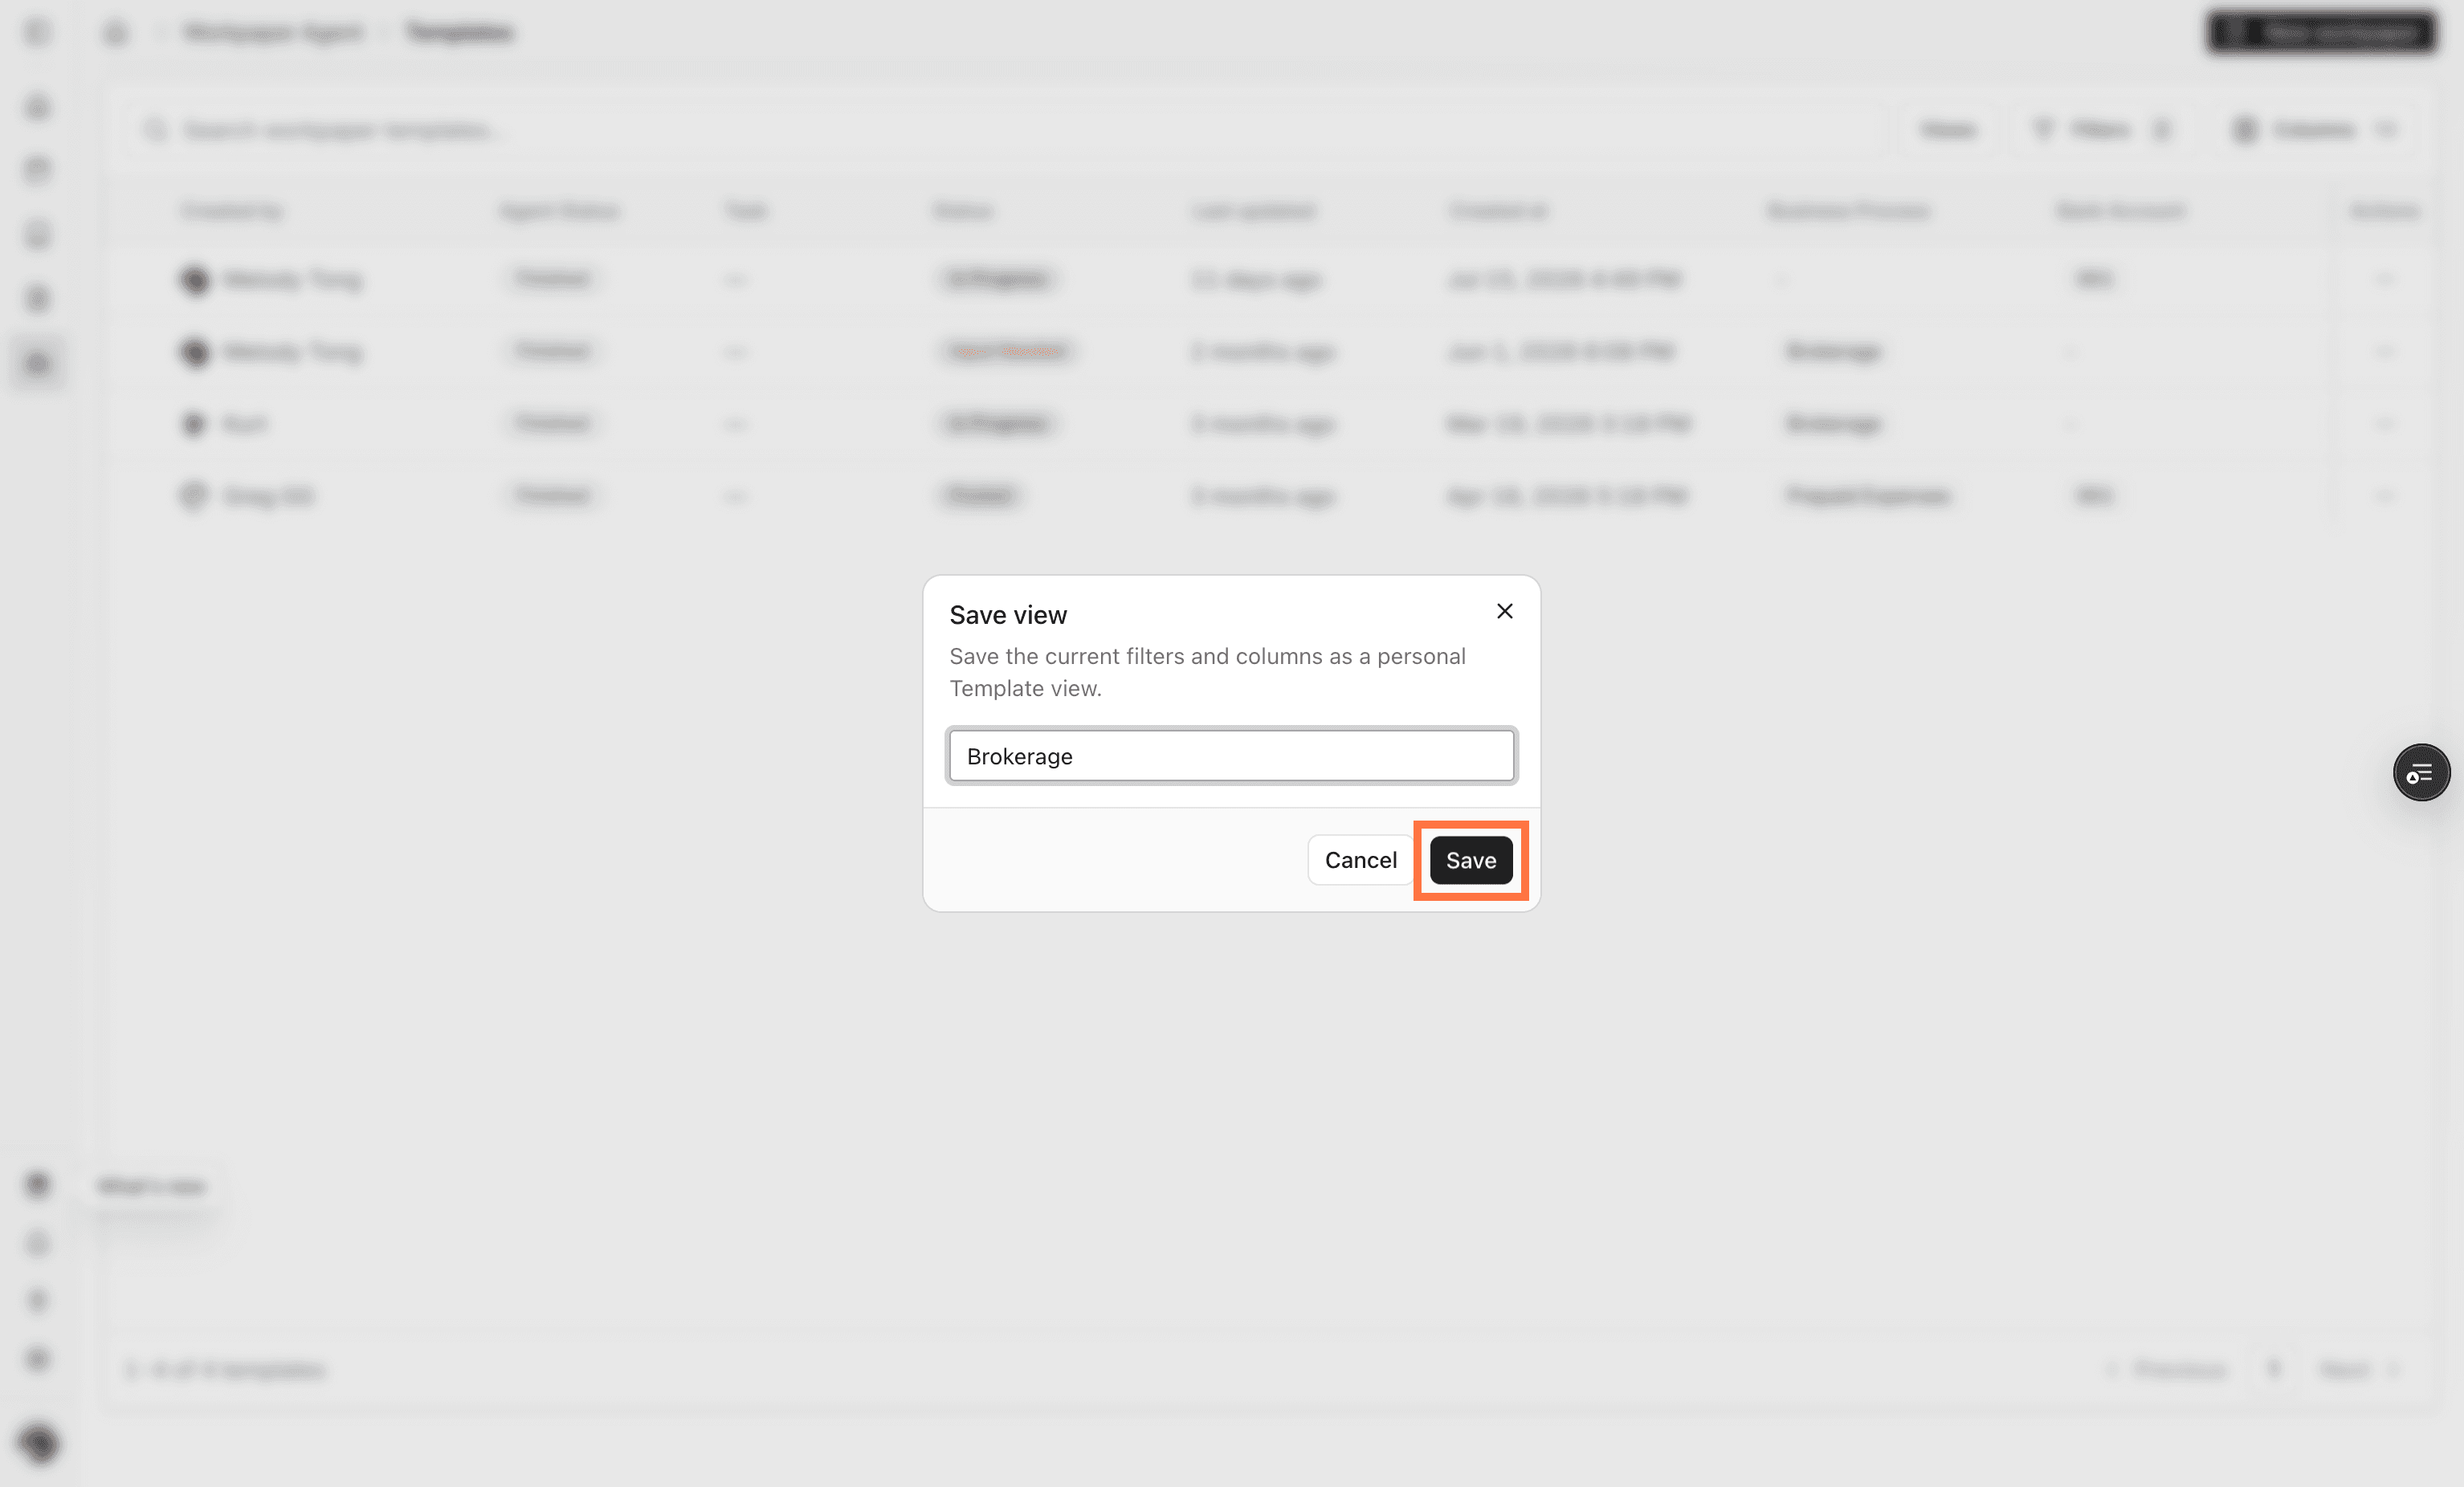
Save the view

Confirm the view name to save the filtered layout at the client account level.

Screenshot showing the Save action for a new view

Step 23

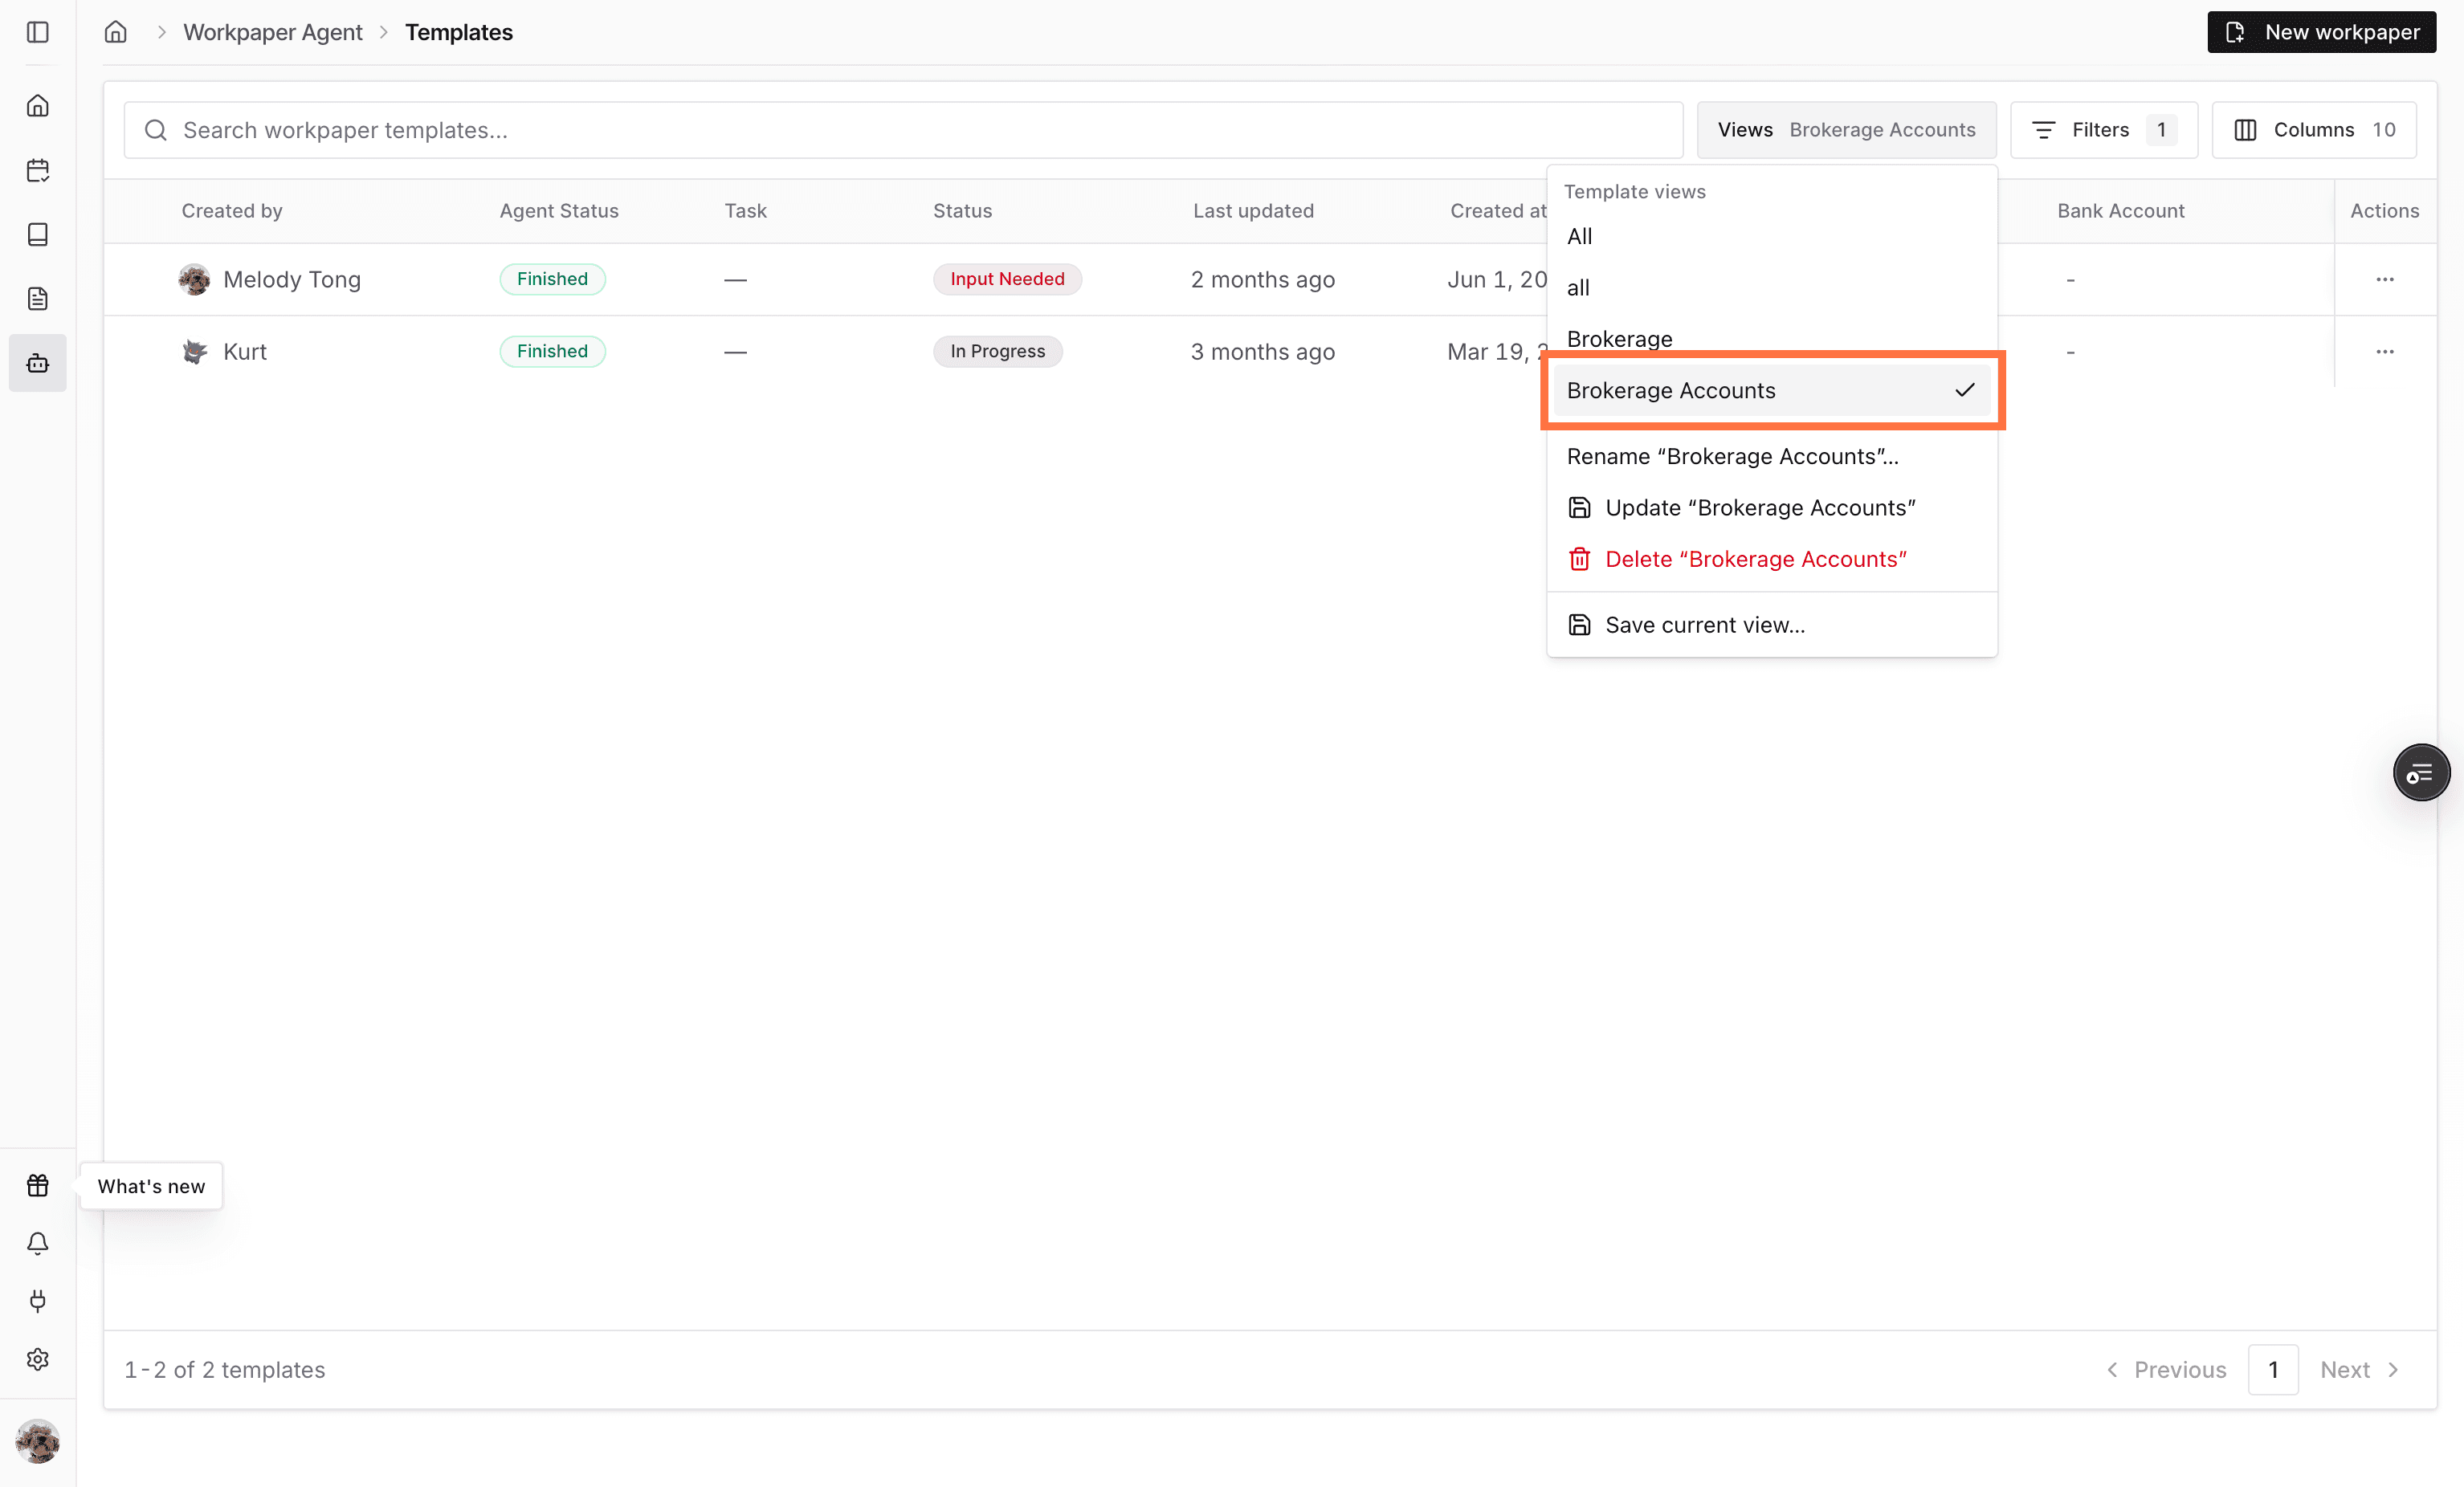
Open a saved view

Use Views to return to a saved view whenever you need quick access to that filtered workpaper list.

Screenshot showing a saved view selected from the Views menu

What this workflow is for

Use labels and saved views when your team needs an easier way to organize and return to Workpaper Agent templates or workpapers. Labels let you tag items by business process or another team-defined grouping, and saved views let you reuse the filters and columns that matter for a client account.

Before you start

Create the label groups and labels your team wants to use before assigning them to templates or workpapers. Label groups and labels created in Settings are saved at the client account level, so all users assigned to that account can see and edit them. After labels are assigned, add the label group as a column or use it as a filter to create a saved view.

FAQ

What can I use labels for?

Labels help organize Workpaper Agent templates and workpapers by process, workflow type, or another grouping your team wants to filter and scan.

Where are saved views stored?

Saved views are stored at the client account level, so users can return to the same filtered list for that client account.

Who can see or edit label groups and labels?

Label groups and labels created in Settings are saved at the client account level. All users assigned to that client account can see and edit them.

Do I need to add label columns before filtering?

No. You can filter by labels from Filters, but adding label groups as columns makes the labels visible in the list.

Limitations

Views are client-account specific

Saved views apply to the client account where they were created and are meant for returning to the same filtered Workpaper Agent list.

Labels are shared within the client account

Label groups and labels created in Settings are visible and editable by all users assigned to that client account.

Labels must exist before assignment

Create the label group and labels in Settings before assigning them to templates or workpapers.

Troubleshooting

I do not see a label in the picker.

Confirm the label exists under Settings > Labels, then reopen the label picker from the template or workpaper actions menu.

The label group is not visible as a column.

Open Columns and select the label group, then save the column selection.

I cannot find a saved view.

Open Views on the same client account where the view was created and check that the current list is the Workpaper Agent template or workpaper list.

Was this helpful?

Need more help?

Ask for human help about this article and provide any feedback.