What to verify
- The workflow completes with the expected result.
- The screenshots match the current product flow.
Ask the support agent
Just ask a direct question or search related articles from the Knowledge Base.
Support Center / Workpaper Agent / Journal Entries
Upload workbook attachments to a Sage journal entry when the posted Journal Entry needs supporting files, resulting in the workbook and selected attachments saved on the Sage journal entry.
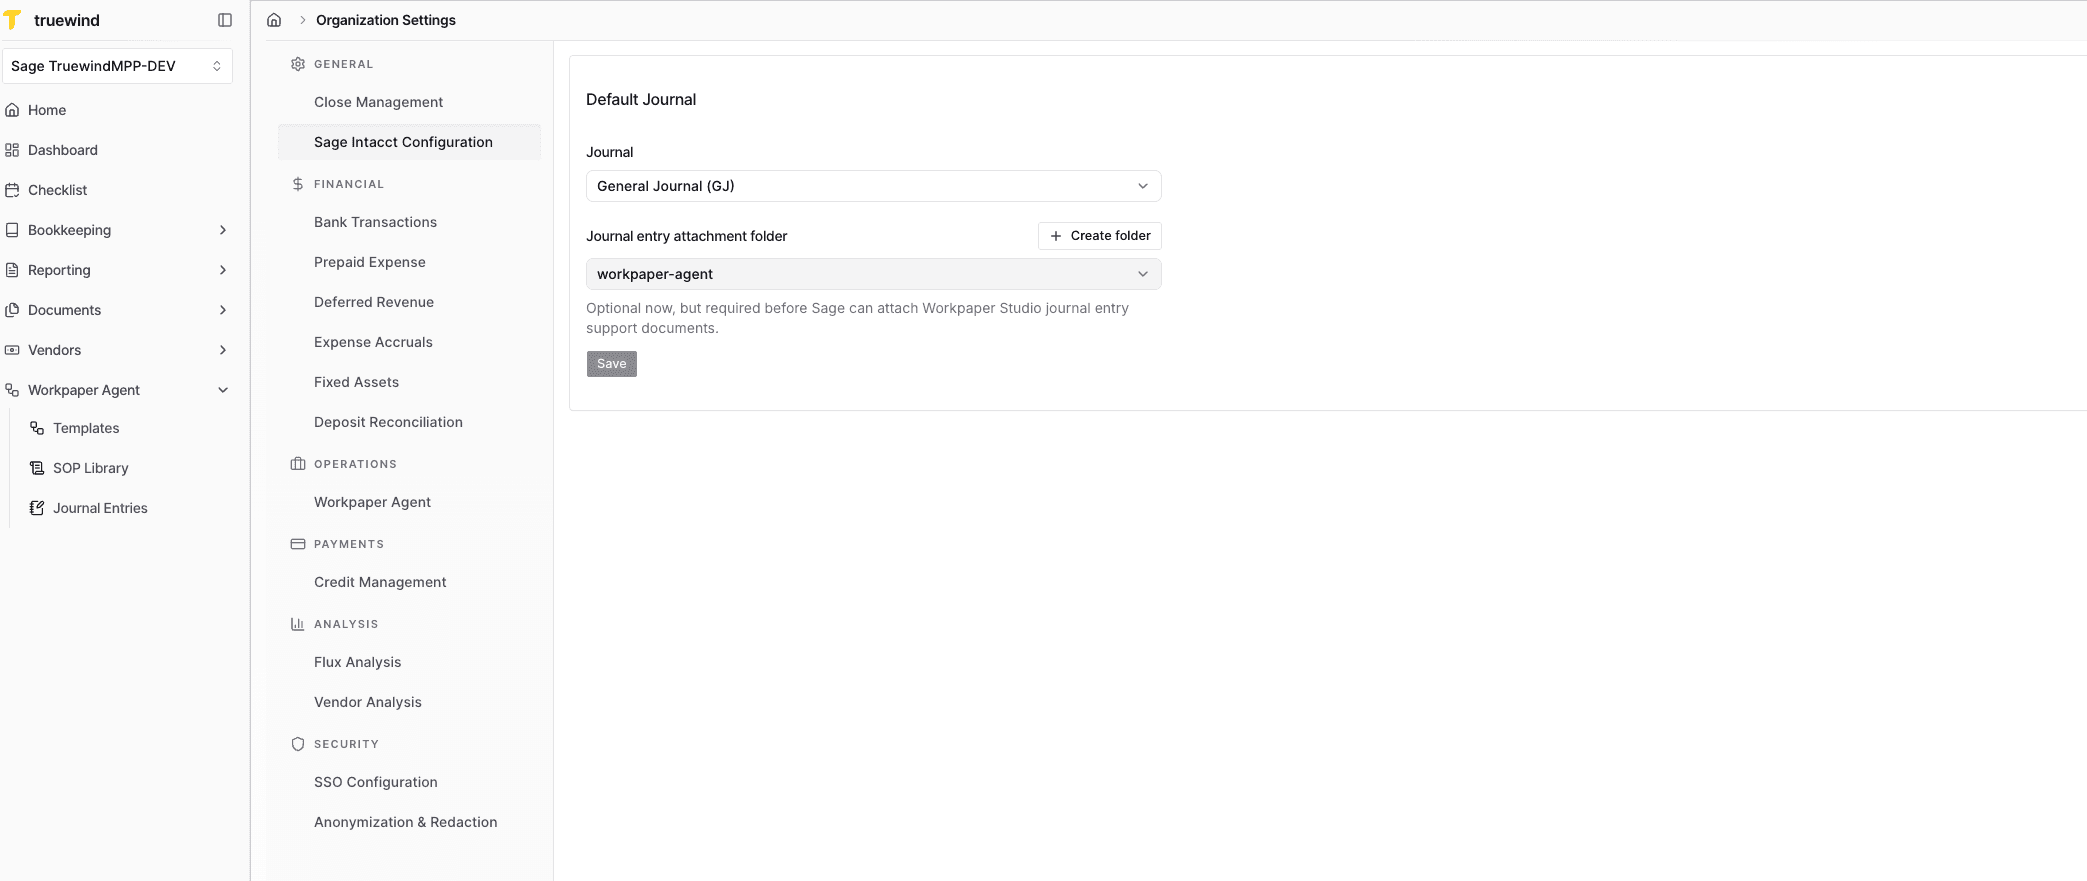
Step 1
Start in Truewind on Workpaper Agent > Journal Entries, then set the Sage folder path before you post any Journal Entry attachments.
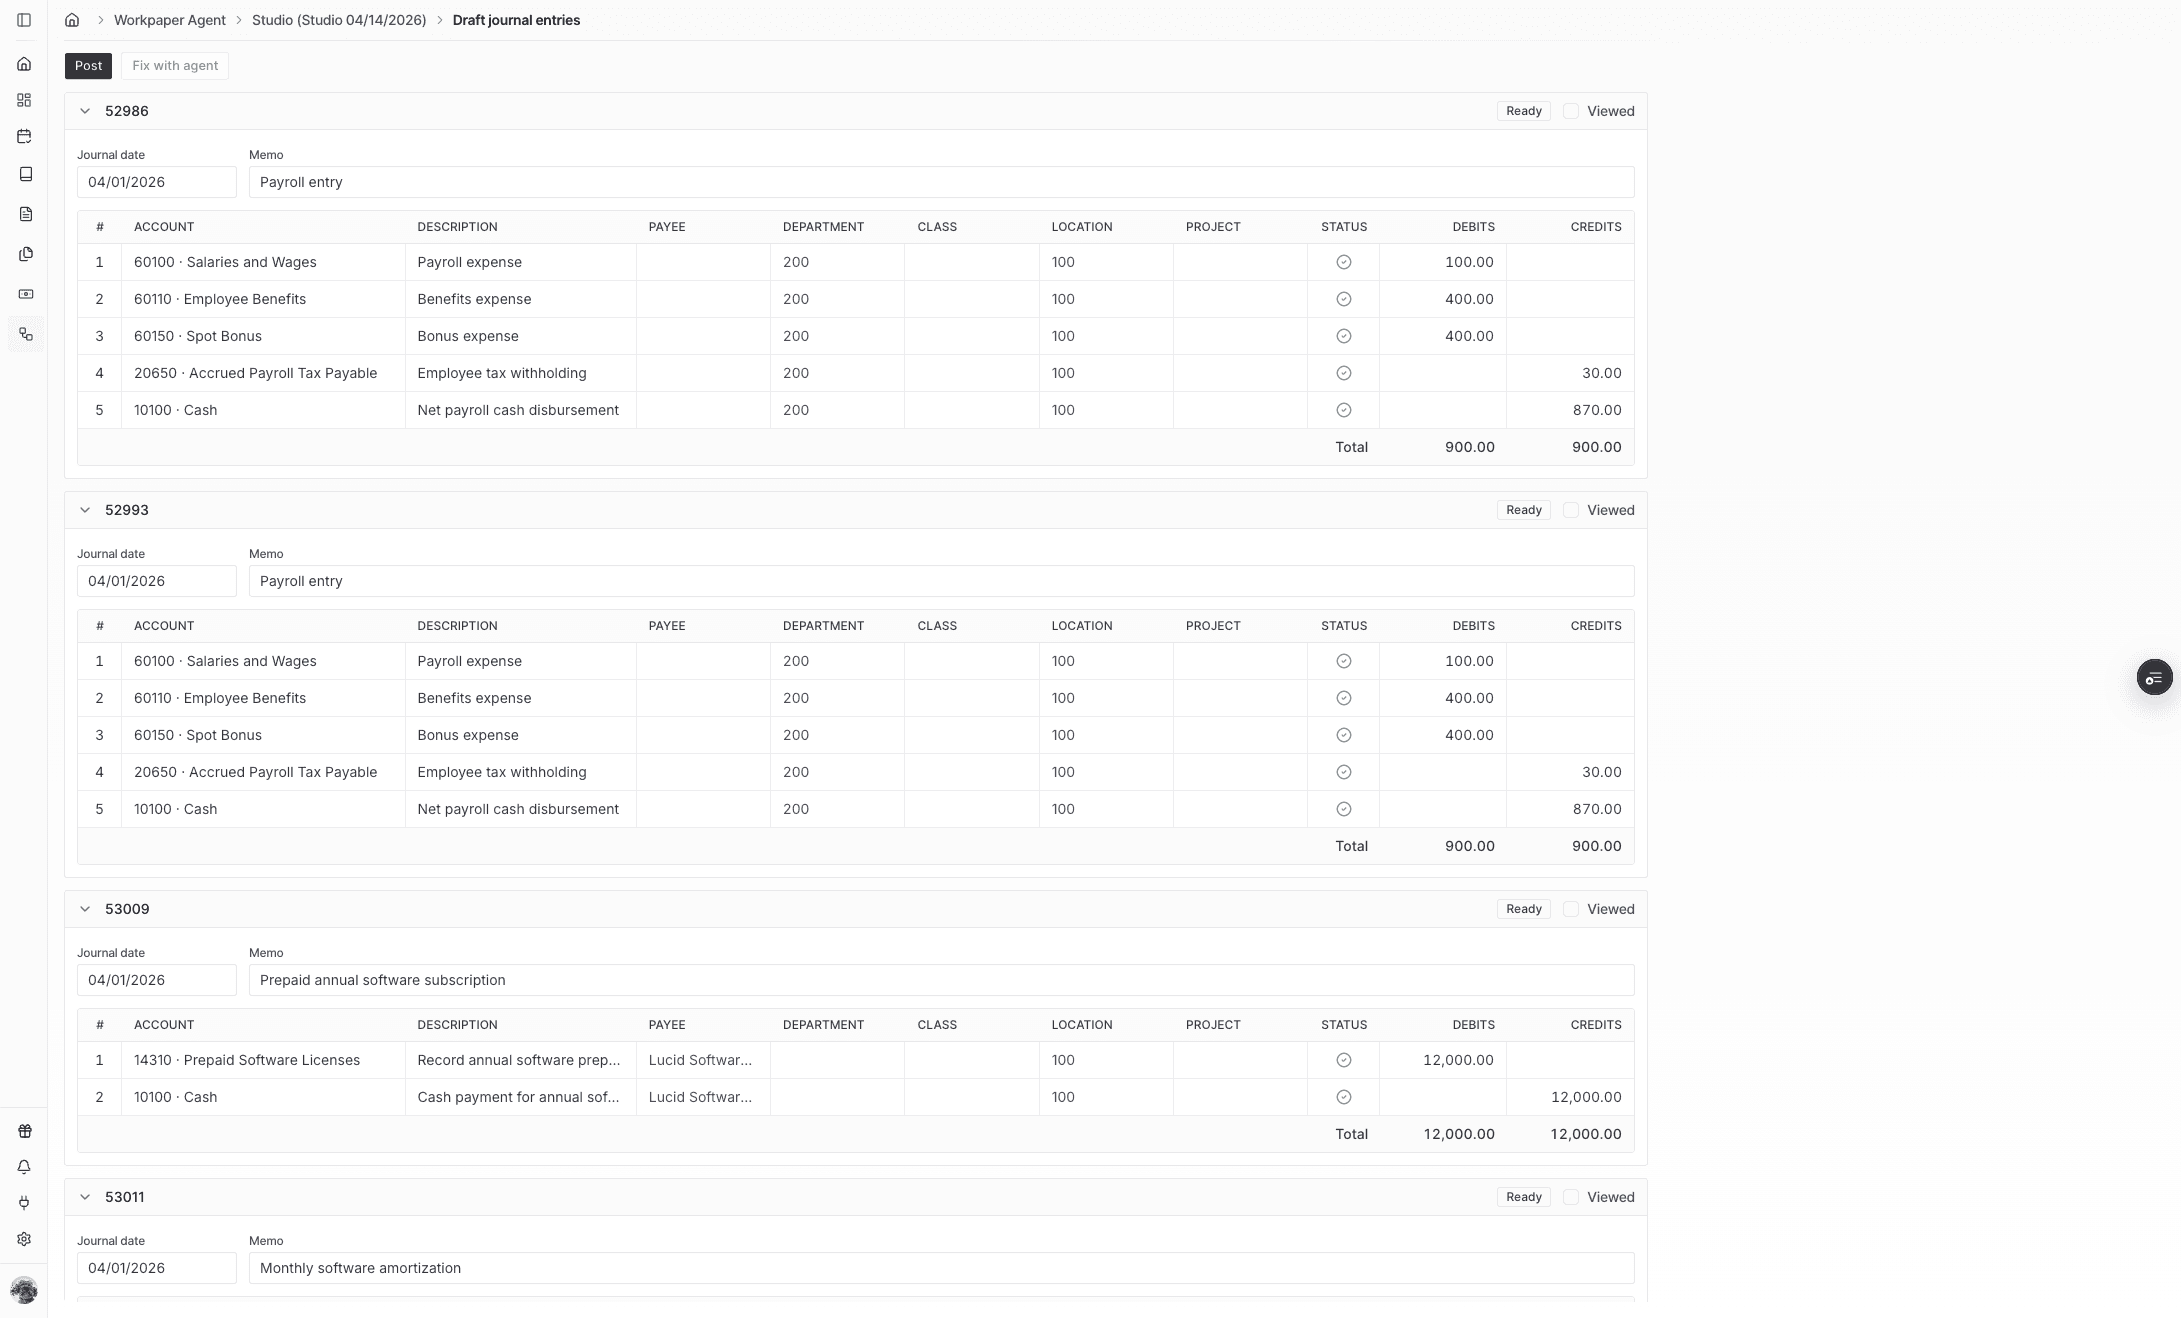
Step 2
Begin the posting flow only after the draft amounts and accounts look correct.
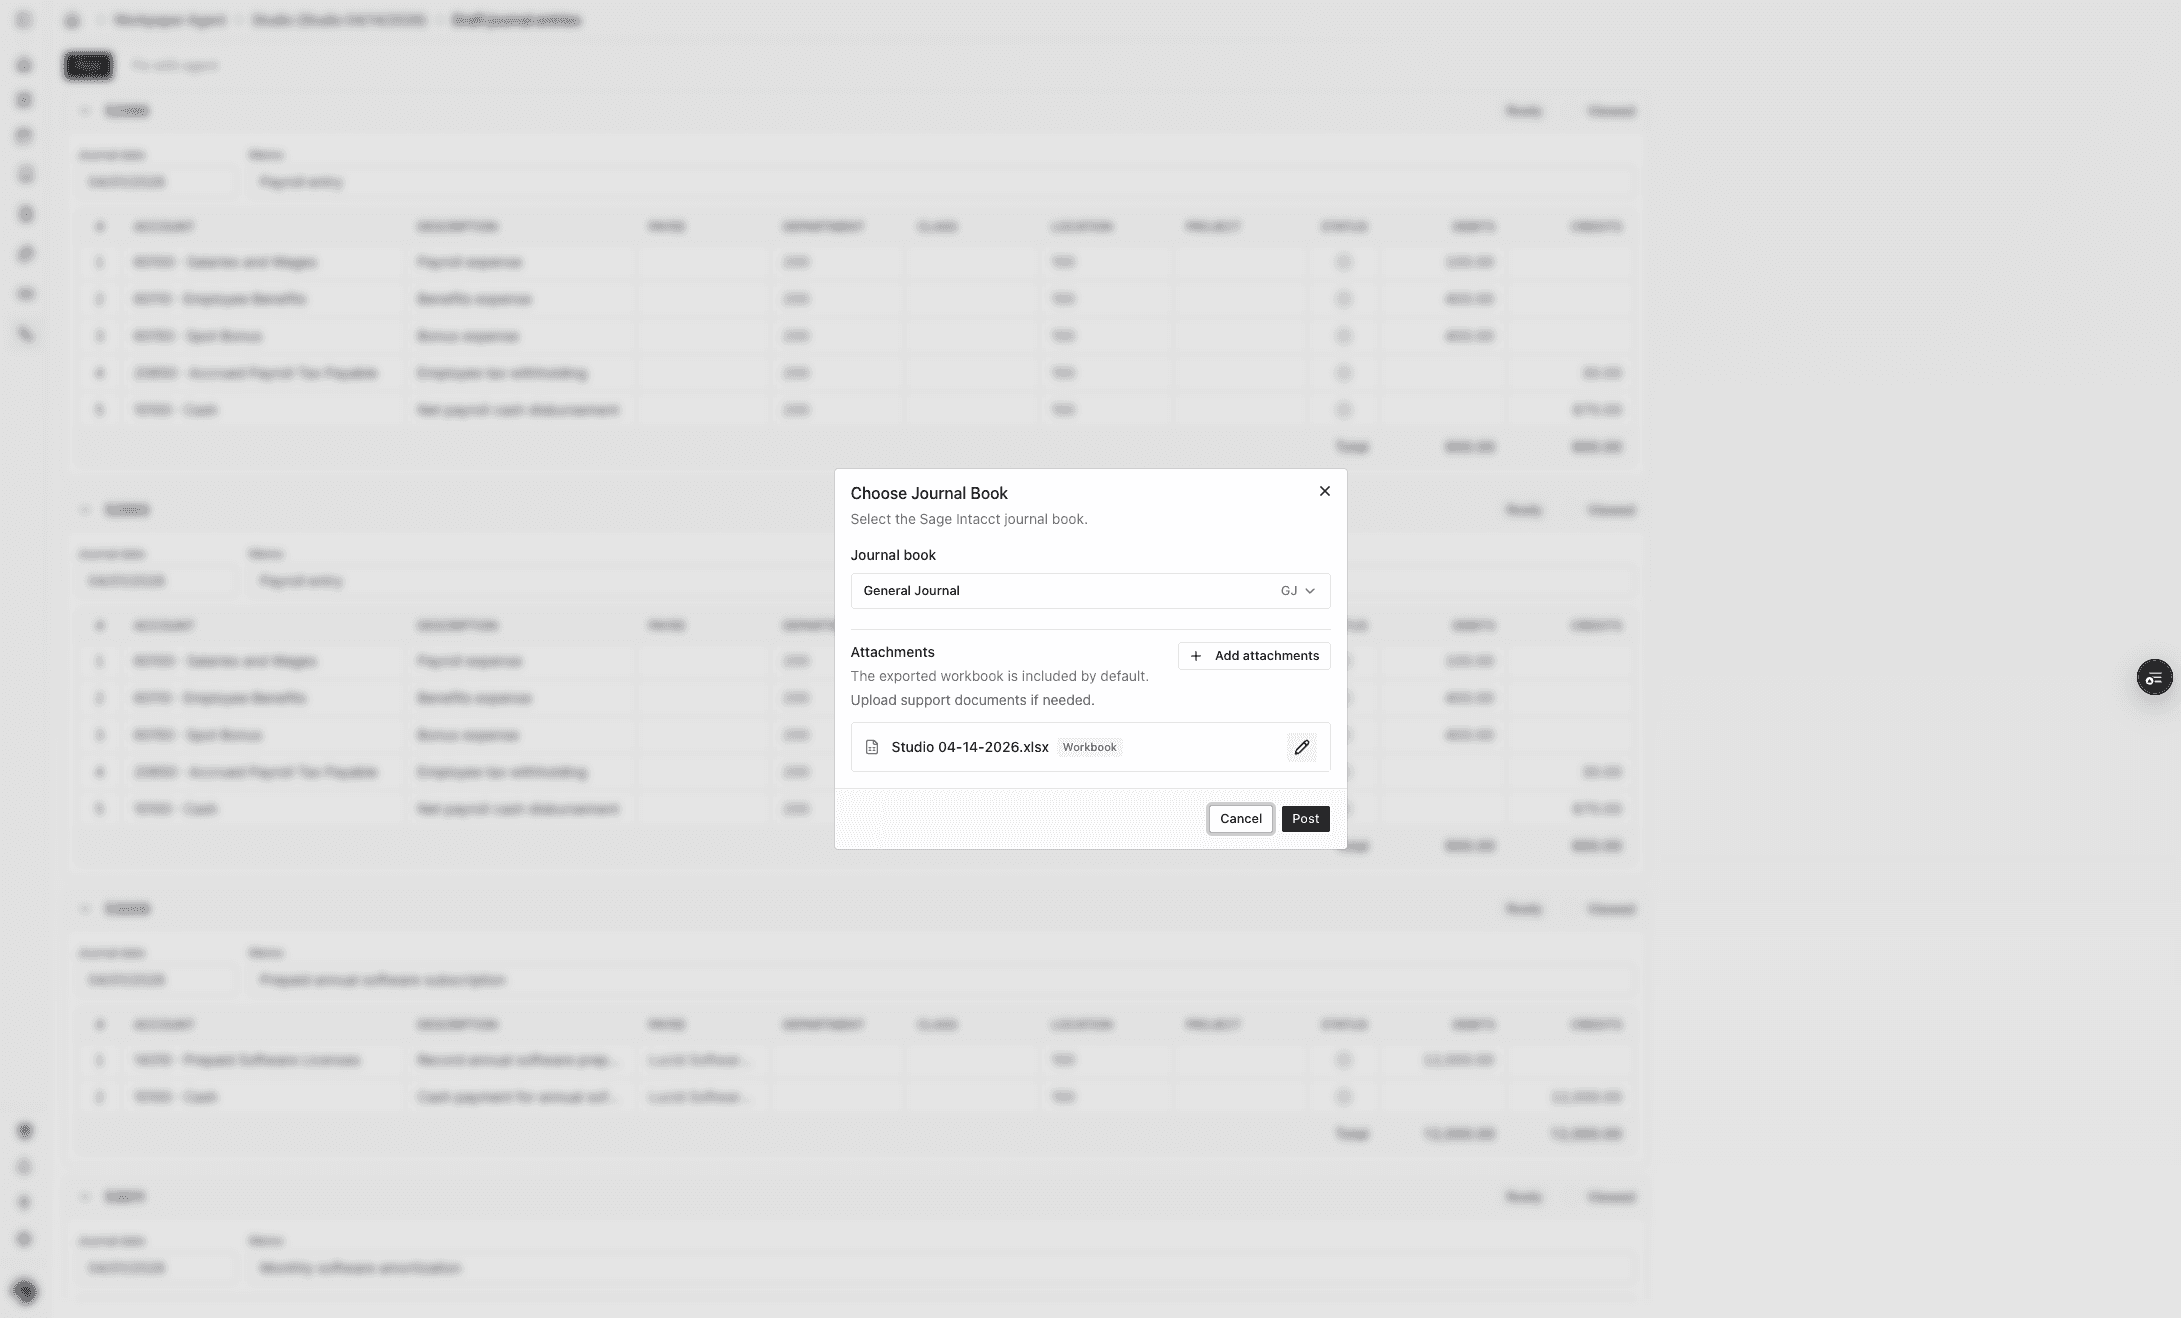
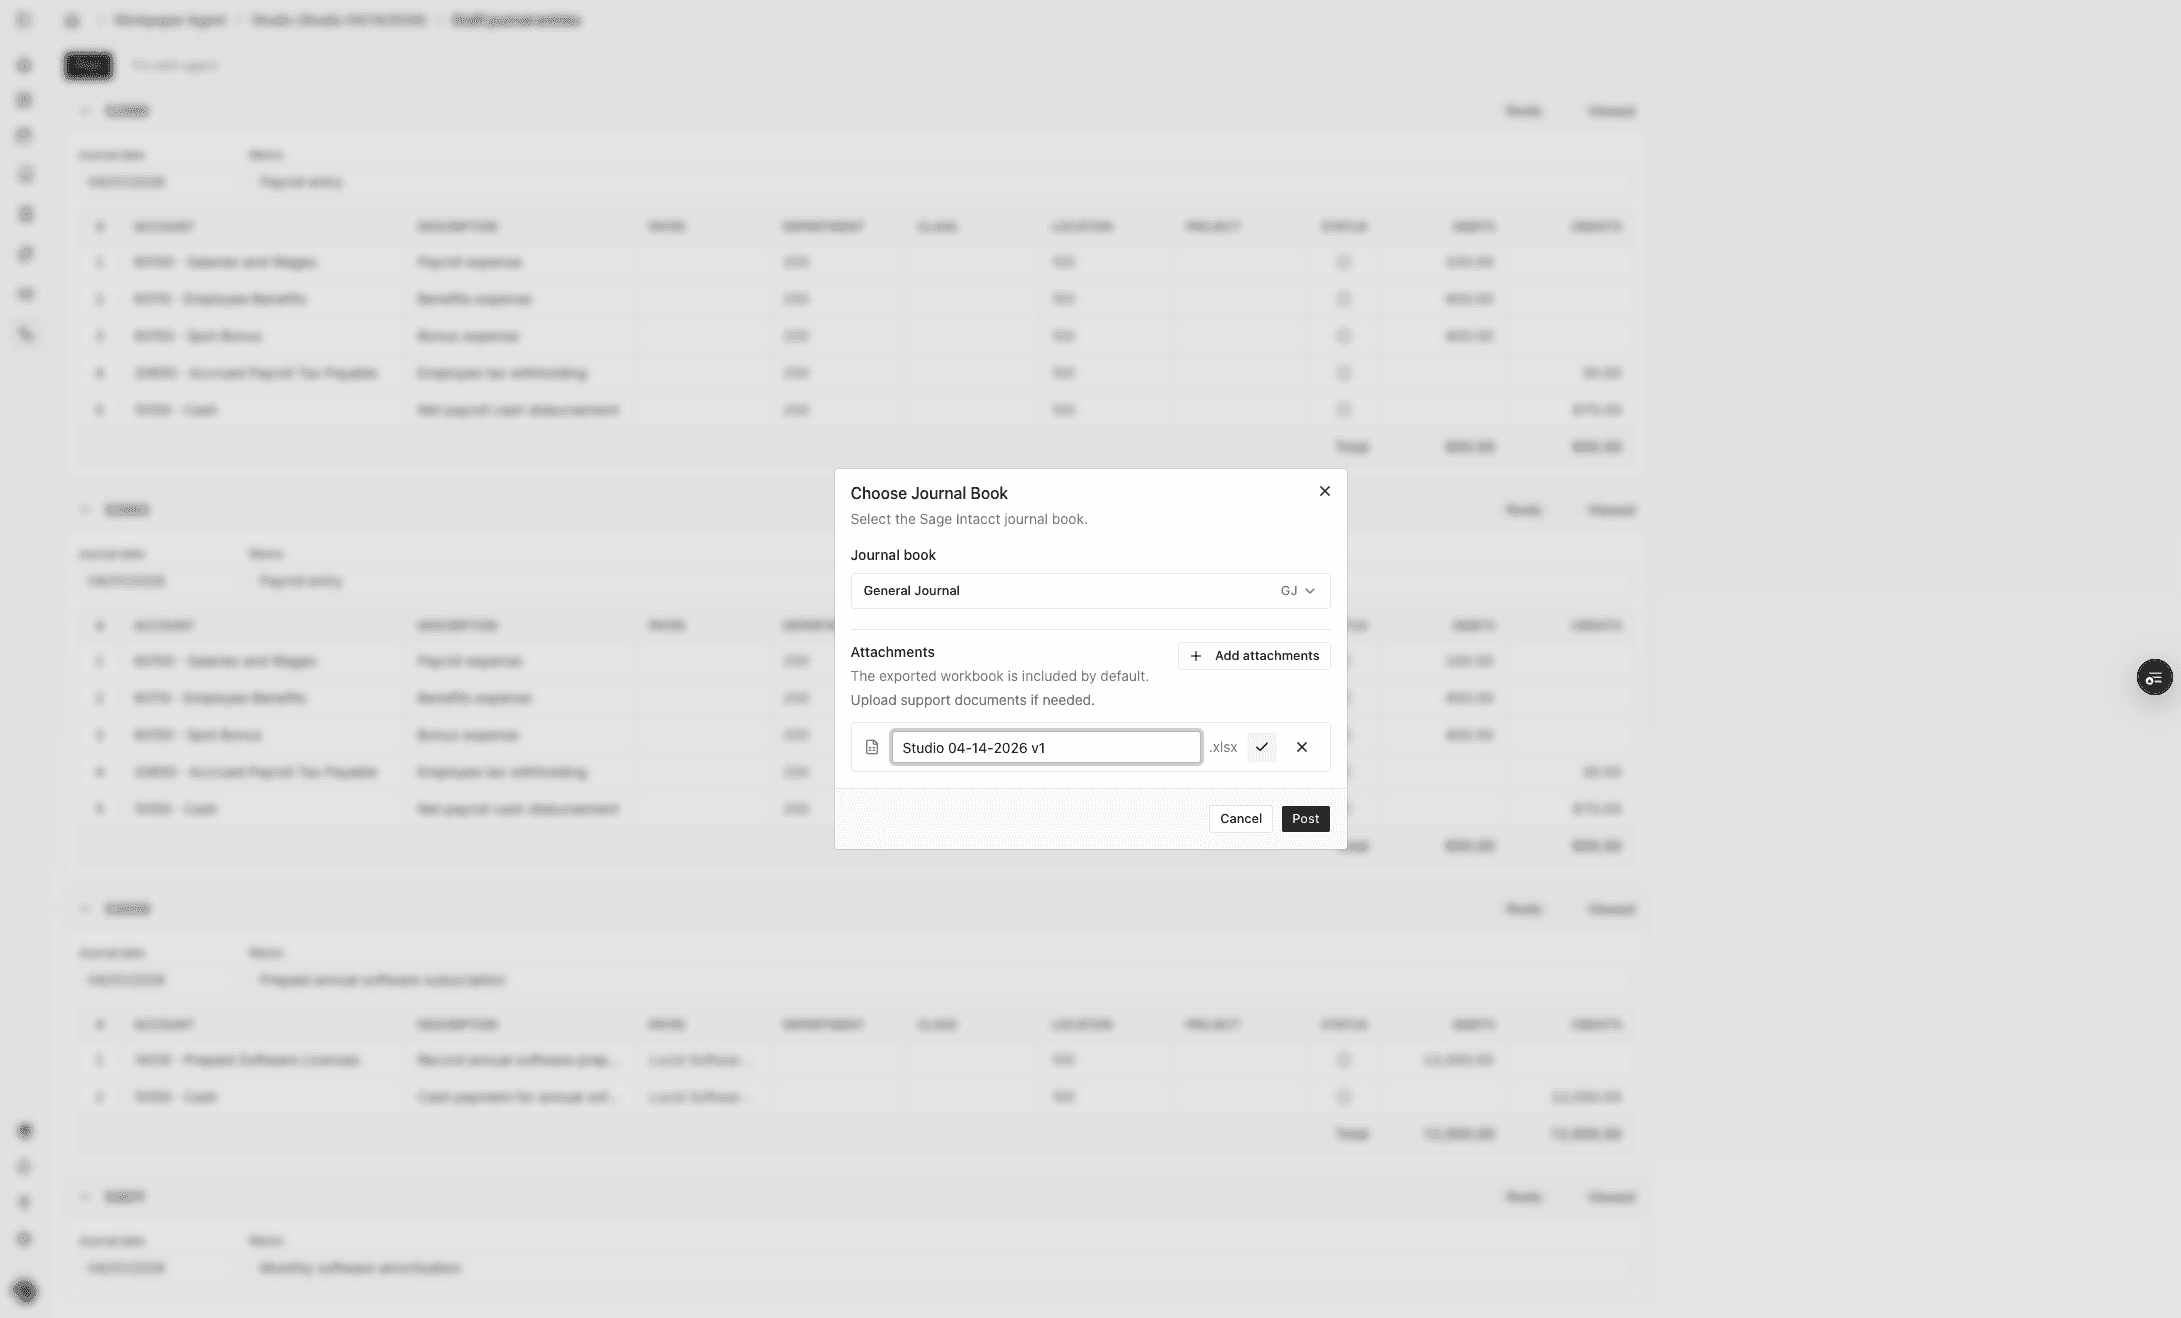
Step 3
A. There is an "Attachments" section B. The workbook is attached as required C. Rename workbook filename.
Step 4
Type Workbook filename.
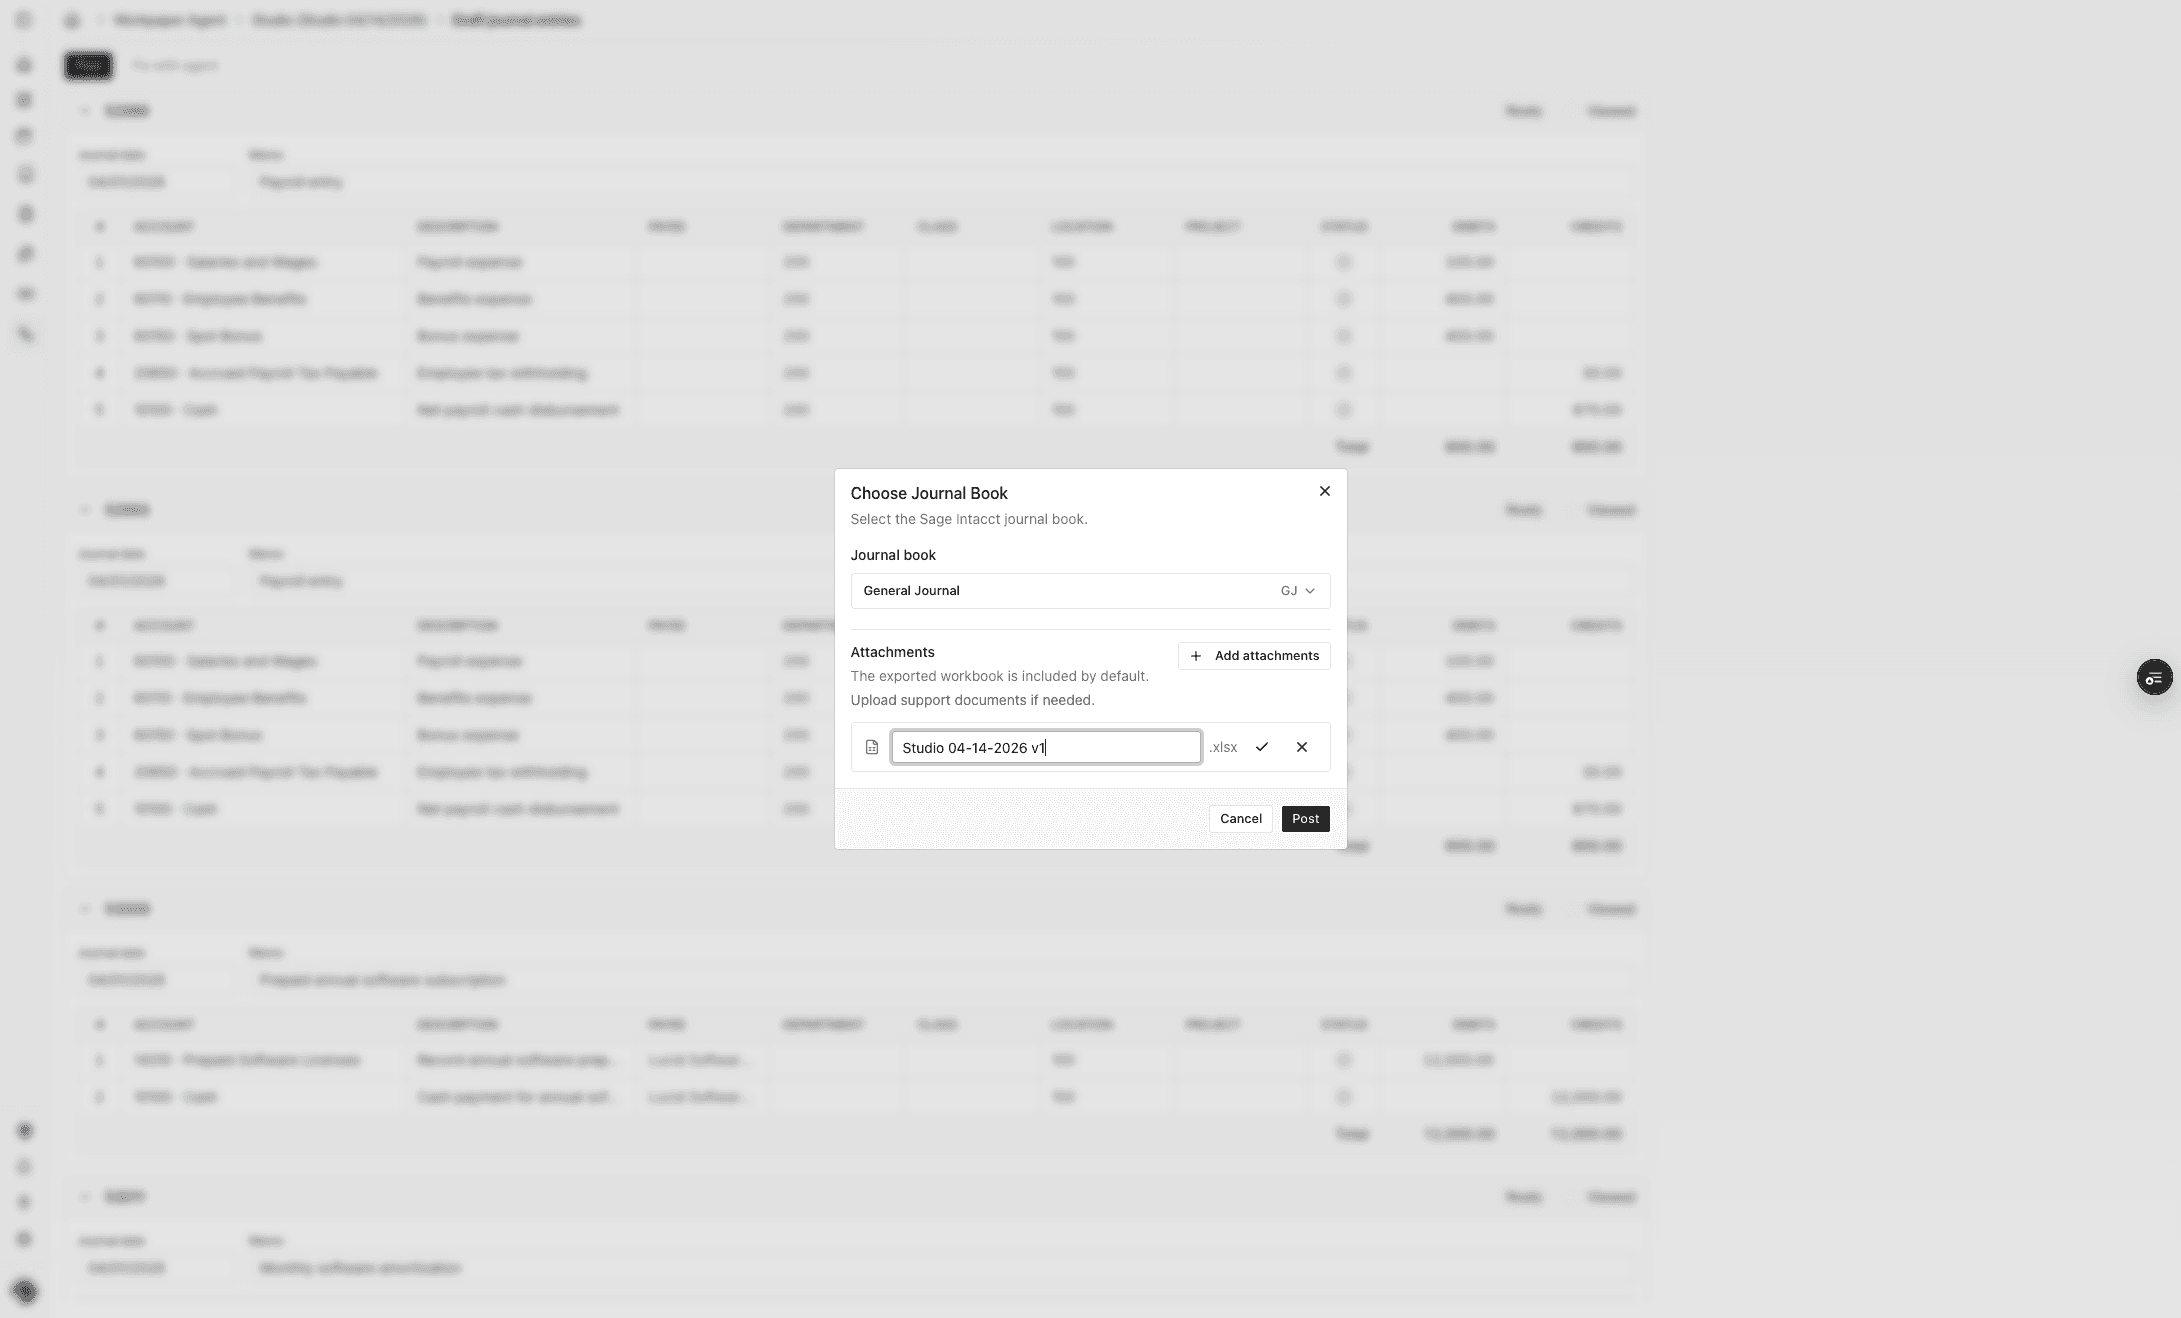
Step 5
Keep the workbook name if you want Sage users to recognize the workpaper source from the attachment list.
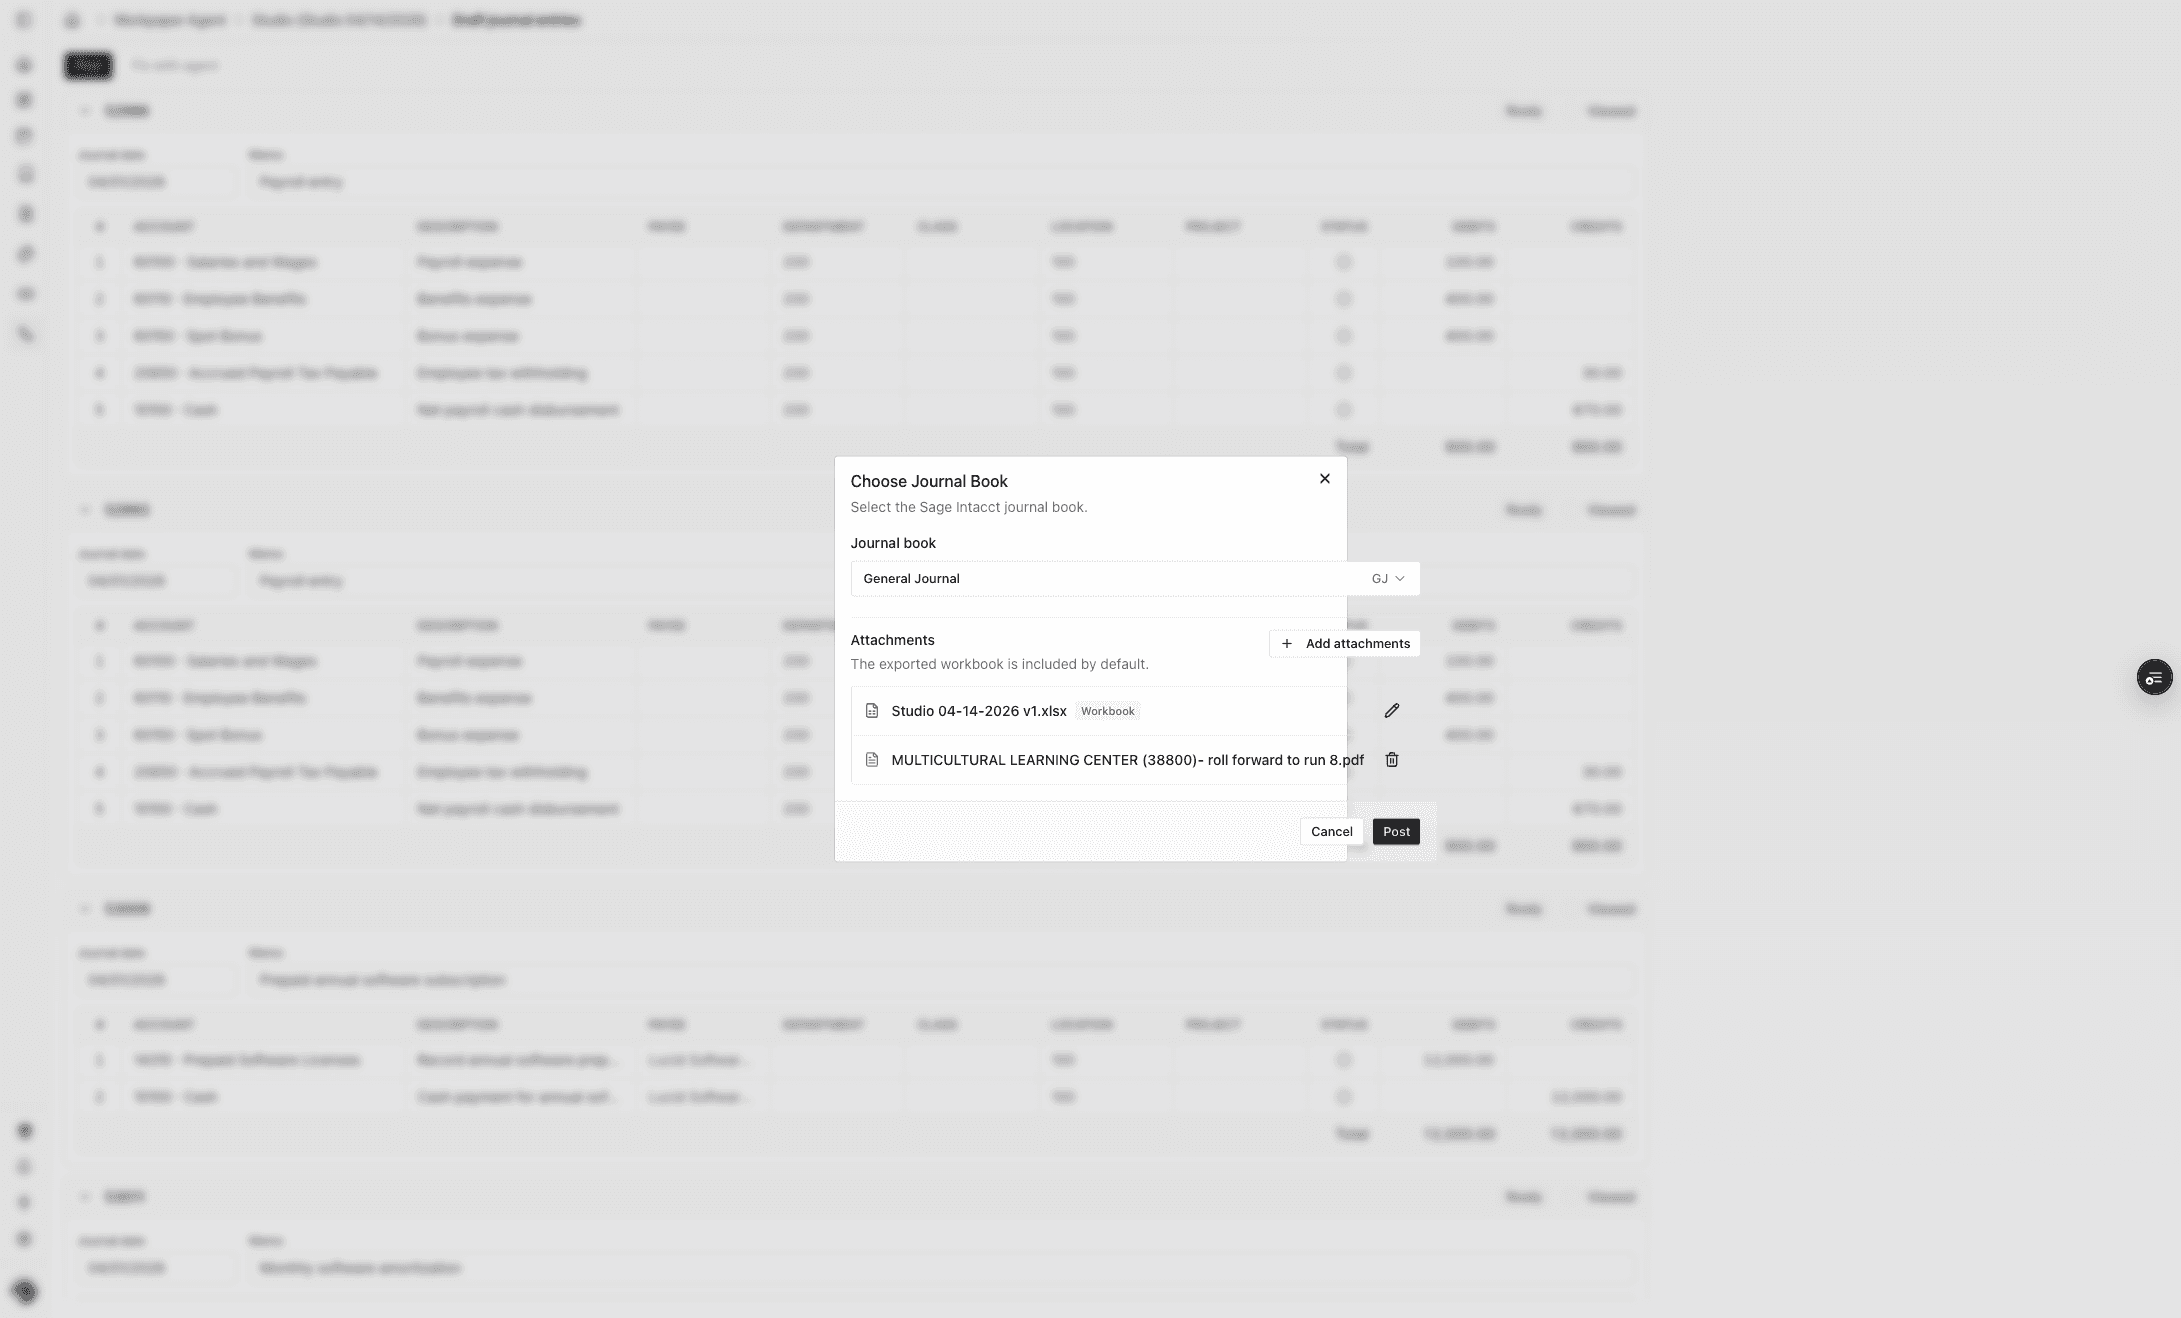
Step 6
Upload the supporting files that should travel with the posted Journal Entry into Sage.

Step 7
A. The New File Attached B. Click on Post.
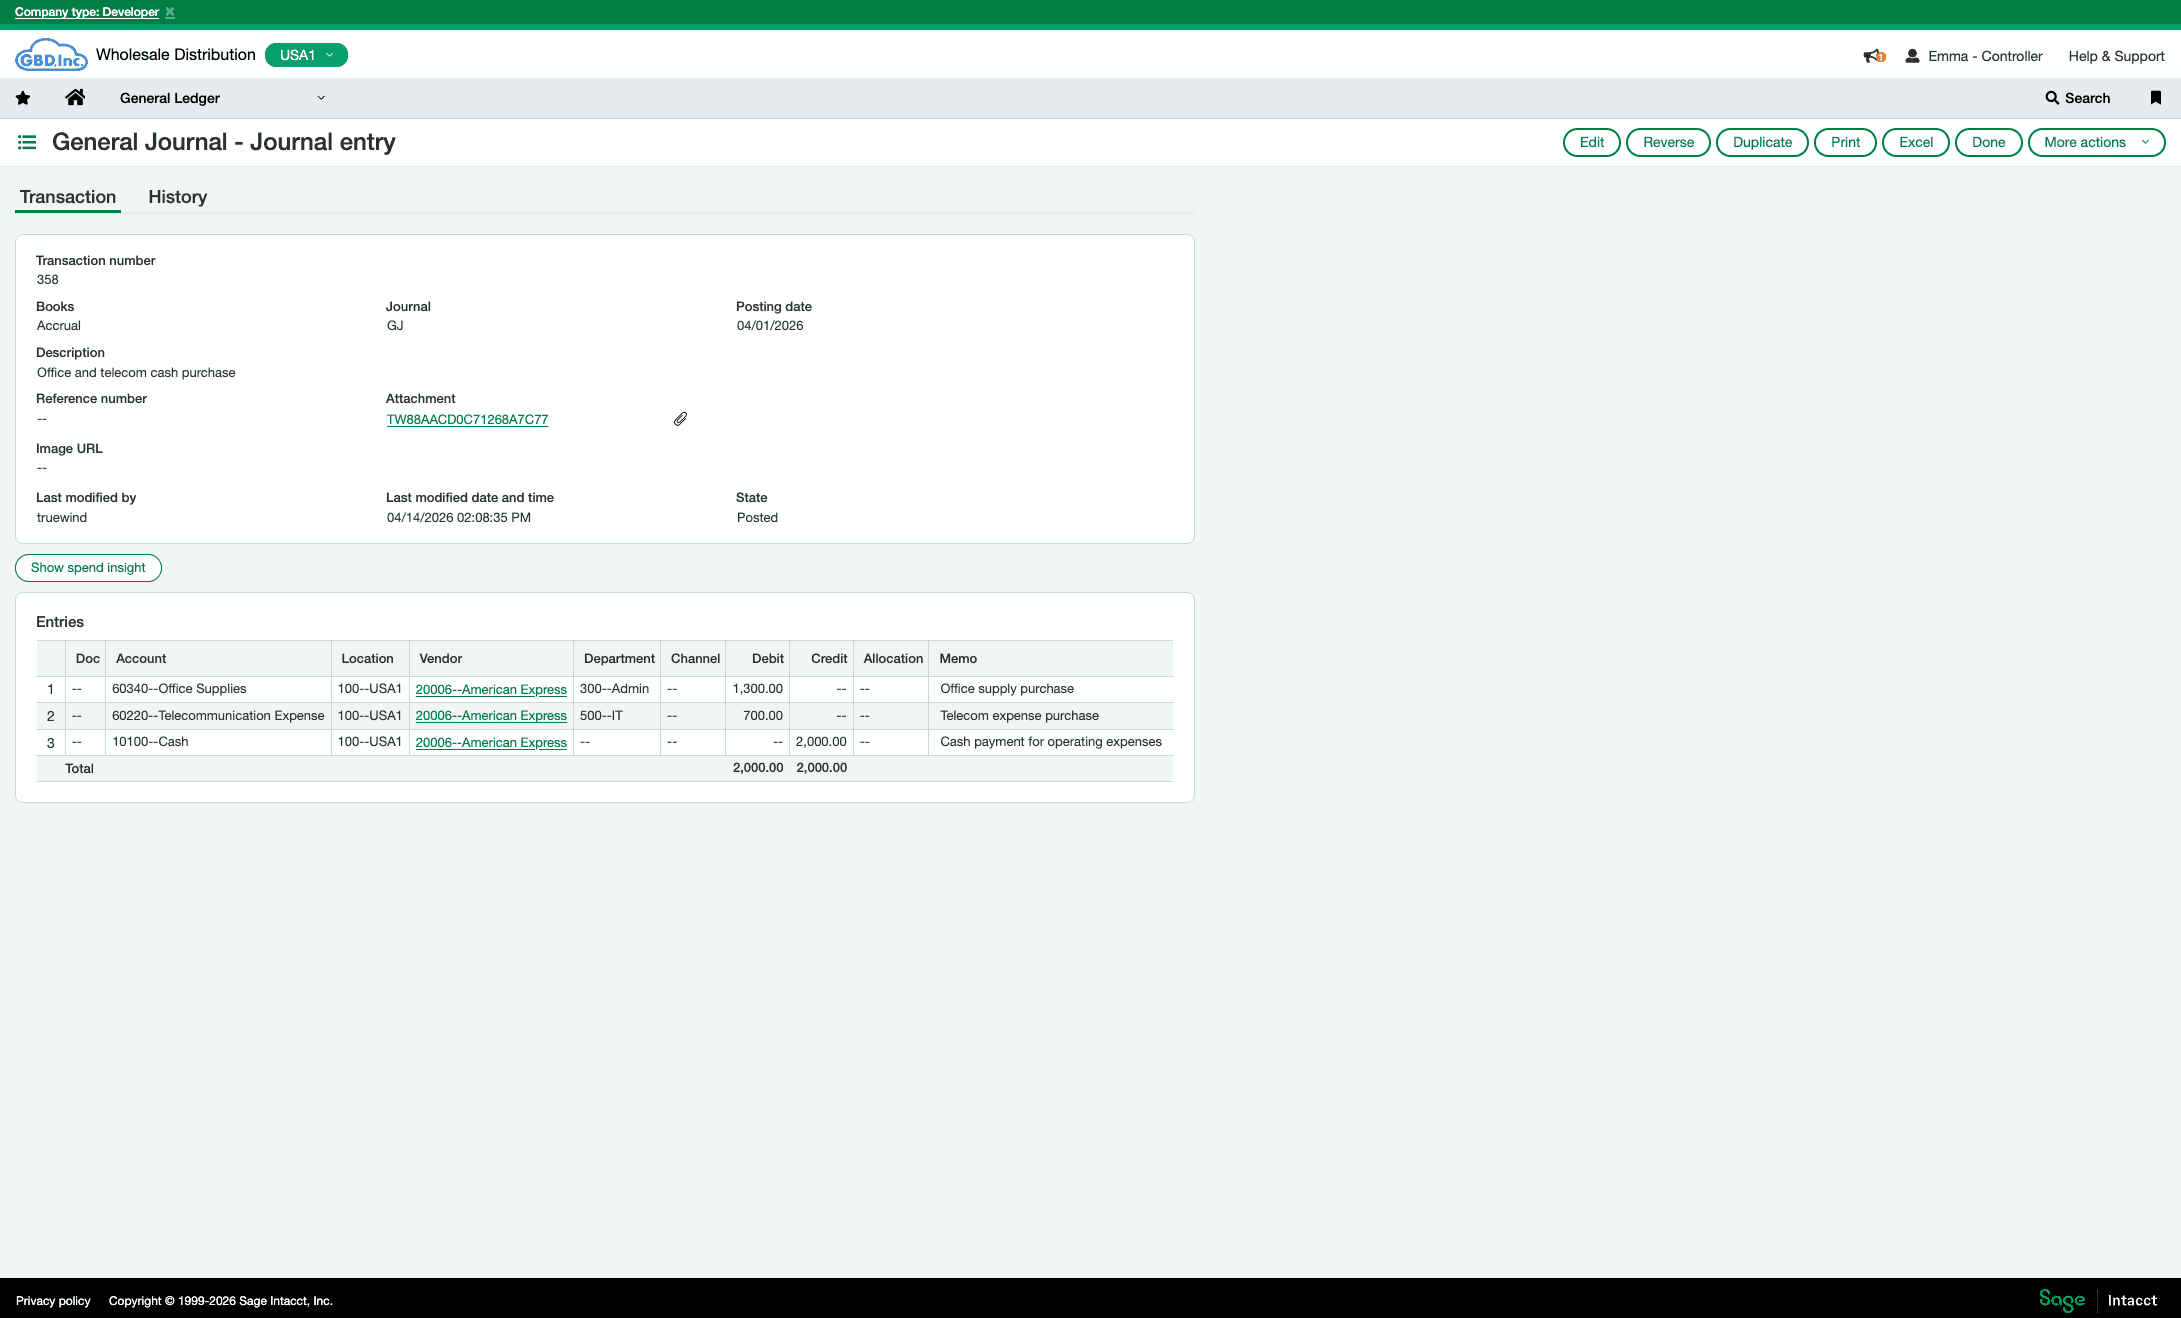
Step 8
In Sage, confirm the files were saved to the configured folder and attached to the posted Journal Entry record.
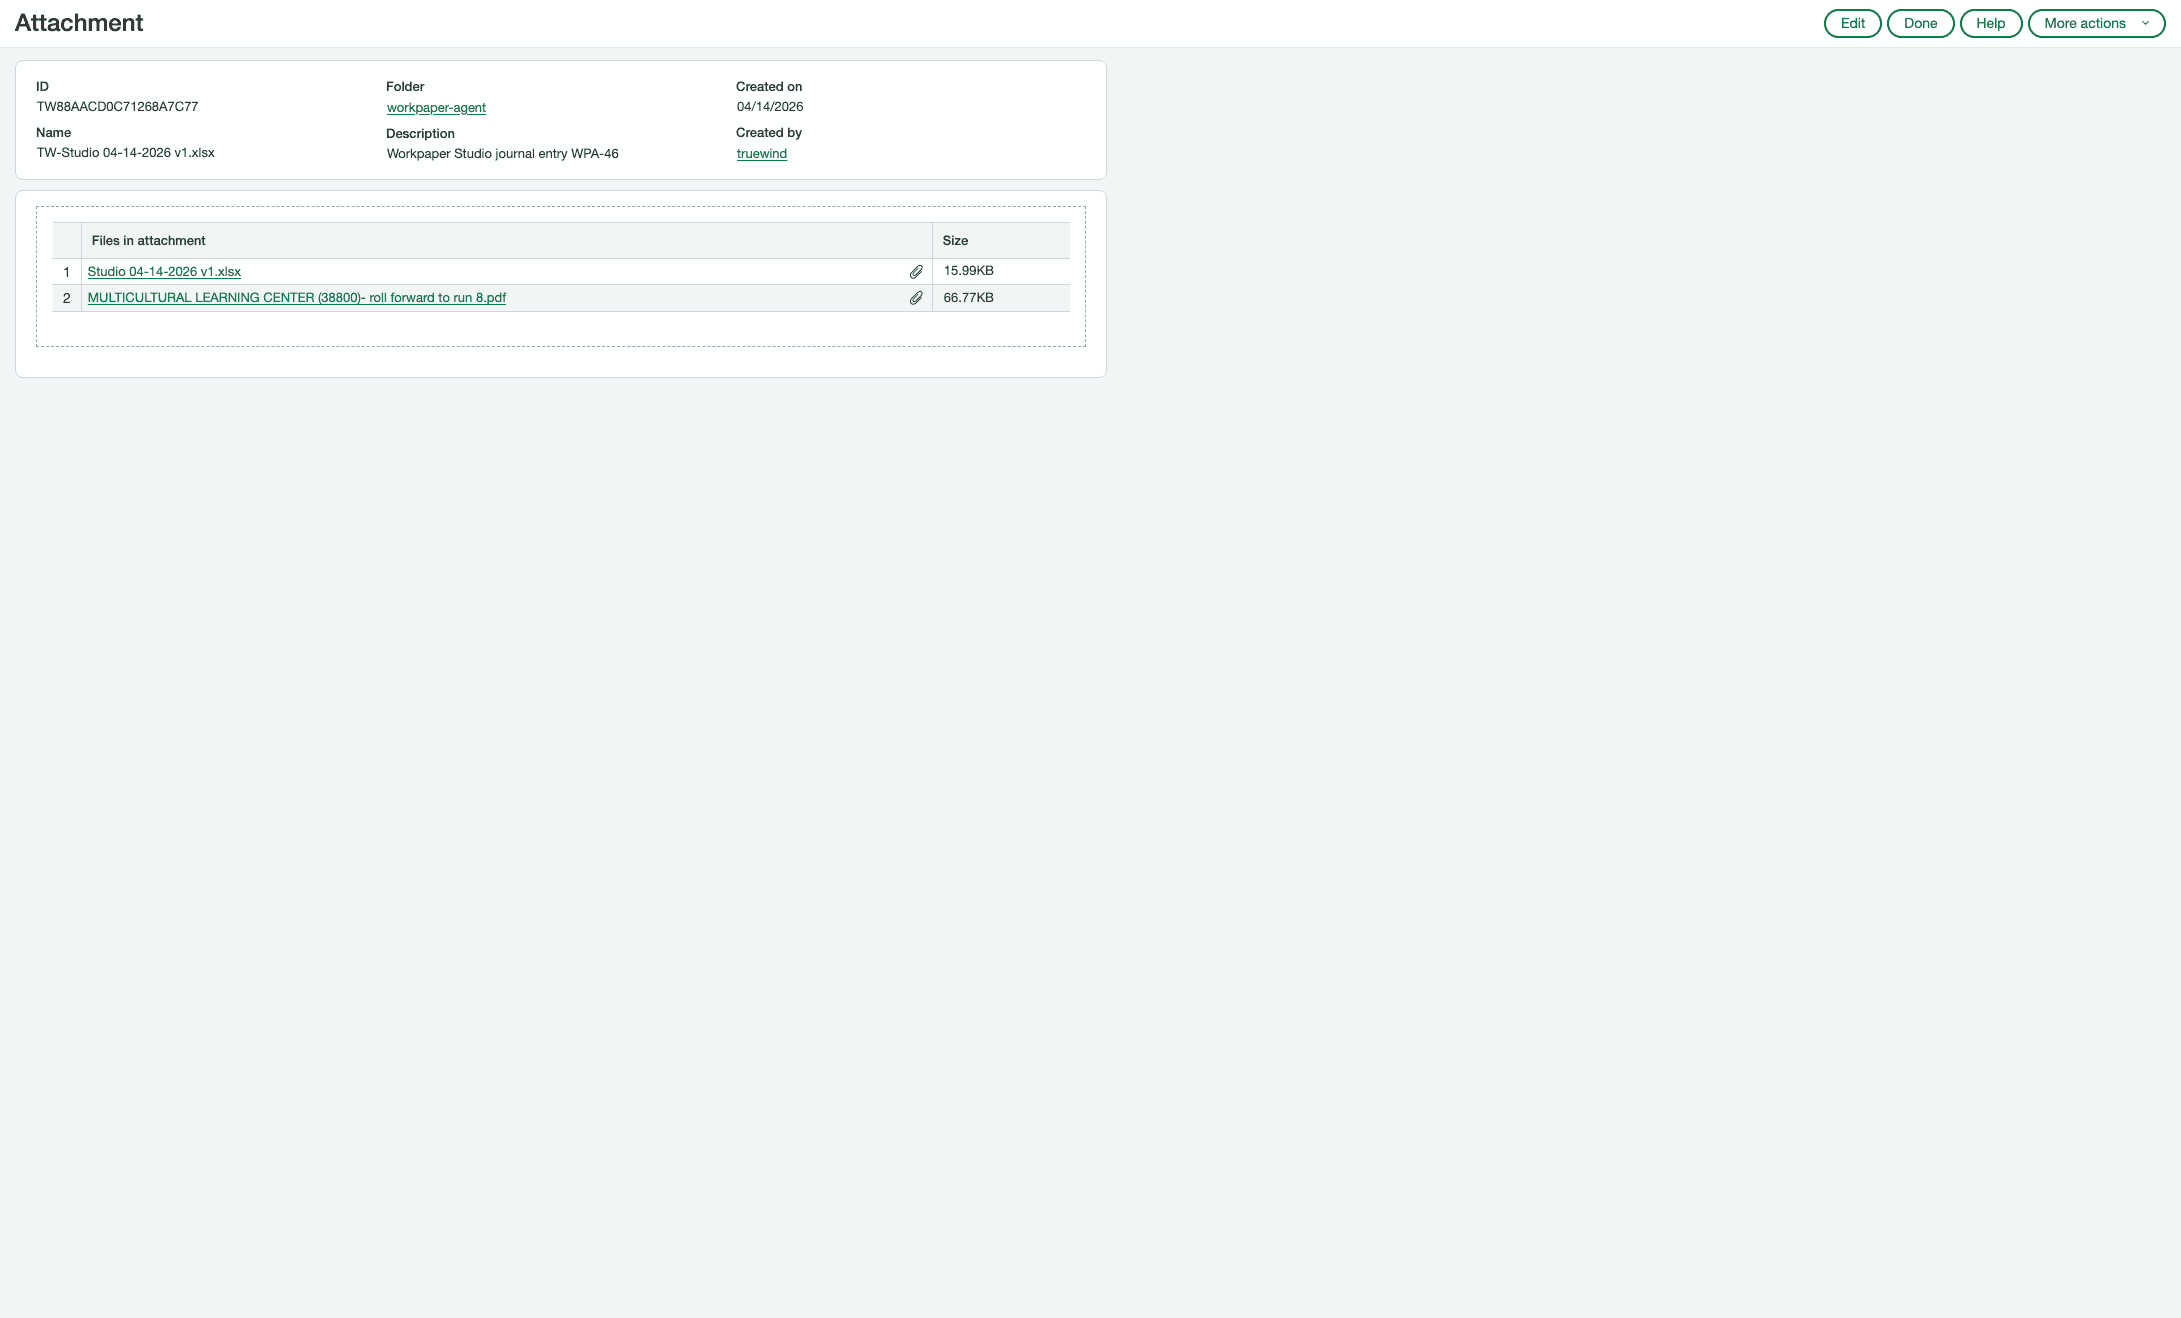
Step 9
Inspect the saved attachment entry in Sage to confirm the files landed in the expected place.
Was this helpful?
Need more help?
Ask for human help about this article and provide any feedback.