What must be set up before importing from Workpaper Agent?
Create and map the clearing account in Deposit Reconciliation before importing the Workpaper Agent Journal Entry output.
Ask the support agent
Just ask a direct question or search related articles from the Knowledge Base.
Support Center / Workpaper Agent / Deposit Reconciliation
Use Workpaper Agent with Deposit Reconciliation when high-volume transactions need to be posted through a clearing account, resulting in imported transactions that can be posted to QuickBooks or Sage.
Step 1
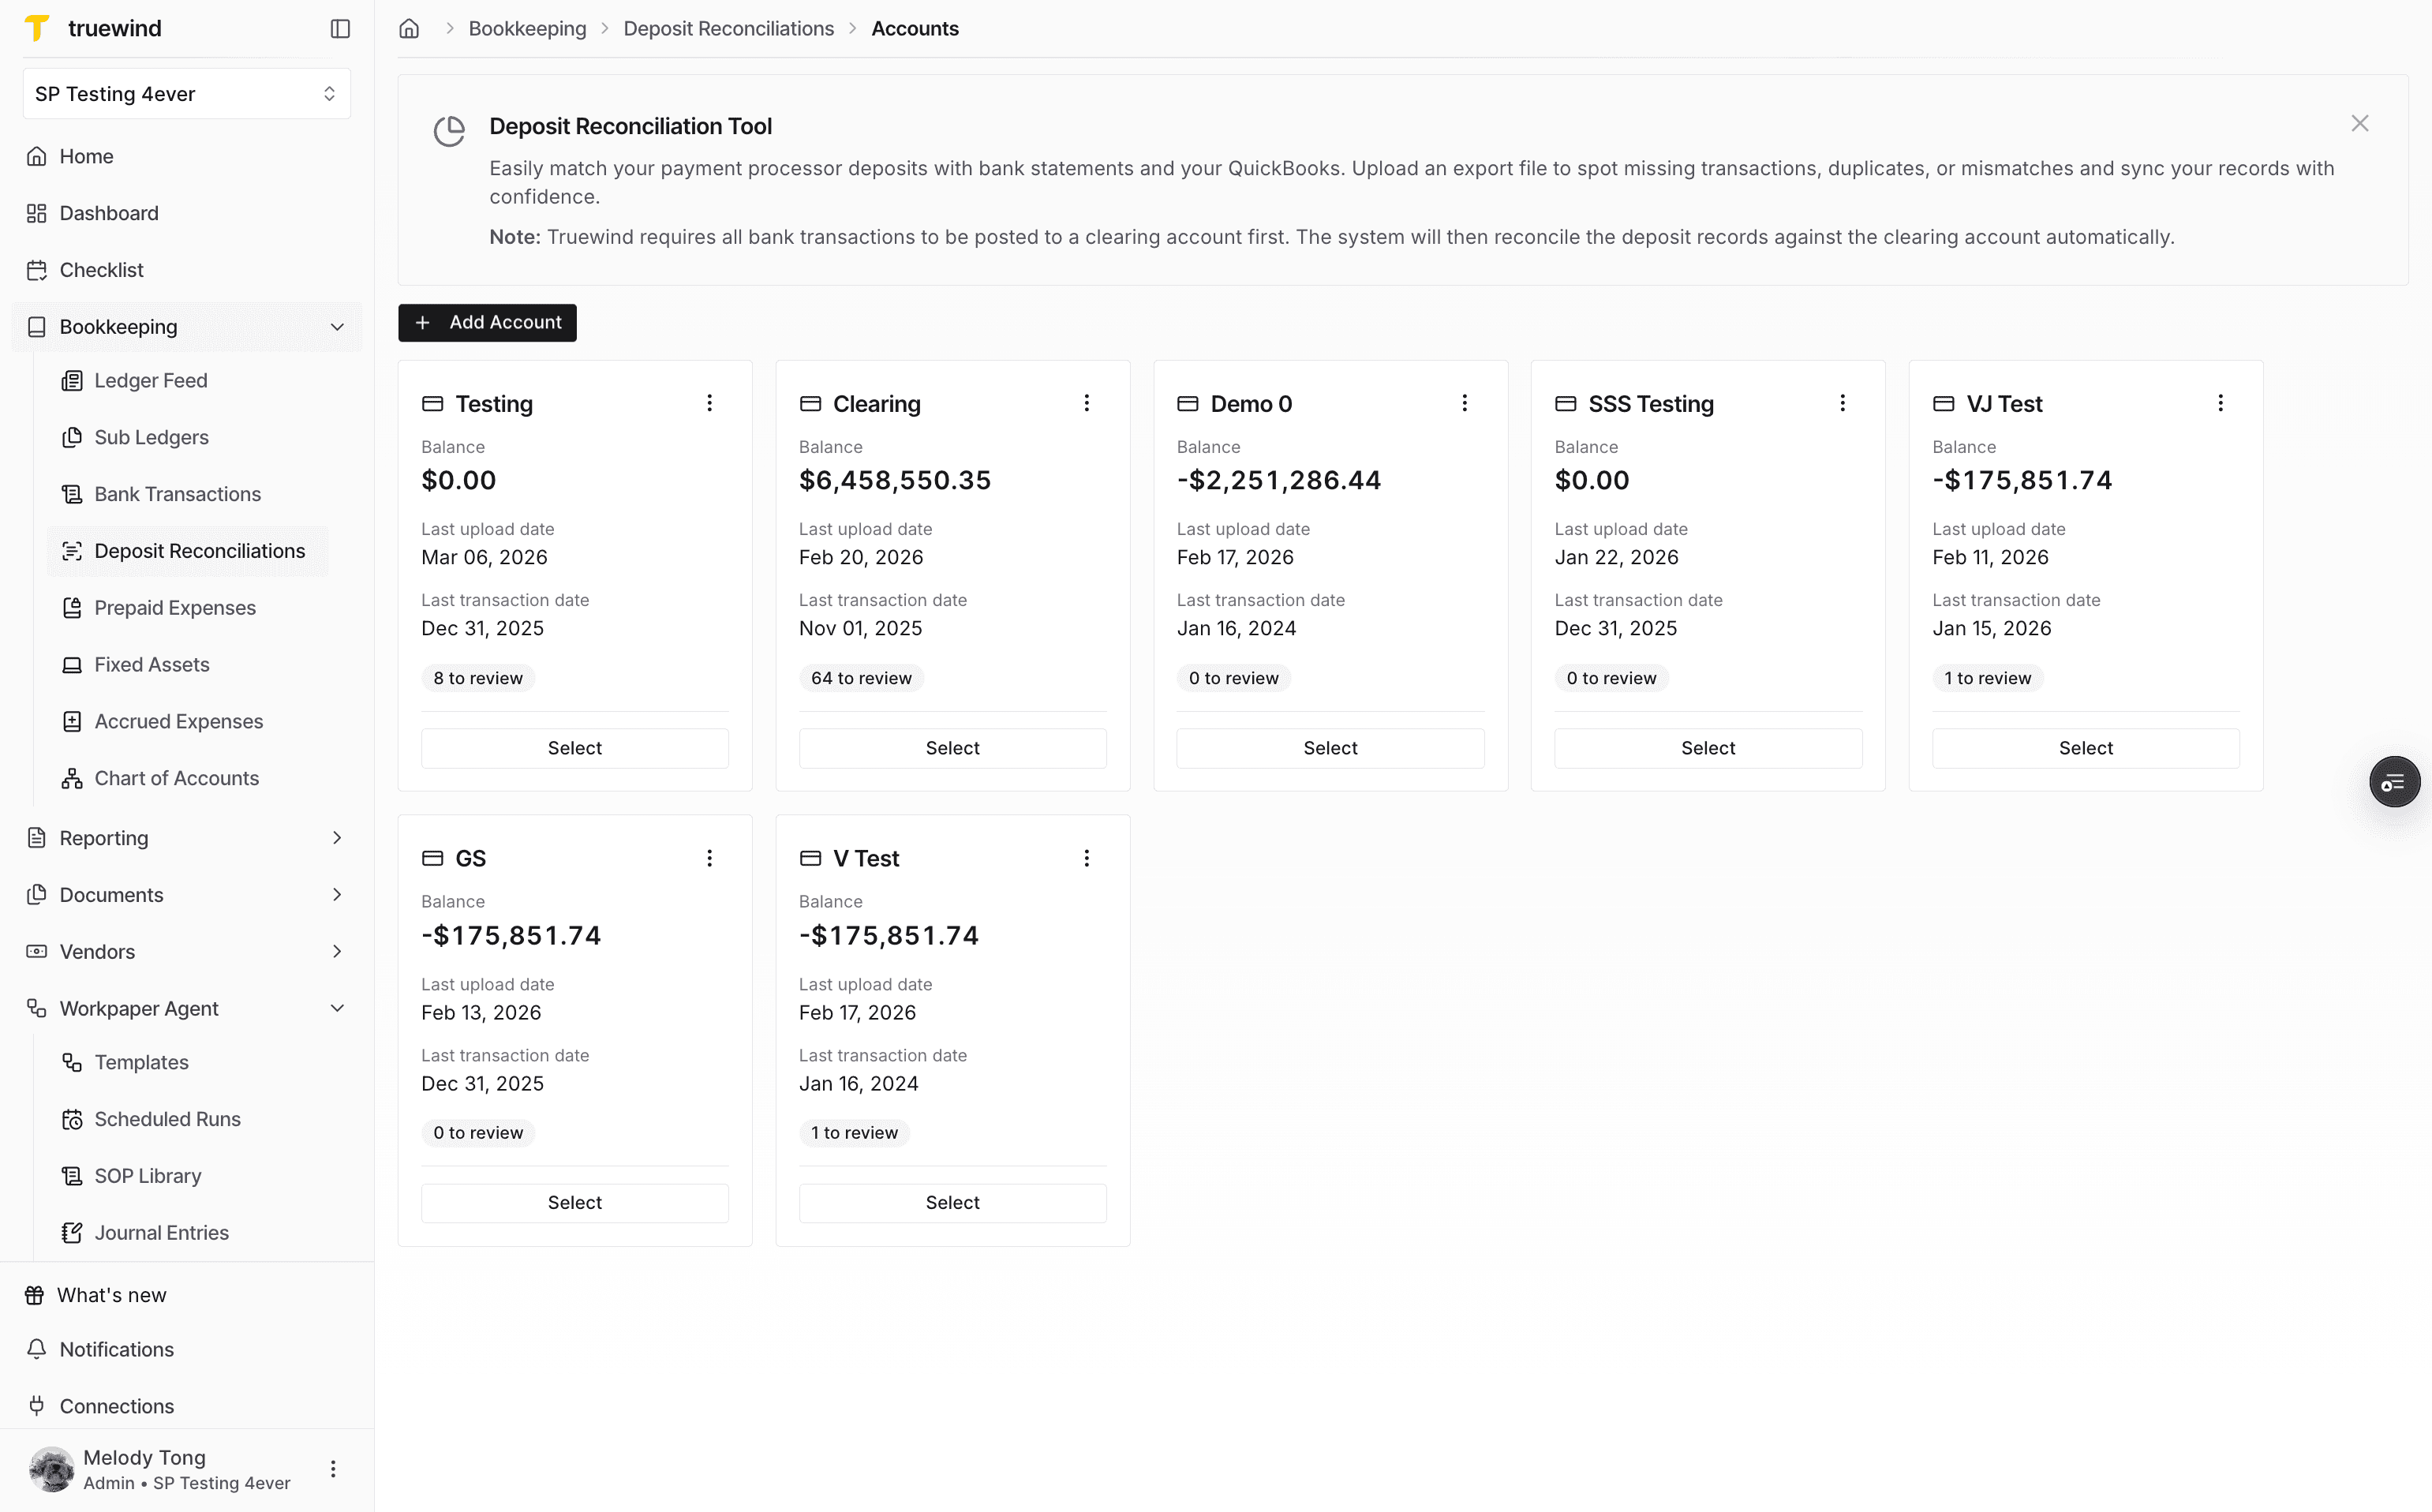
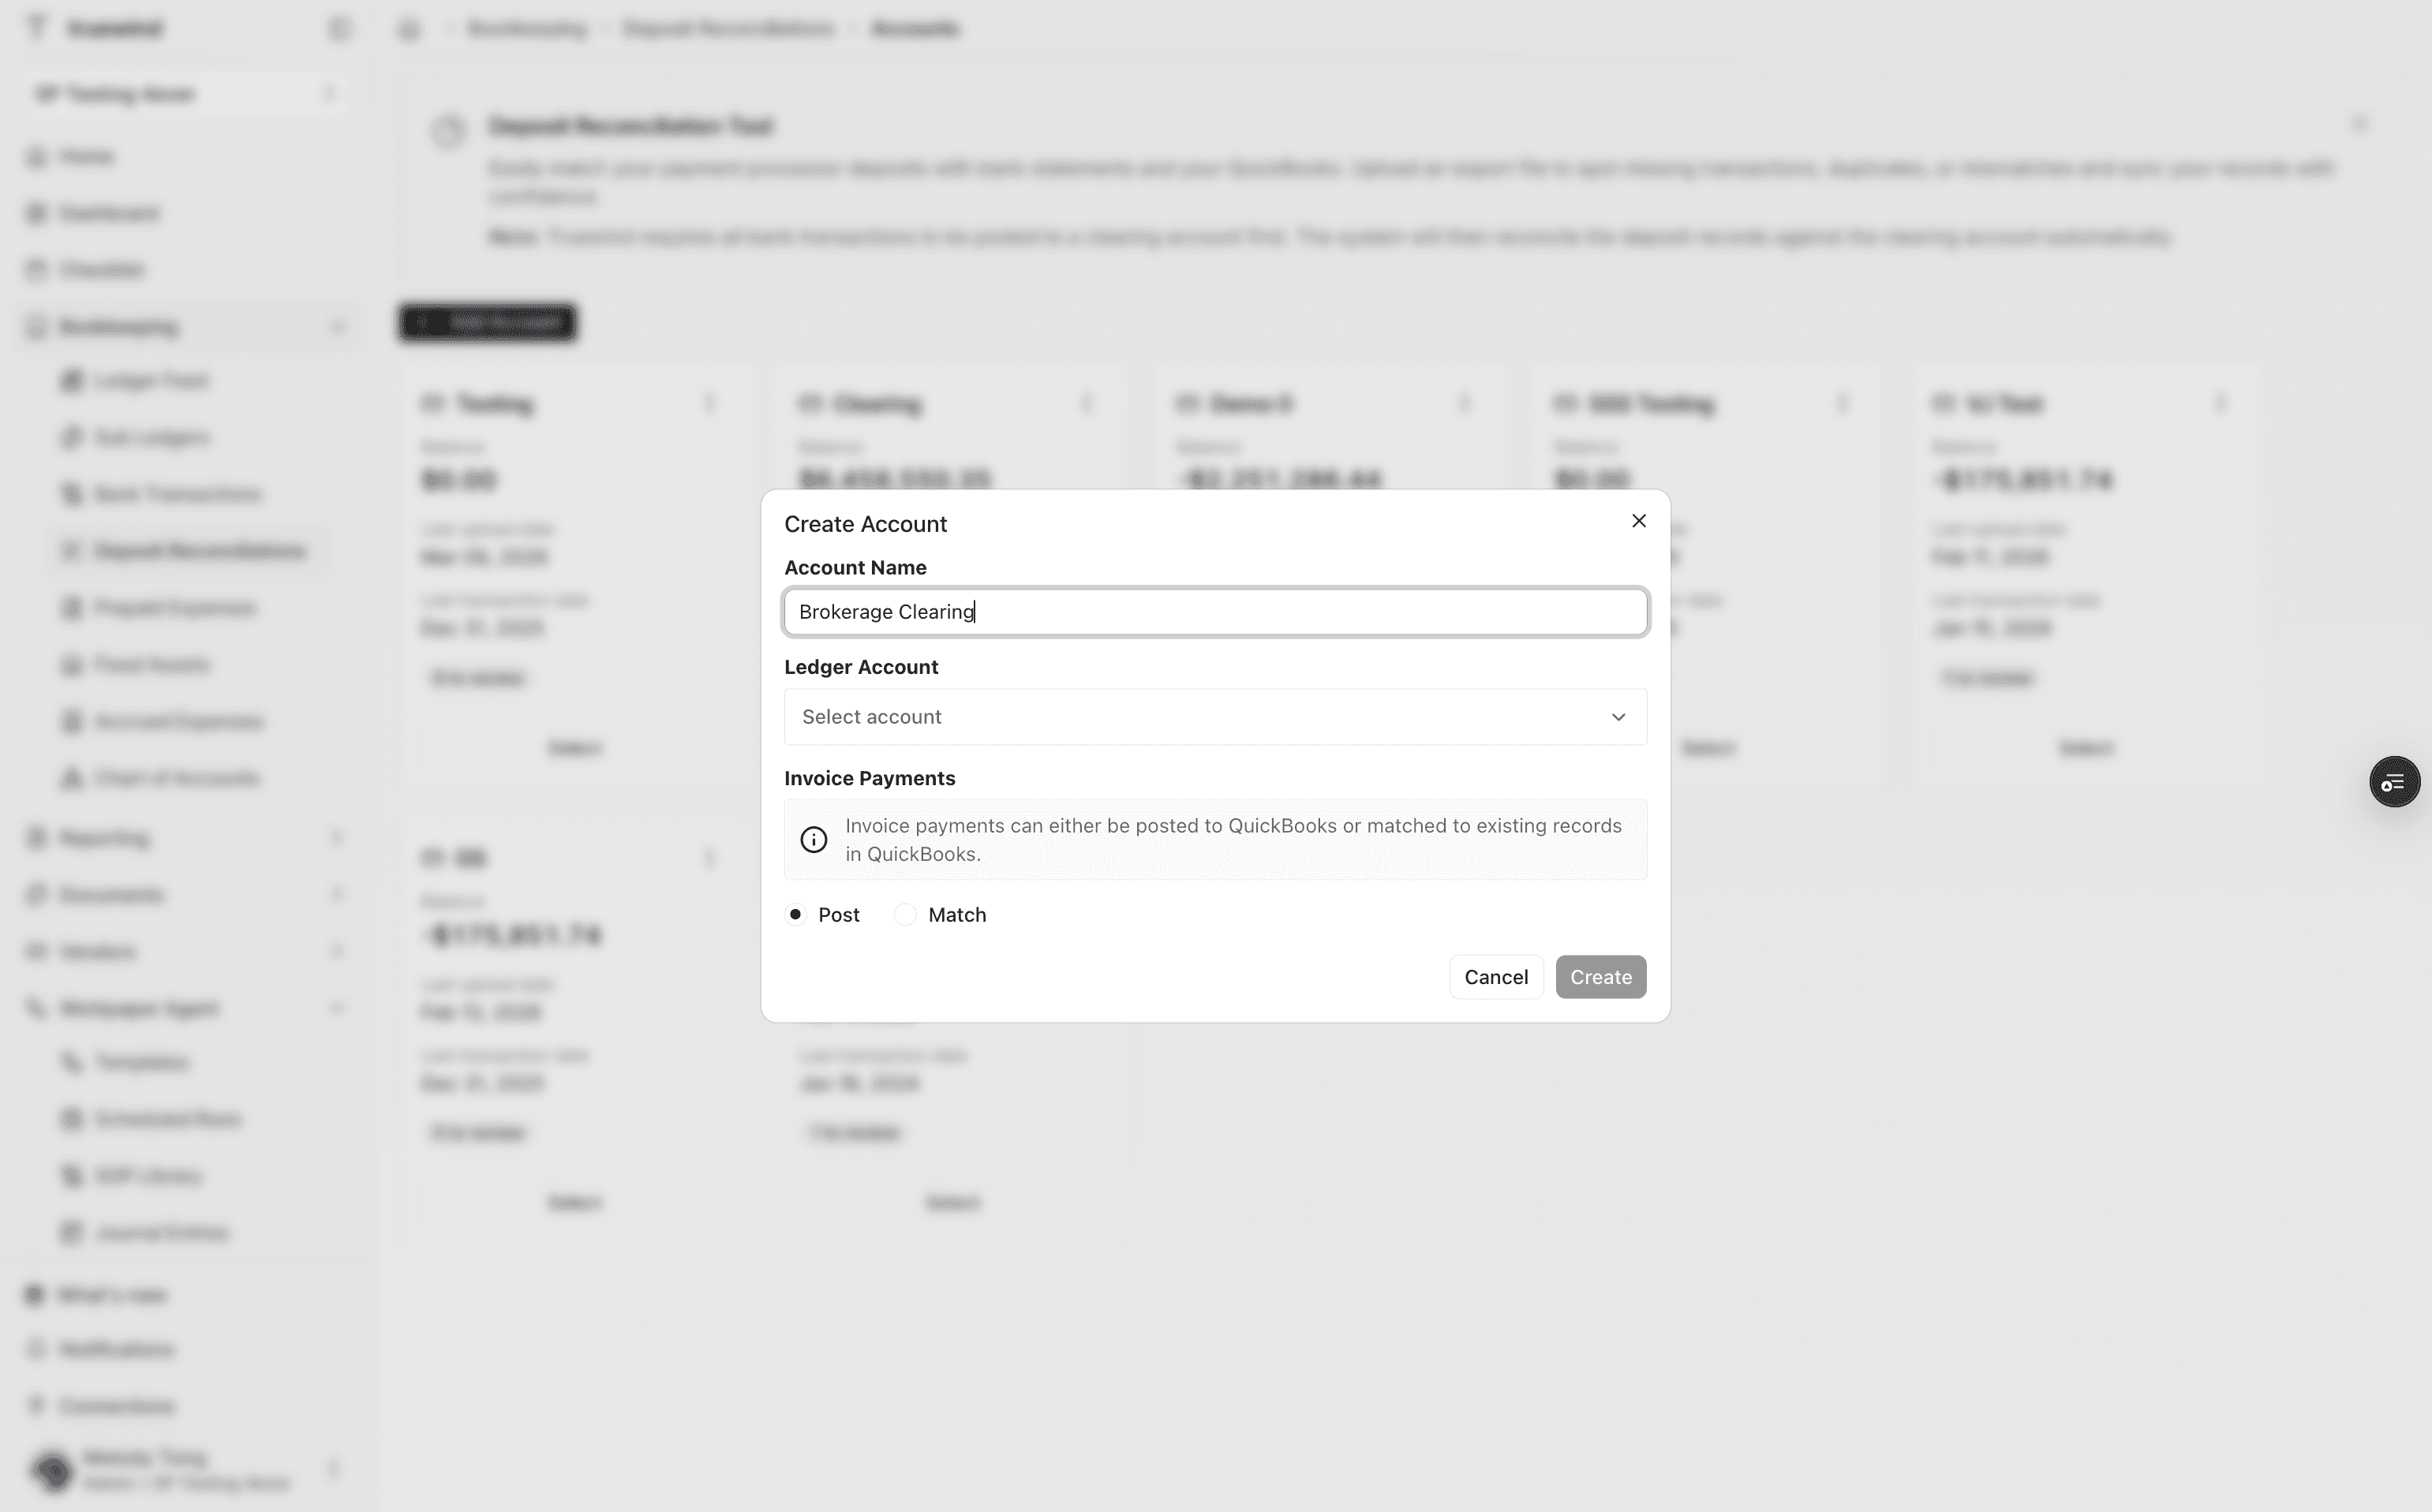
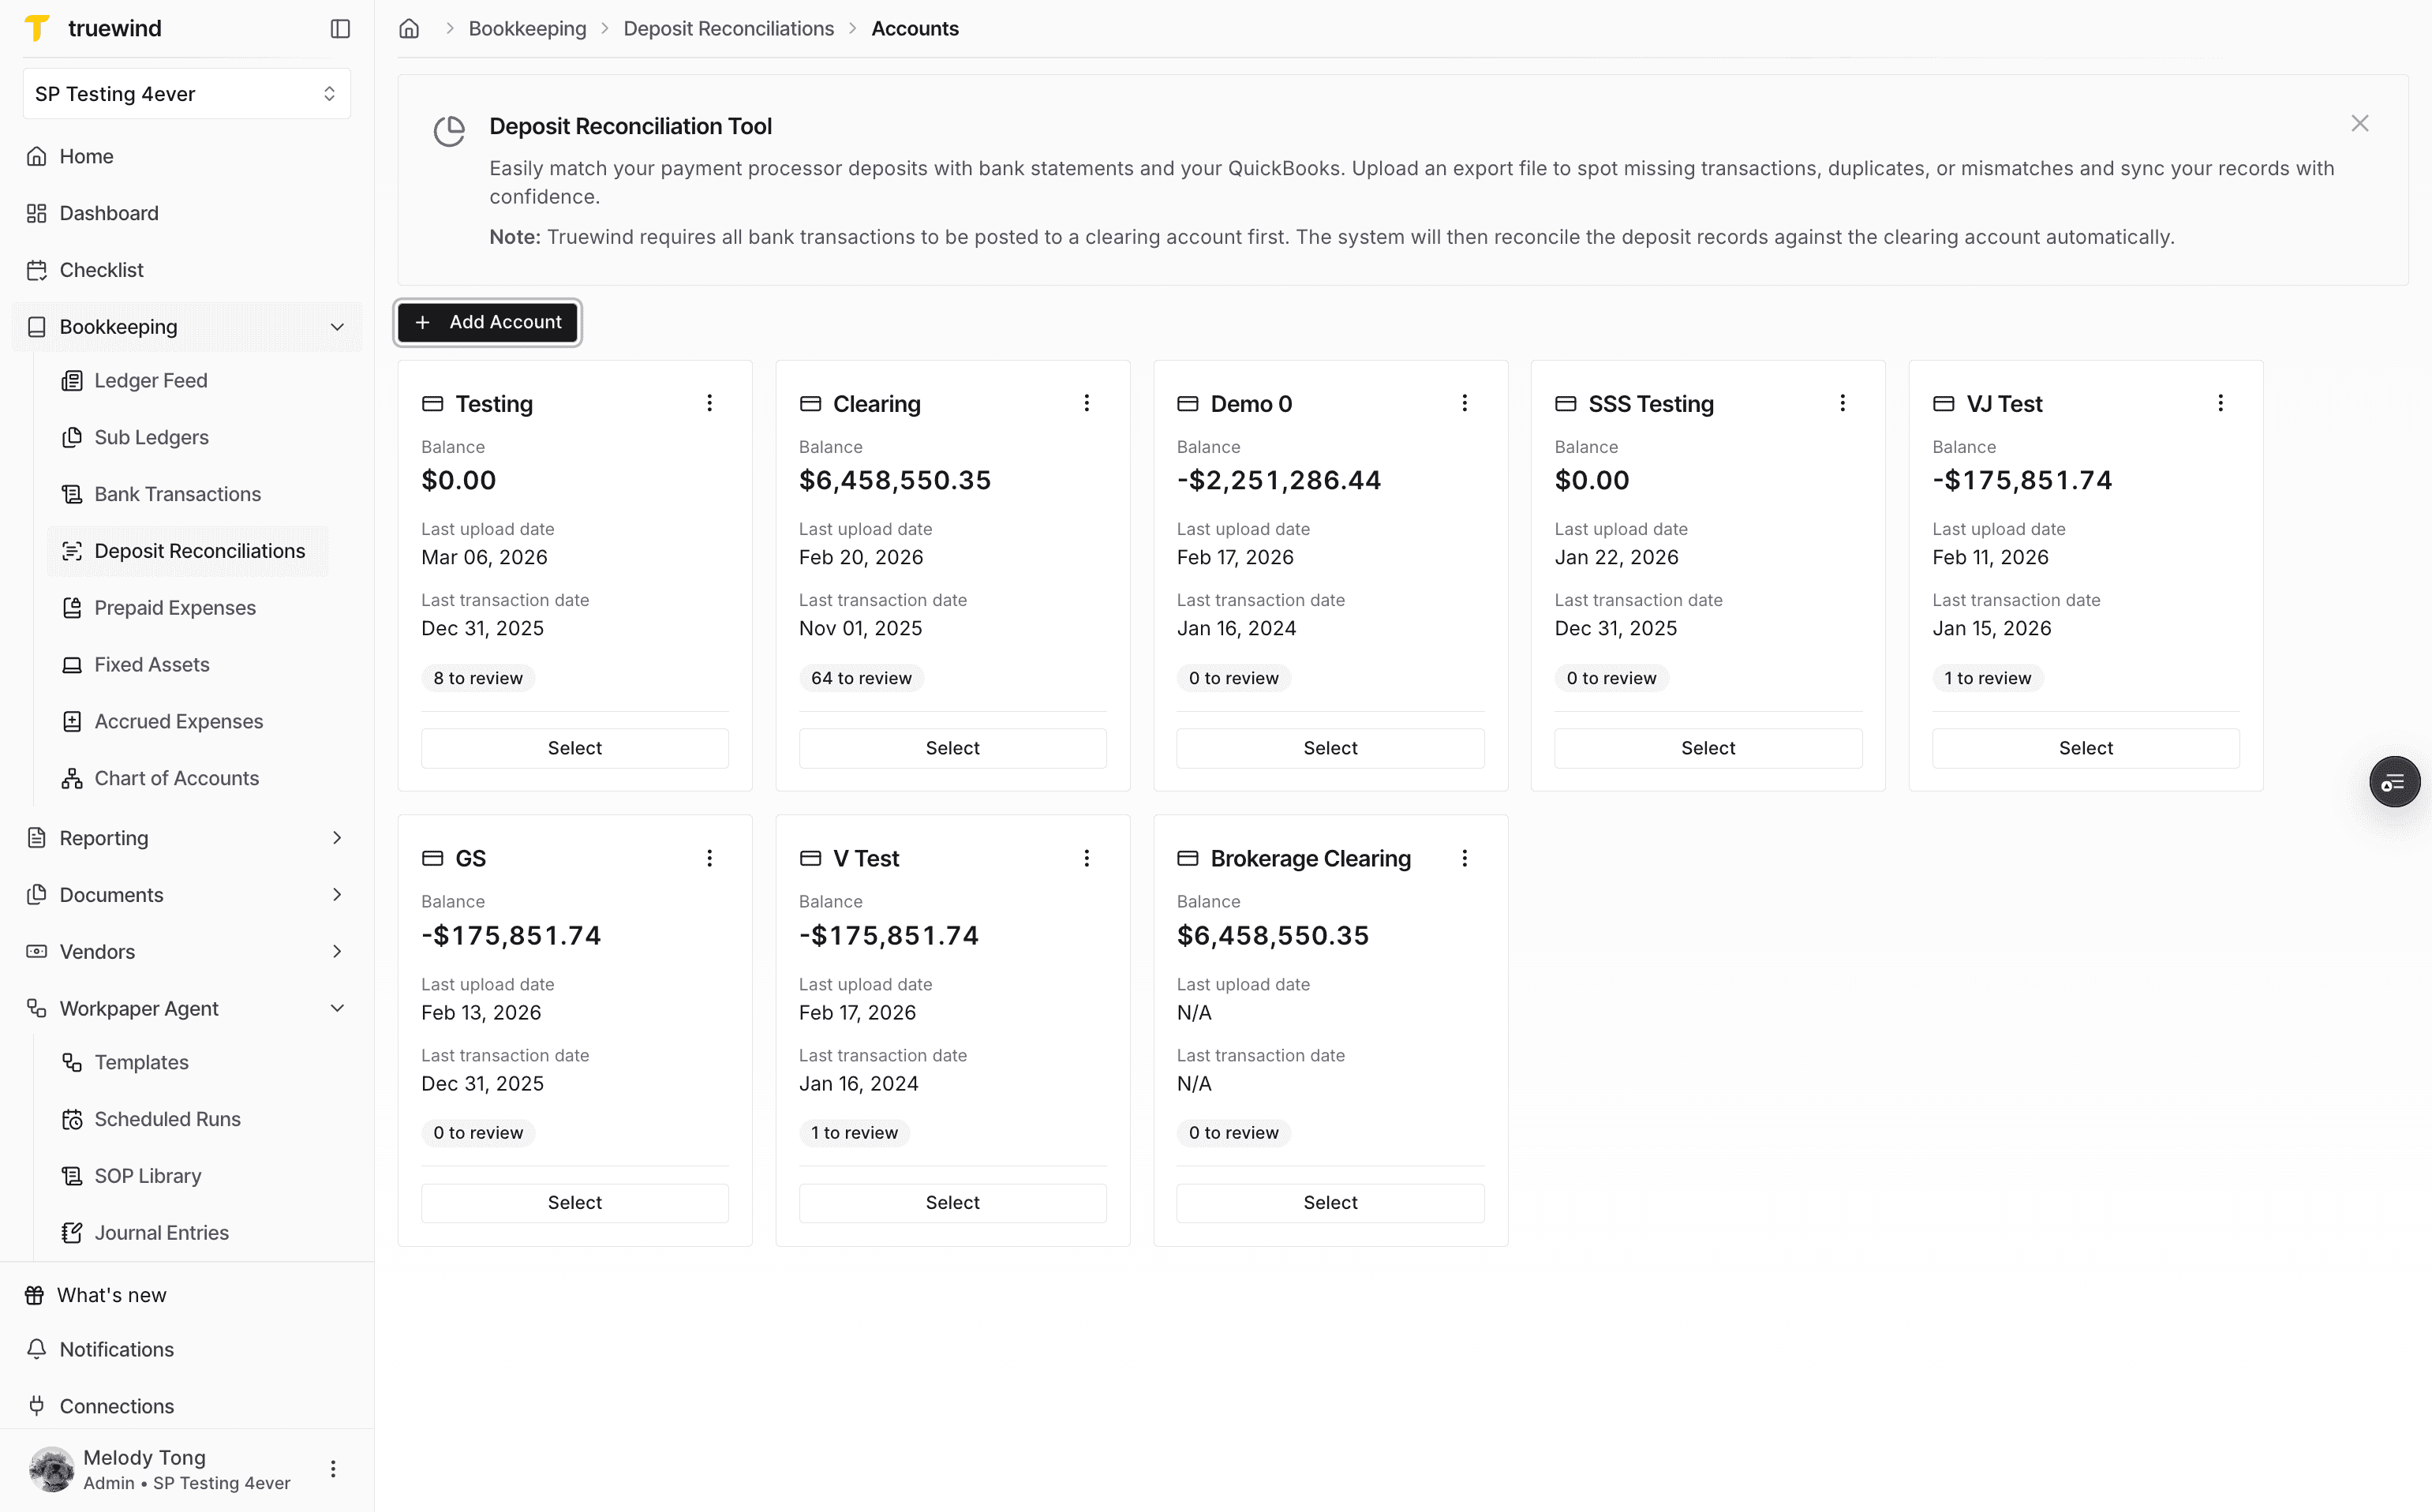
Start in Truewind and add the Deposit Reconciliation account that will receive the Workpaper Agent output.
Step 2
Use a recognizable name for the clearing account so it is easy to select later from Workpaper Agent.
Step 3
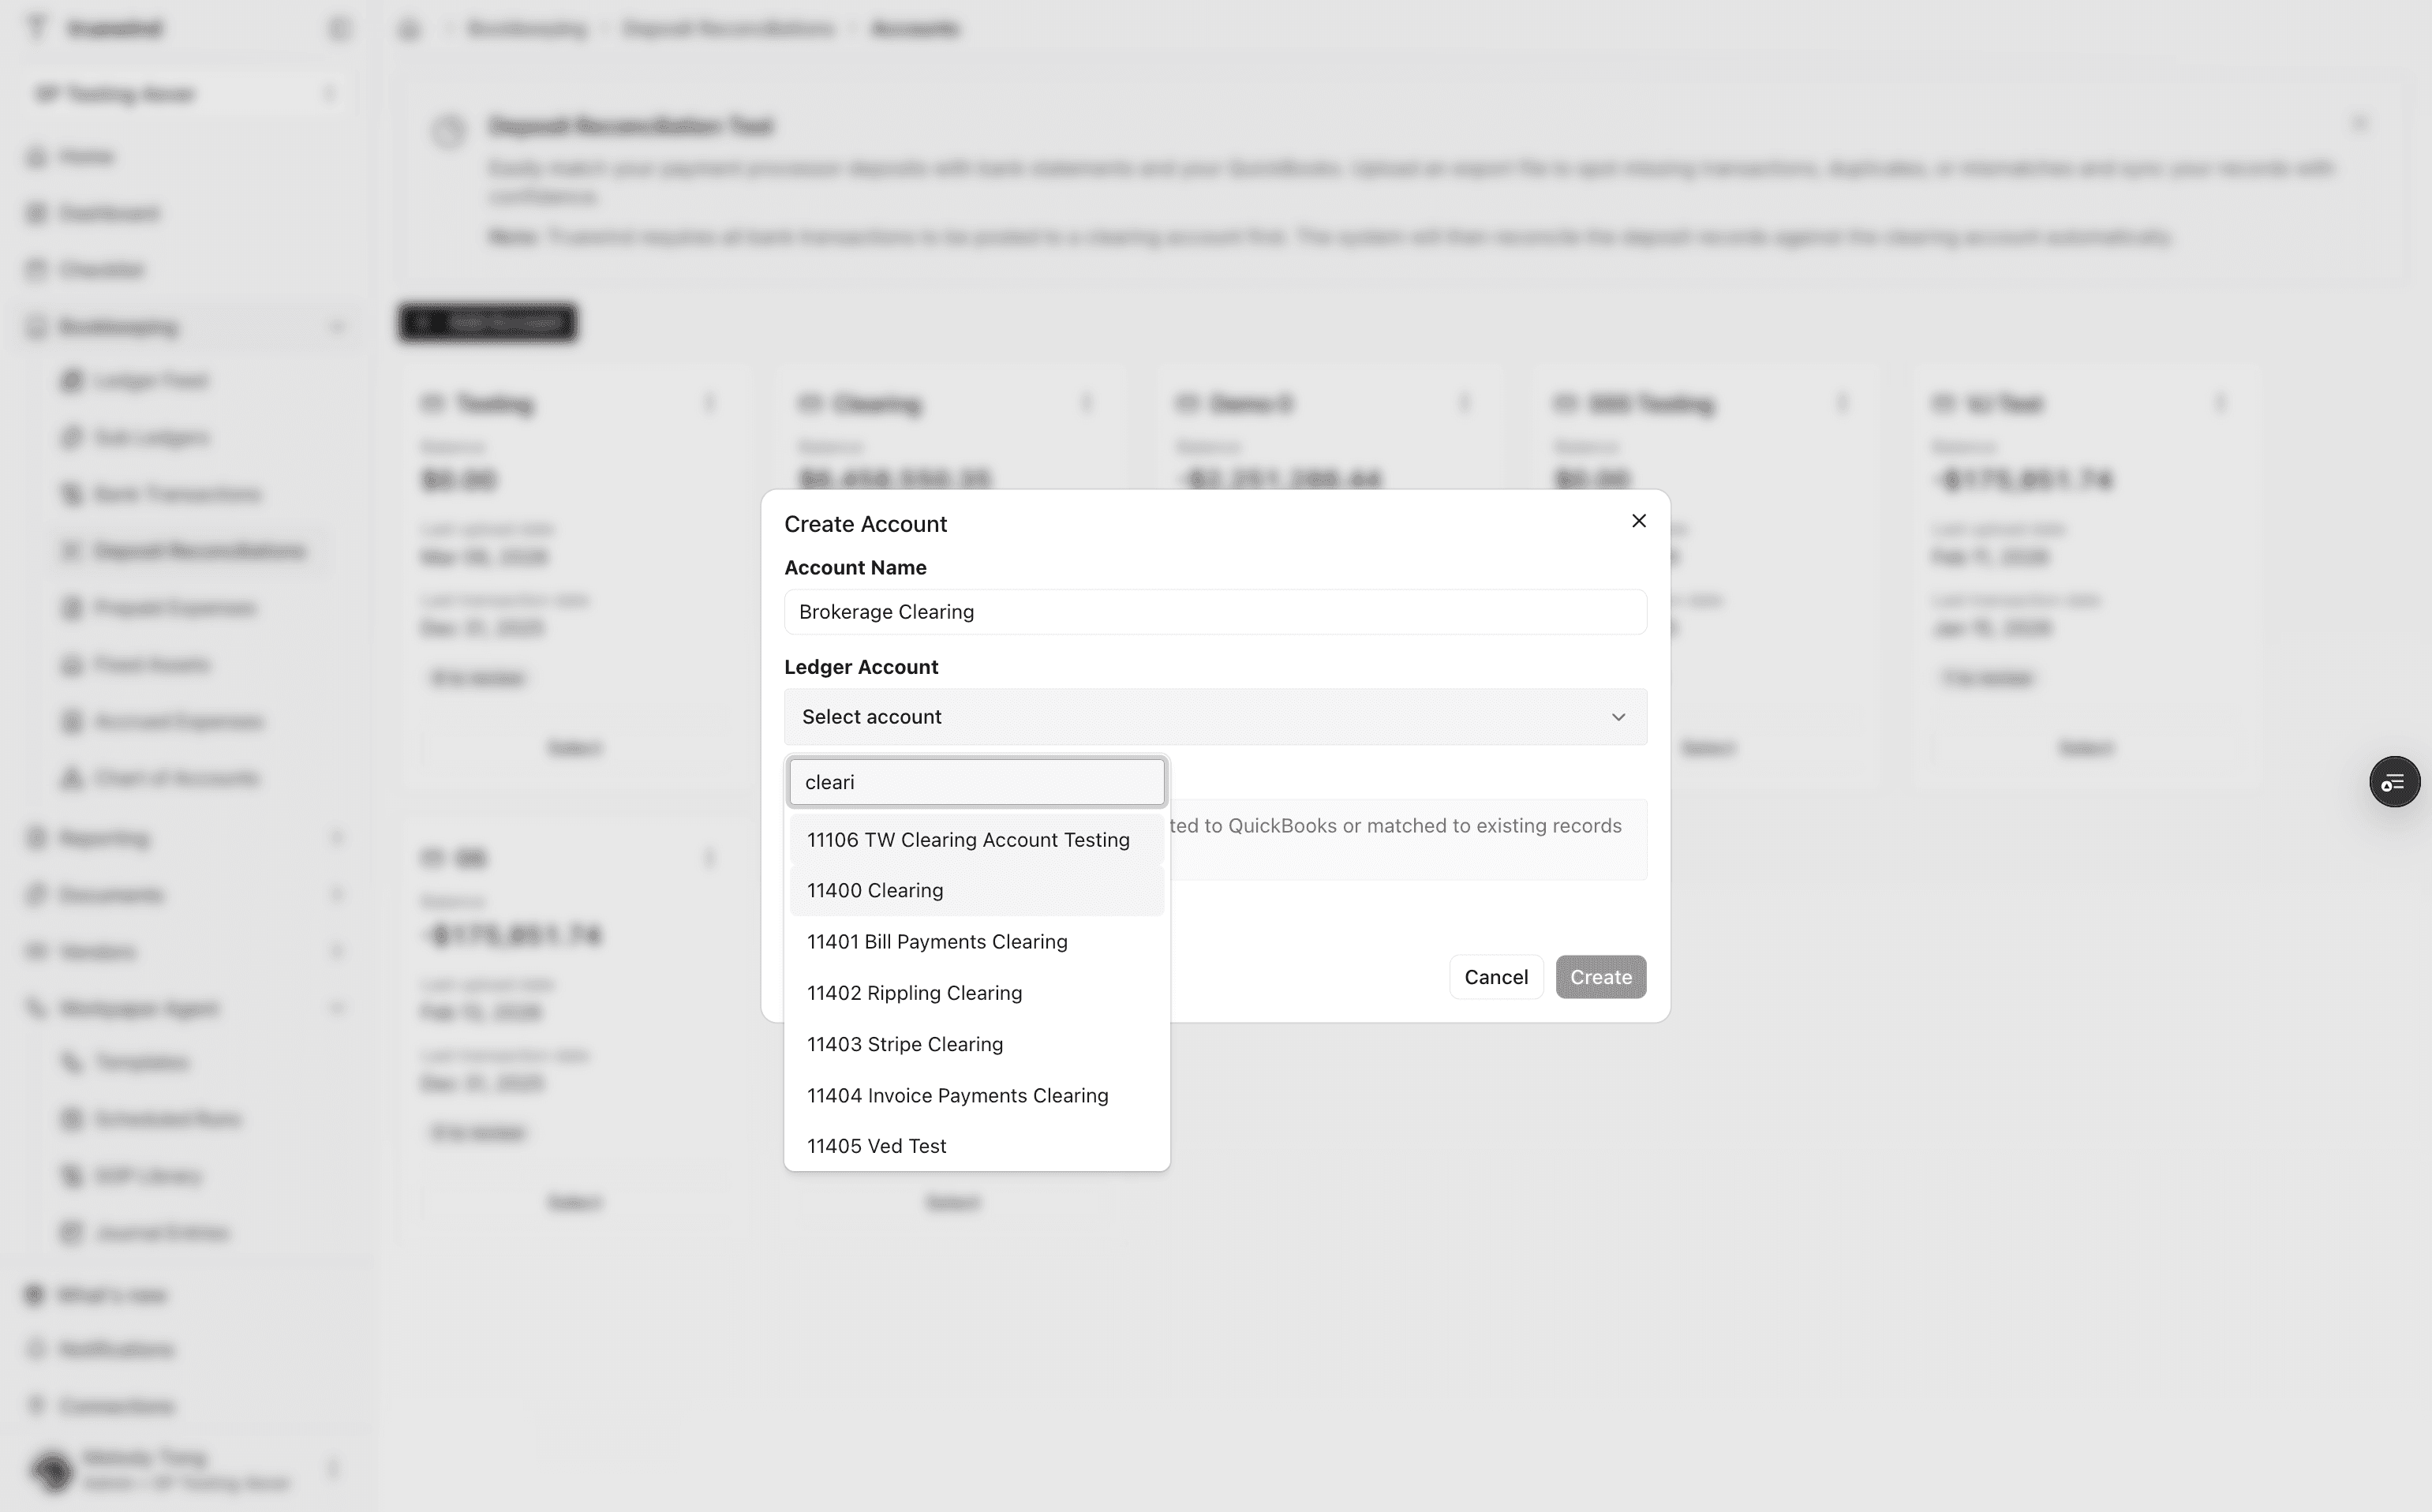
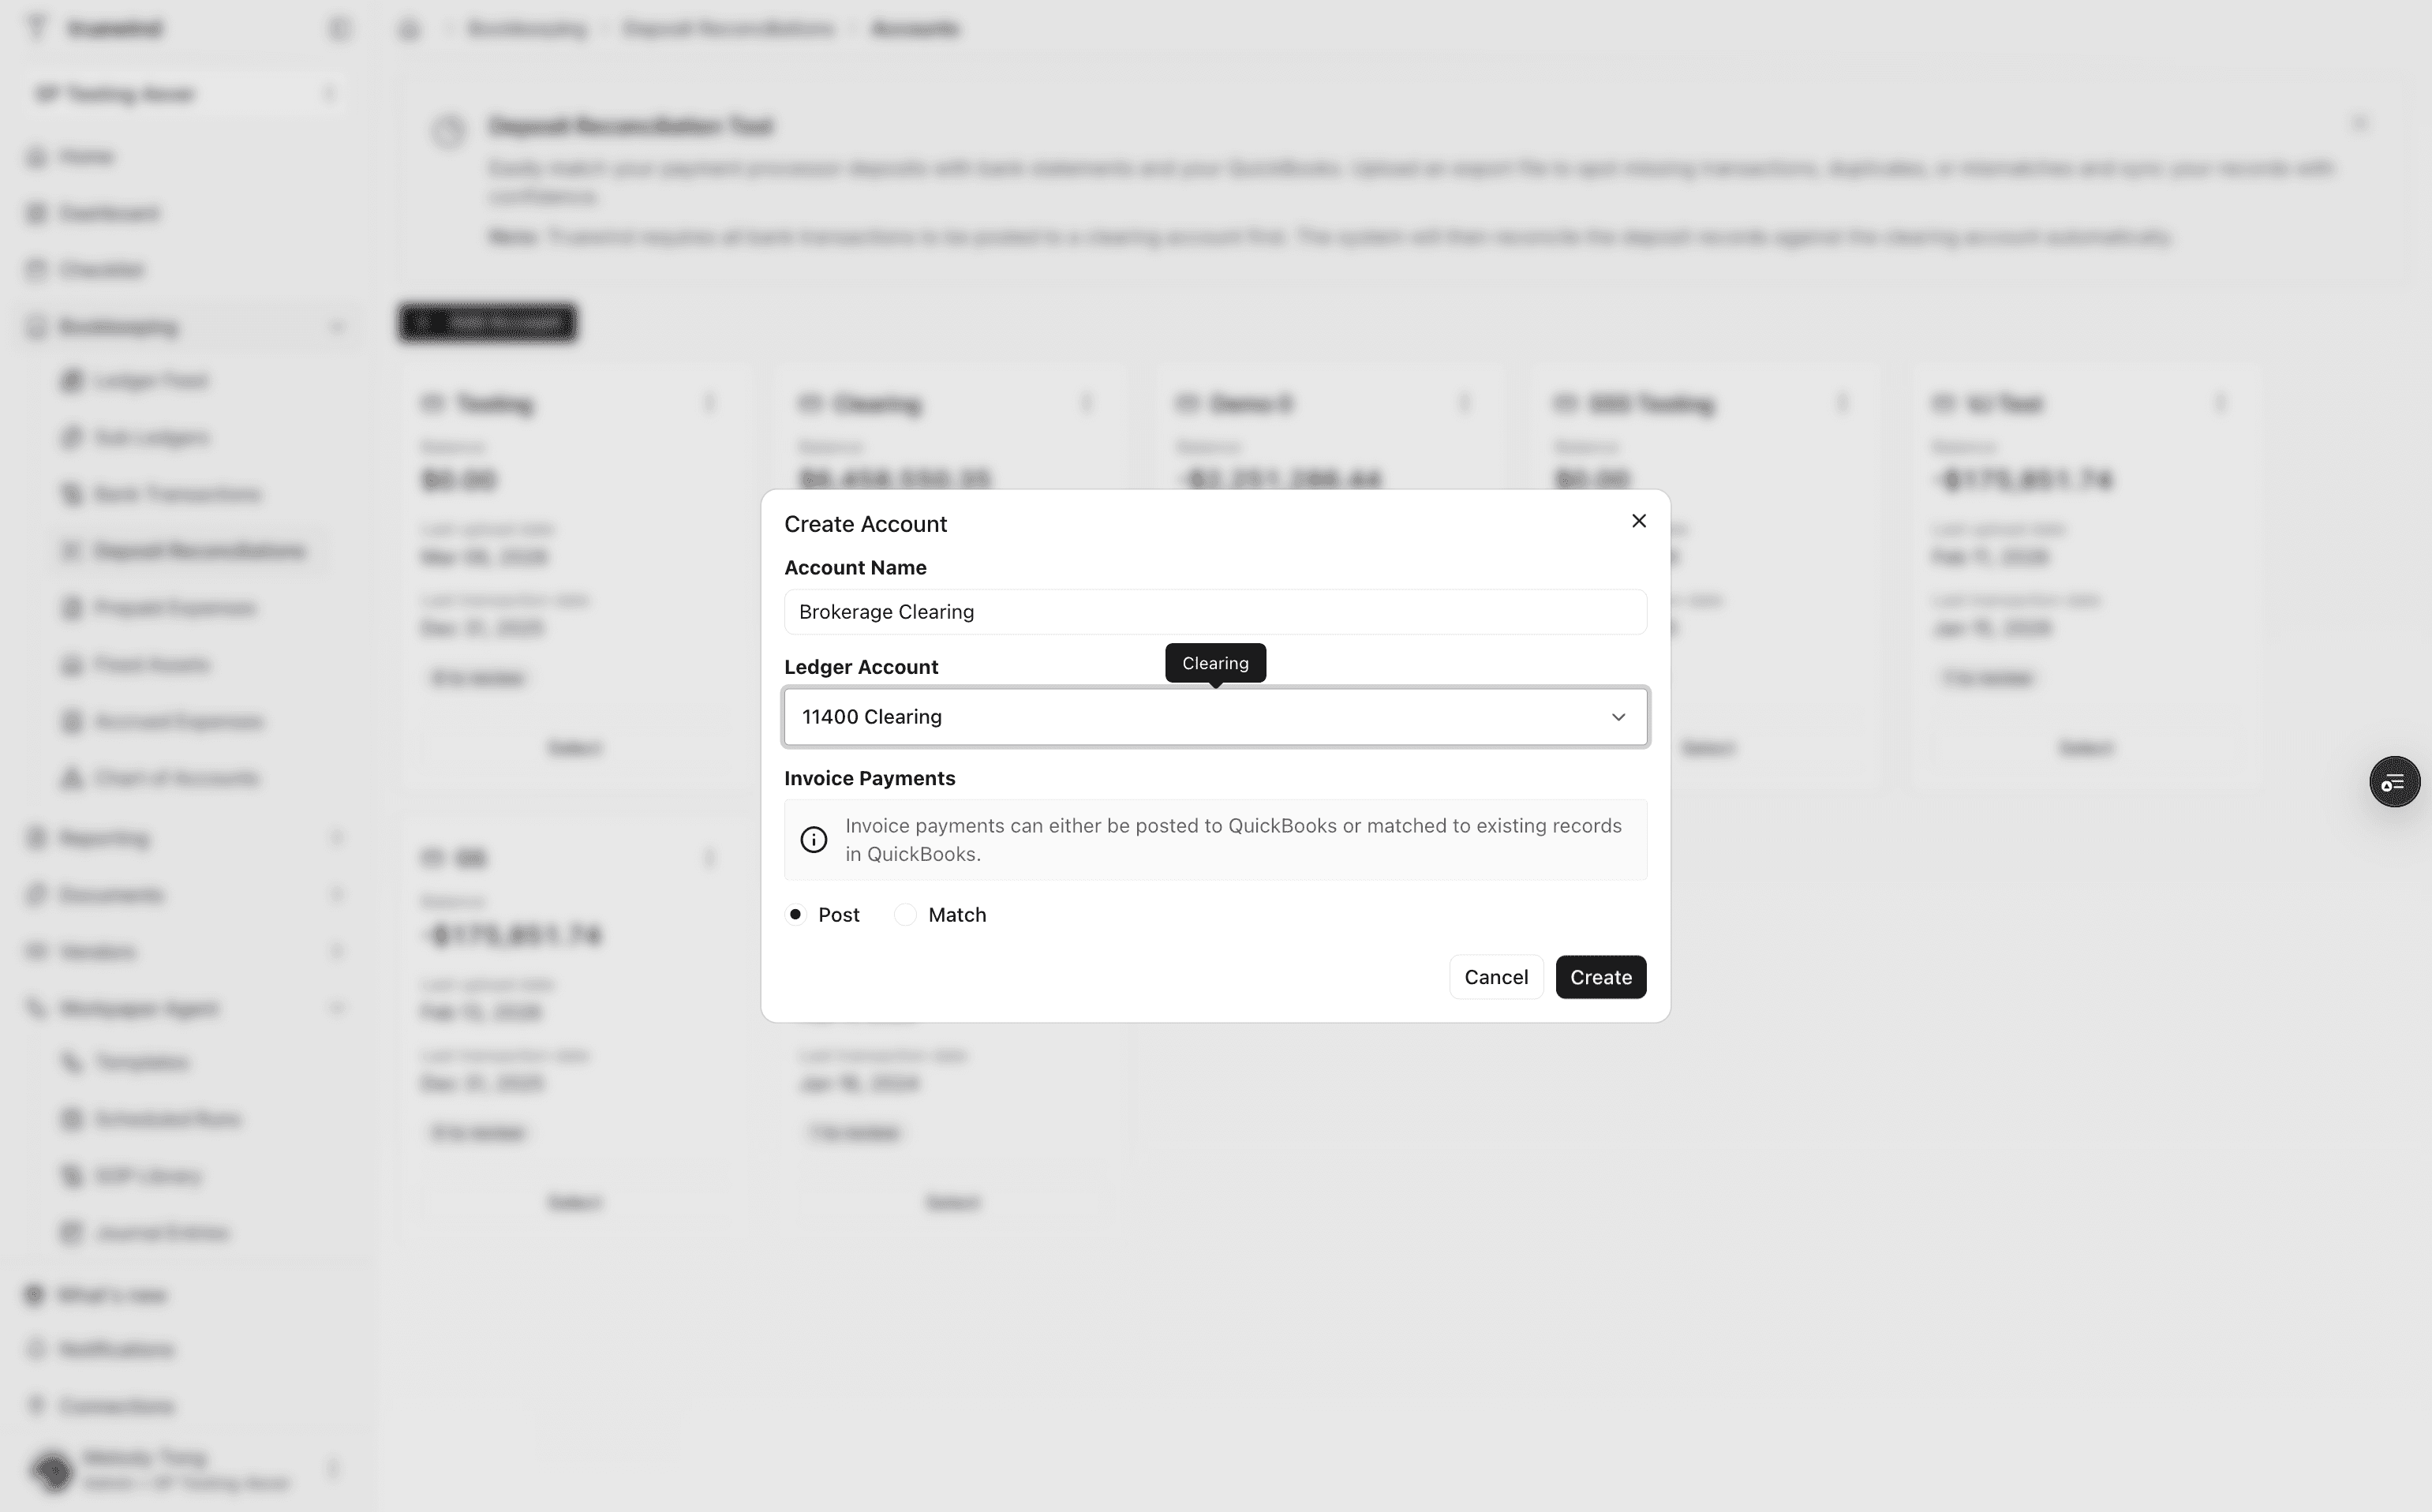
Choose the ERP account that Deposit Reconciliation should use as the clearing account for posted transactions.
Step 4
Save the Deposit Reconciliation account after the clearing-account mapping is complete.
Step 5
Review the account list to make sure the clearing account is ready before moving back to Workpaper Agent.
Step 6
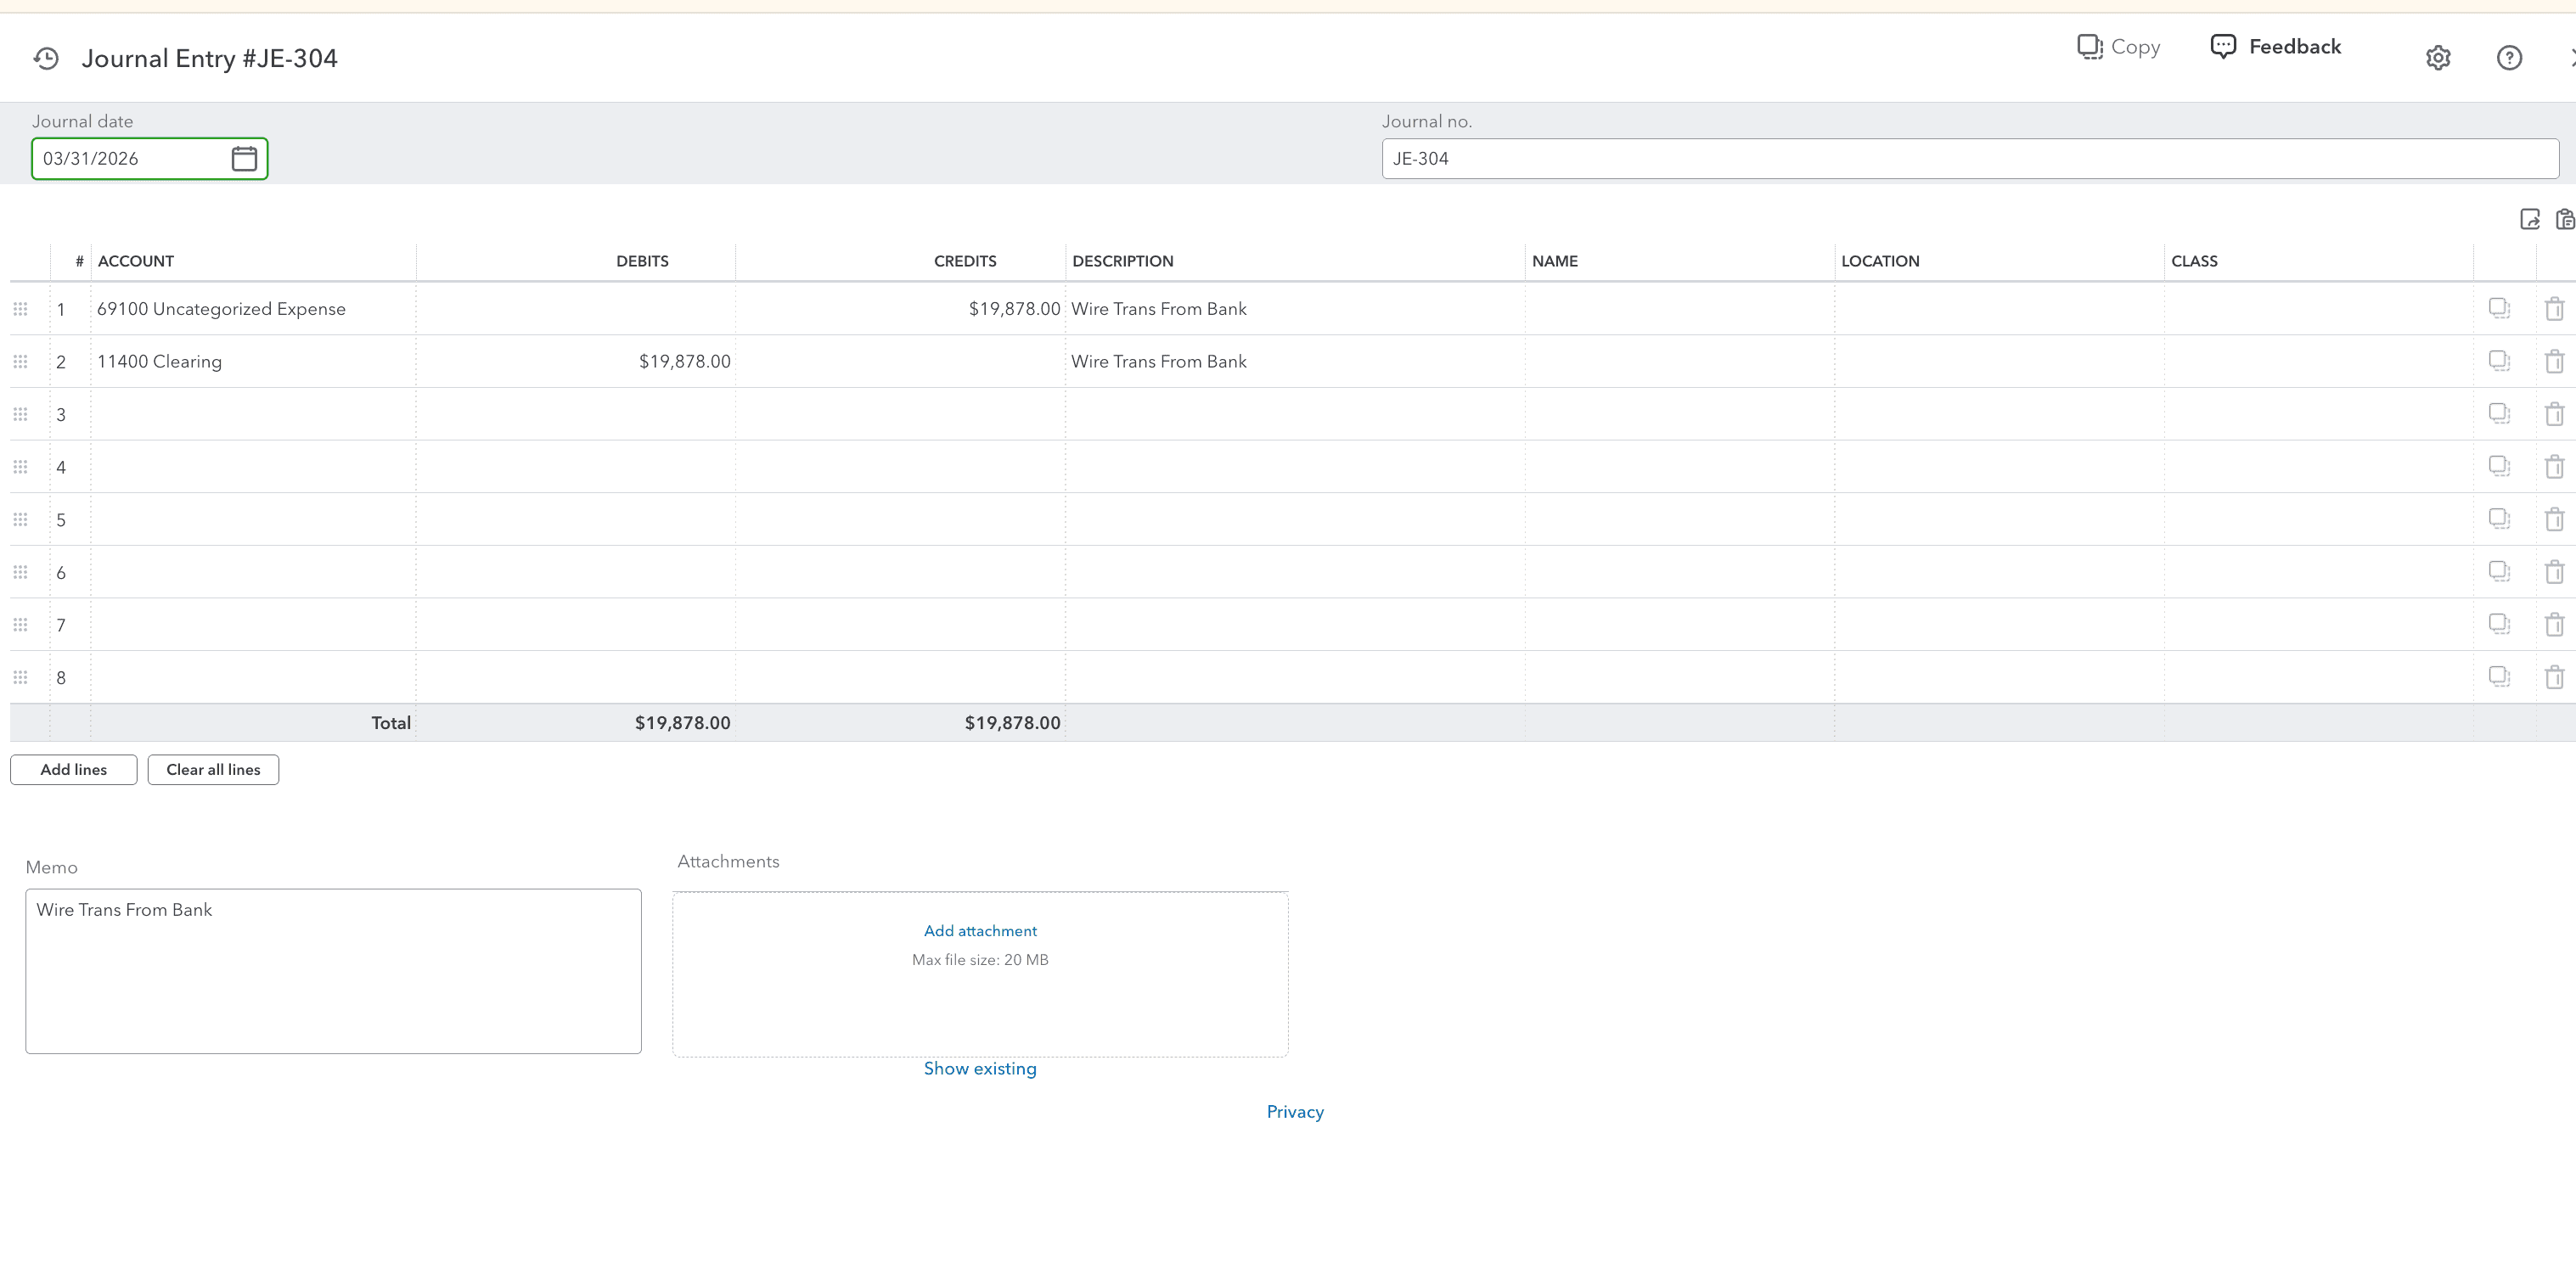
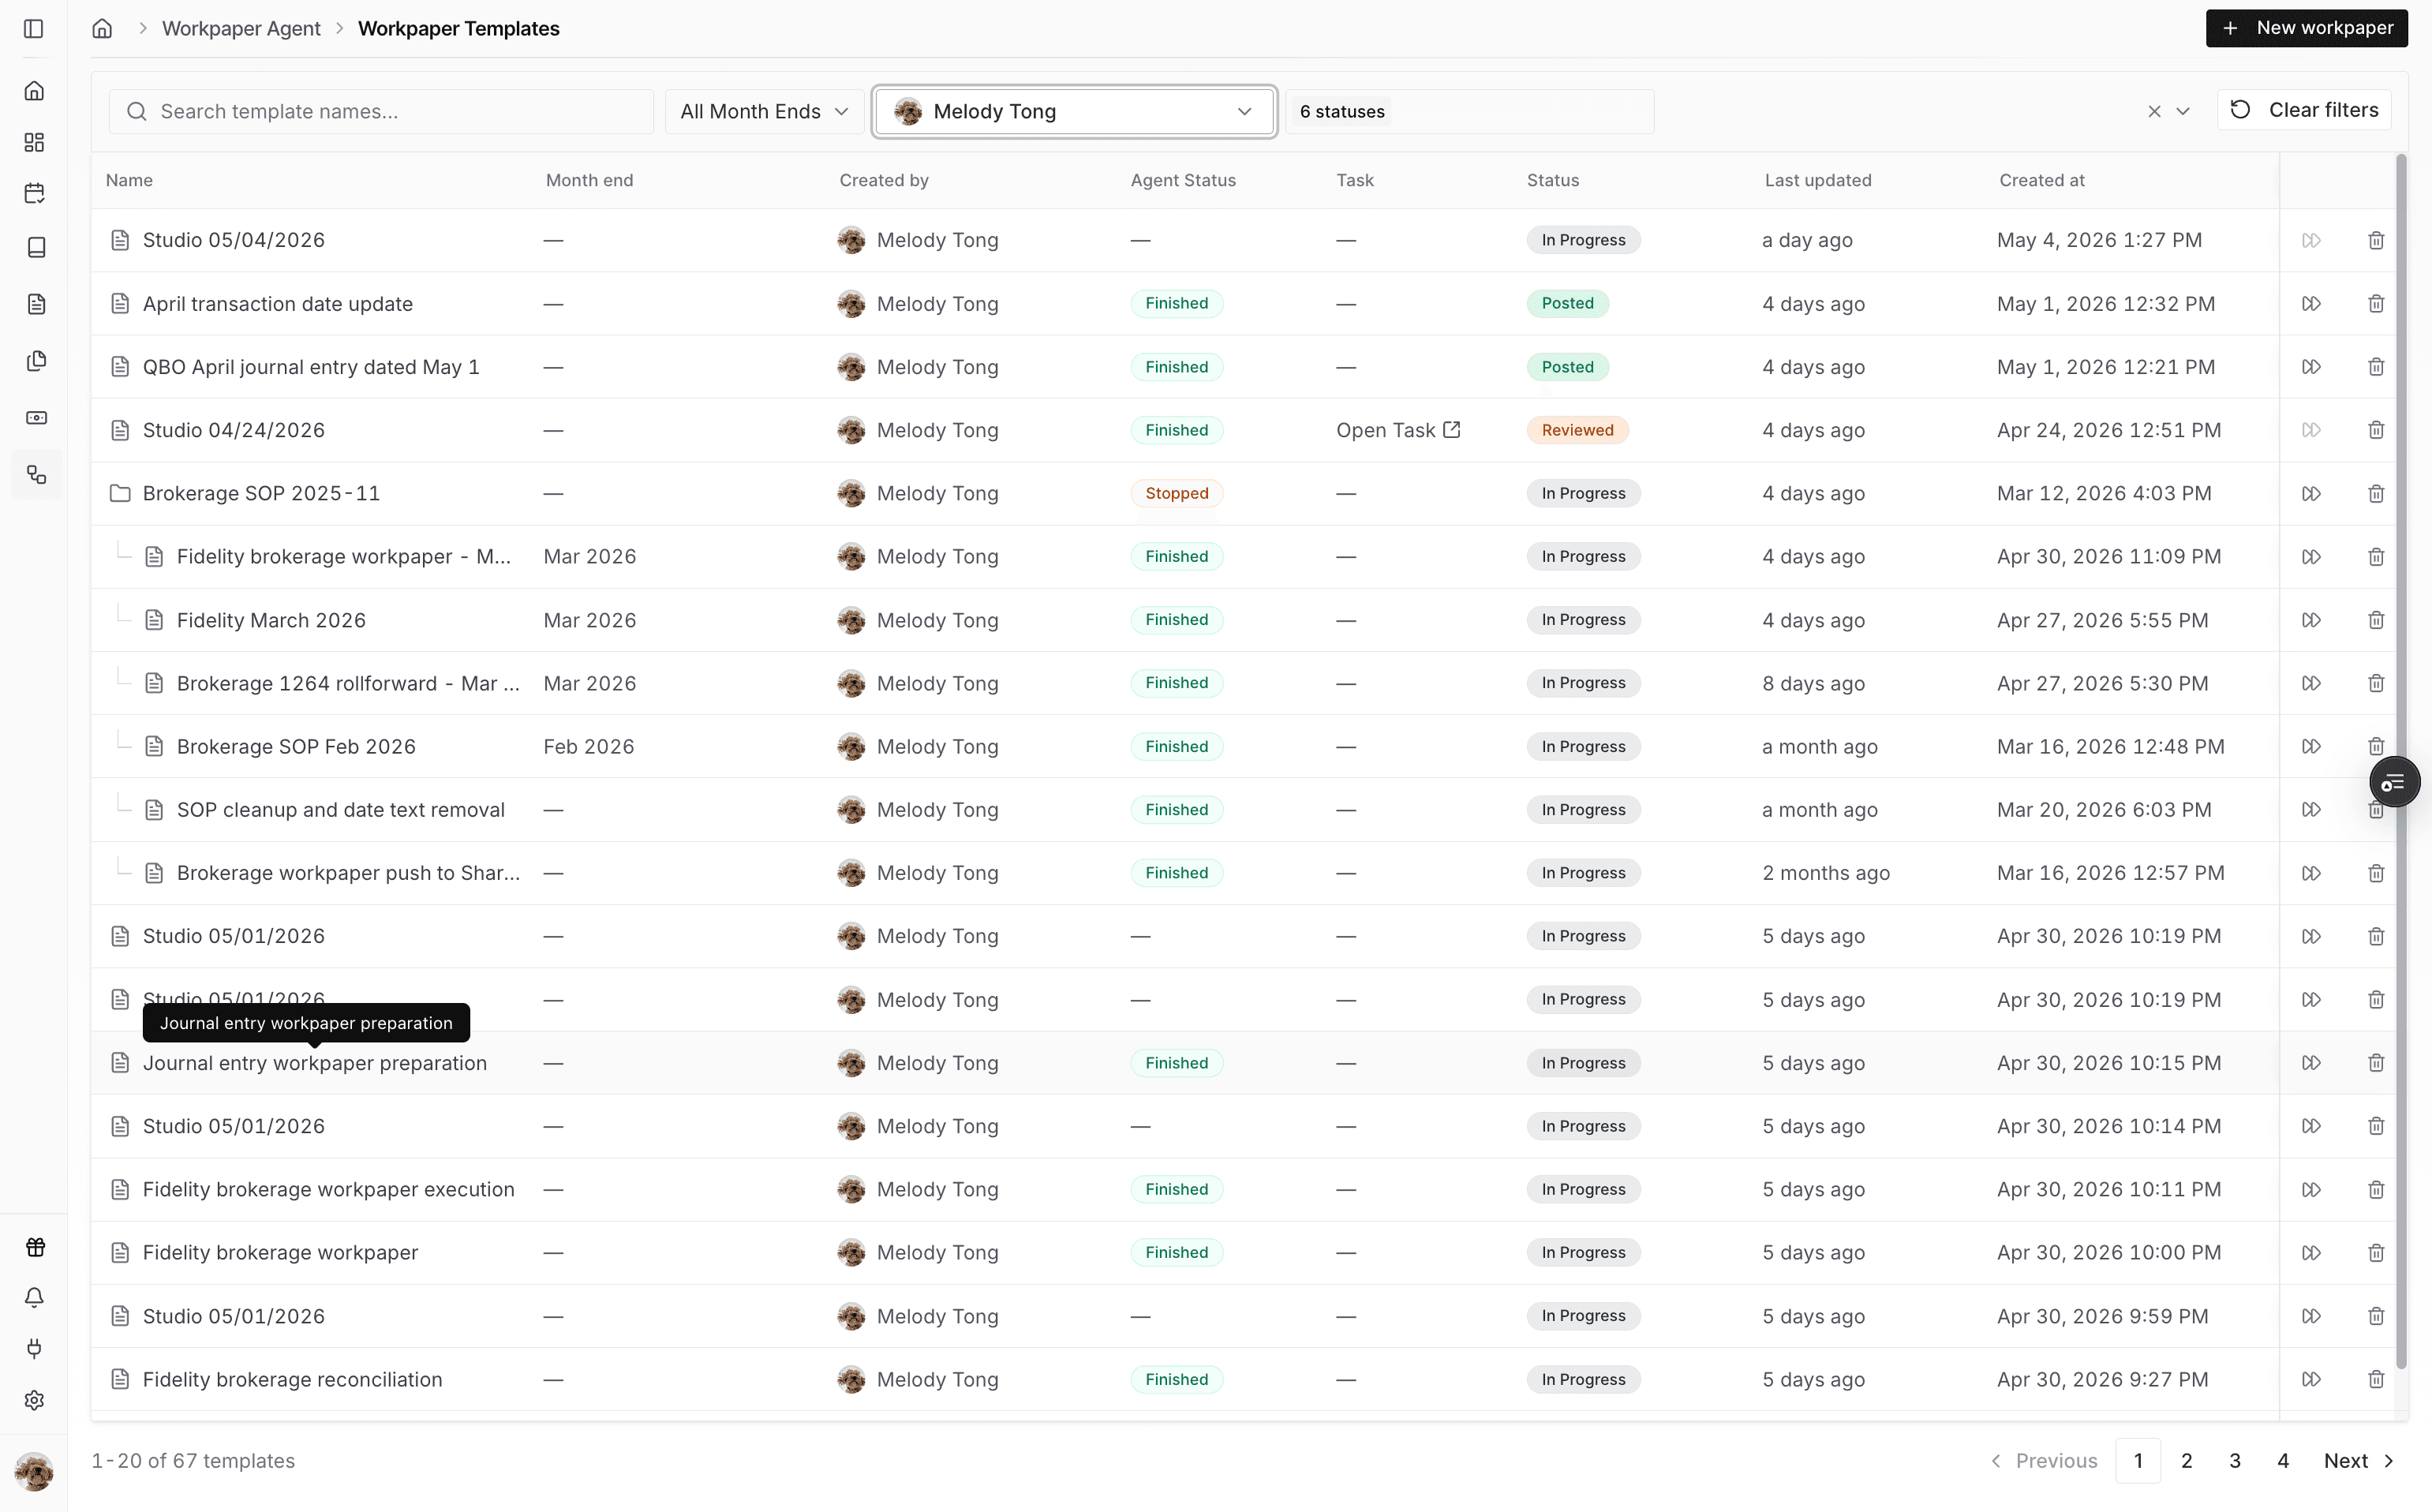
Go to Workpaper Agent templates so you can open the workpaper that prepares the Journal Entries.
Step 7
Confirm the journal date, journal number, account lines, and memo before sending the workpaper data into Deposit Reconciliation.
Step 8
Use the Journal Entry preparation option to move from the workbook into the Deposit Reconciliation import path.
Step 9
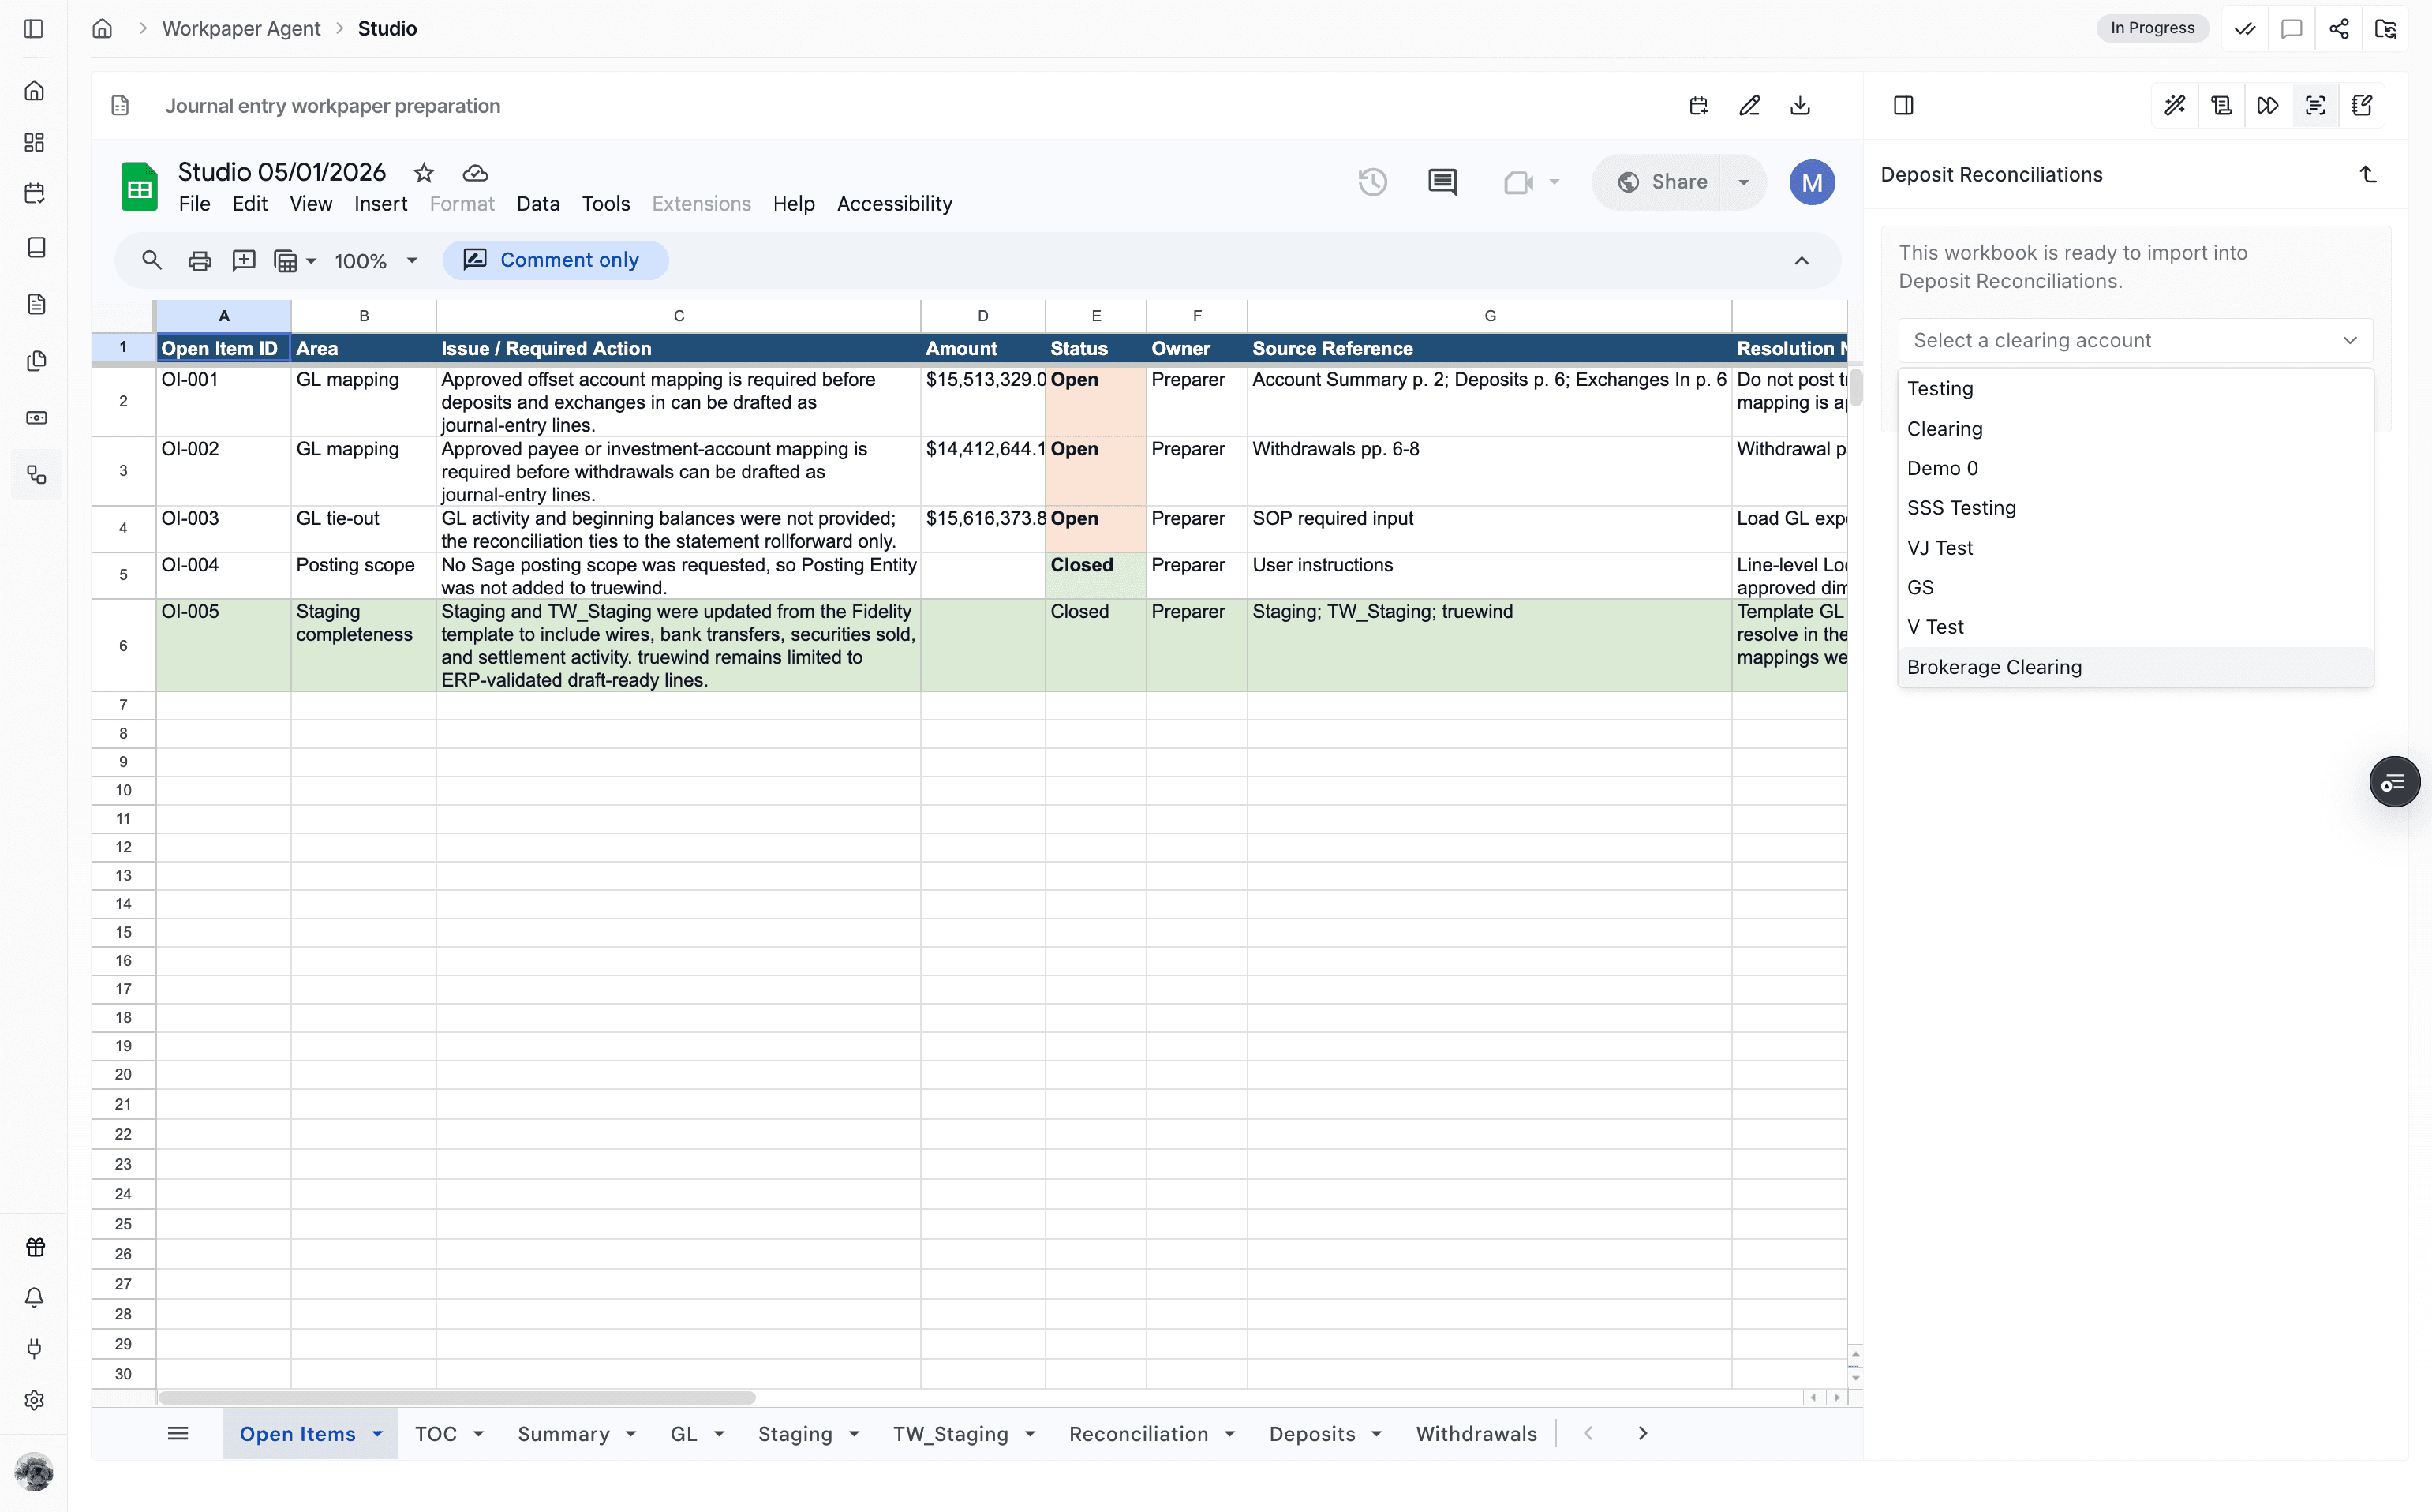
Choose Deposit Reconciliations as the destination for the prepared Journal Entry transactions.
Step 10
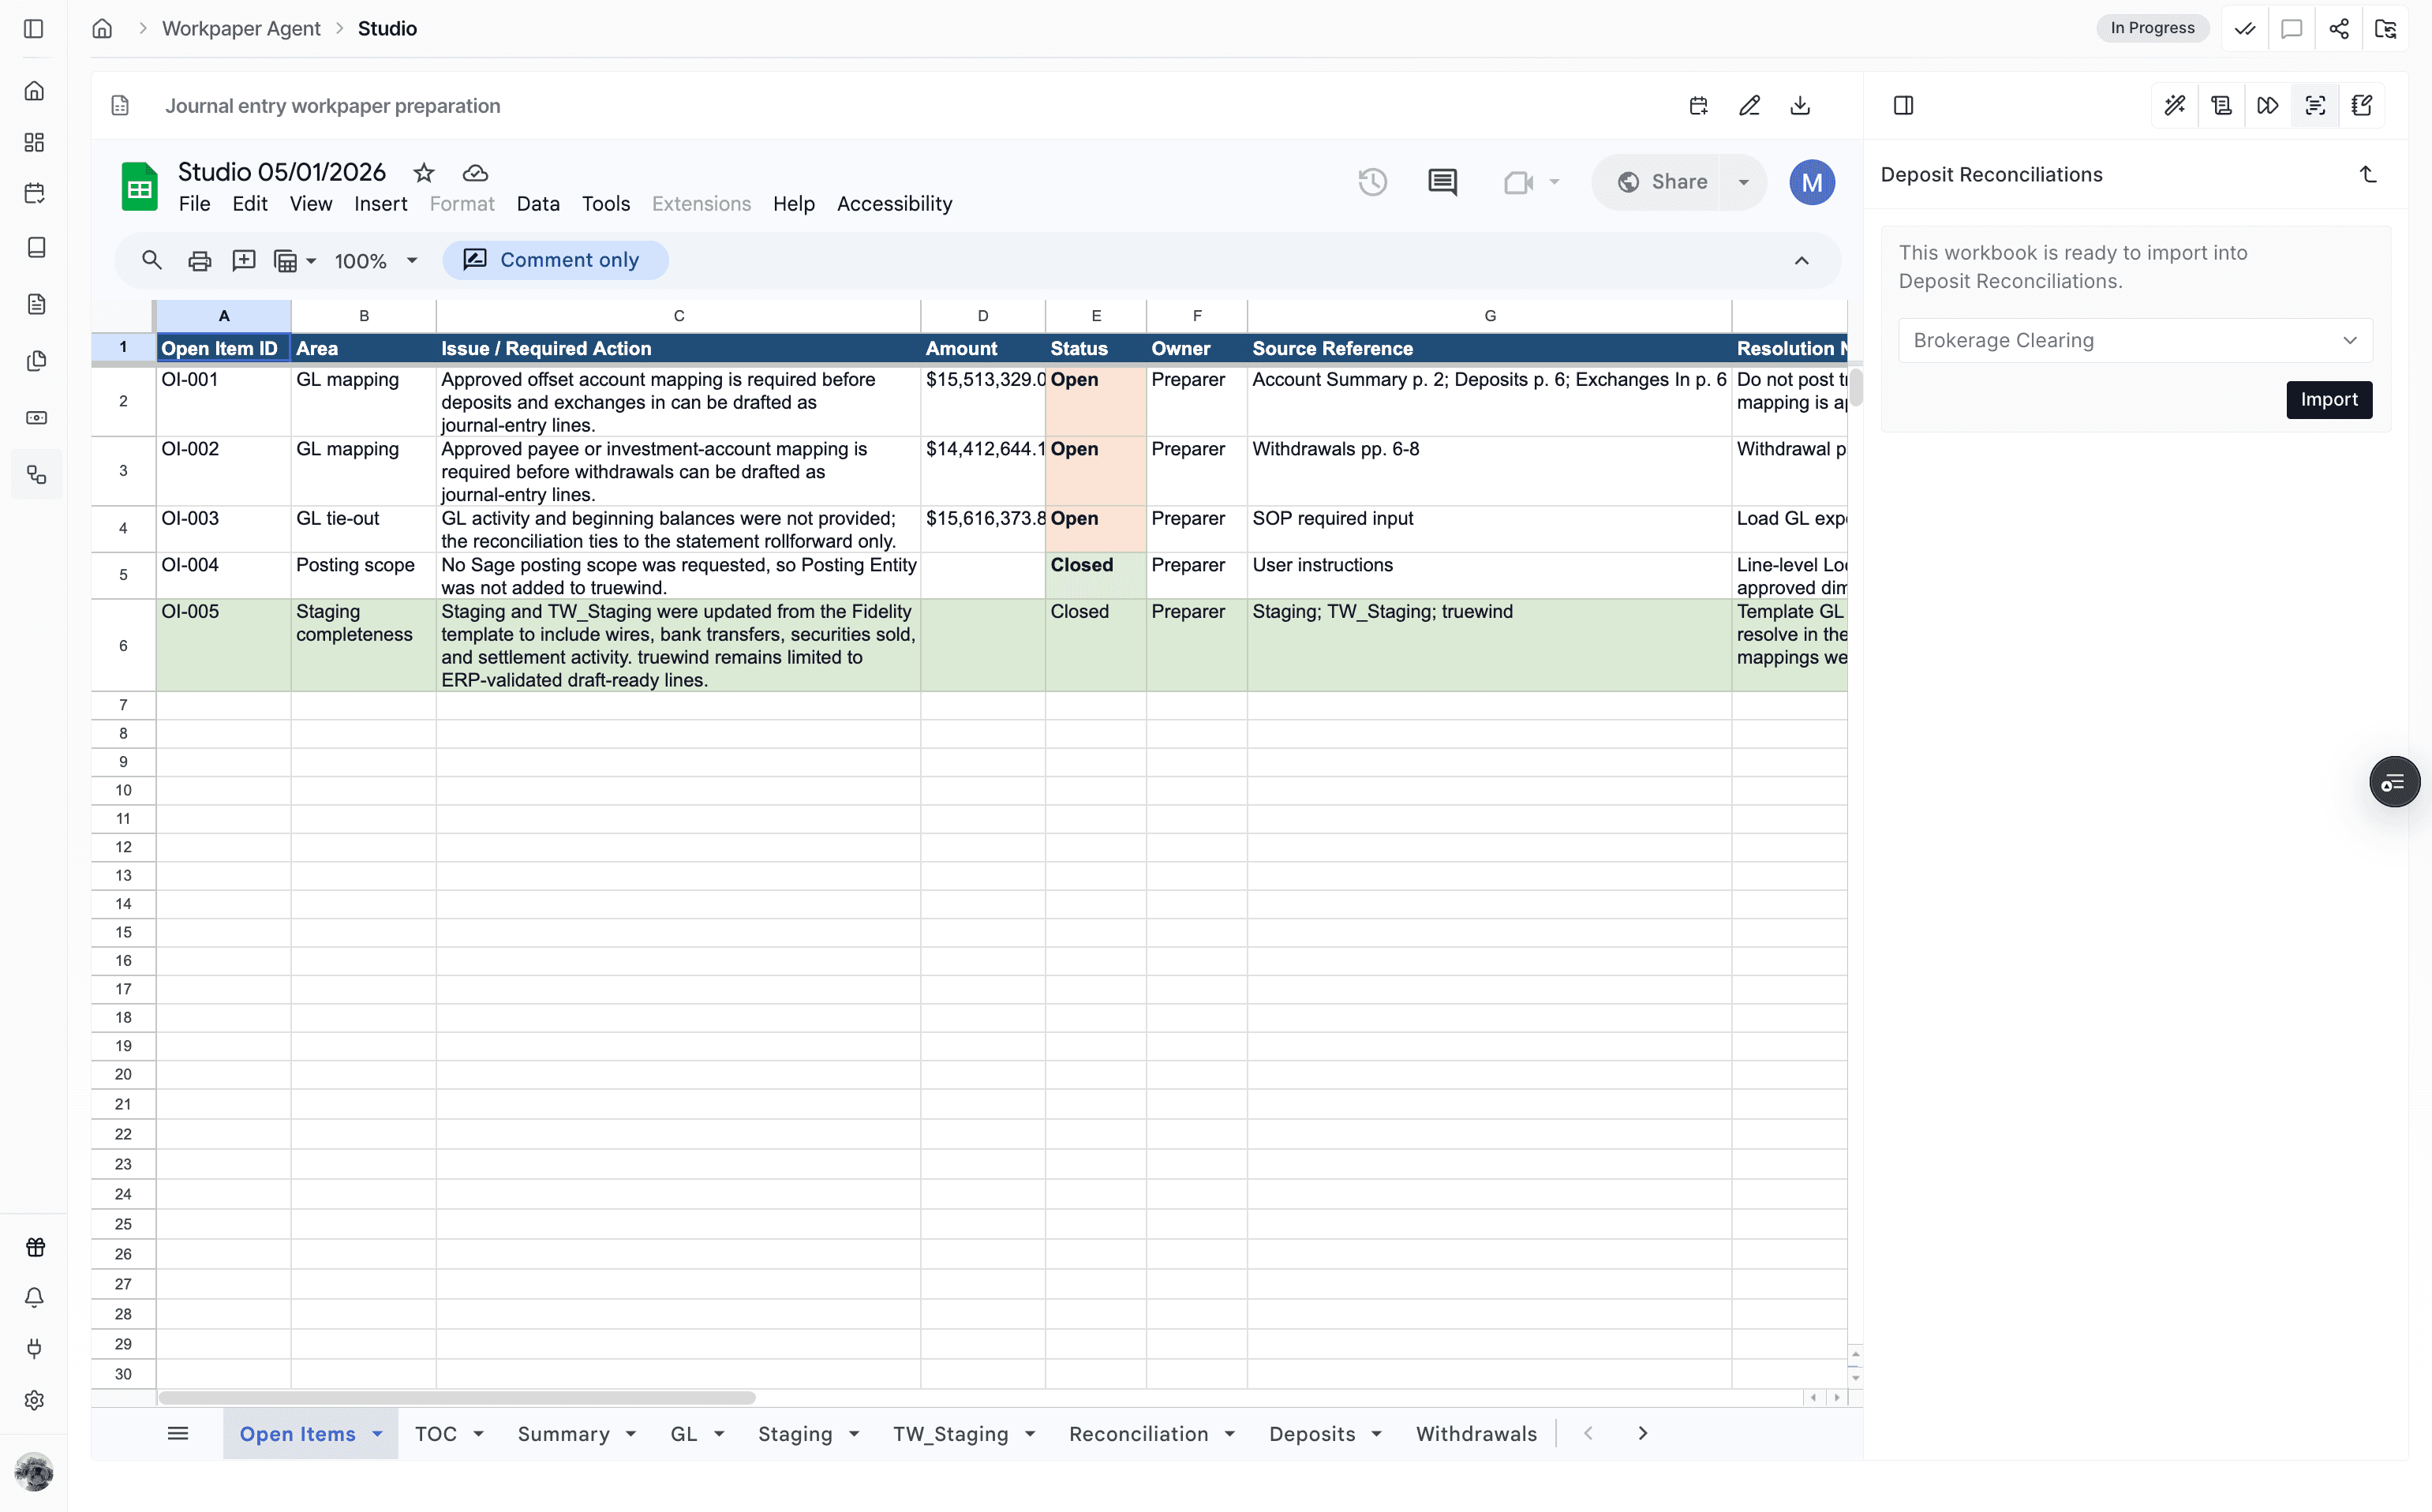
Pick the clearing account you created in Deposit Reconciliation. Truewind checks the workbook for a TW_Staging tab and can create one if needed.
Step 11
Start the import so Truewind can prepare the mapped transactions for Deposit Reconciliation review.
Step 12
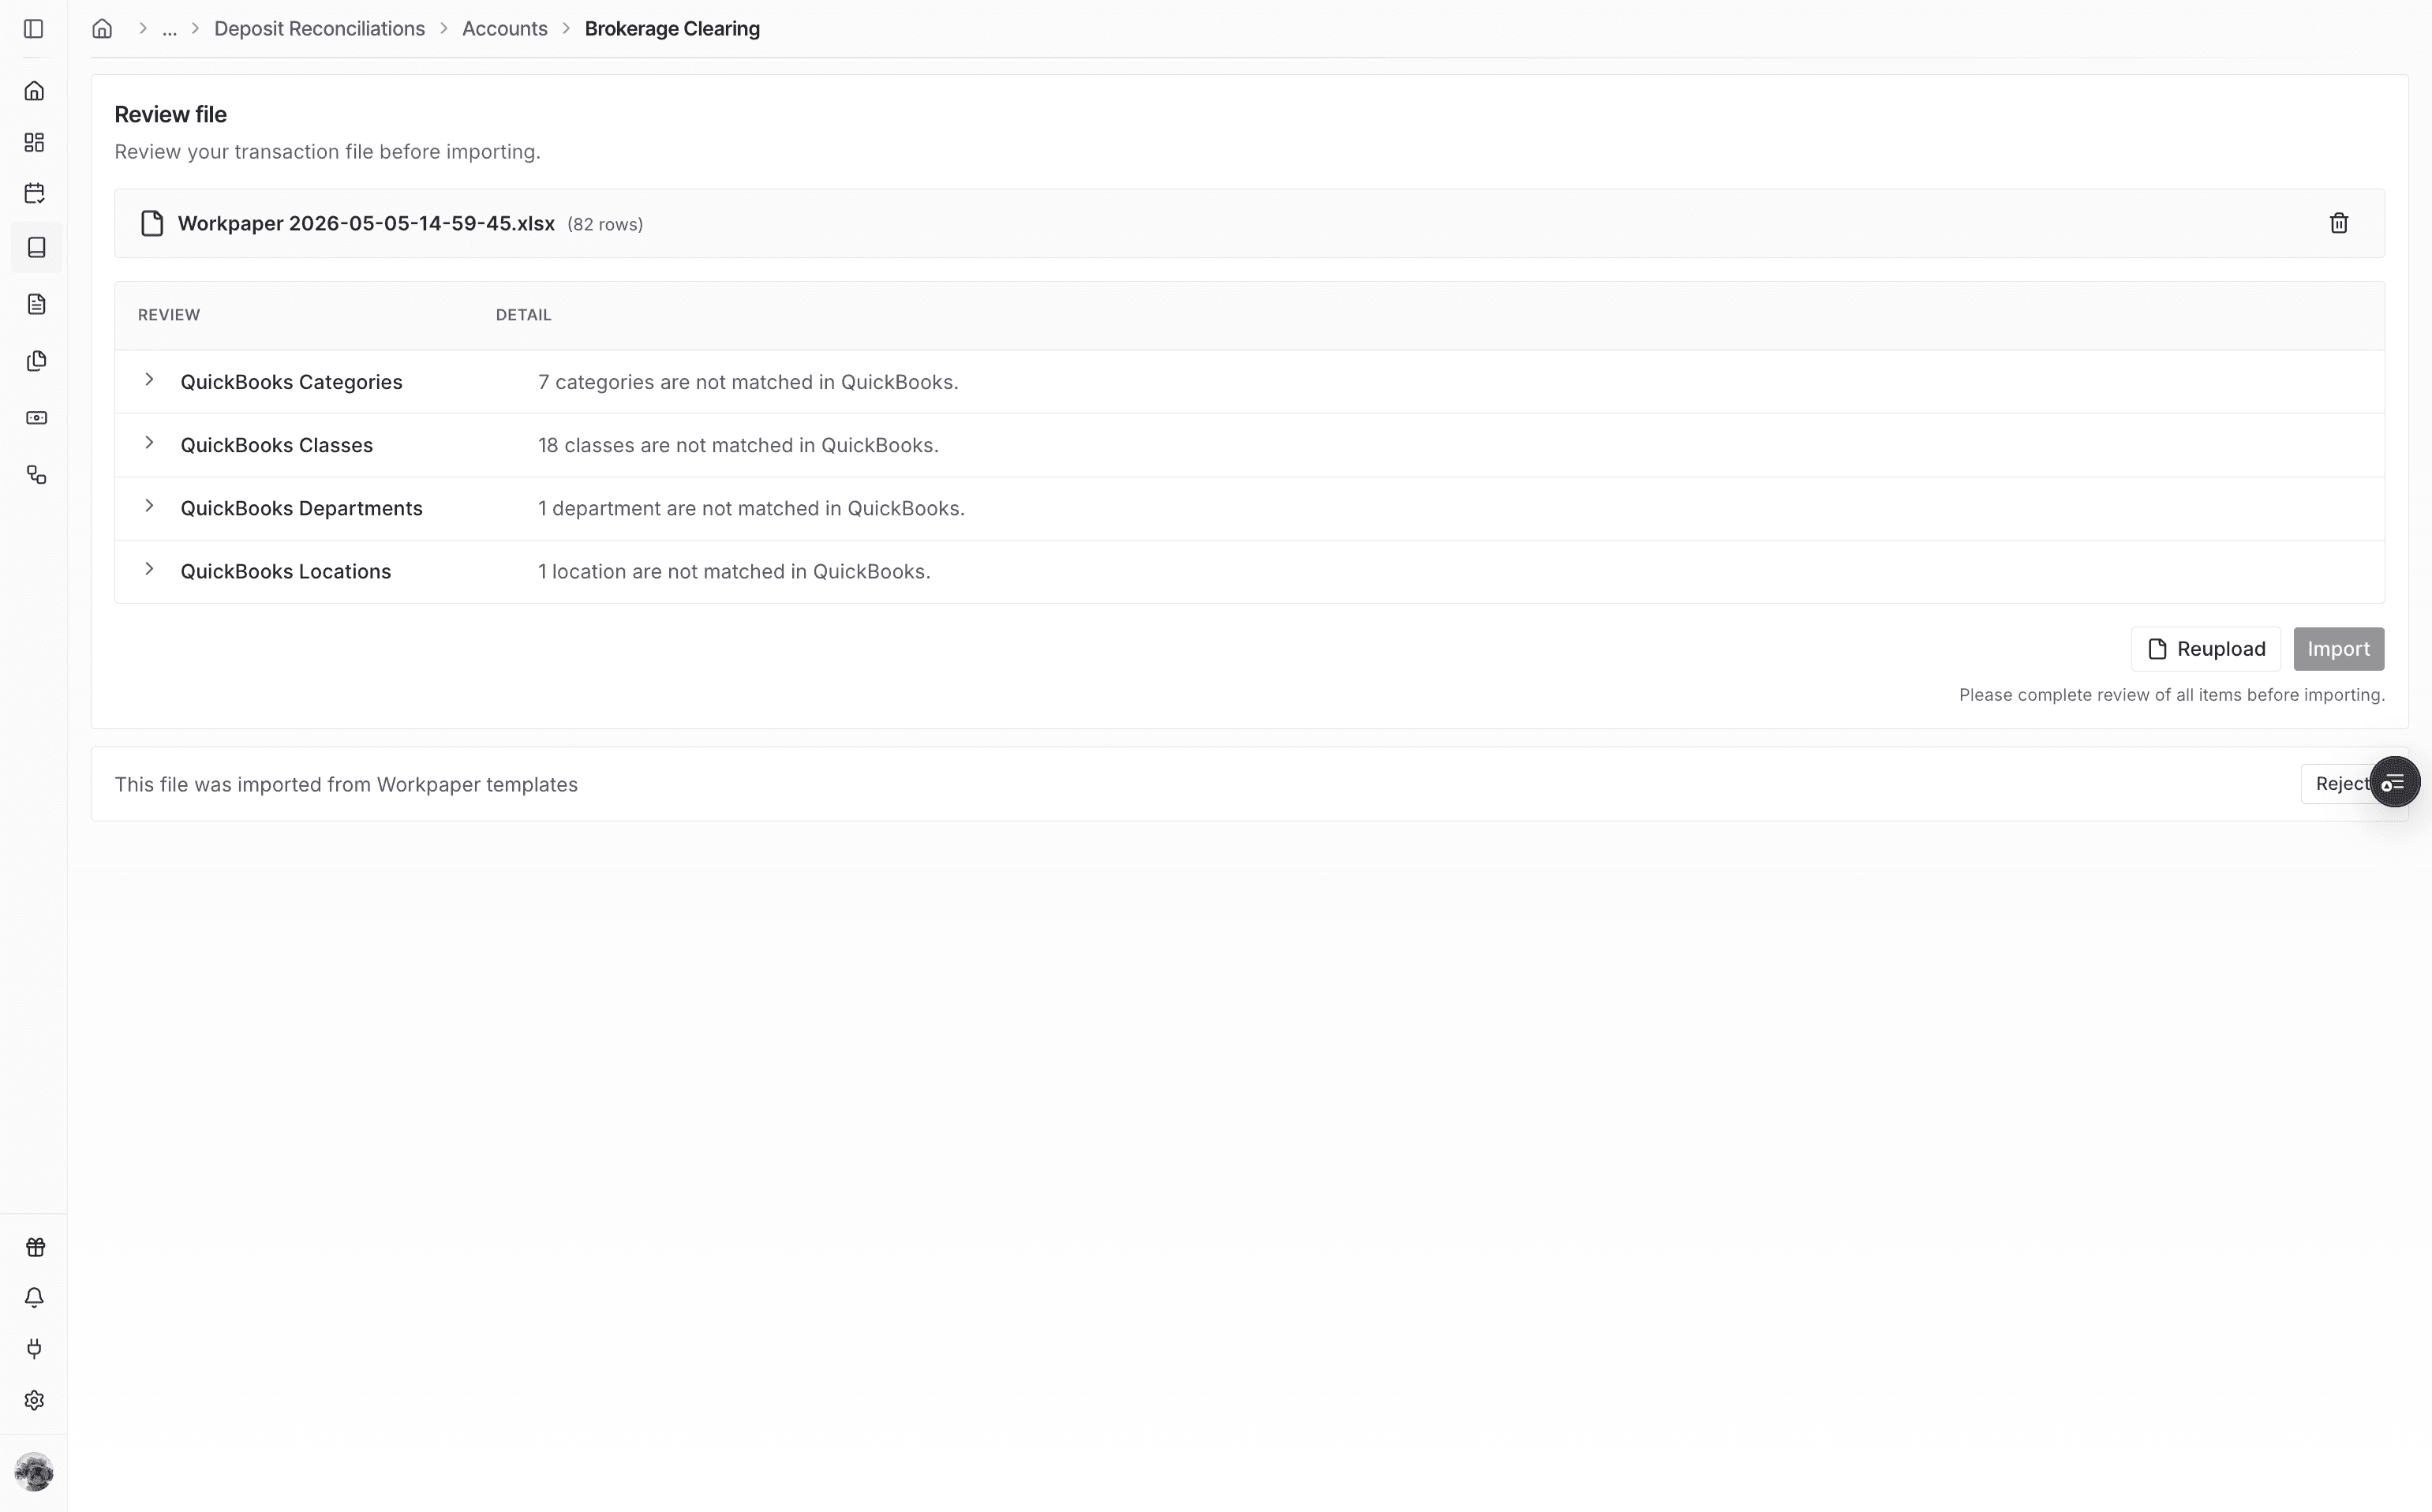
Check the review file for uncertain mappings that need confirmation before the transactions can be imported.
Step 13
Select the correct QuickBooks category or ERP category when Truewind flags a value that does not have an exact match.
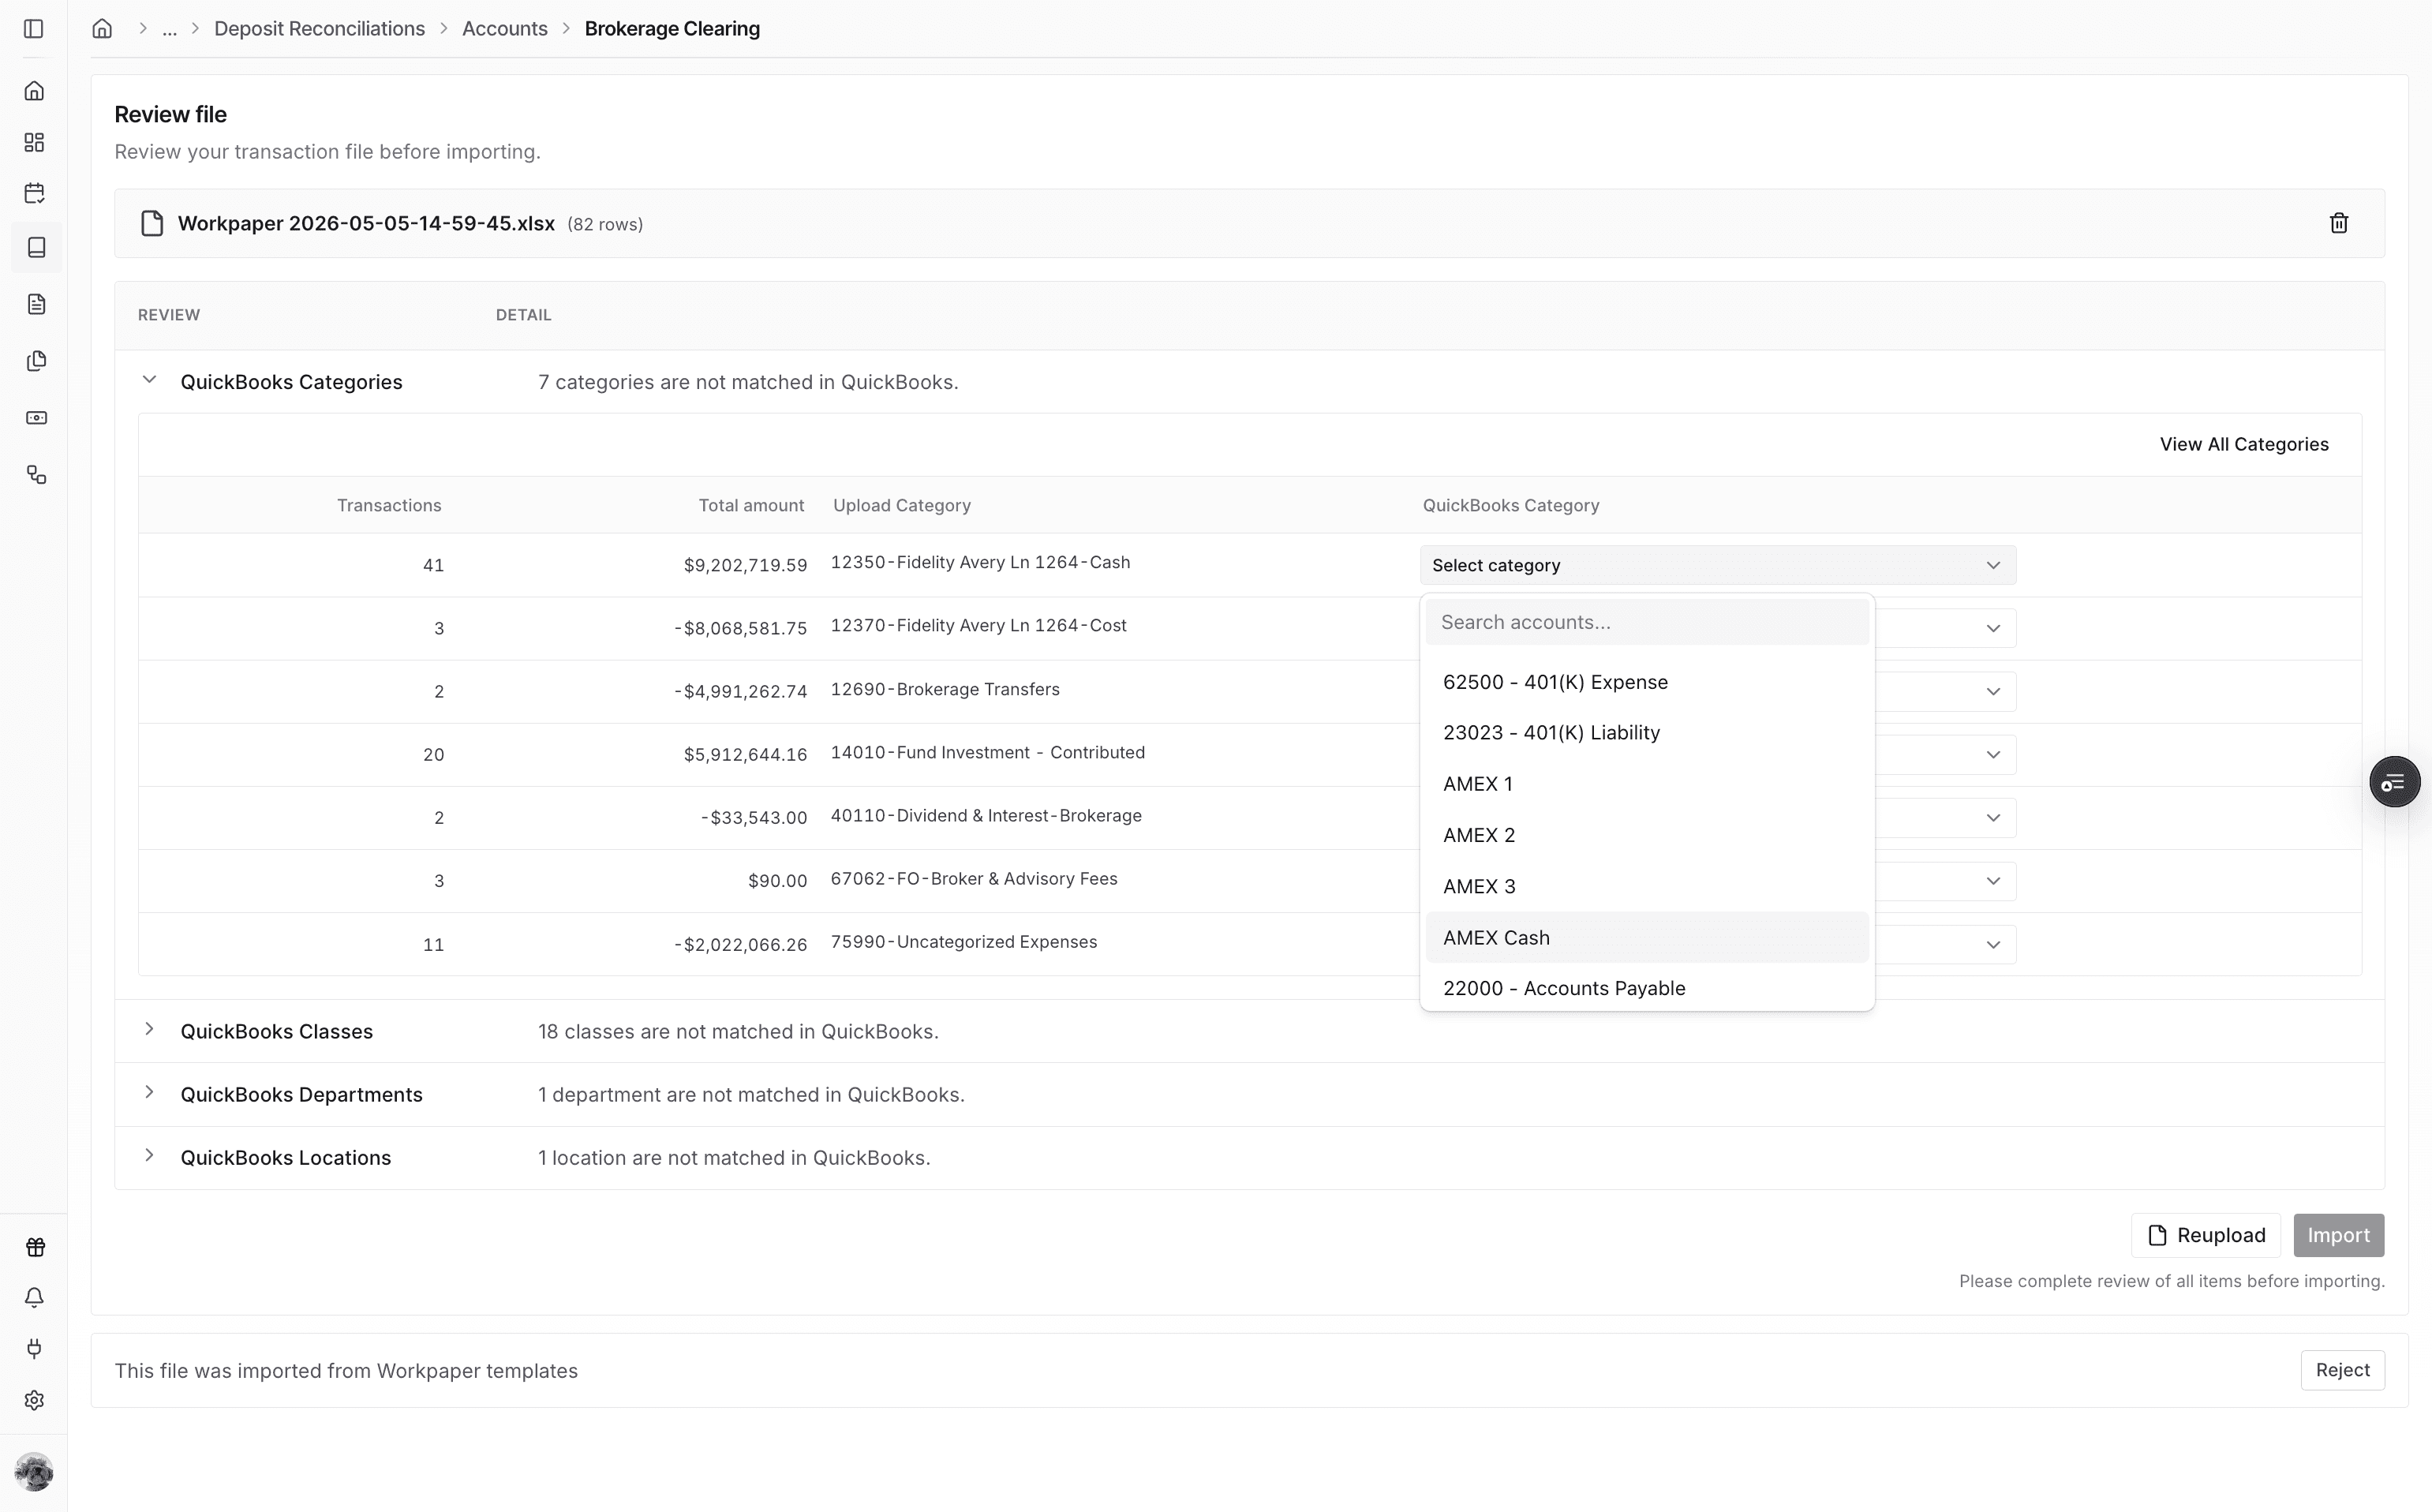
Step 14
Continue after the required mapping decisions are complete.

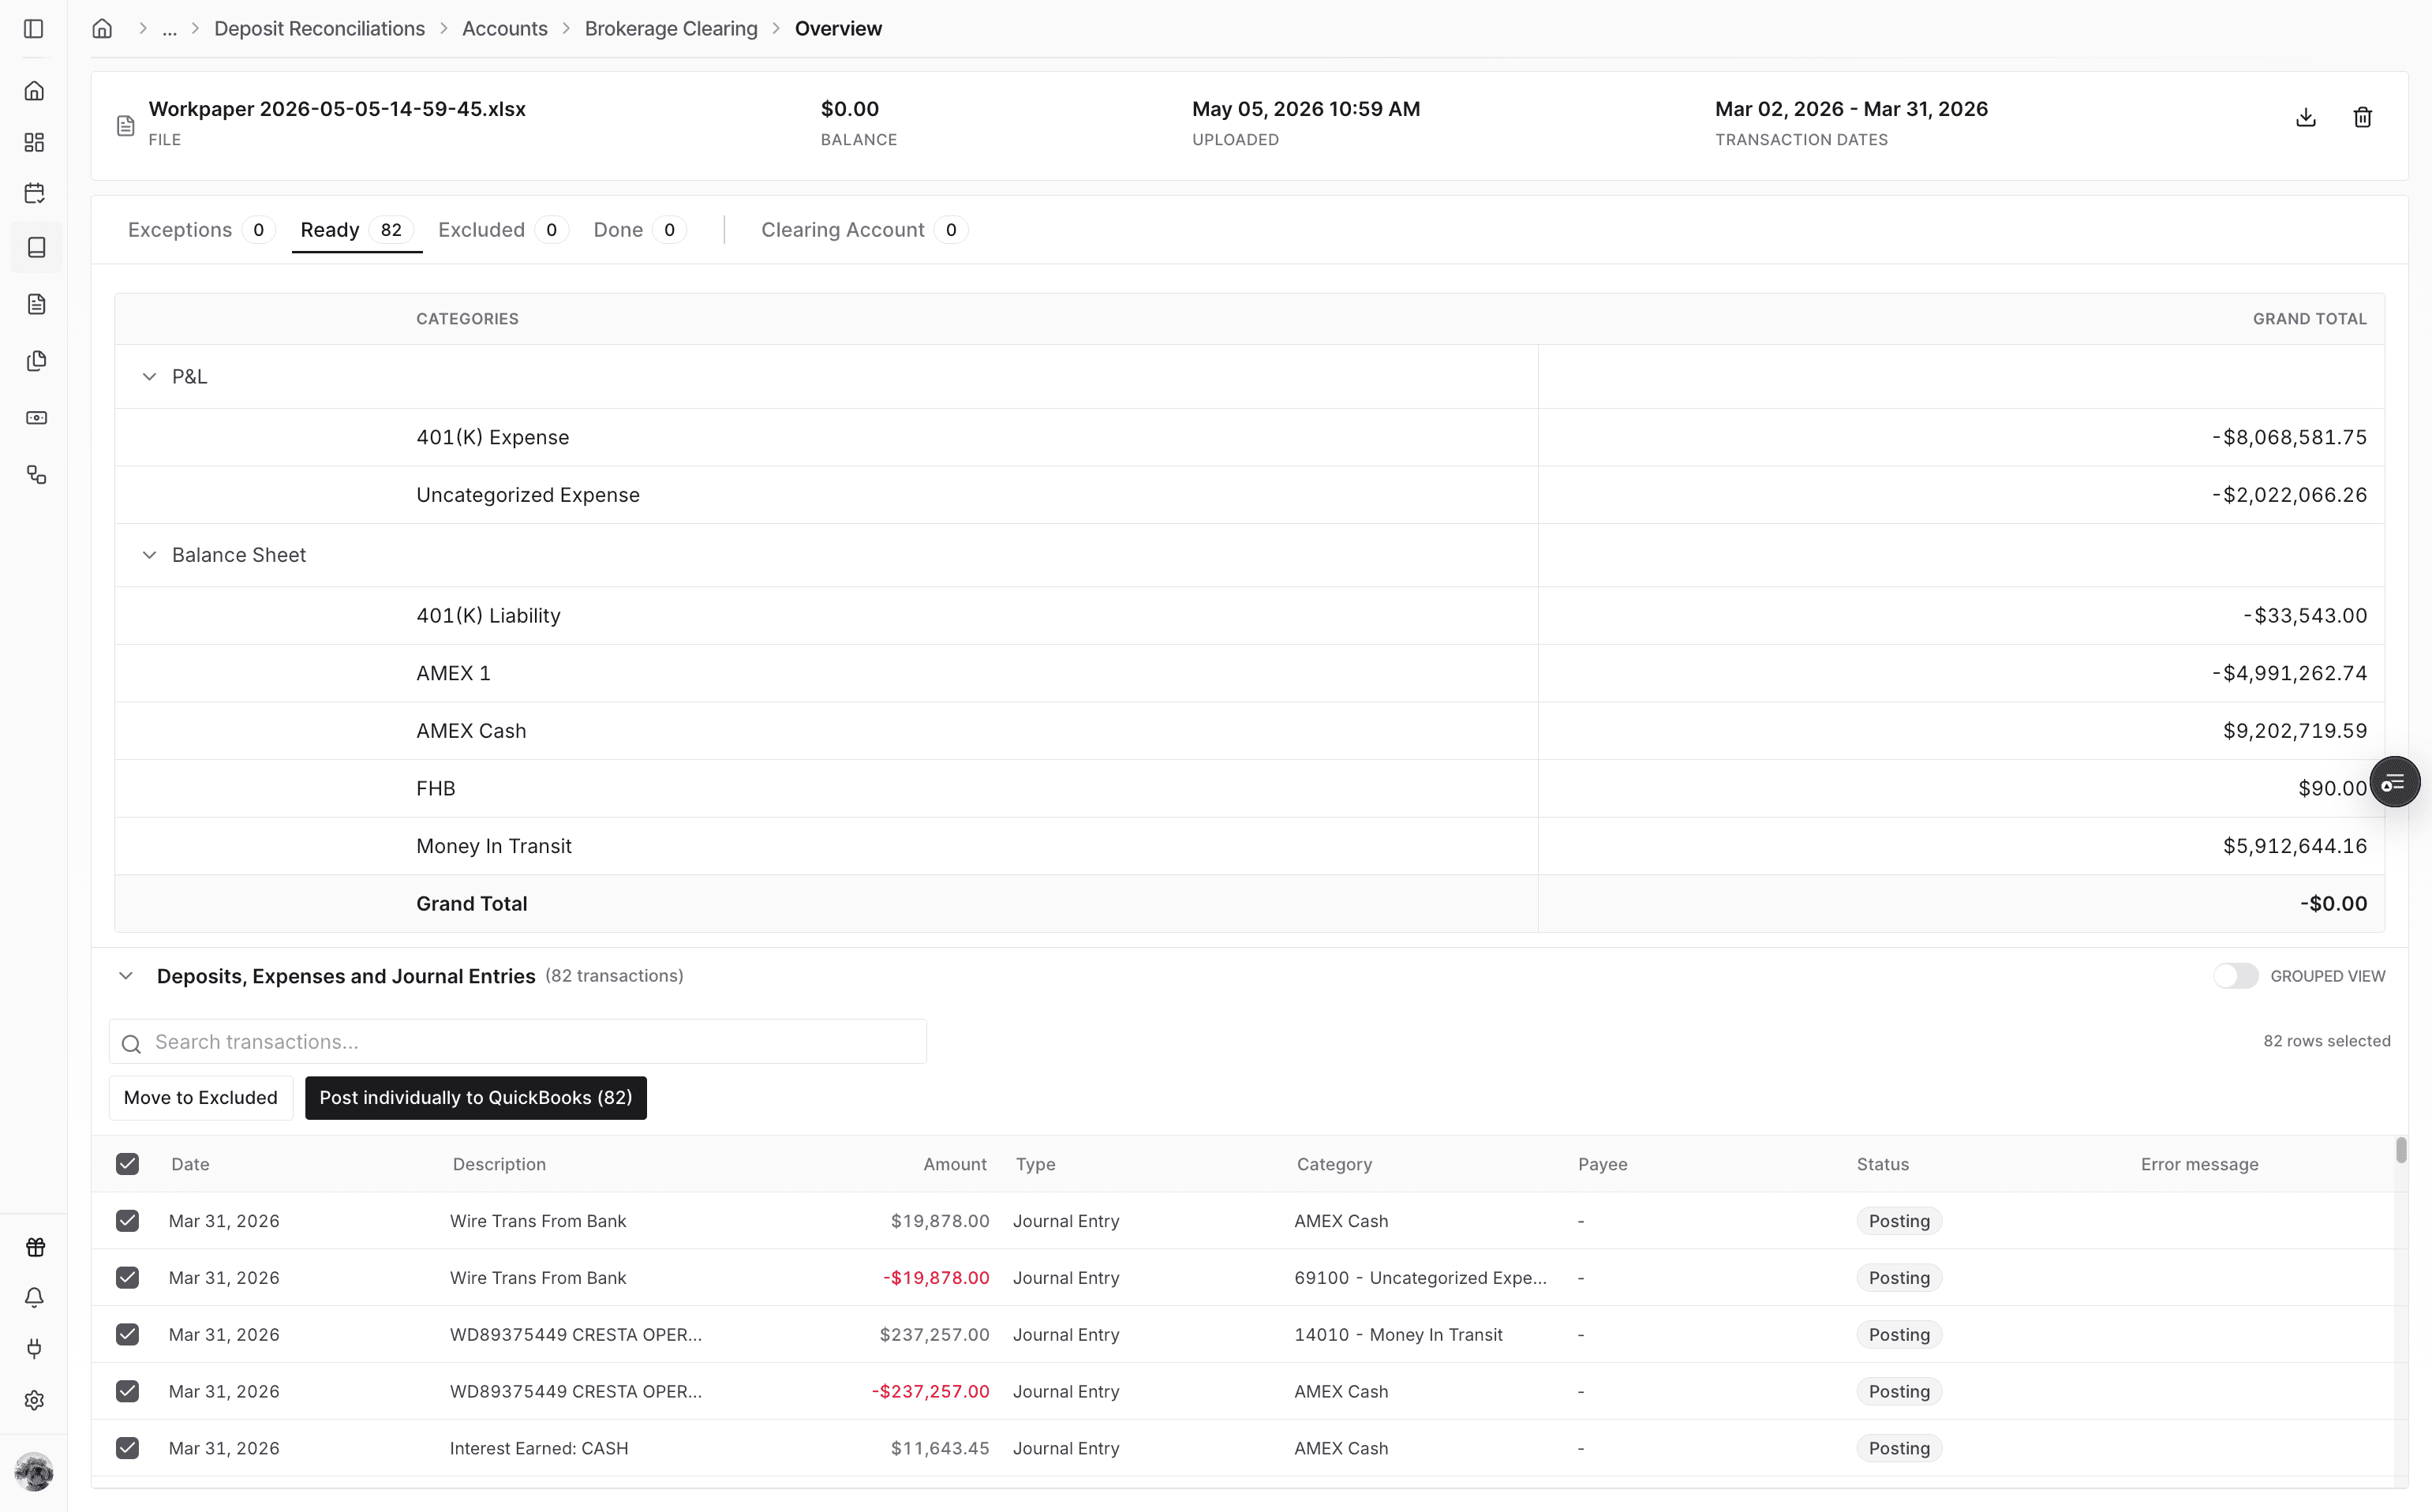
Step 15
Use the Ready tab to compare the imported P&L and balance sheet totals before posting.
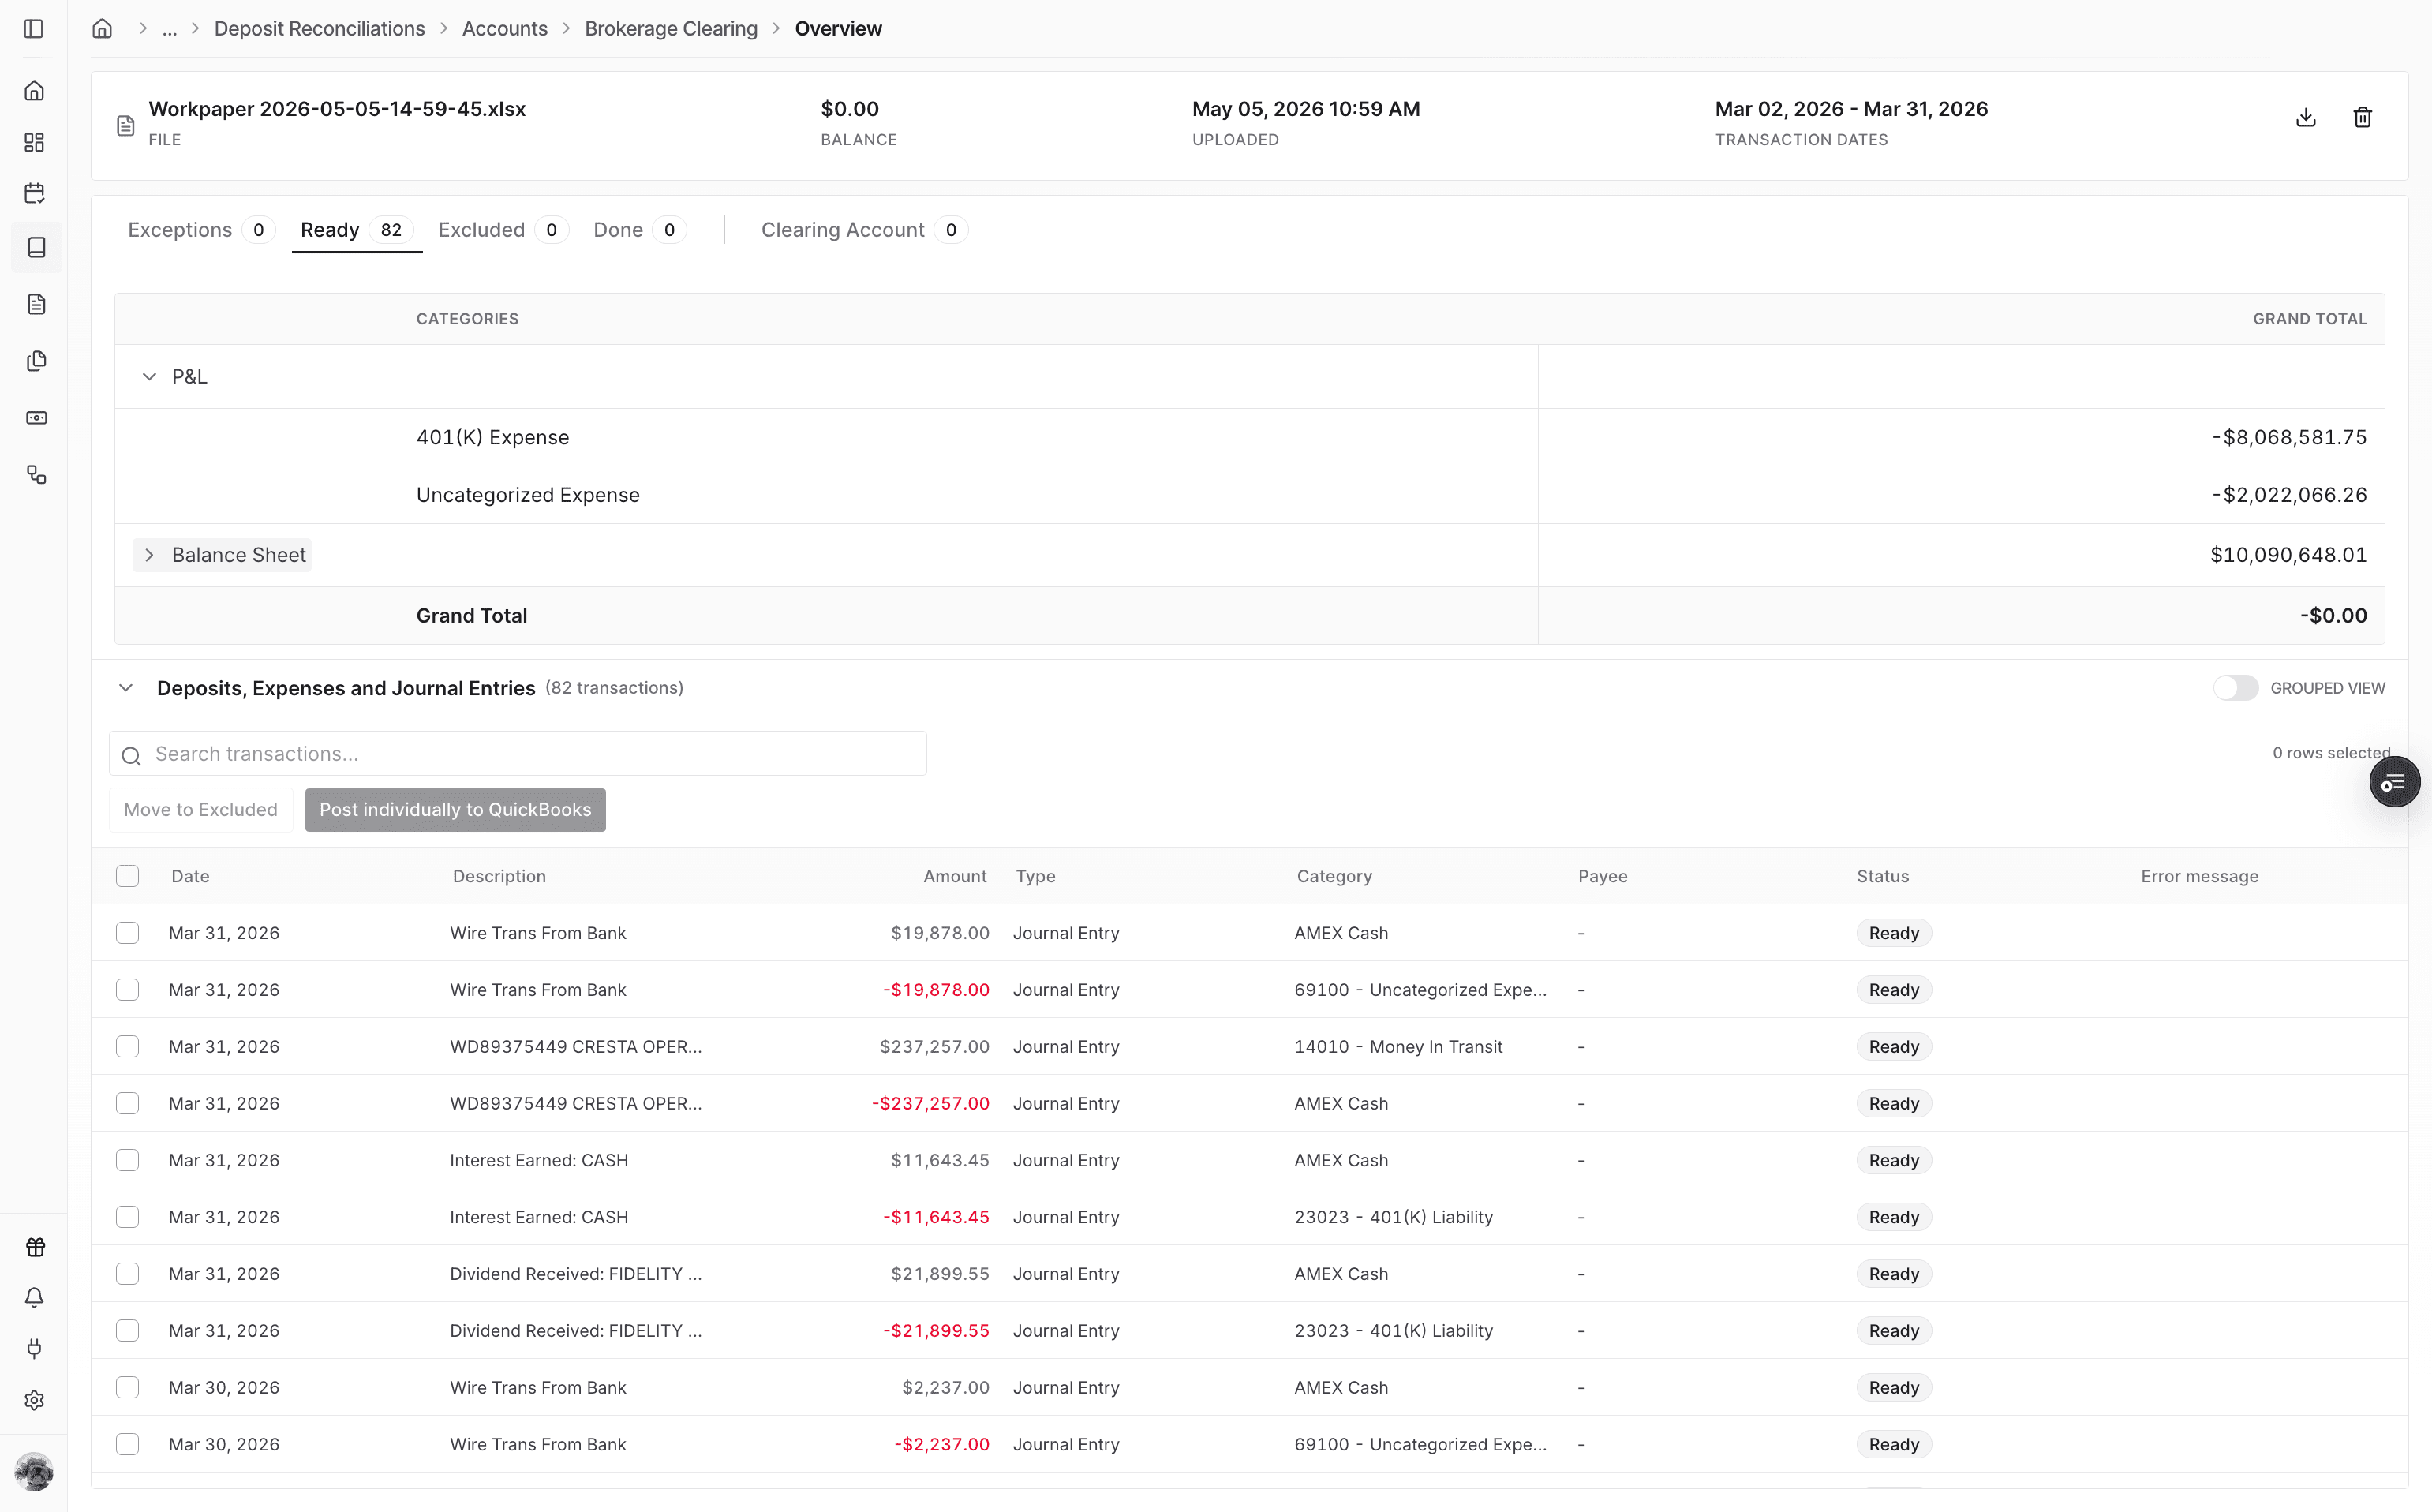
Step 16
Review the imported transactions and confirm they are ready for posting to the ERP.
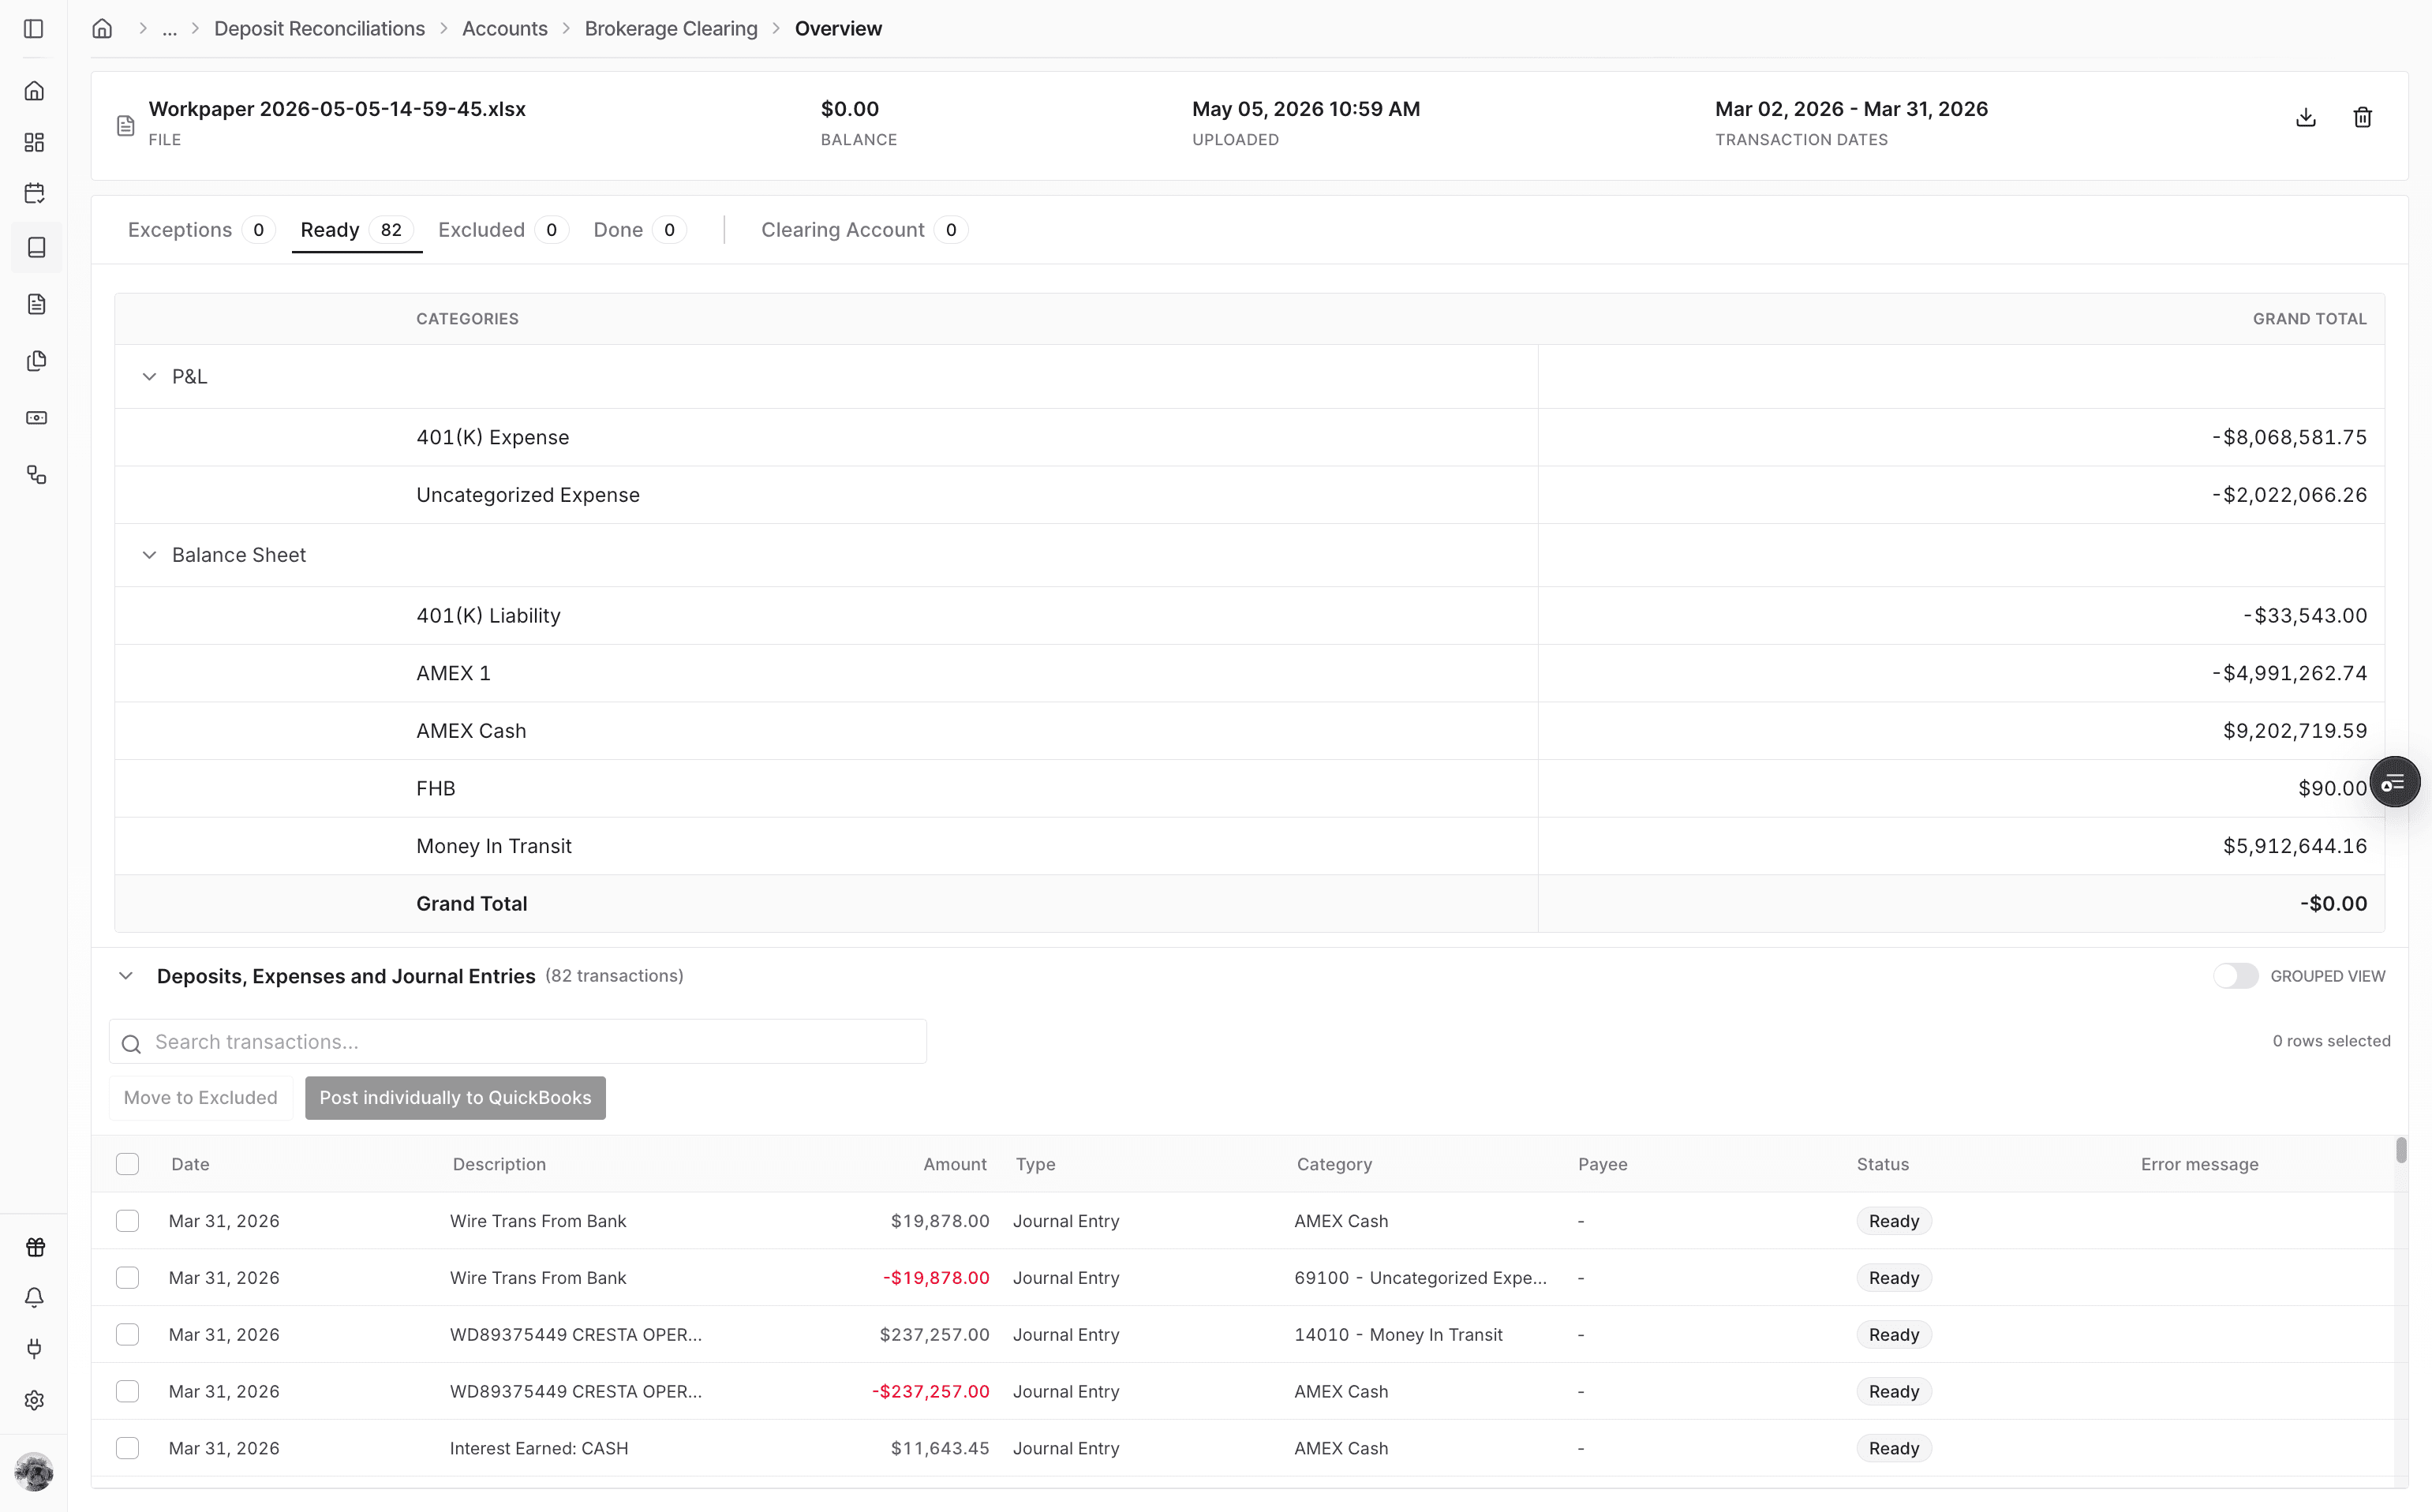
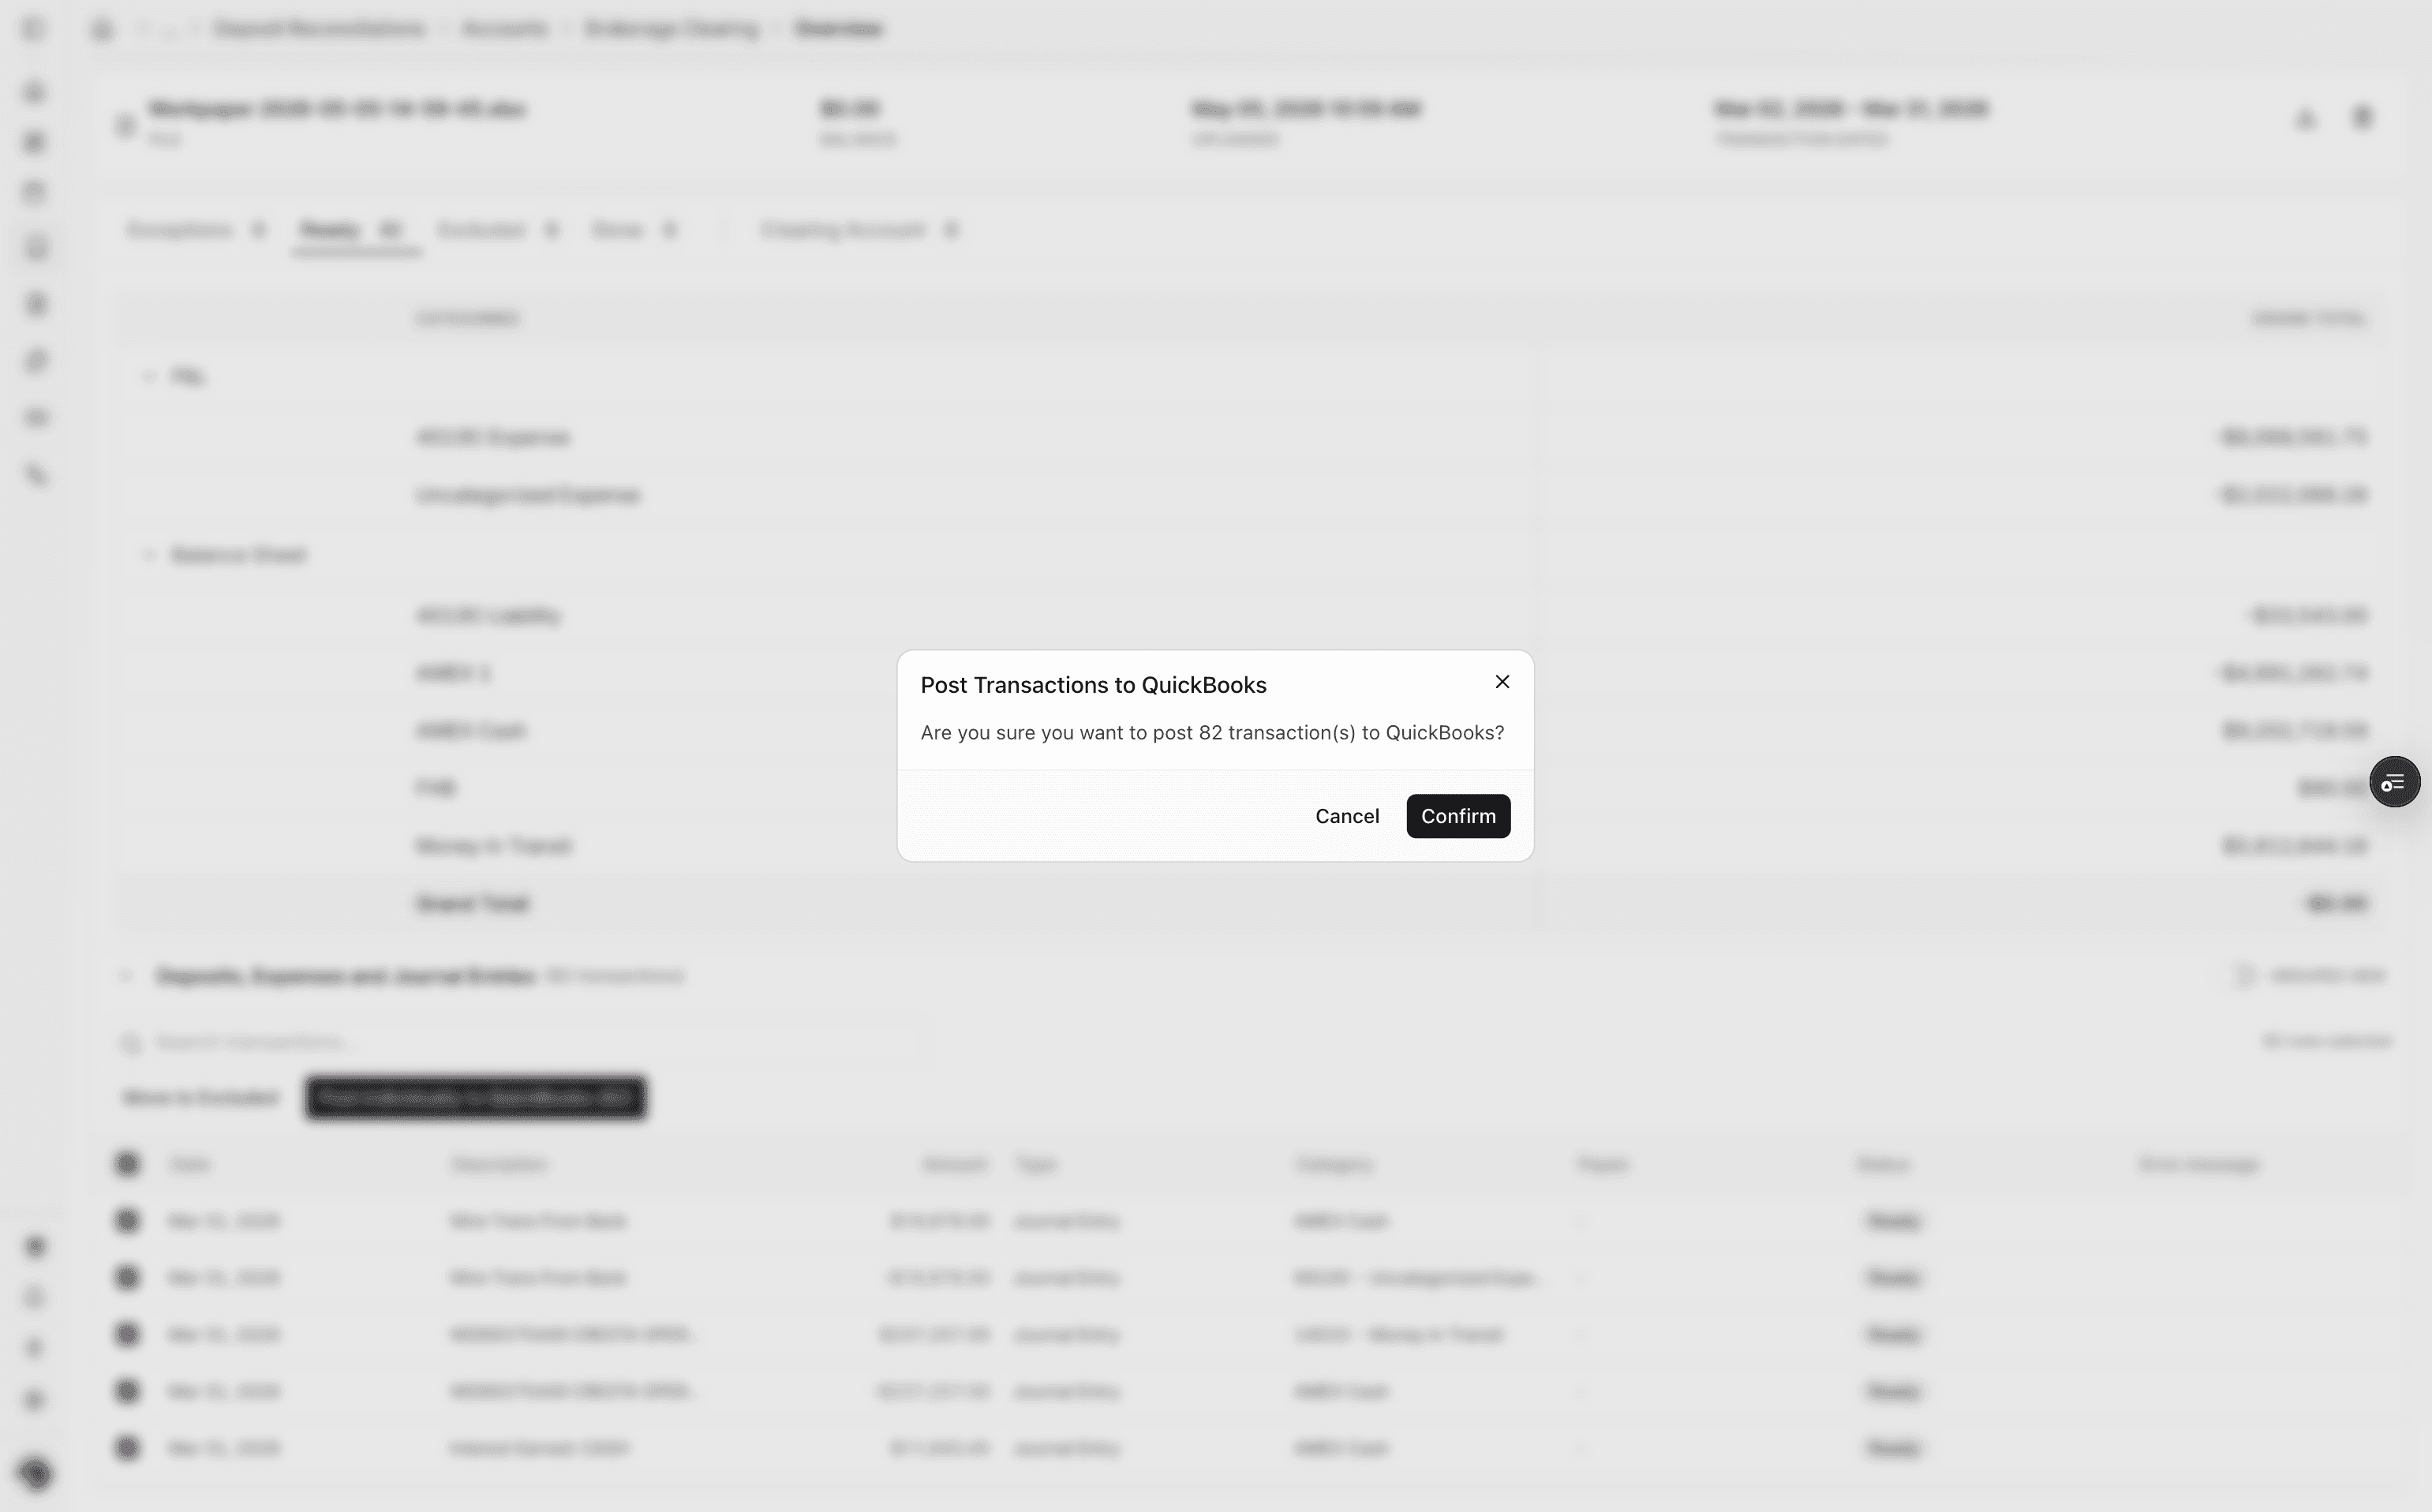
Step 17
Start posting the ready transactions to the connected ERP.
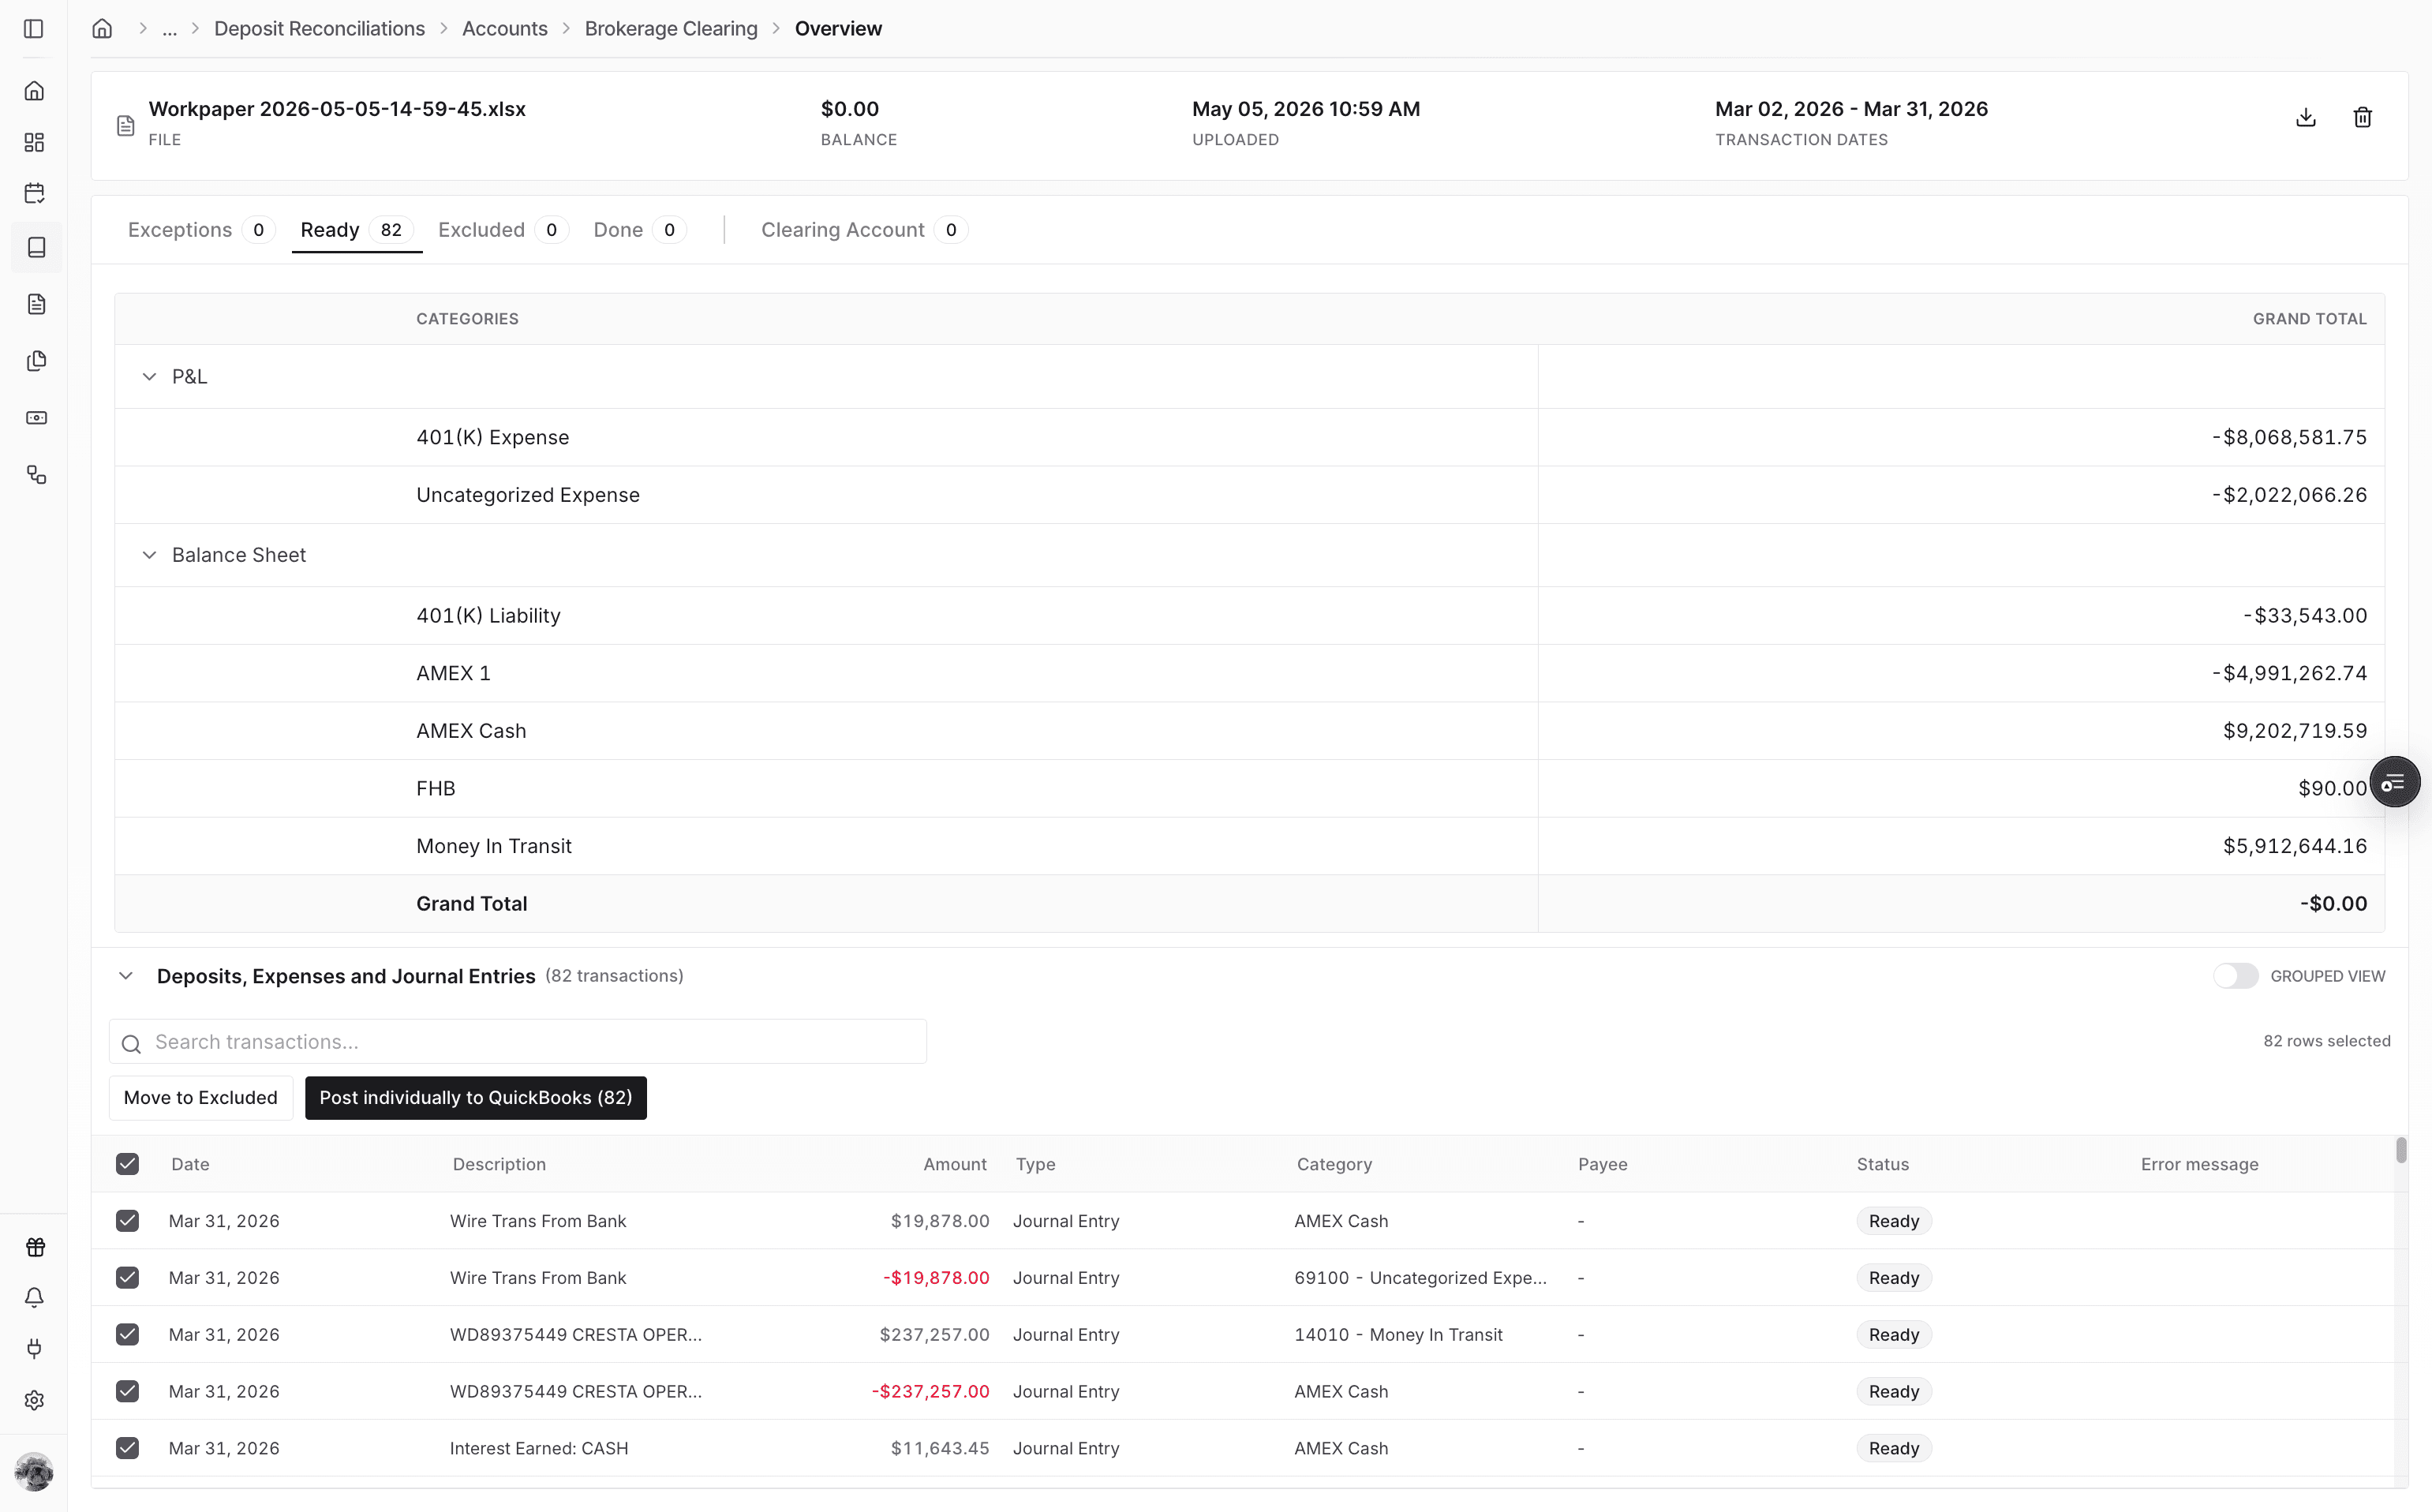
Step 18
Confirm the posting action after reviewing the transaction count and ERP destination.
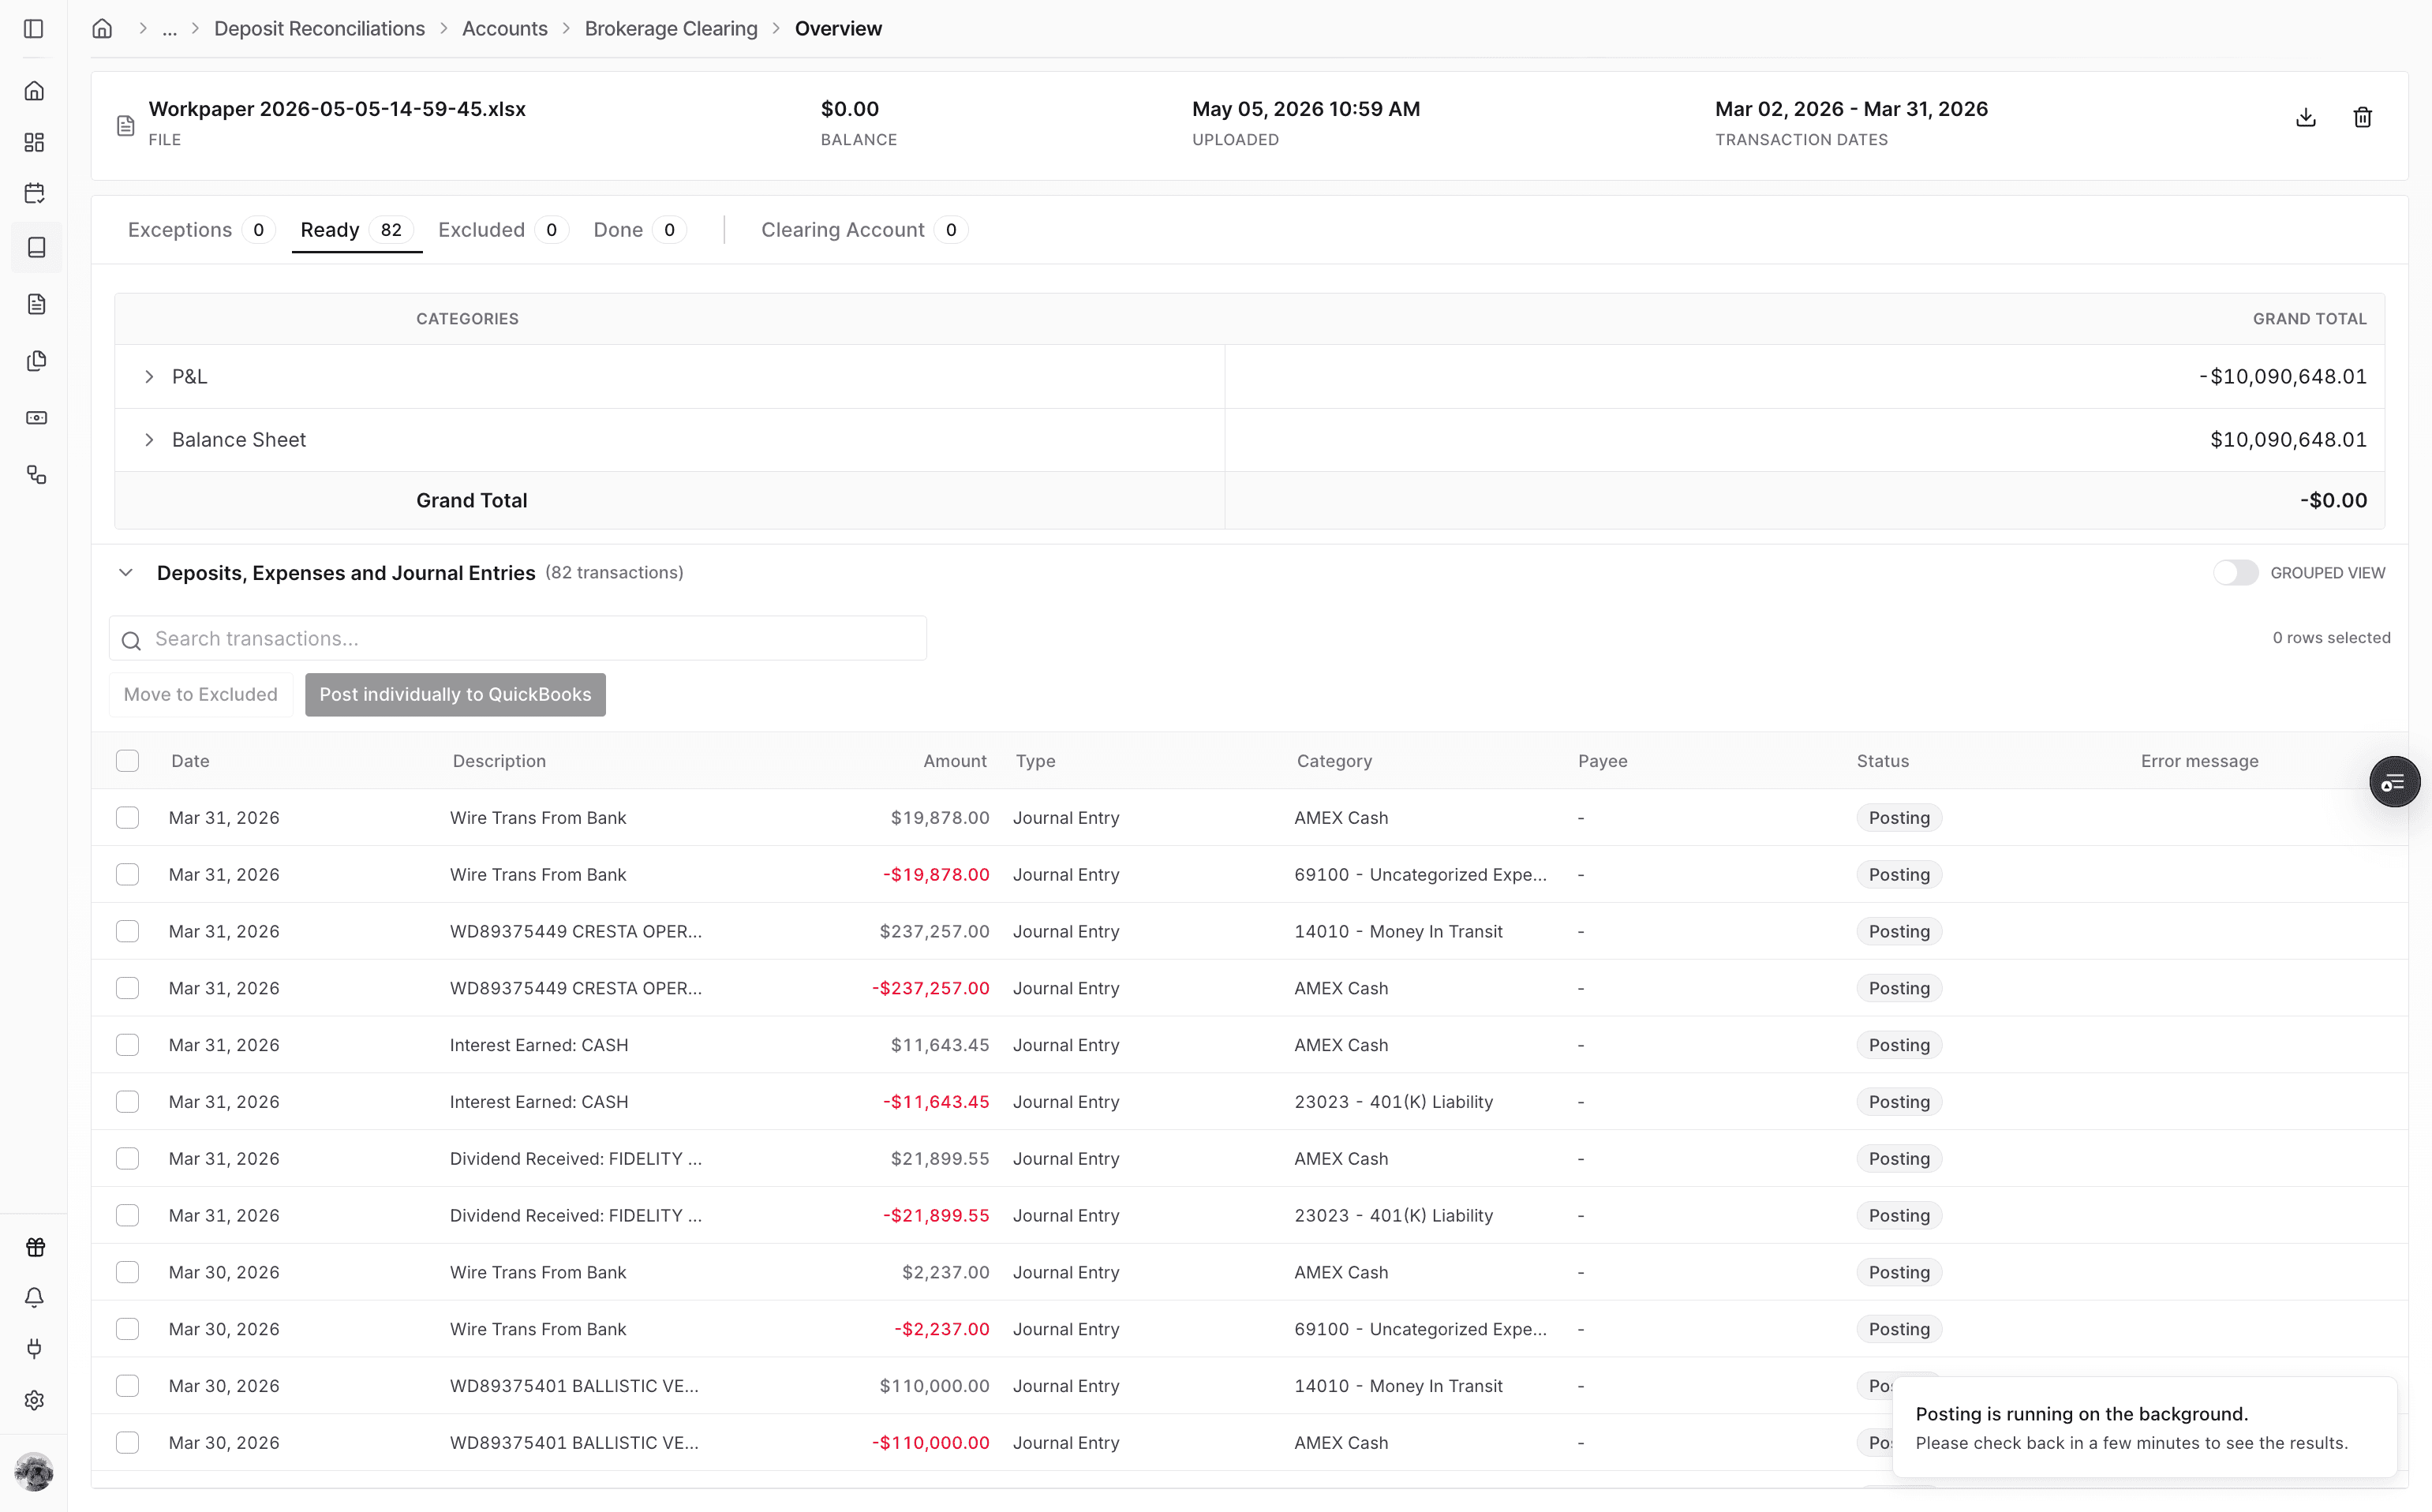
Step 19
Truewind moves the transactions into Posting status while the ERP submission runs.
Step 20
Posting continues in the background, so you can watch for the completion message before checking final results.
Step 21
Transactions move to Done after posting completes.
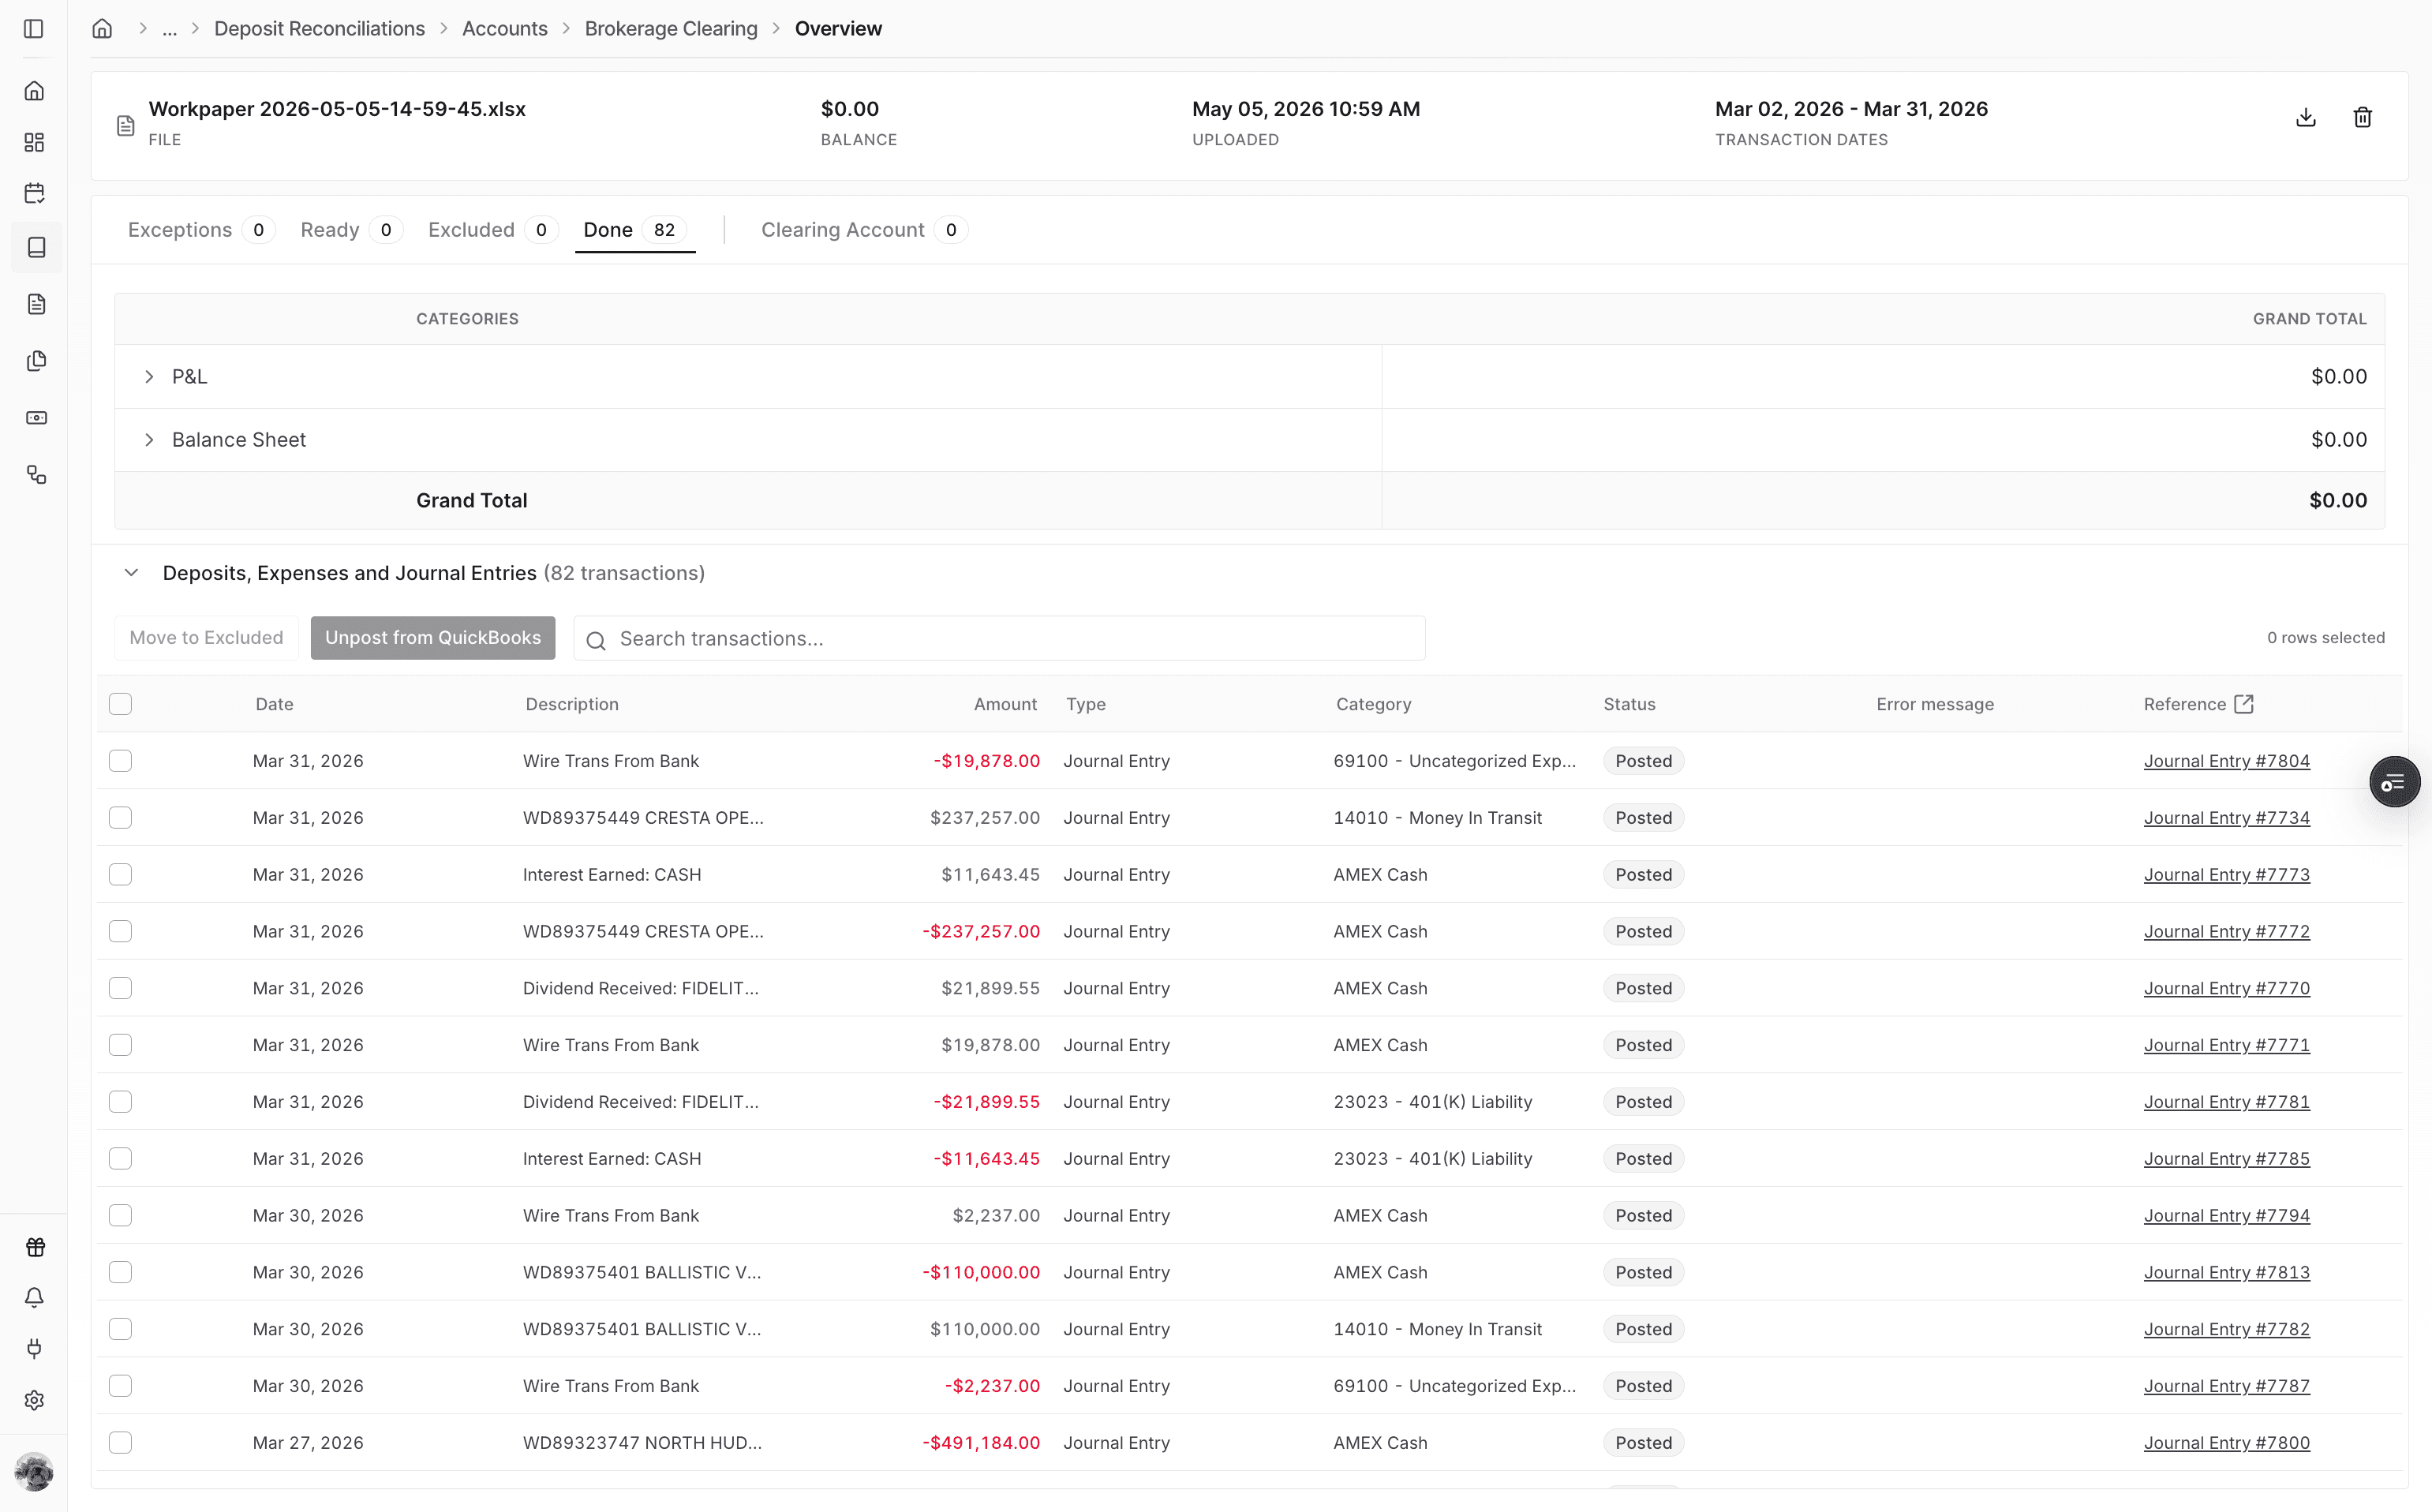
Step 22
Confirm Posted status. For QuickBooks, open the Journal Entry link; for Sage, use the Journal Entry reference number.

Create and map the clearing account in Deposit Reconciliation before importing the Workpaper Agent Journal Entry output.
Workpaper Agent checks for a TW_Staging tab. If the tab is missing, Truewind can create the standardized staging tab before import.
Truewind flags mappings it cannot match exactly in the ERP. Review and select the correct category, payee, or dimension before posting.
QuickBooks links can open the posted Journal Entry in the ERP. Sage users should confirm the Journal Entry reference number after posting.
Open each flagged mapping and choose the correct ERP value before running the final import.
Confirm whether the client is connected to QuickBooks or Sage, then check the ERP posting status or Journal Entry reference for that system.
Was this helpful?
Need more help?
Ask for human help about this article and provide any feedback.