Before you add a document
Make sure the selected transaction is the one that actually needs documentation, especially when several similar transactions are waiting in the same queue.
Ask the support agent
Just ask a direct question or search related articles from the Knowledge Base.
Support Center / Bank Transactions / Features
Attach supporting documents to bank transactions when the row needs documentation, resulting in the document linked to the correct transaction.
Step 1
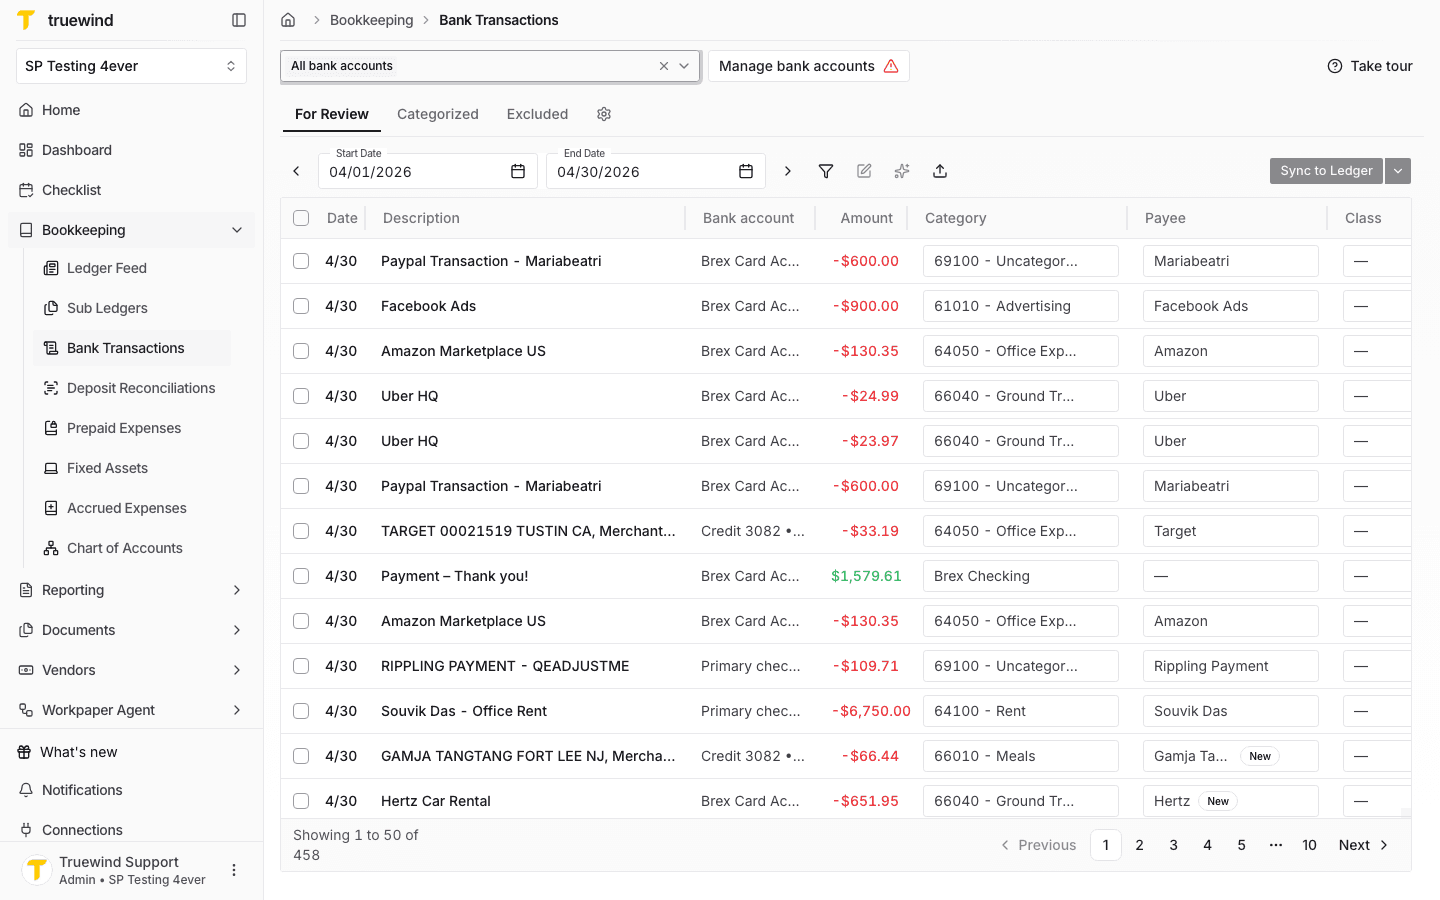
Start in Bookkeeping > Bank Transactions and select the bank accounts you want to review so transaction rows are visible.
Step 2
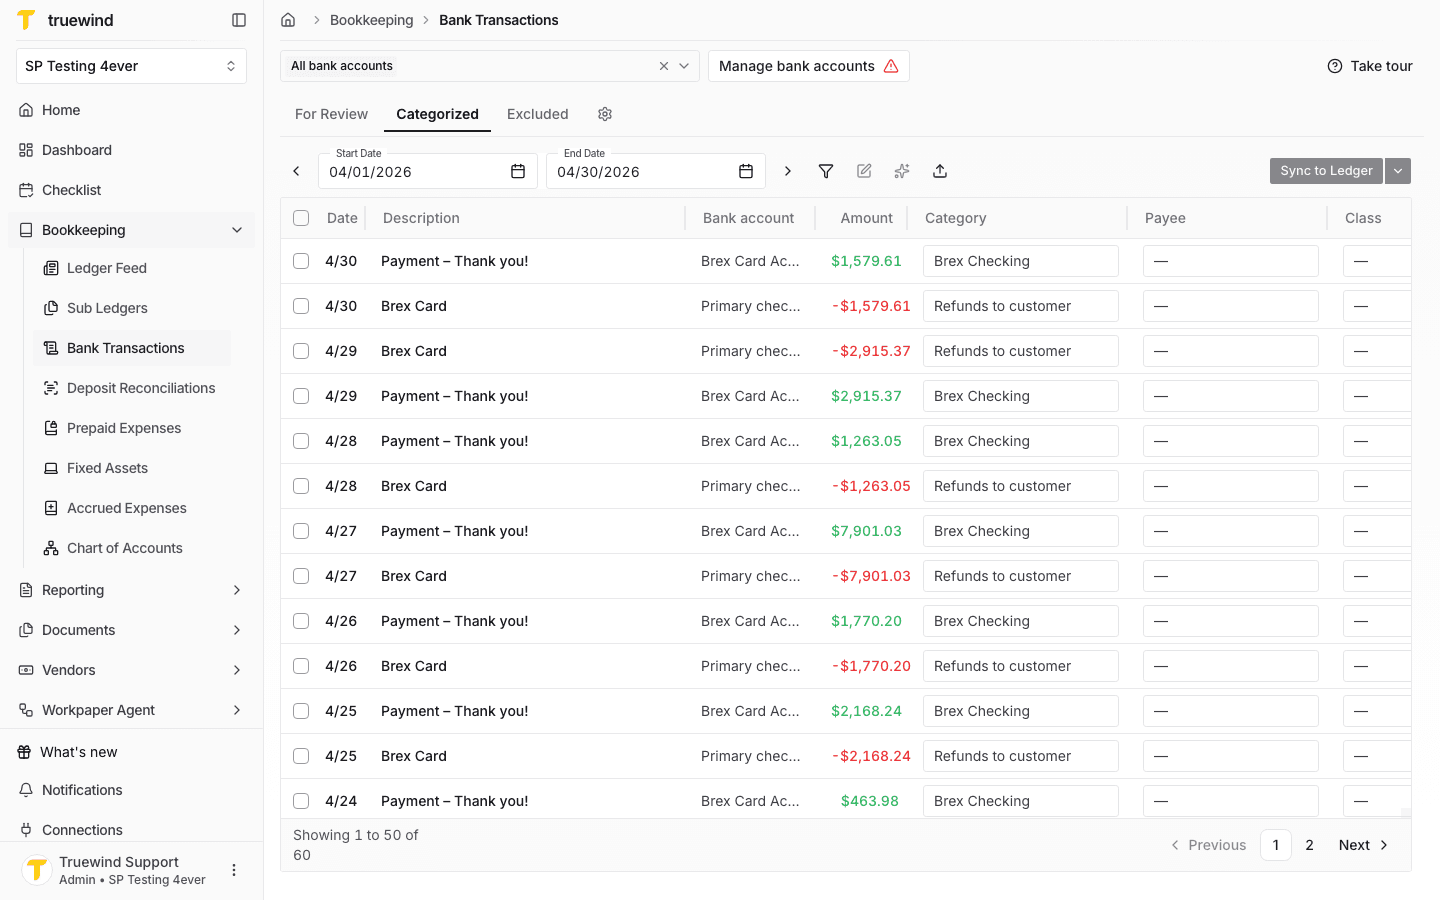
Use the Categorized tab to find a synced or matched transaction that needs supporting documentation.
Step 3
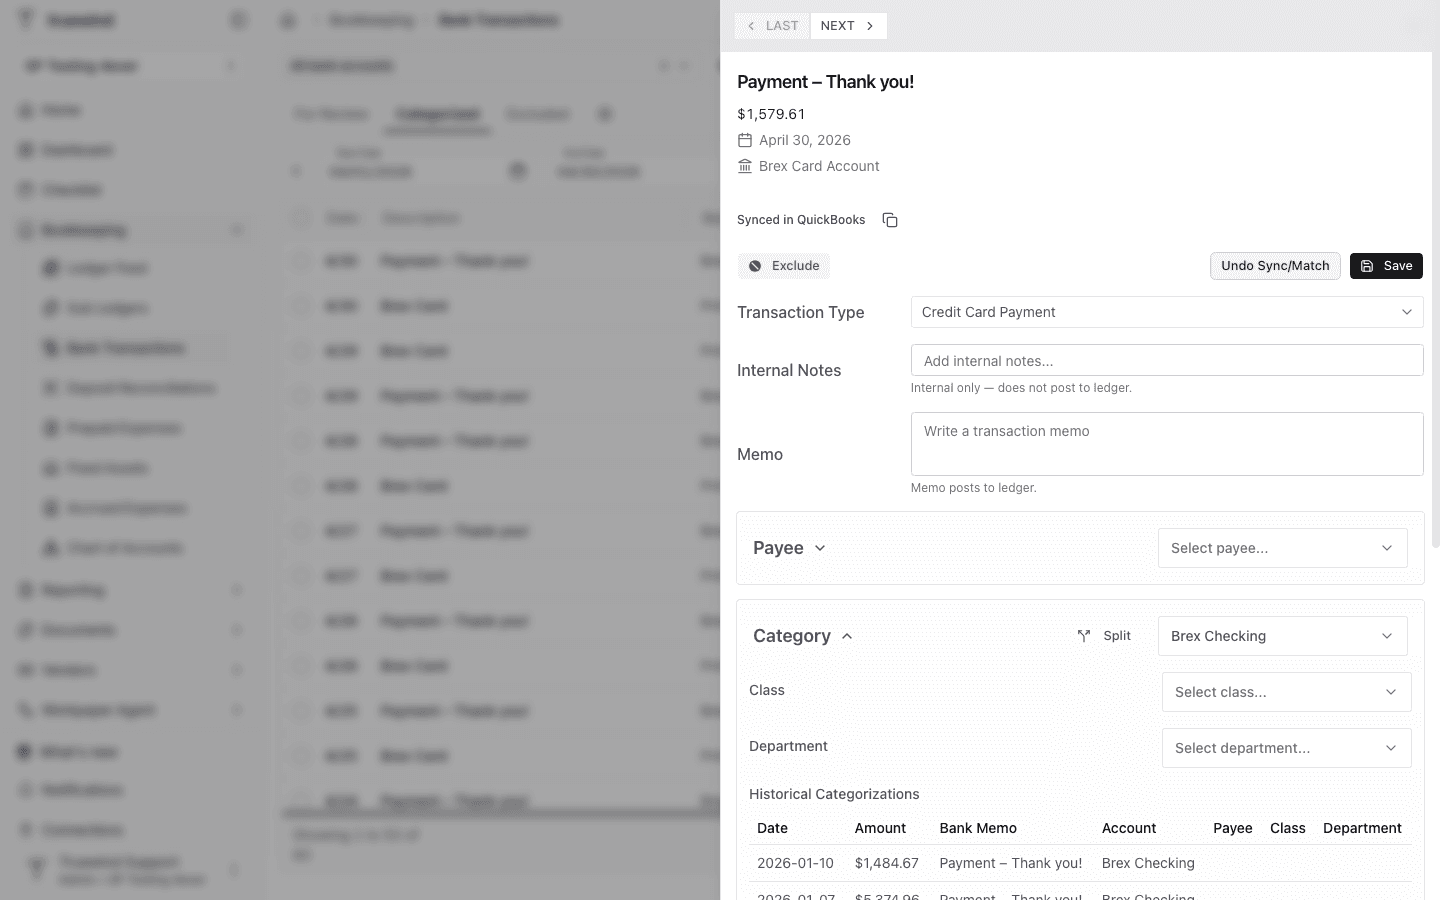
Select the row you want to document so the transaction detail panel opens on the right.
Step 4
Scroll to Documents and click Add to link a receipt, invoice, or other supporting file to the transaction.
Step 5
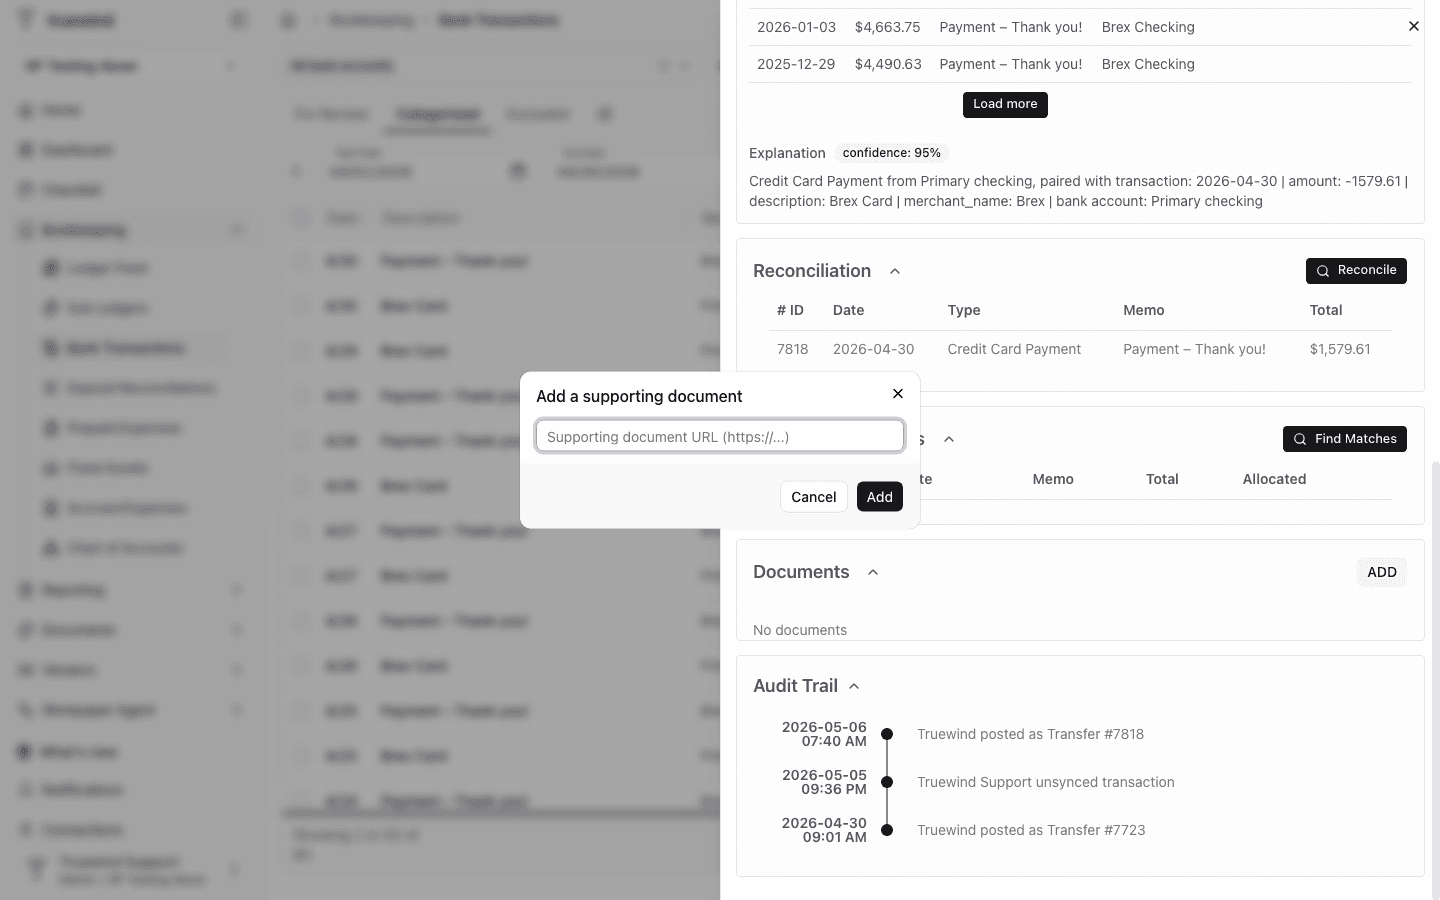
Paste an HTTPS link to the supporting document, then click Add so it is available from the transaction detail.

Make sure the selected transaction is the one that actually needs documentation, especially when several similar transactions are waiting in the same queue.
The Add action appears on synced or matched transaction details where Truewind can attach a supporting document link.
Open a synced or matched transaction from Categorized and confirm the transaction has a saved accounting outcome before adding documentation.
Was this helpful?
Need more help?
Ask for human help about this article and provide any feedback.