Why mapping matters
Unmapped bank accounts can block the Bank Transactions table from loading the accounts you selected for review.
Ask the support agent
Just ask a direct question or search related articles from the Knowledge Base.
Support Center / Bank Transactions / Bank Connections
Map connected bank accounts to ledger accounts when Bank Transactions cannot proceed without account mapping, resulting in accounts that load correctly for review and reconciliation.
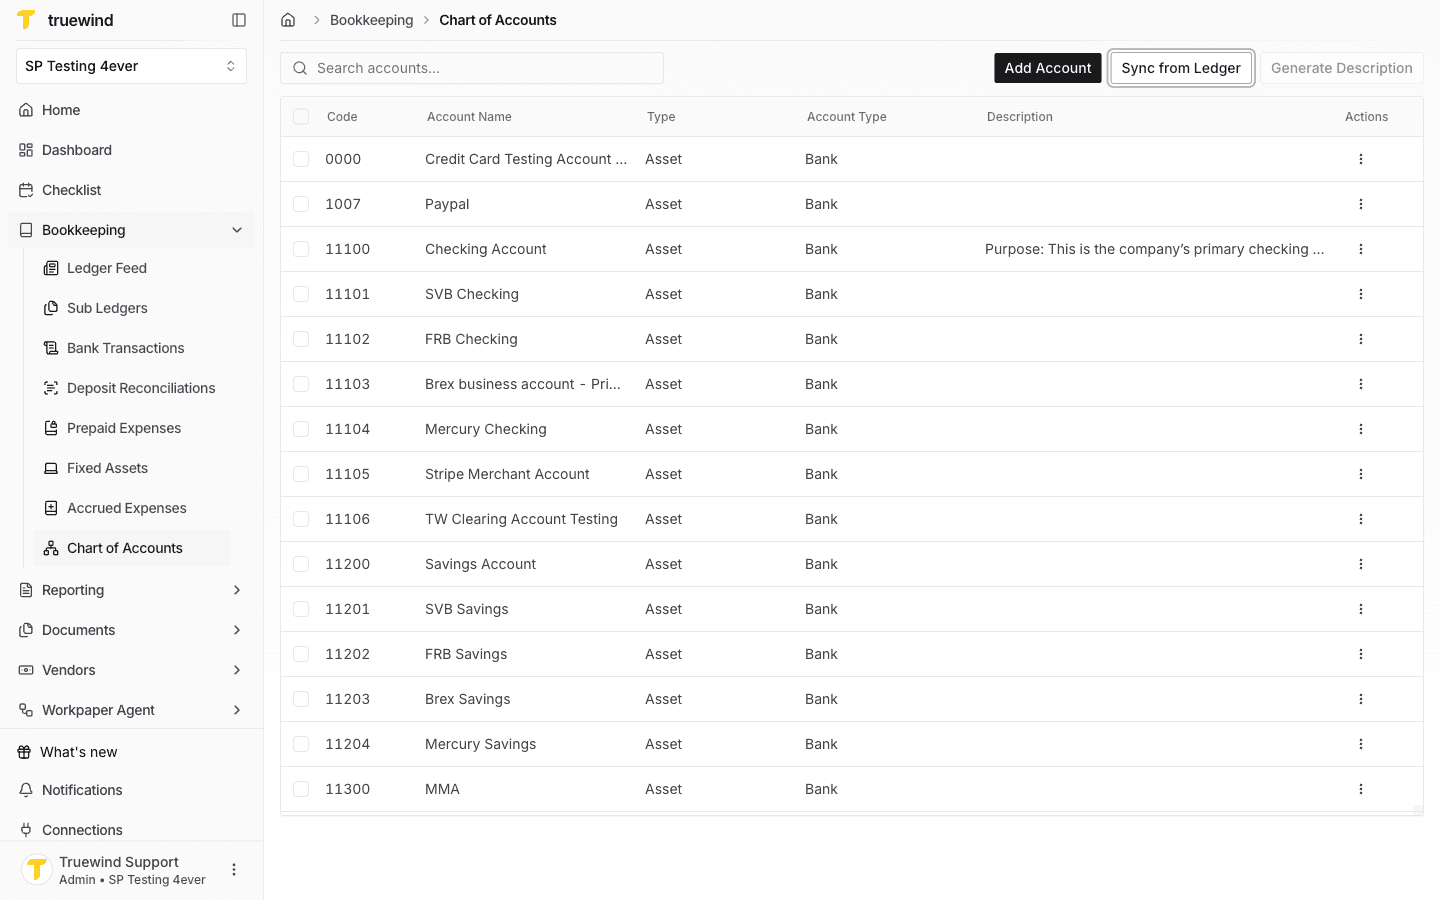
Step 1
This opens the Chart of Accounts page with all currently recognized accounts.

Step 2
Truewind automatically sync the list of Chart of Accounts to Truewind. If you have made any recent changes like deleting/adding an account on your ERP or it's the new onboarded account, Truewind may take some time to sync Chart of Accounts here. Alternatively, you can manually refresh the list by clicking on Sync From Ledger button to update Chart of Accounts.
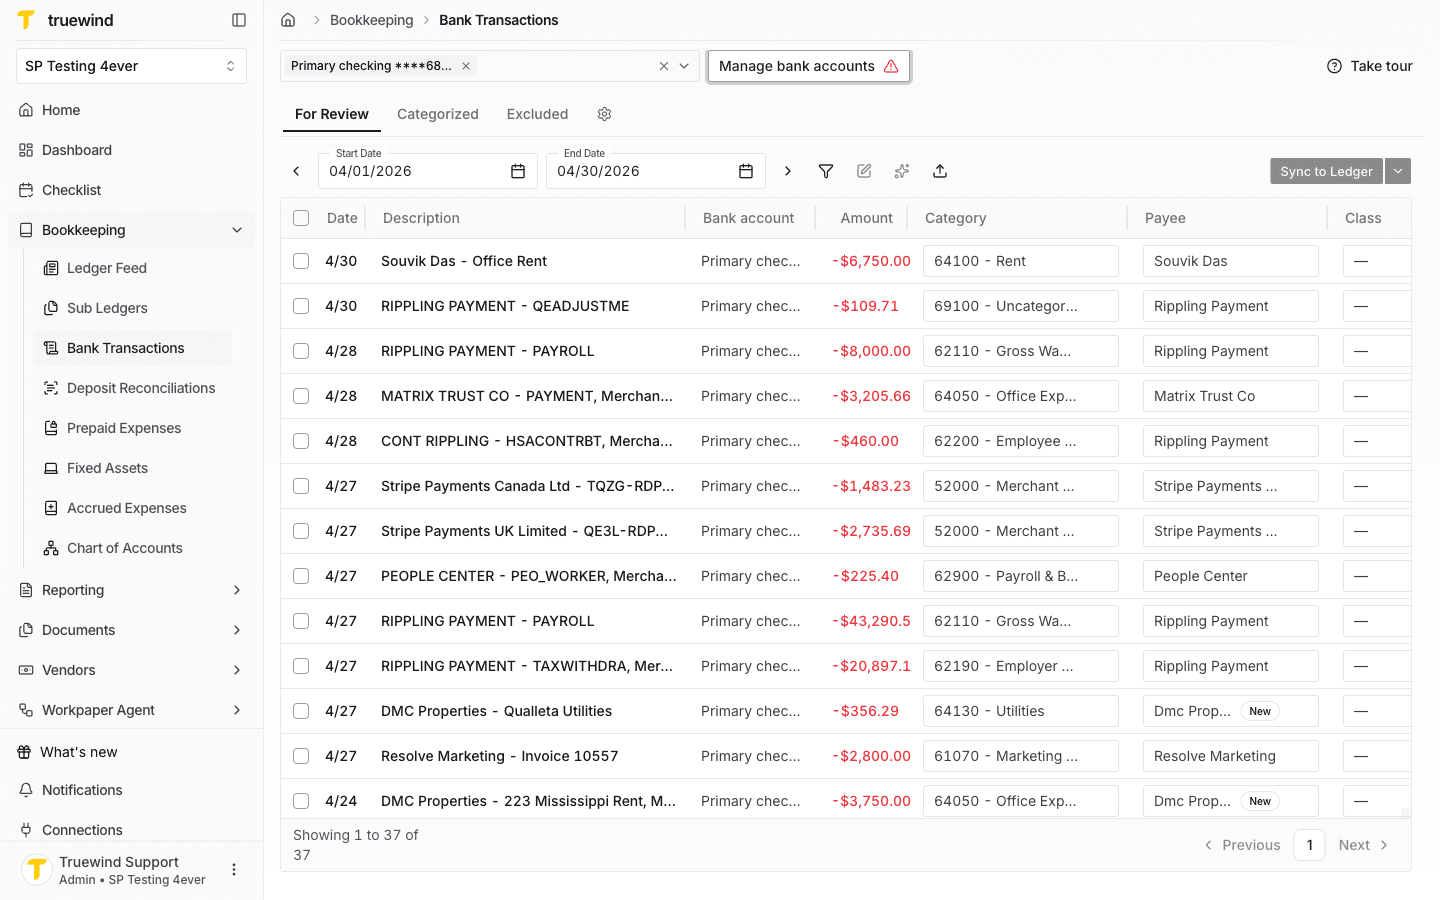
Step 3
Open the Bank Transactions page and click on the Manage bank accounts button to go to the Bank Accounts page.
Step 4
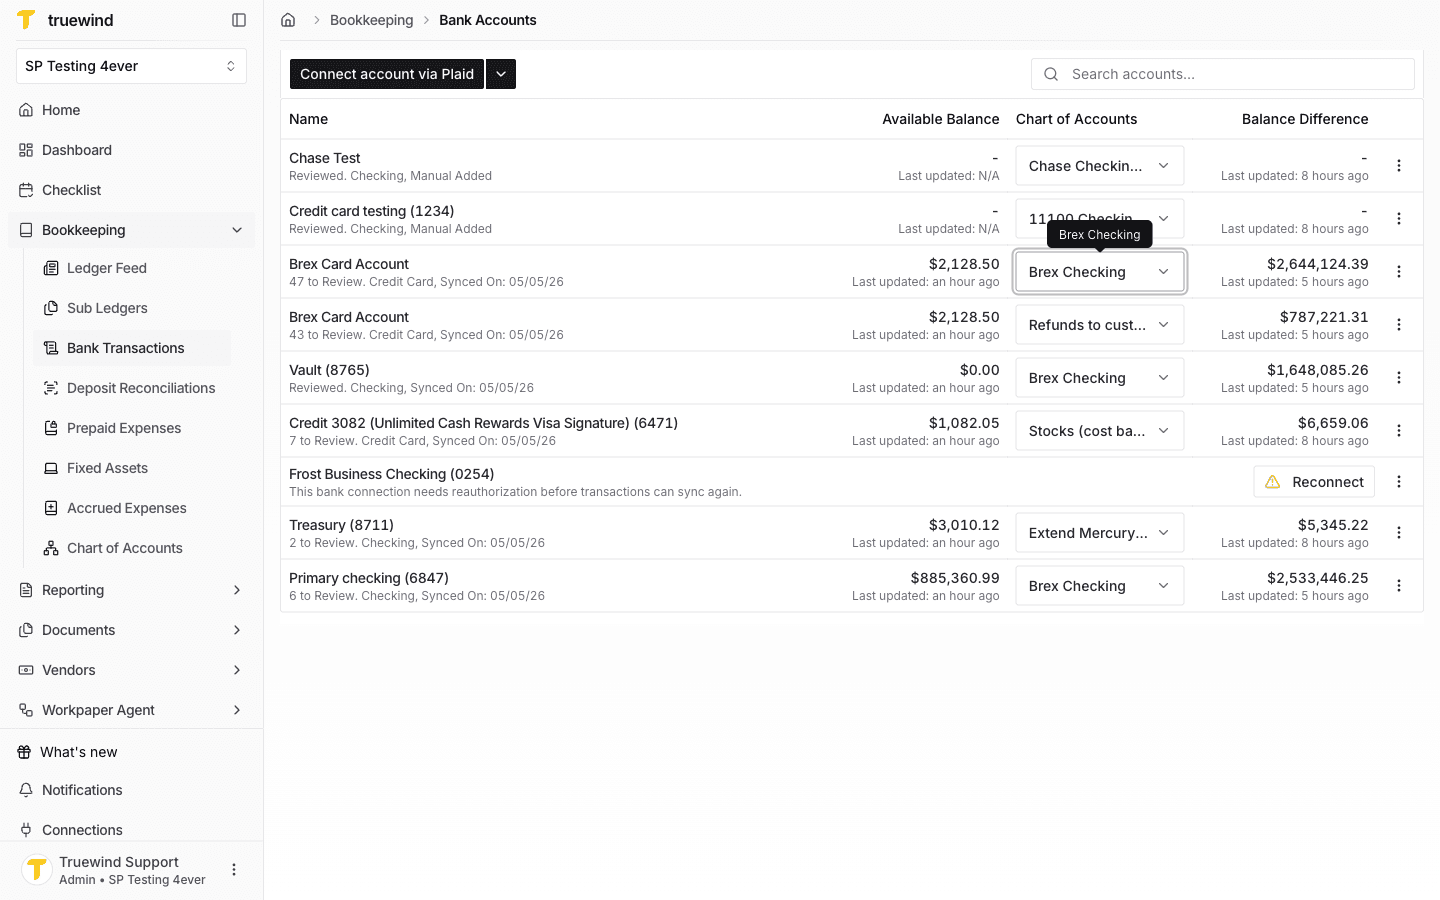
Verify your bank accounts and their mapping to ERP accounts from Chart of Accounts.
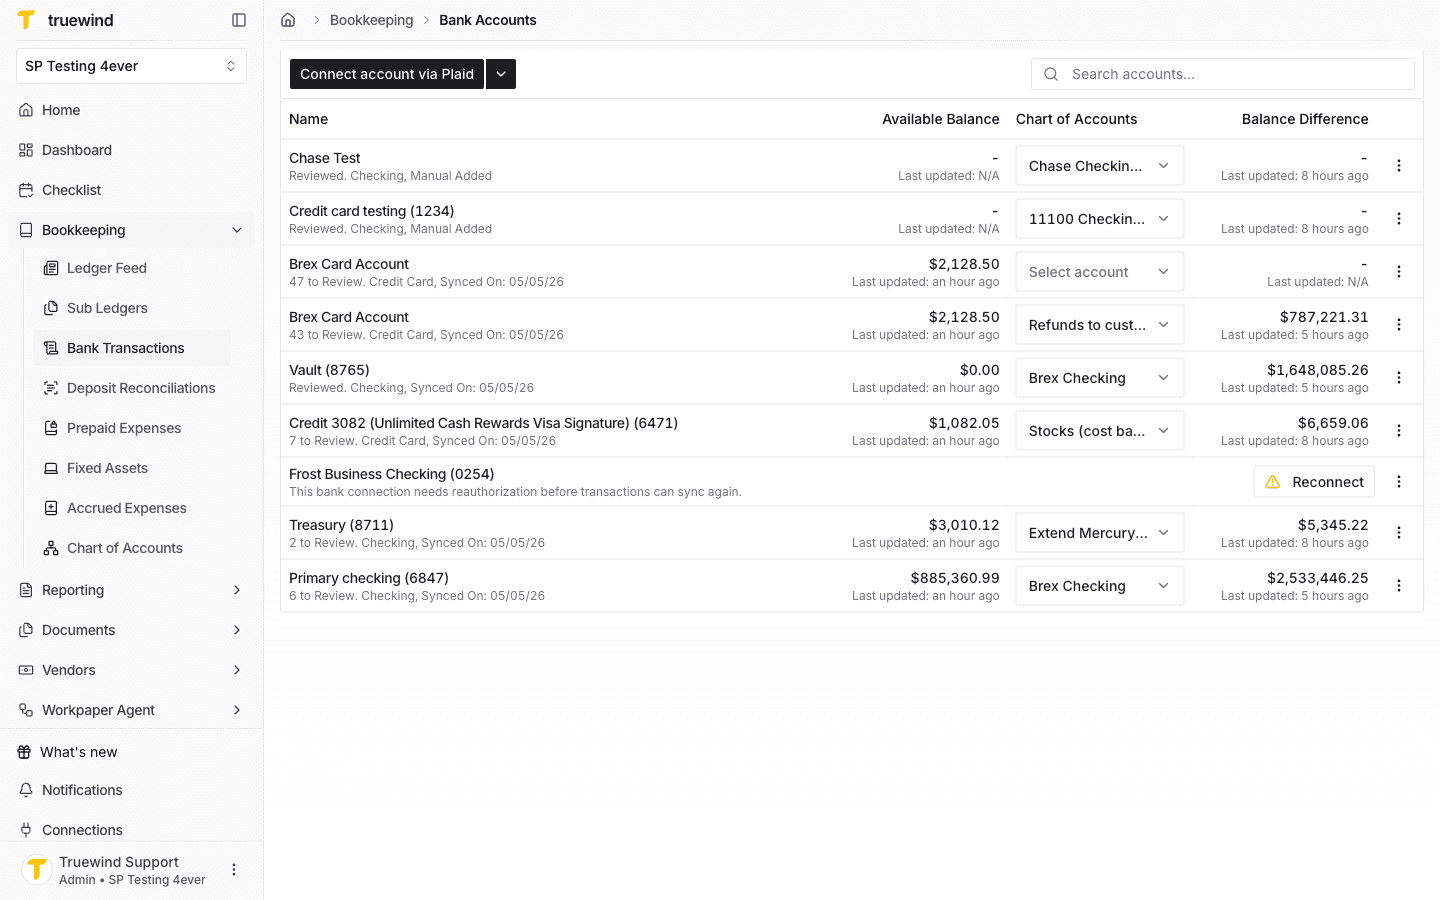
Step 5
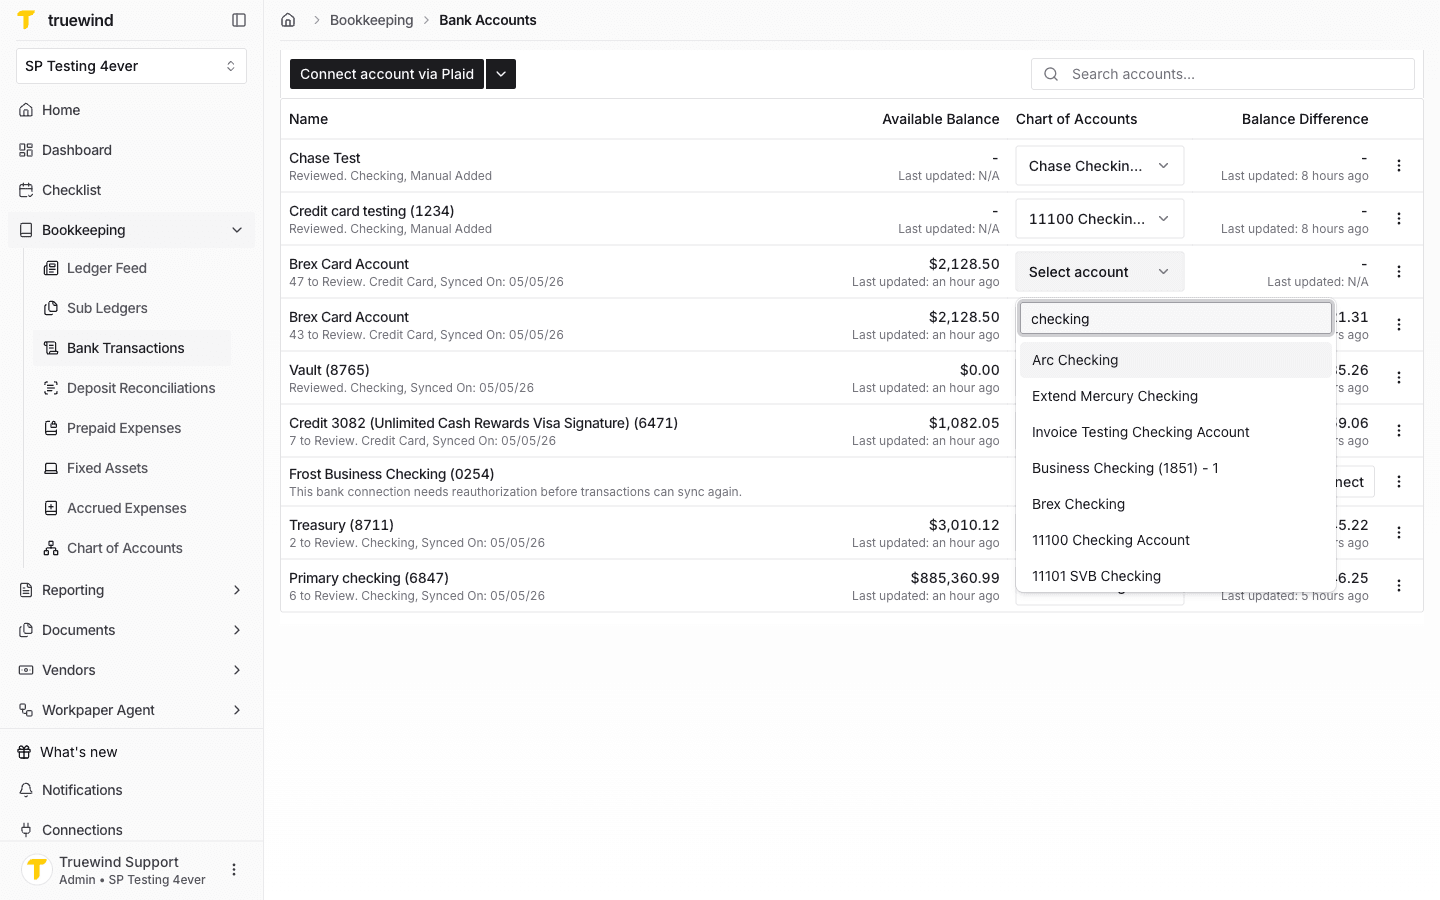
In order to update the bank account mapping, click on the Chart of Accounts dropdown for your desired bank account row.
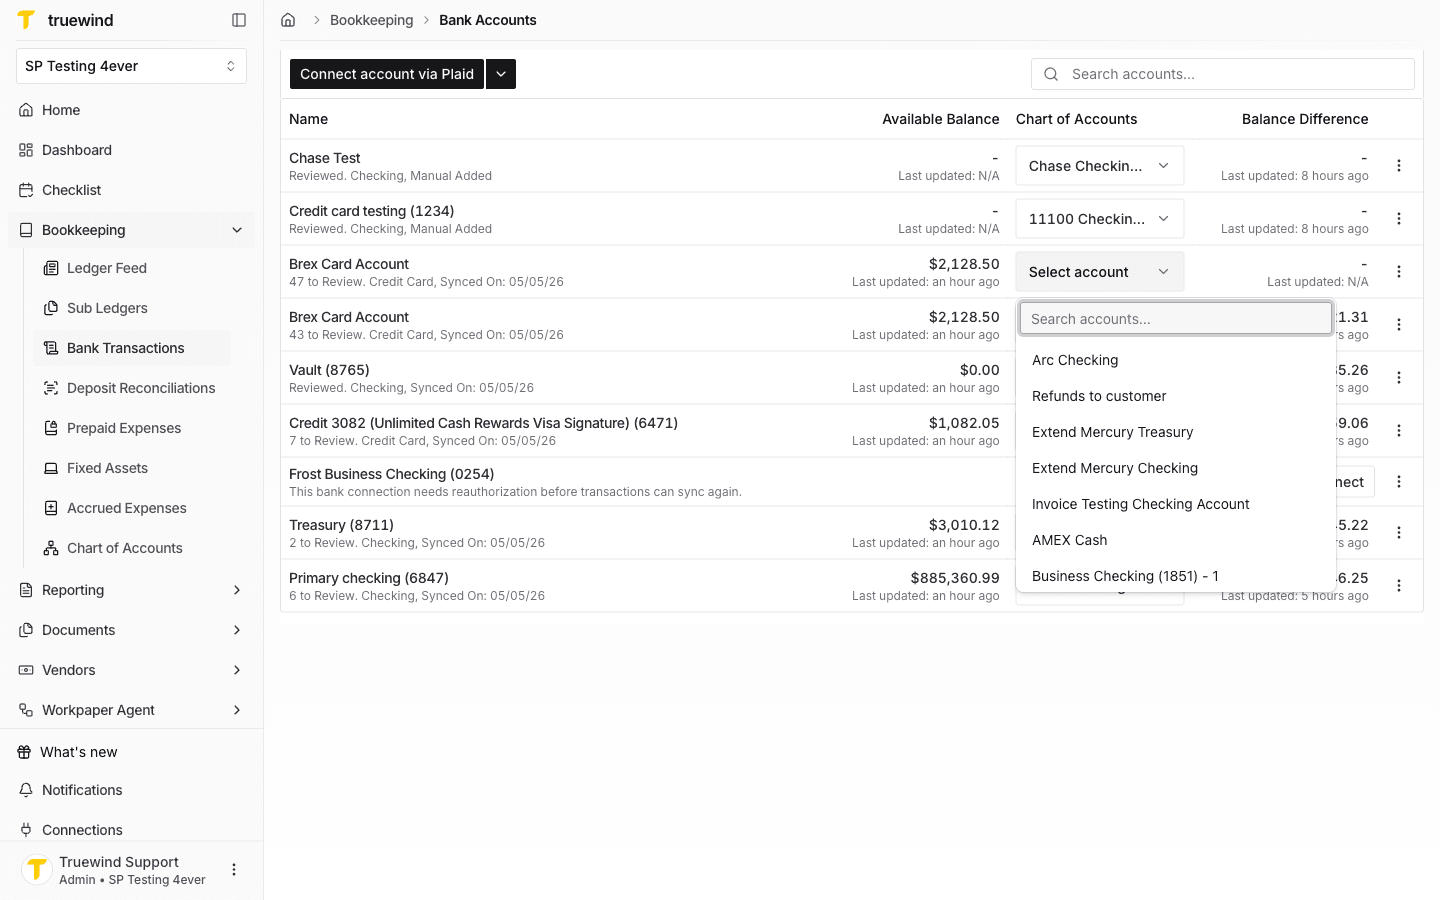
Step 6
Use the search to find the account you want to map, and click on it.
Step 7
After the account updated, verify the mapping is properly represented on the Bank Accounts page.
Unmapped bank accounts can block the Bank Transactions table from loading the accounts you selected for review.
Was this helpful?
Need more help?
Ask for human help about this article and provide any feedback.