After import
Once the transactions are visible, move into categorization and reconciliation so the close workflow stays current.
Ask the support agent
Just ask a direct question or search related articles from the Knowledge Base.
Support Center / Bank Transactions / Features
Import transaction activity into Truewind when new source data needs review, resulting in transactions ready for categorization and reconciliation.
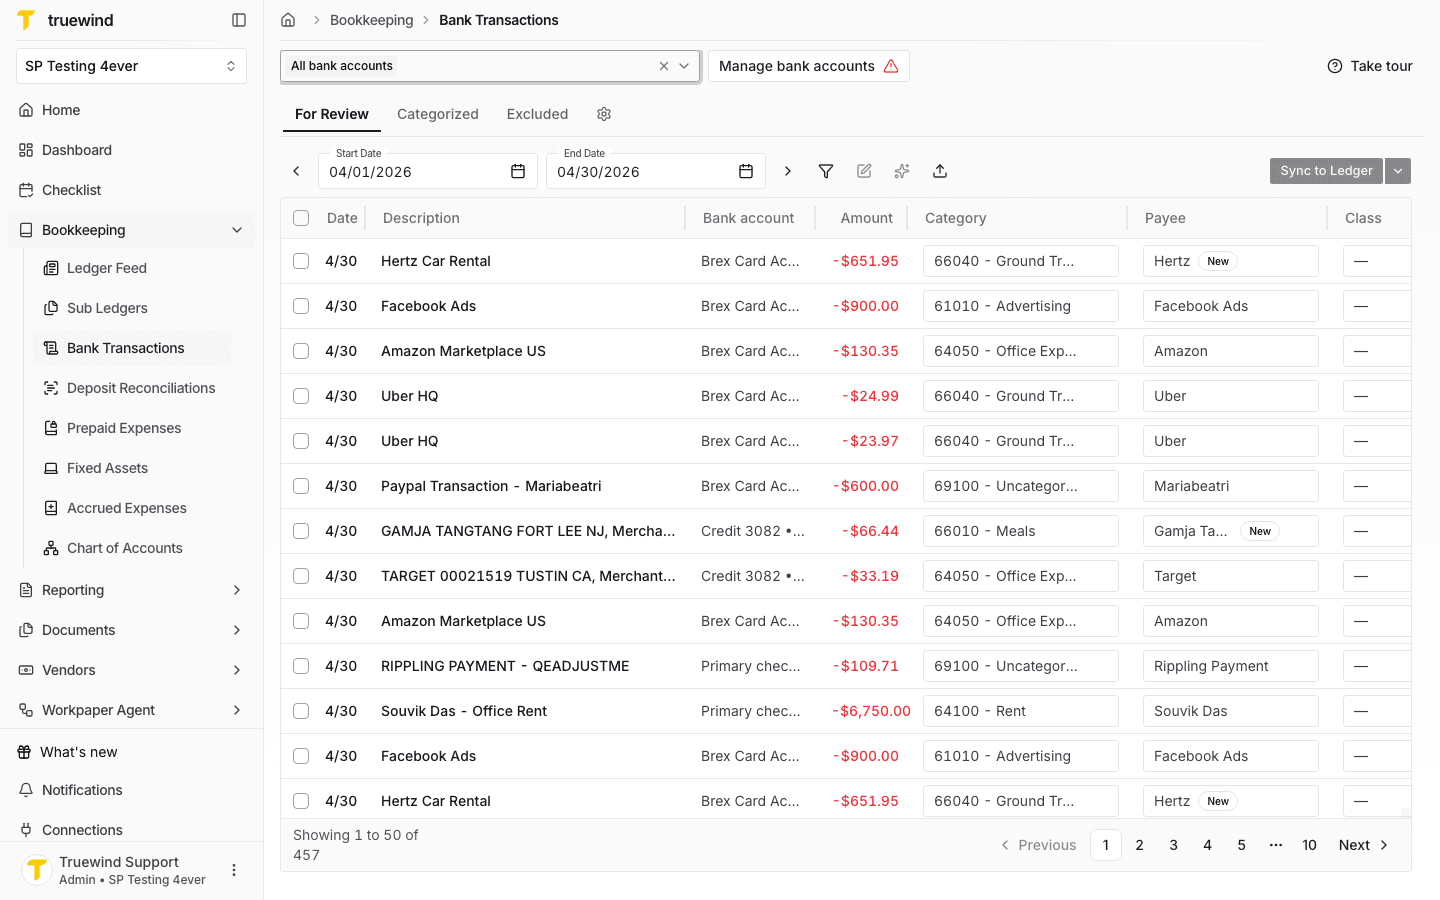
Step 1
Start in Bookkeeping > Bank Transactions and select the bank accounts you want to review so transaction rows are visible.
Step 2
Click Import to start the transaction import flow before choosing a bank account and file.
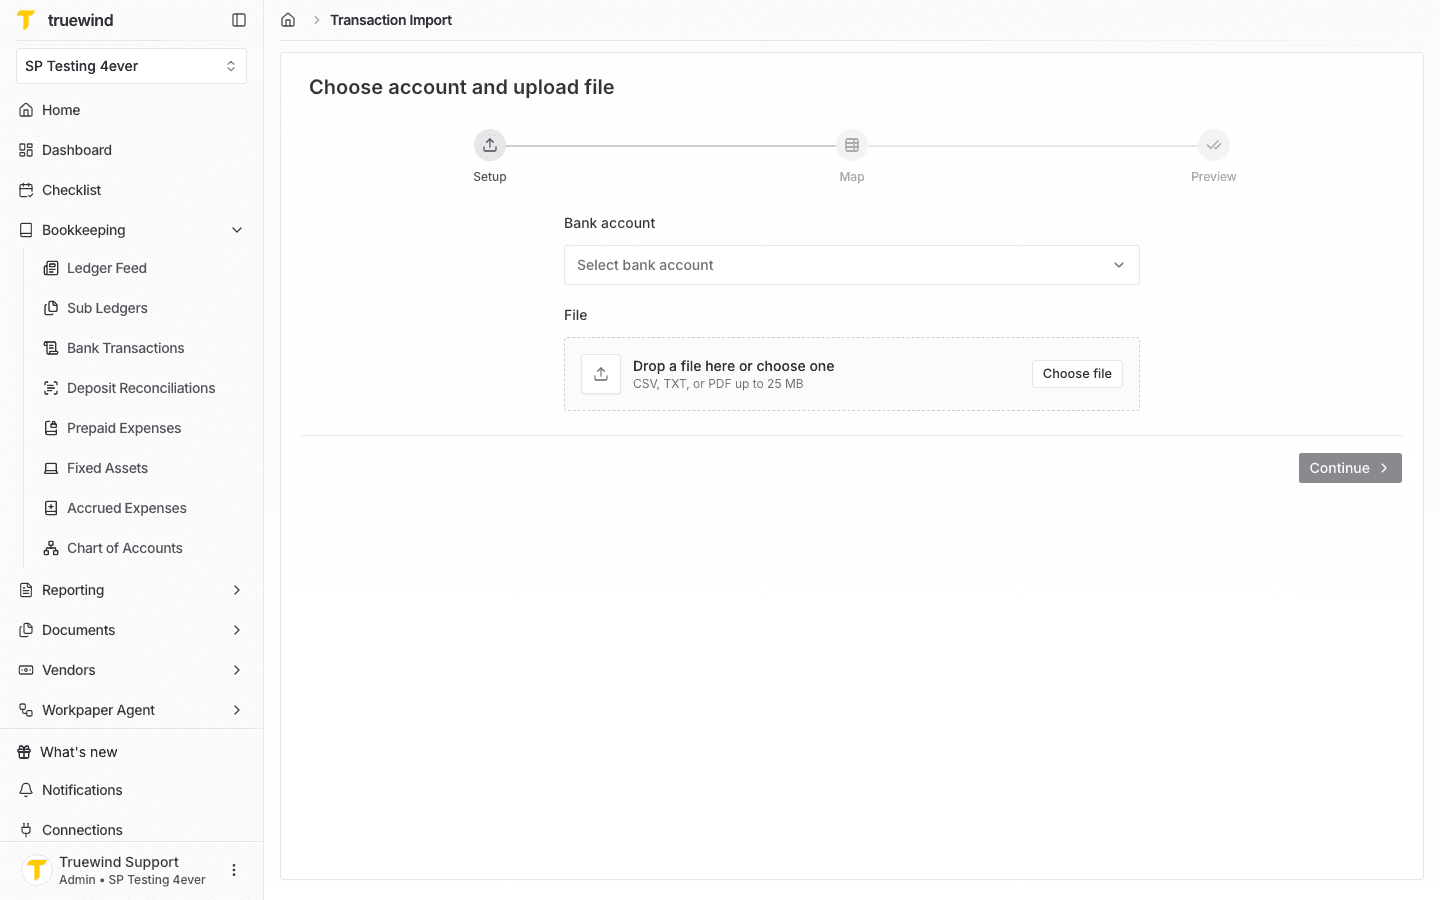
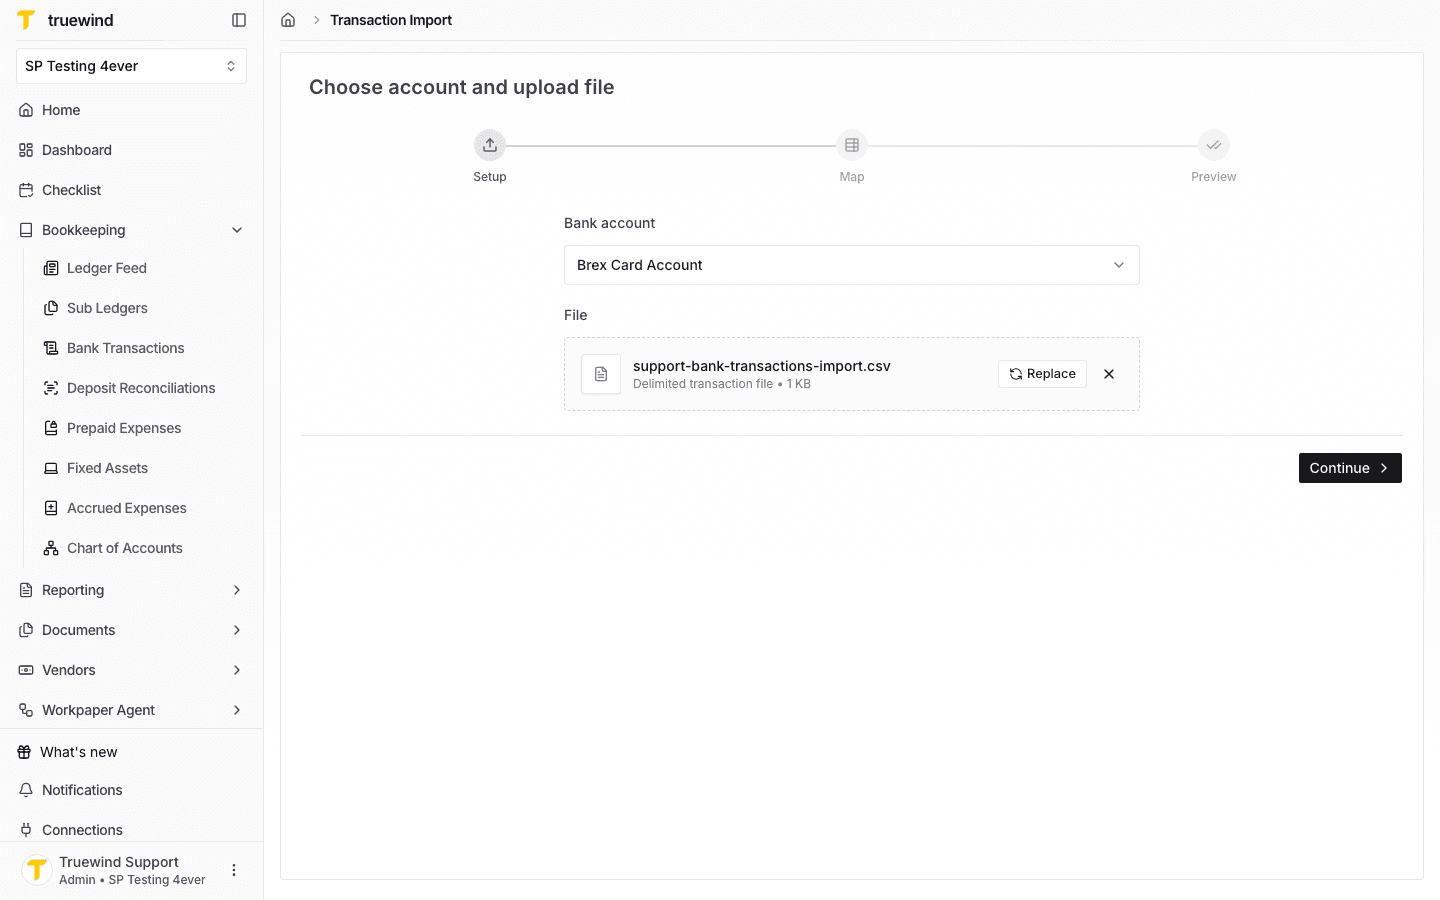
Step 3
Select the destination bank account, then upload a CSV, TXT, or PDF file that contains the transactions.
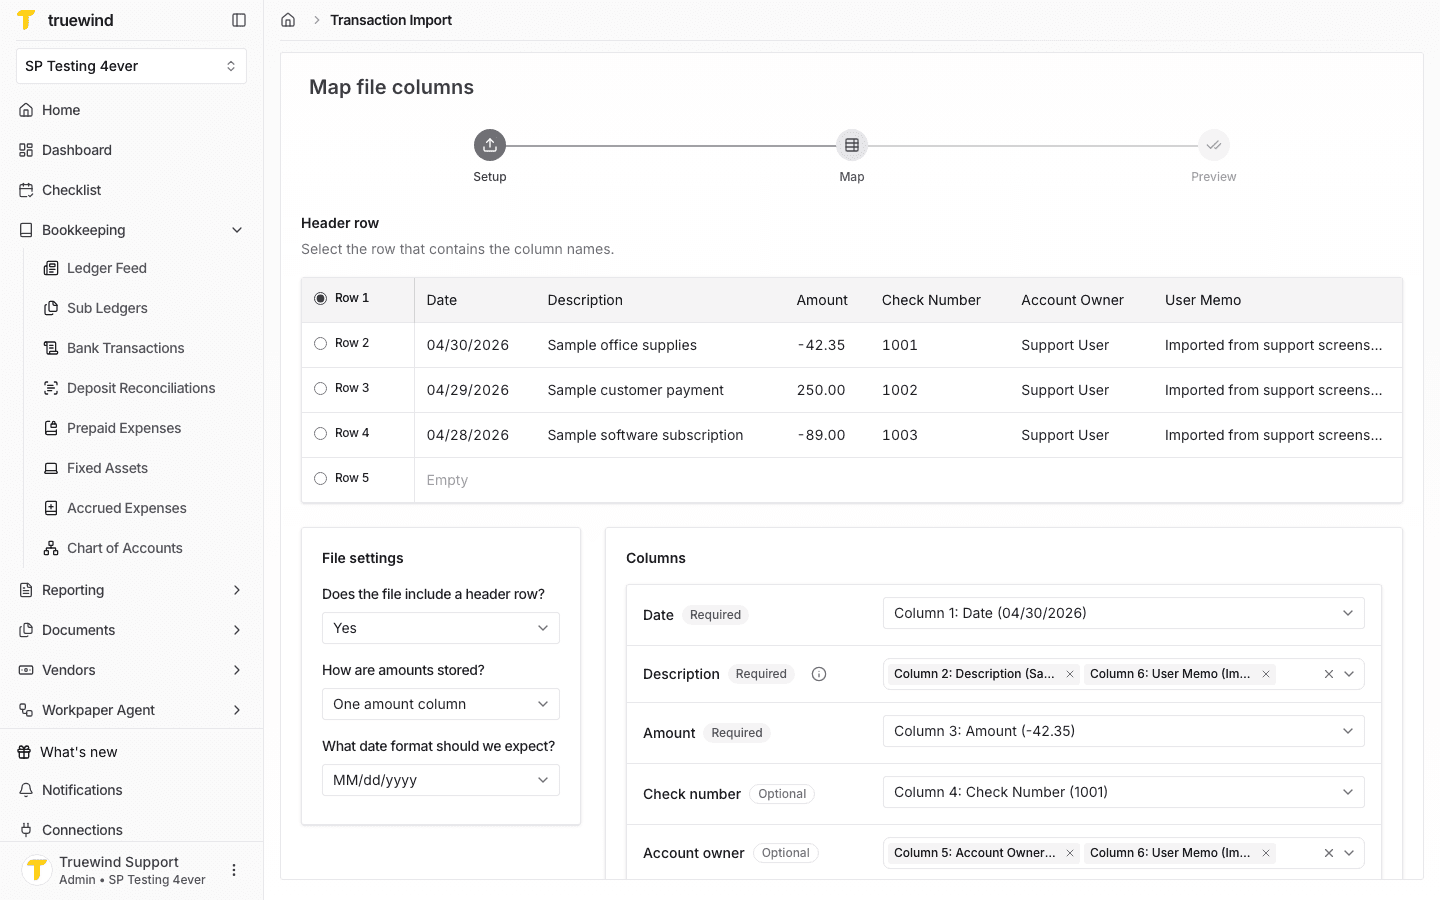
Step 4
Confirm the header row, amount format, date format, and column mappings before previewing the import.
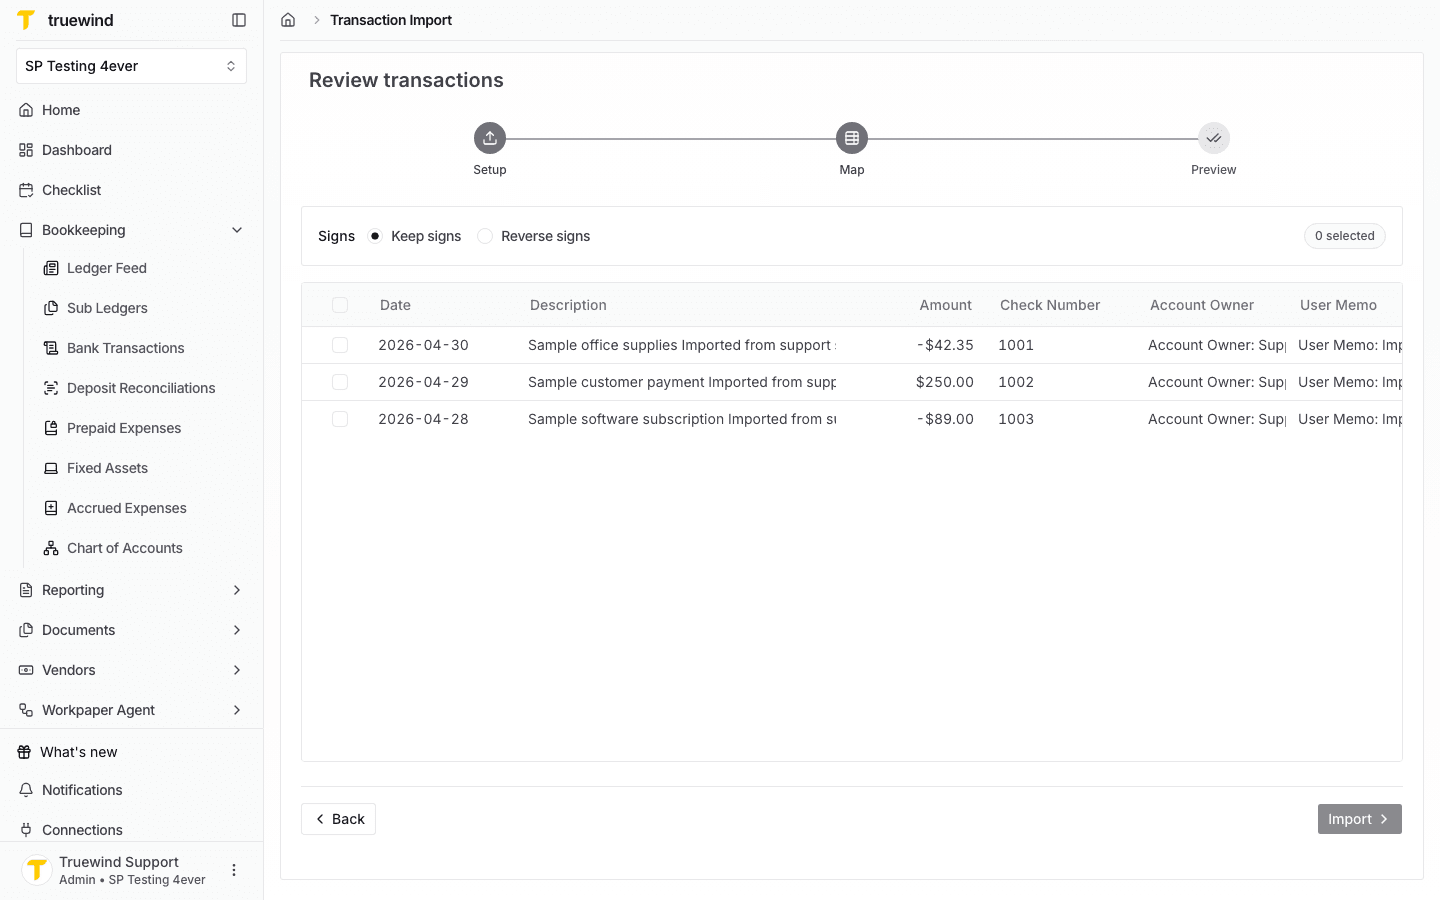
Step 5
Check the preview rows and sign handling so income and expense amounts will be imported correctly.
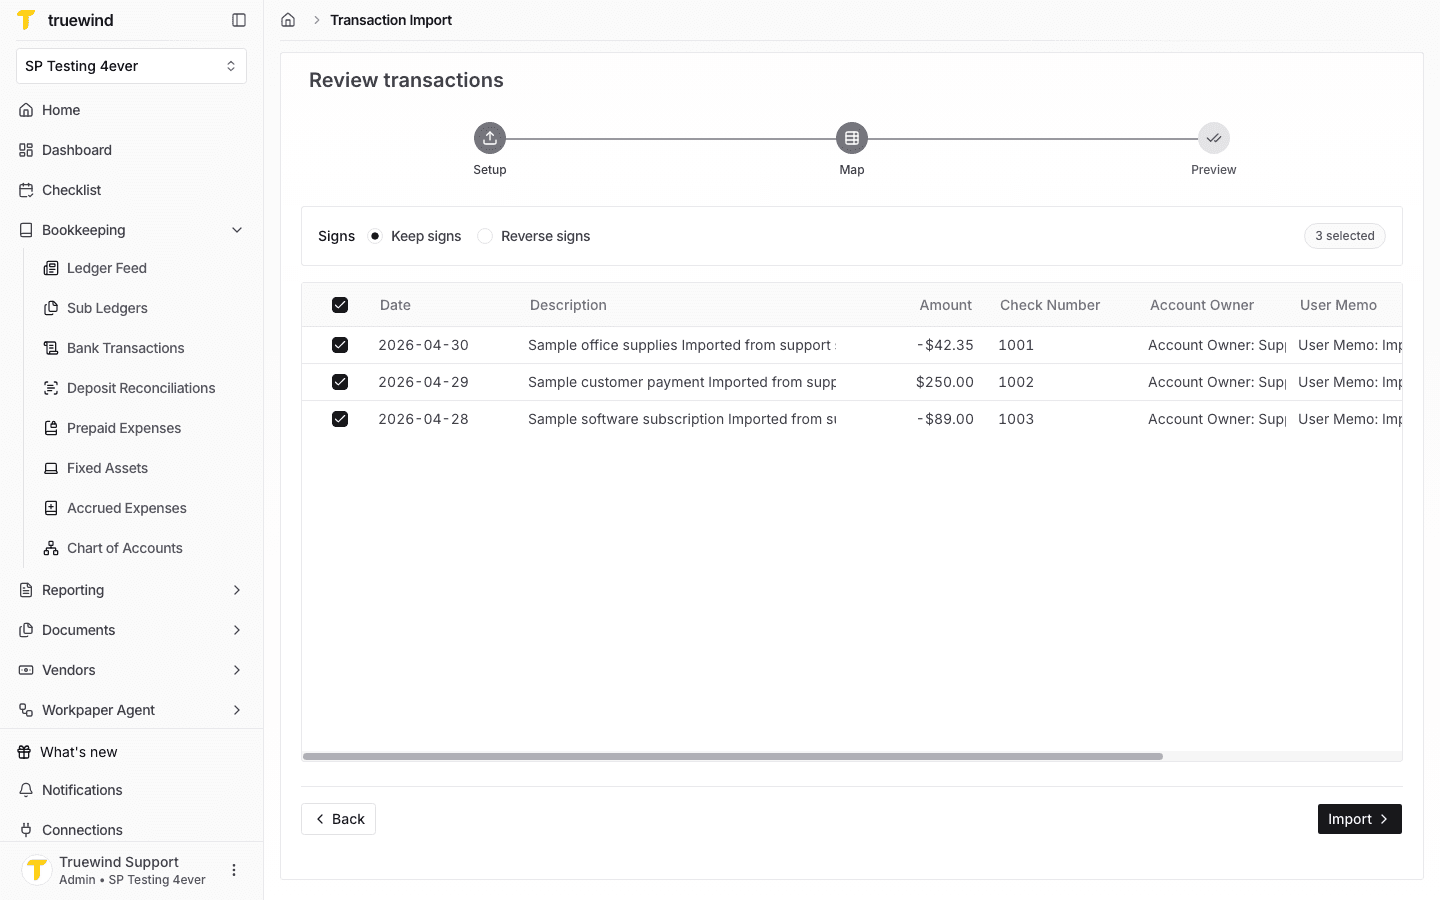
Step 6
Select the transactions you want to import; the Import button becomes available once at least one valid row is selected.
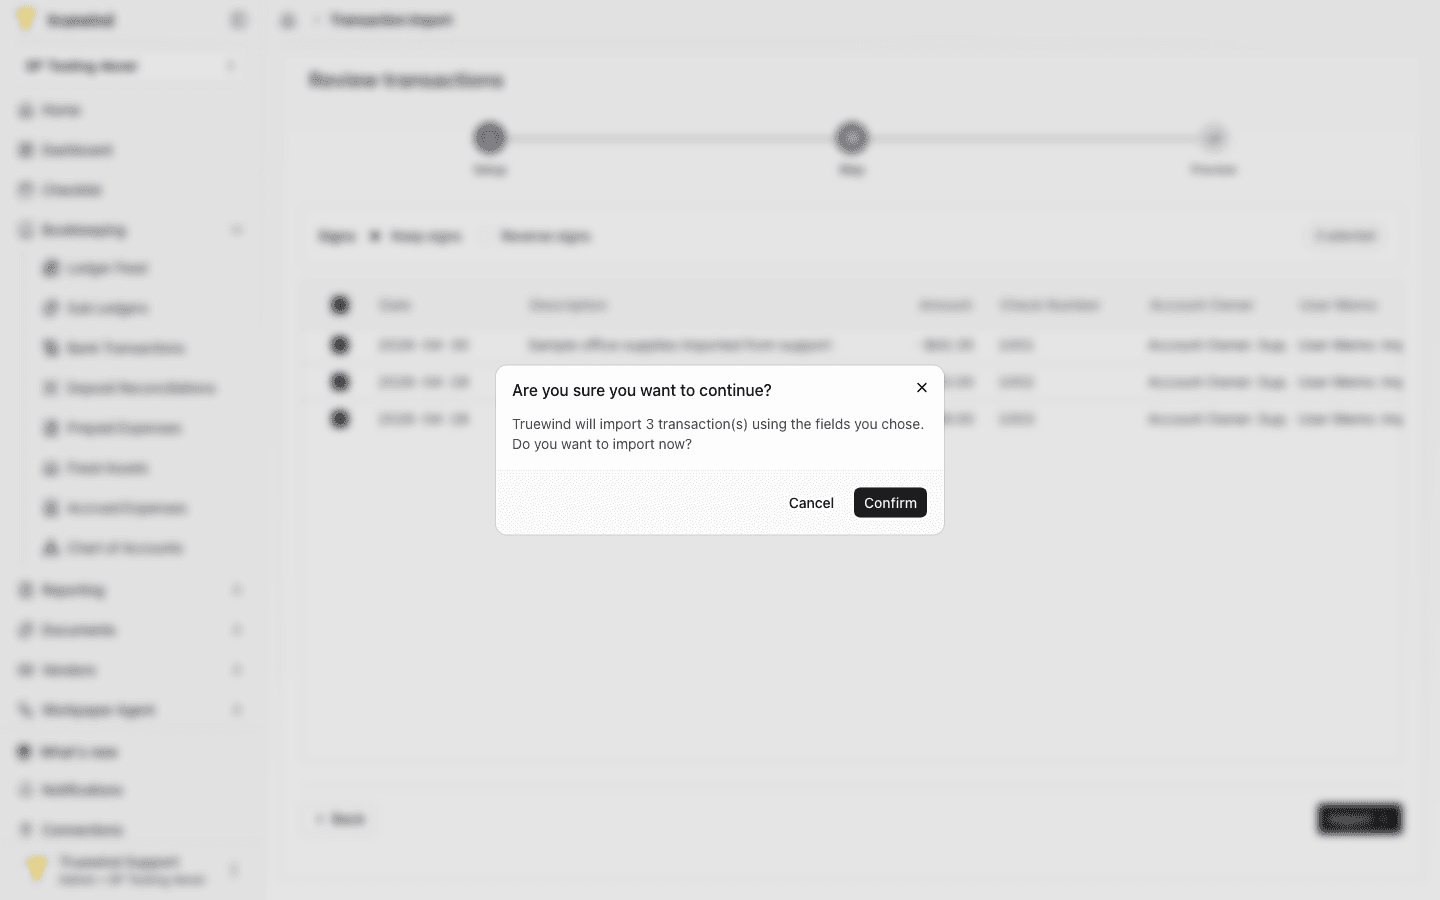
Step 7
Review the confirmation message before completing the import into Bank Transactions.
Once the transactions are visible, move into categorization and reconciliation so the close workflow stays current.
Use the source that matches your current setup. If your bank connection is active, prefer sync. Use import when you need to load data manually.
Missing fields, unexpected formats, or partial exports can affect review and reconciliation later.
Re-check the source file or source system export, then retry with the corrected data.
Was this helpful?
Need more help?
Ask for human help about this article and provide any feedback.