What to verify
- The bank account has the correct entity and location assignment before sync.
- The Sage Intacct journal entry shows the expected inter-entity posting.
Ask the support agent
Just ask a direct question or search related articles from the Knowledge Base.
Support Center / Bank Transactions / Features
Sync inter-entity transactions to Sage when entity and location assignments must carry into the posted journal entry, resulting in the expected Sage inter-entity posting.
Step 1
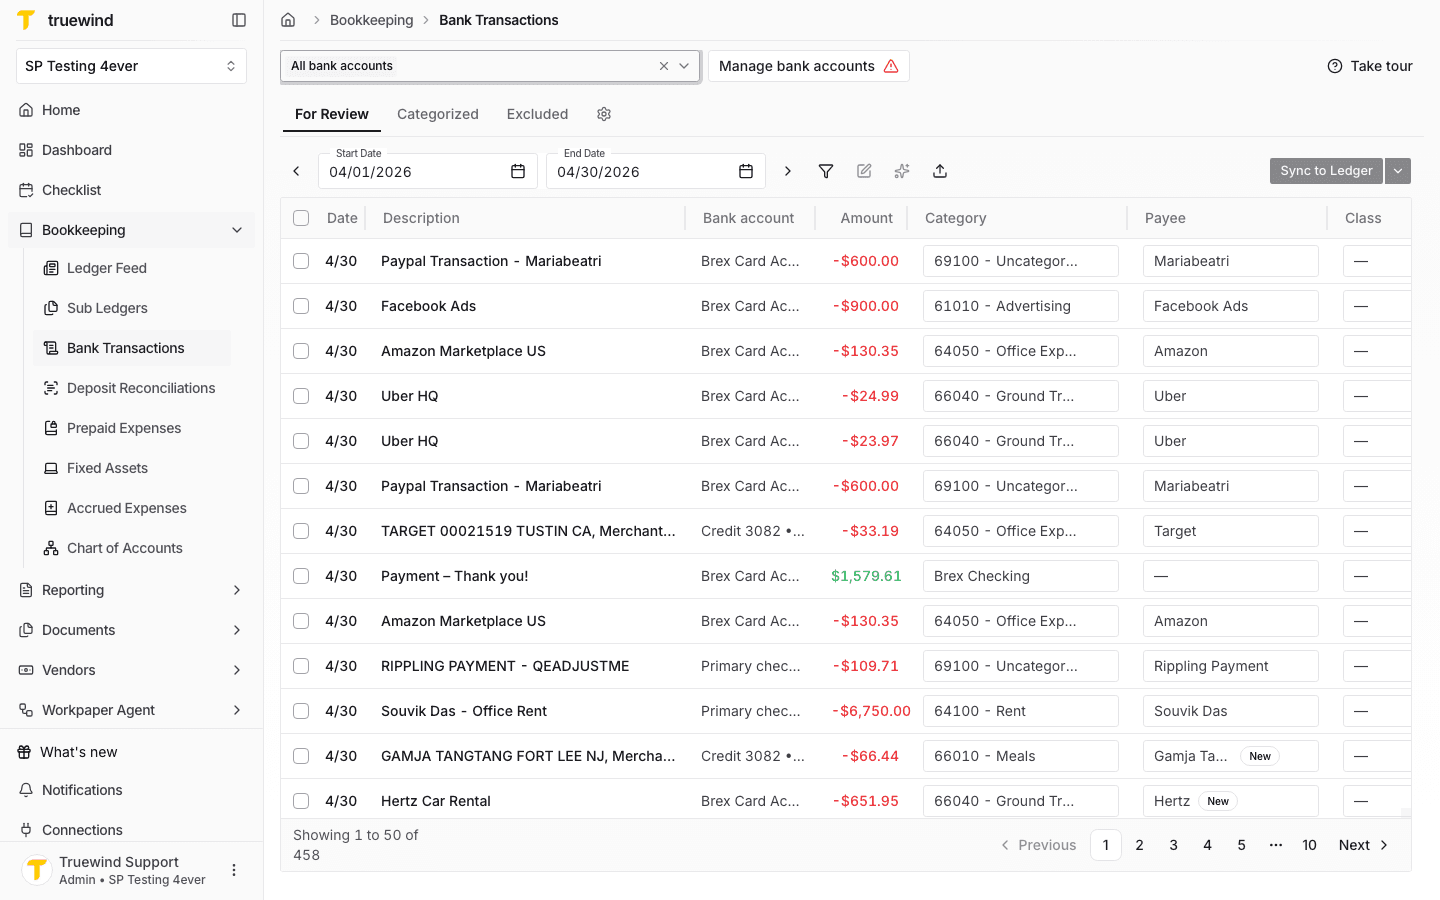
Start in Bookkeeping > Bank Transactions and select the bank accounts you want to review so transaction rows are visible.
Step 2
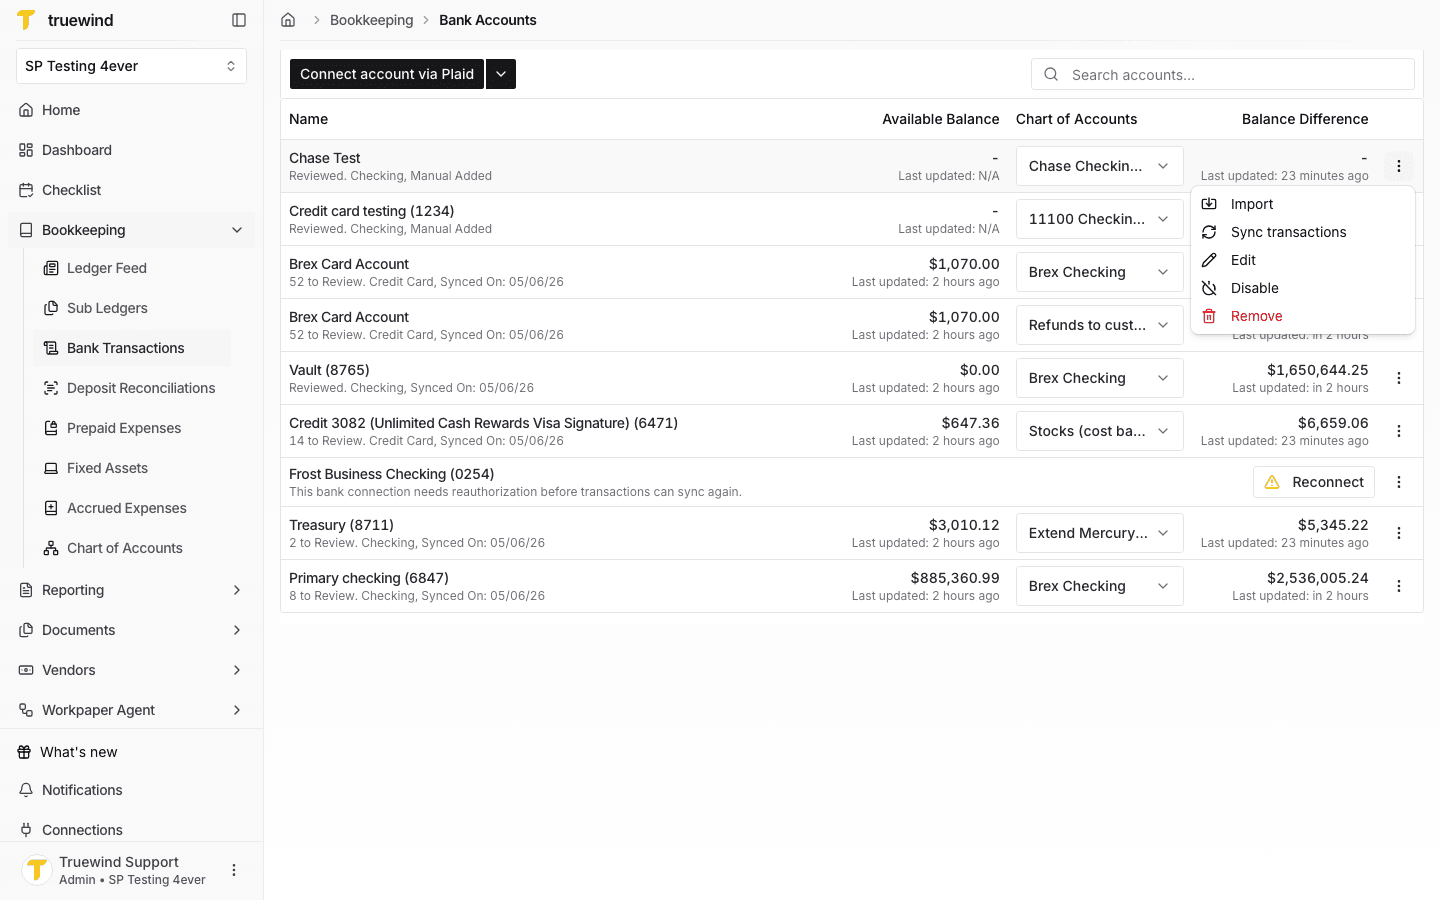
Use Manage bank accounts when the bank-level entity or location assignment needs to drive inter-entity posting.

Step 3
Open the account actions menu for the bank account whose default posting assignment you want to review.
Step 4
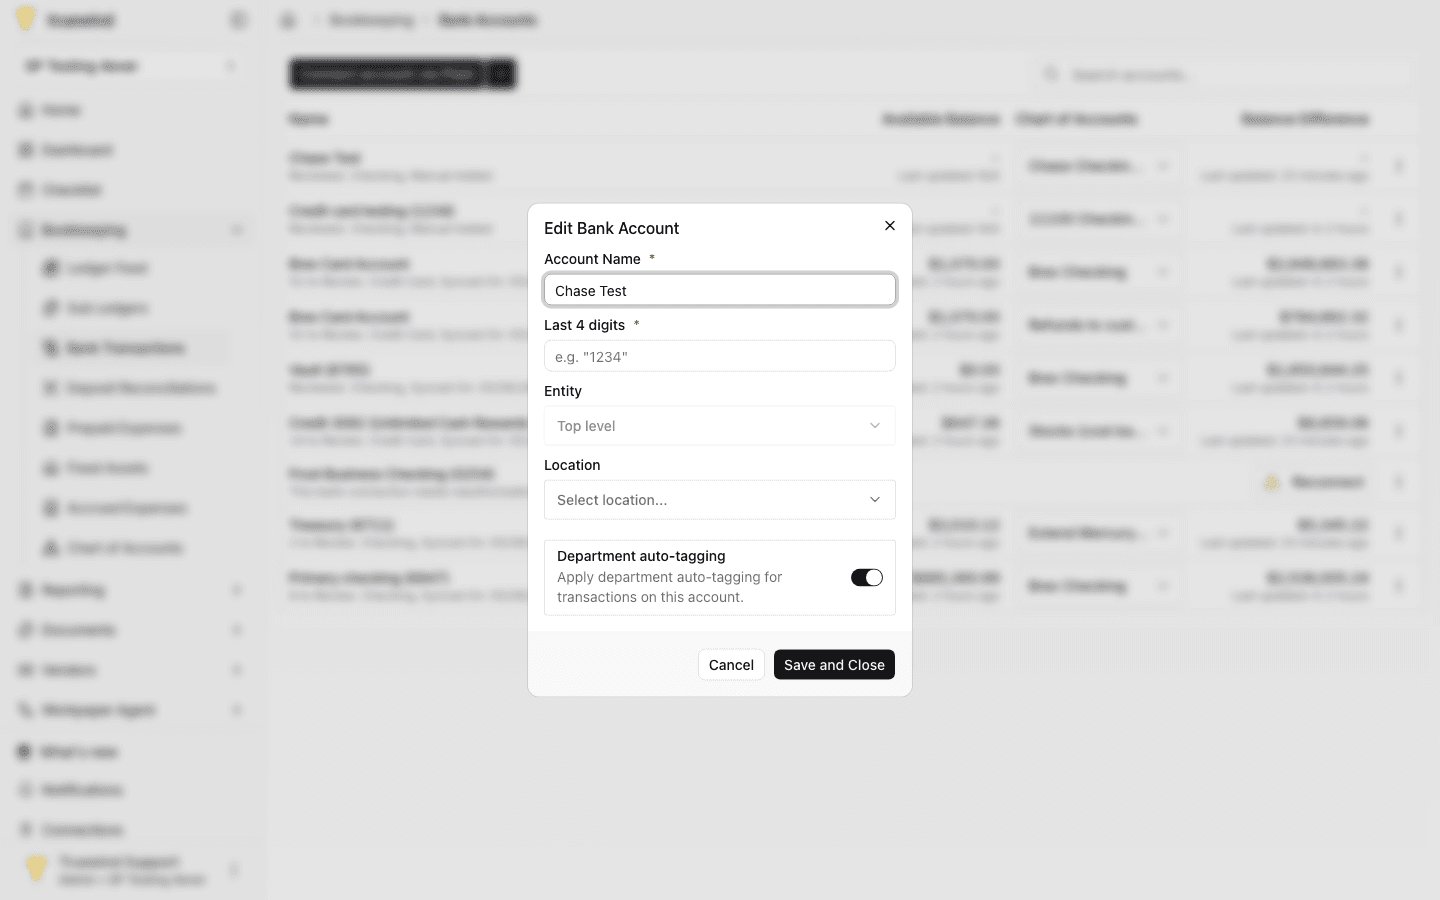
Confirm the account name, last four digits, entity, and location before relying on this bank account for inter-entity transactions.
Step 5
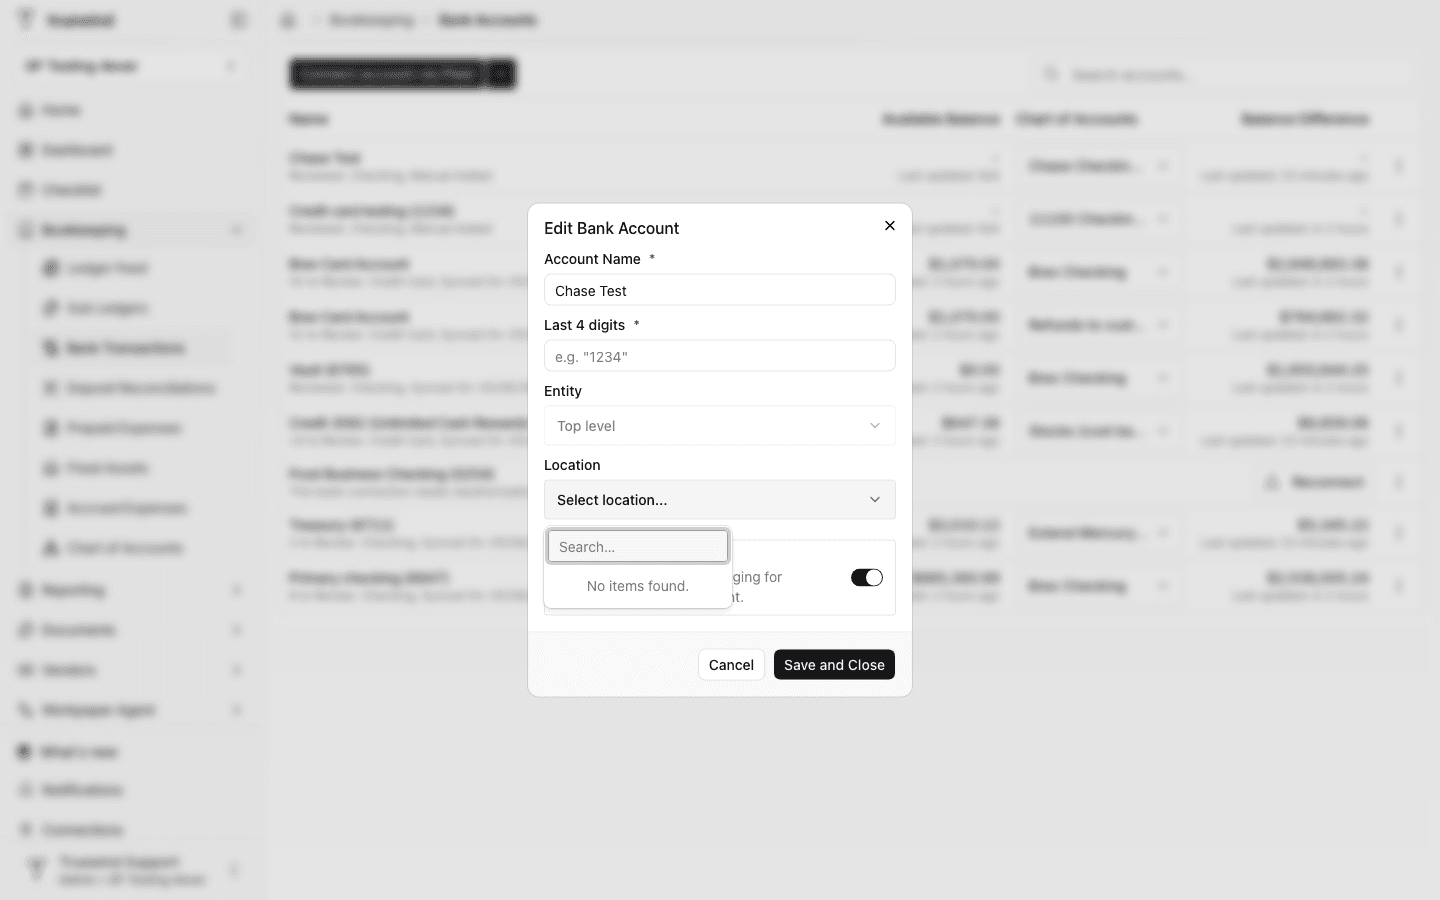
Select a location when the client setup requires one for Sage Intacct inter-entity journal entries.
Step 6
Go back to Bank Transactions after checking bank defaults, then refresh categorization if existing rows need to inherit updated assignments.

Step 7
At the transaction level, review the side panel before syncing. The bank account assignment provides the default entity and location, and any exception should be checked here before posting to Sage Intacct.
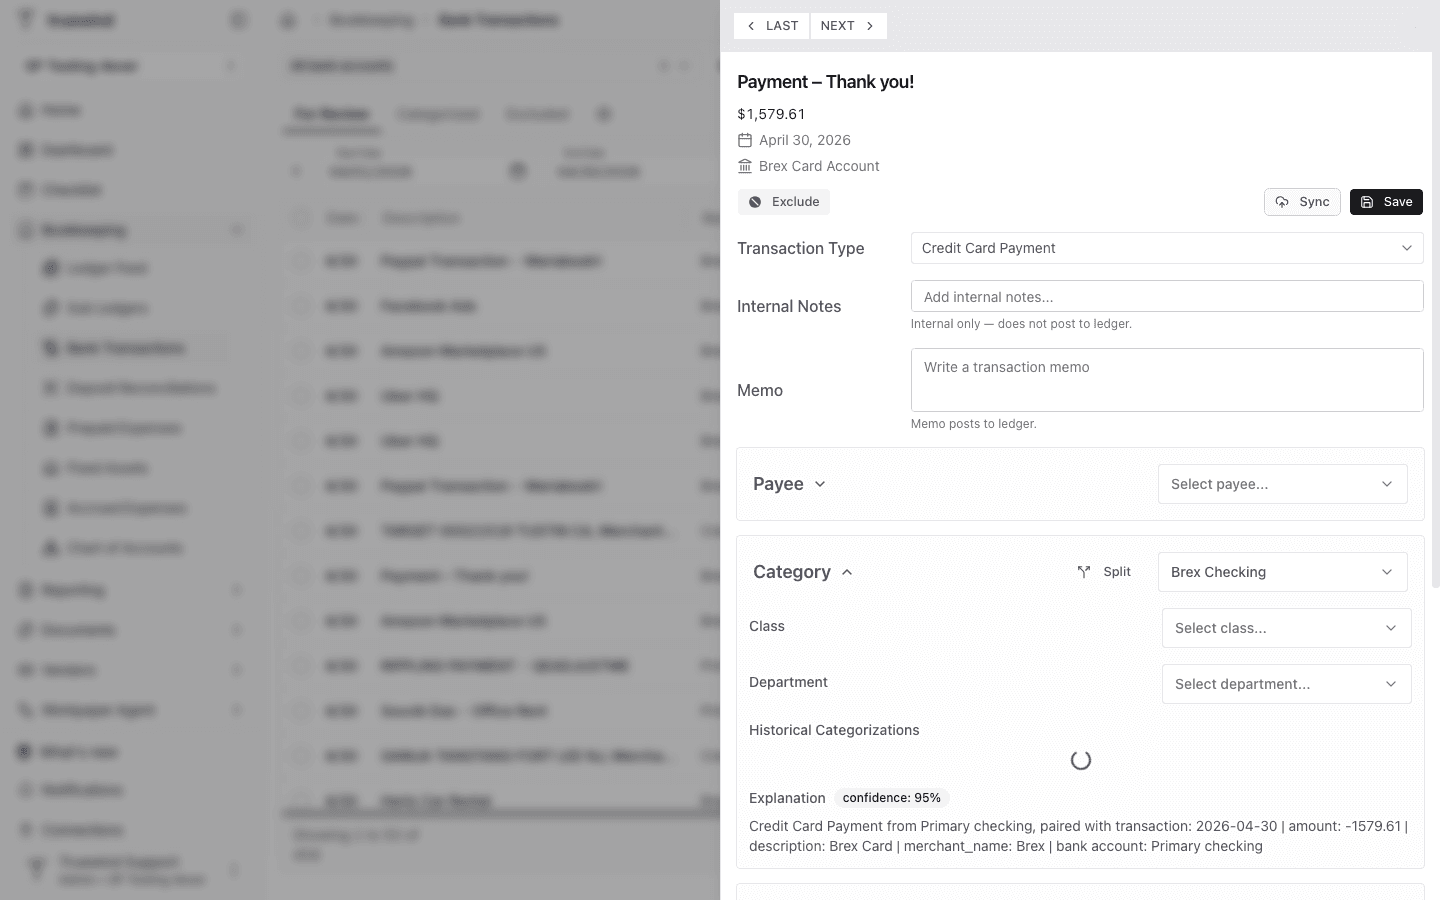
Step 8
Use Split when the transaction needs line-item level category or dimension review before it posts to the ledger.

Step 9
Sync only after the bank account assignment and transaction-level details look correct for the intended Sage Intacct journal entry.
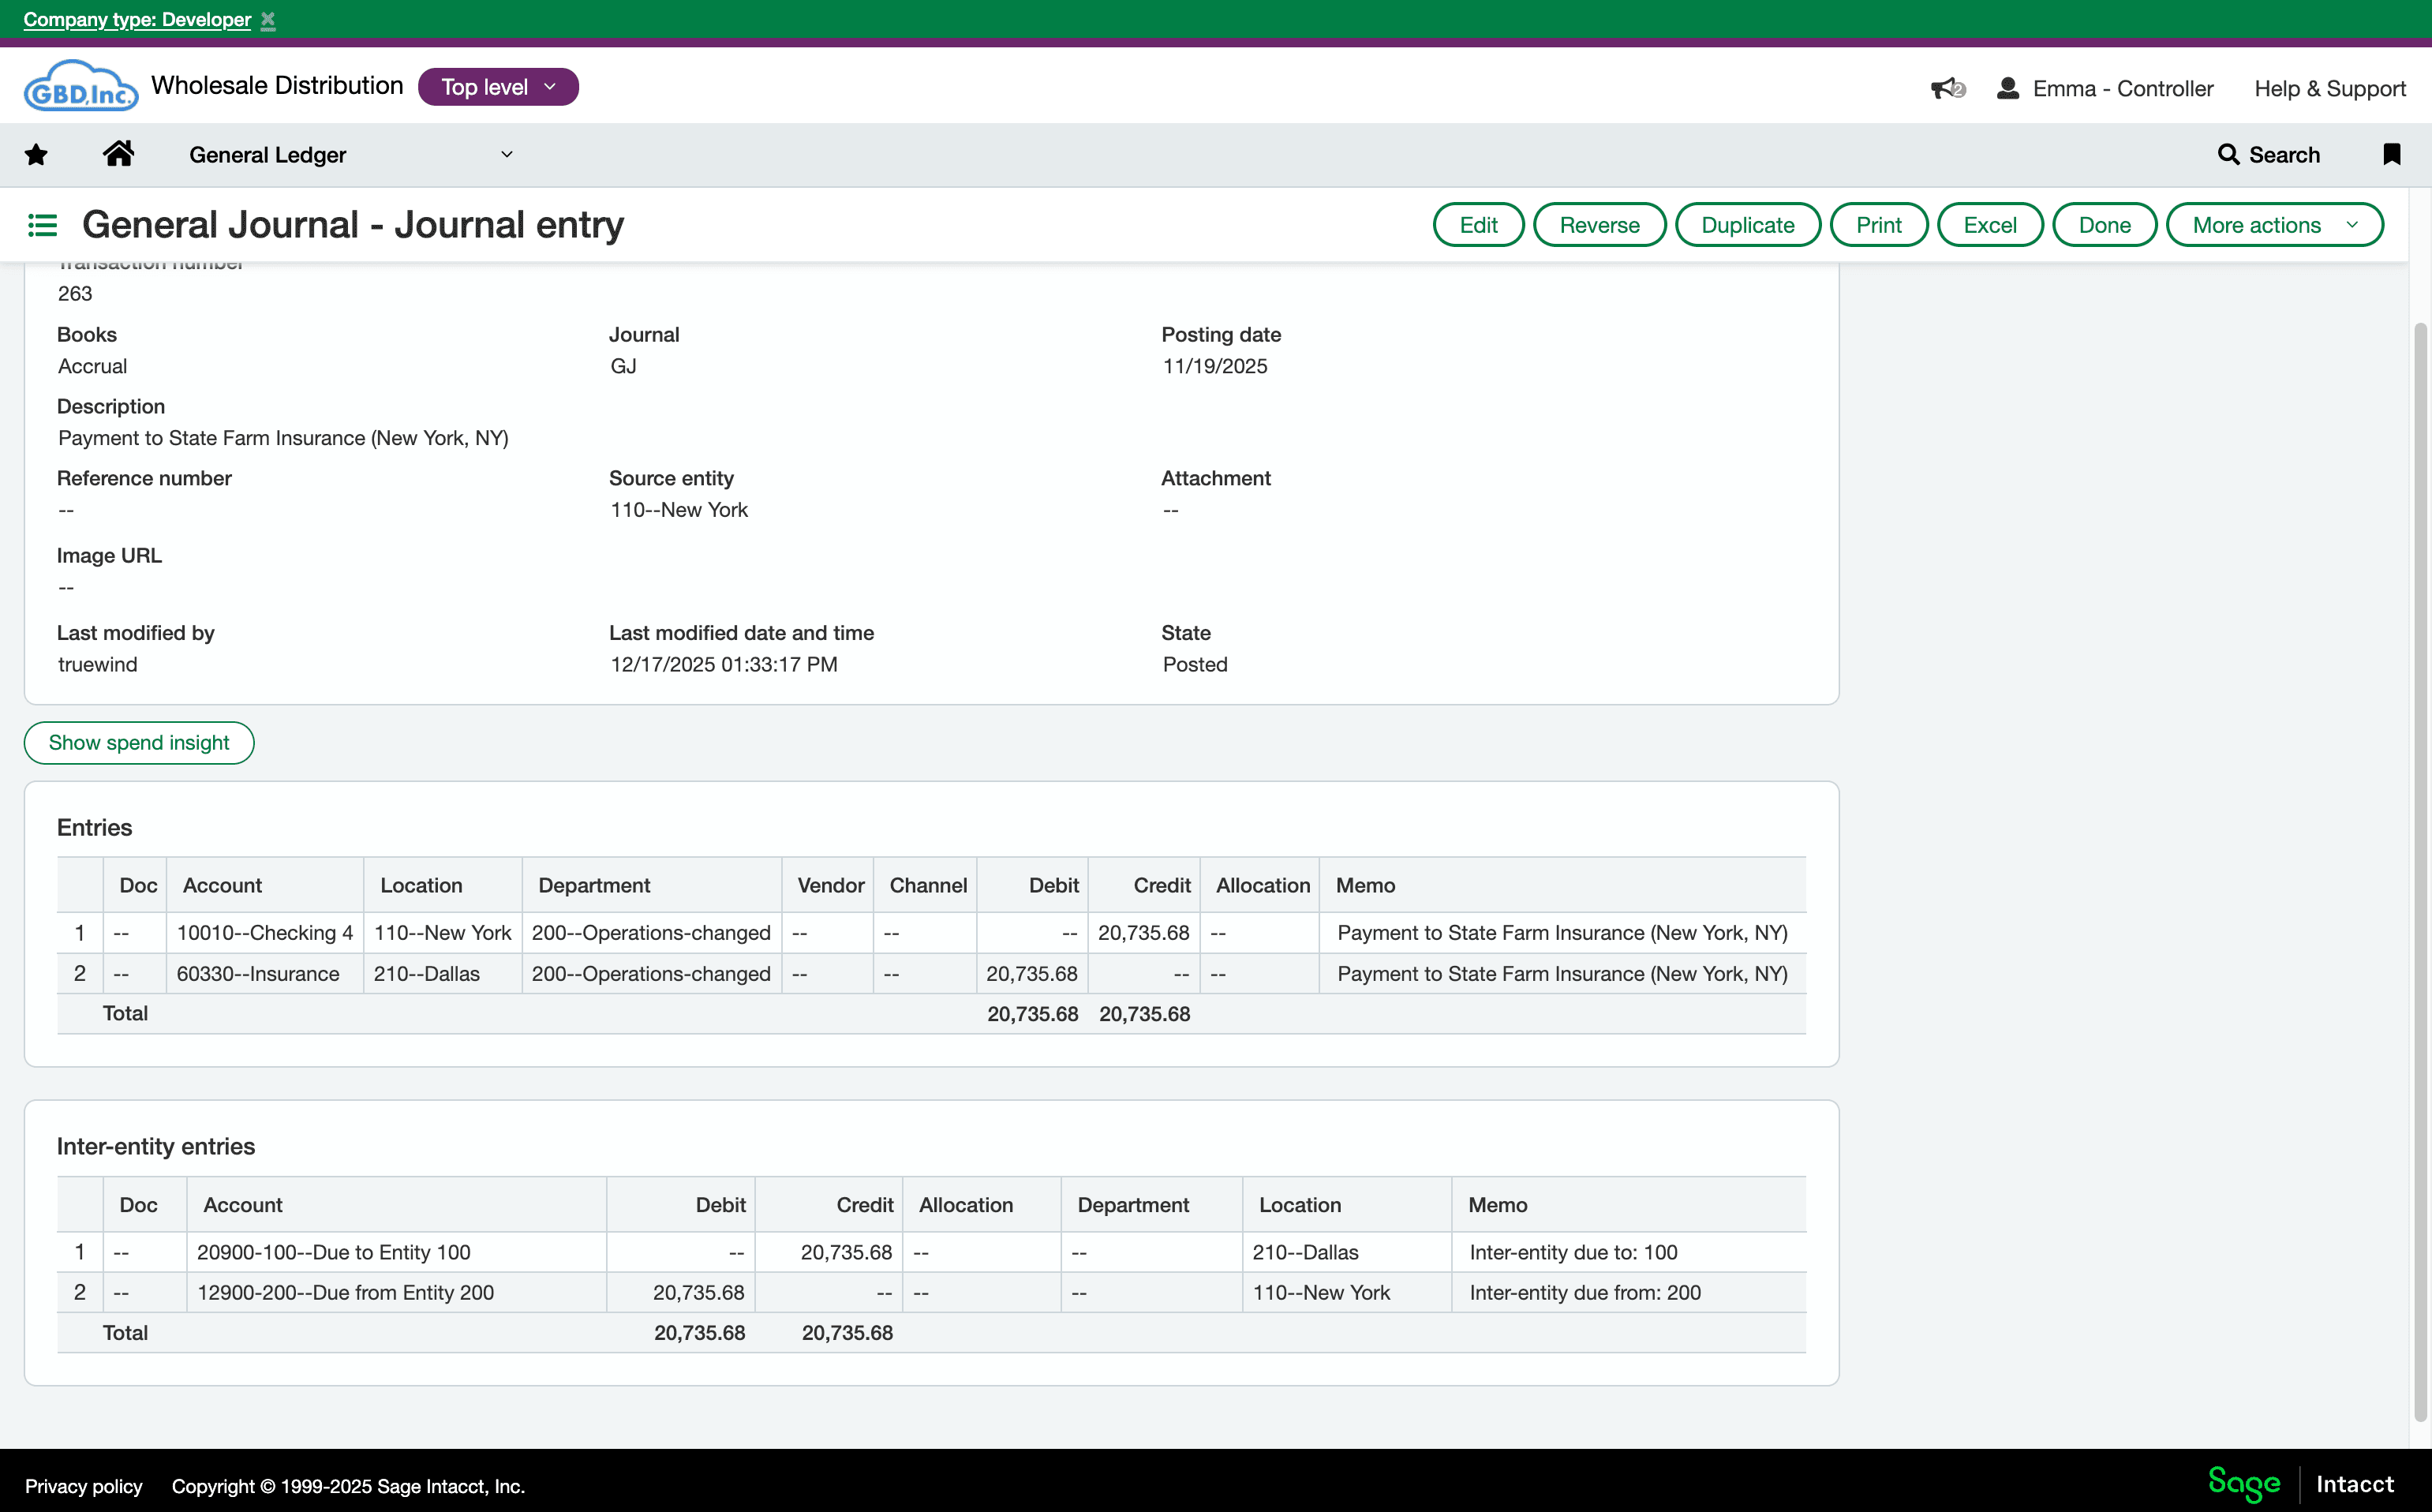
Step 10
In Sage Intacct, confirm the posted journal entry includes the expected source entity, entry lines, and inter-entity entries.

Step 11
Inspect the transaction-level location to confirm it matches the intended inter-entity posting.

Step 12
Confirm the ERP-side location matches the value you chose in Truewind before closing the workflow.
Was this helpful?
Need more help?
Ask for human help about this article and provide any feedback.