
Helpful review habit
Use the term date filter before reviewing schedule rows so the monthly amounts and remaining balances match the period you intend to reconcile.
Ask the support agent
Just ask a direct question or search related articles from the Knowledge Base.
Support Center / Prepaid Expenses / Manage
Review prepaid schedules from Reporting when you need a complete view by term date, resulting in schedule status and amortization visibility.
Step 1
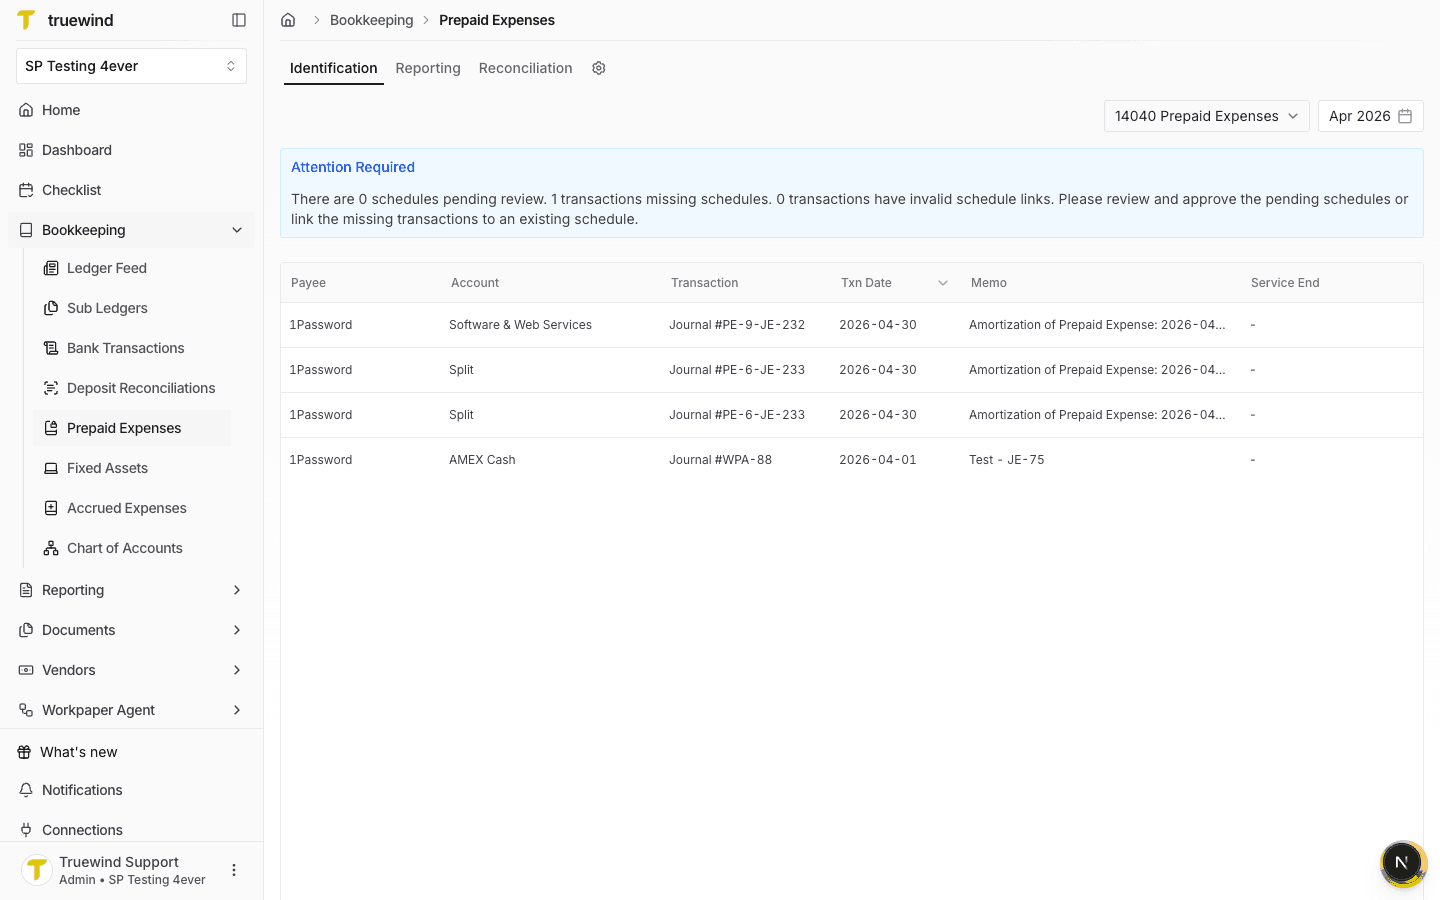
Start in Bookkeeping > Prepaid Expenses so the prepaid workflow tabs and account controls are available.
Step 2
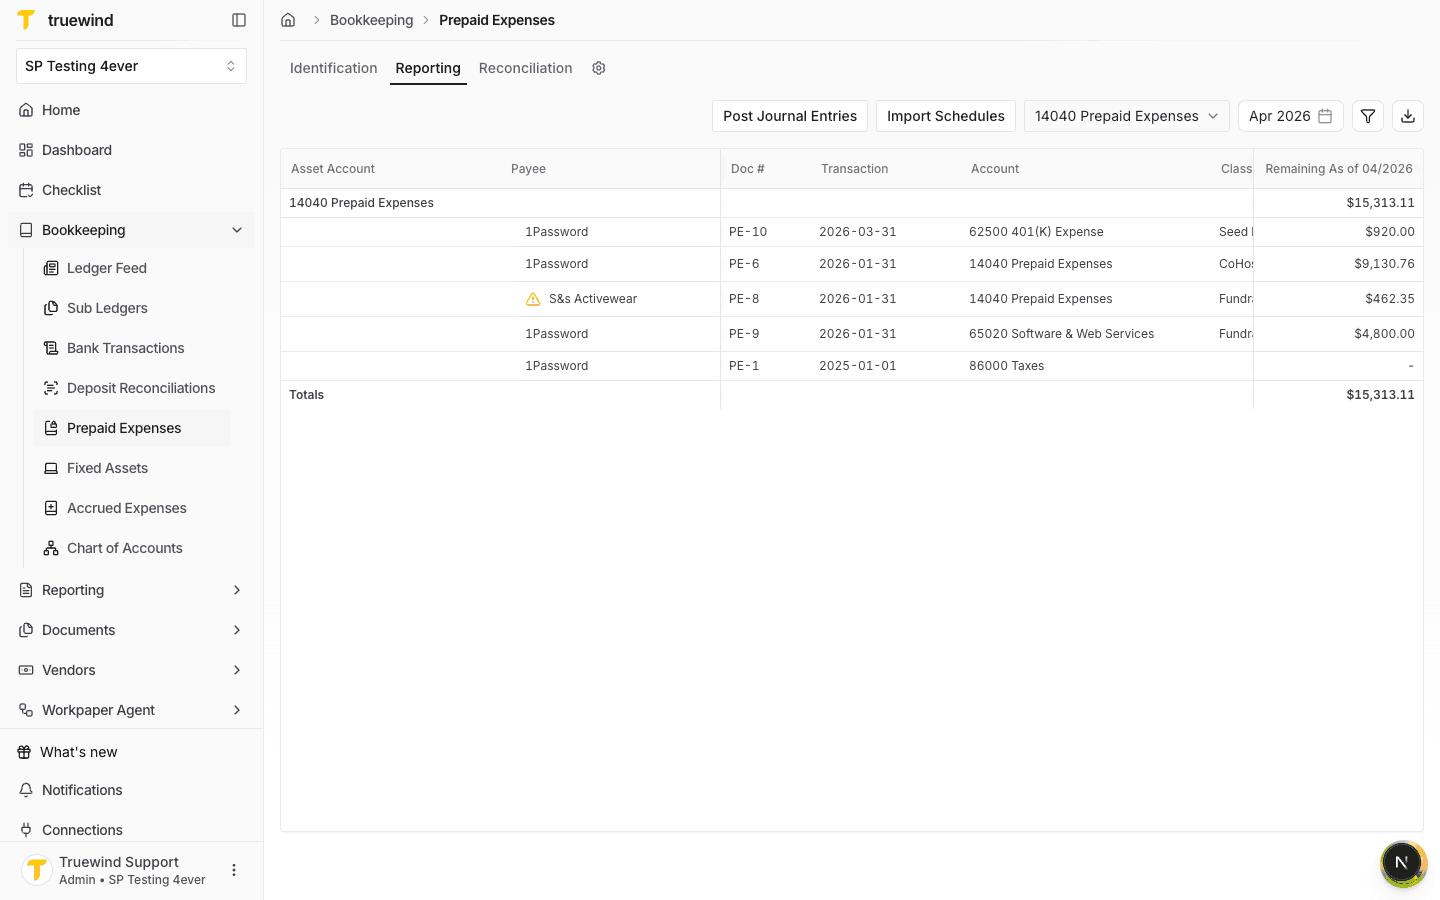
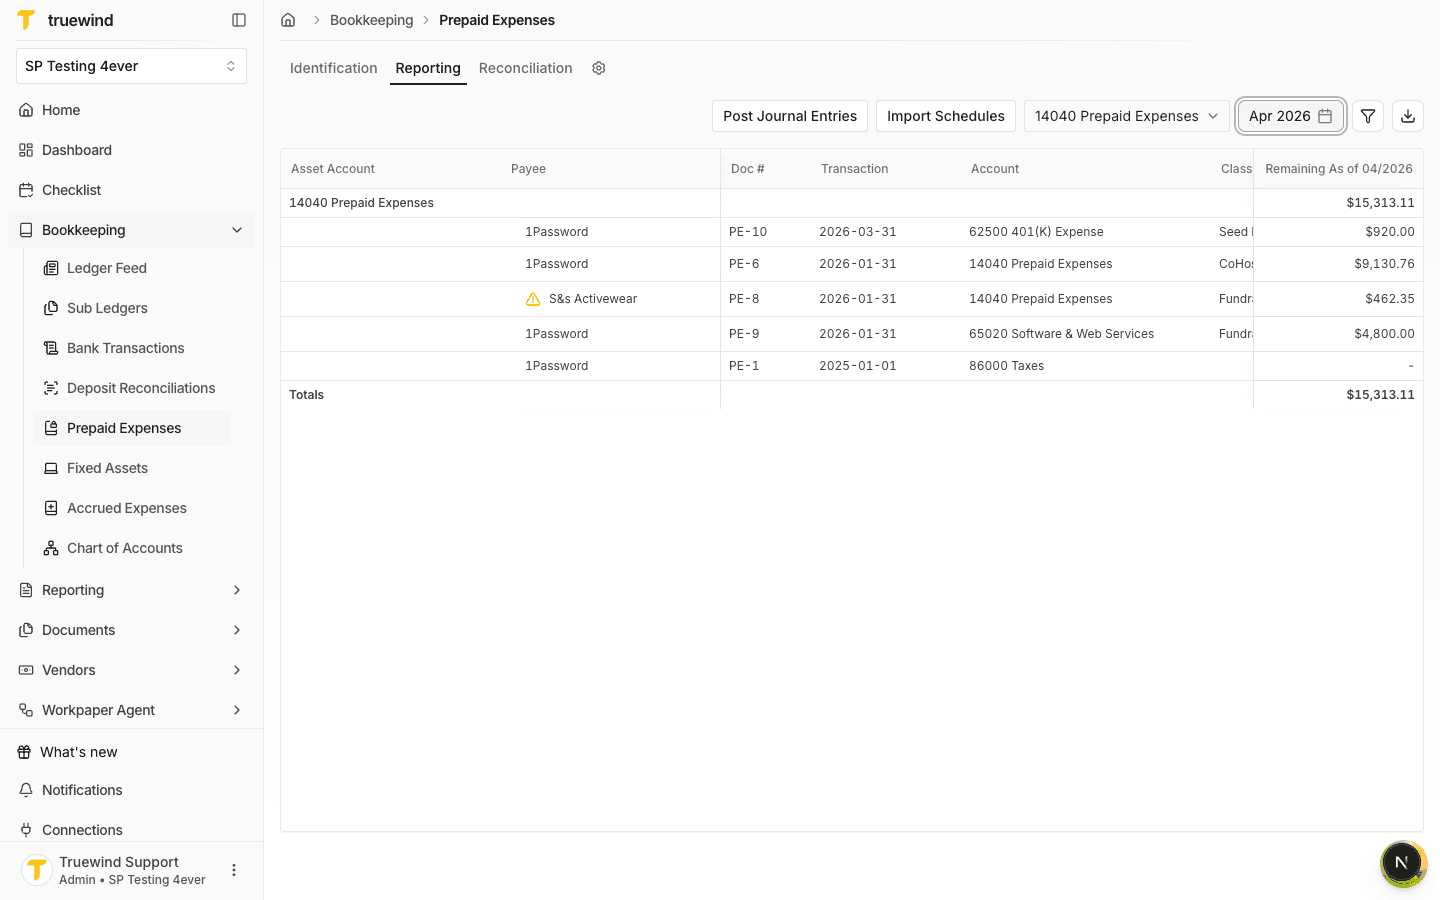
Reporting shows prepaid schedules by account, term date, service period, status, and remaining balance.
Step 3
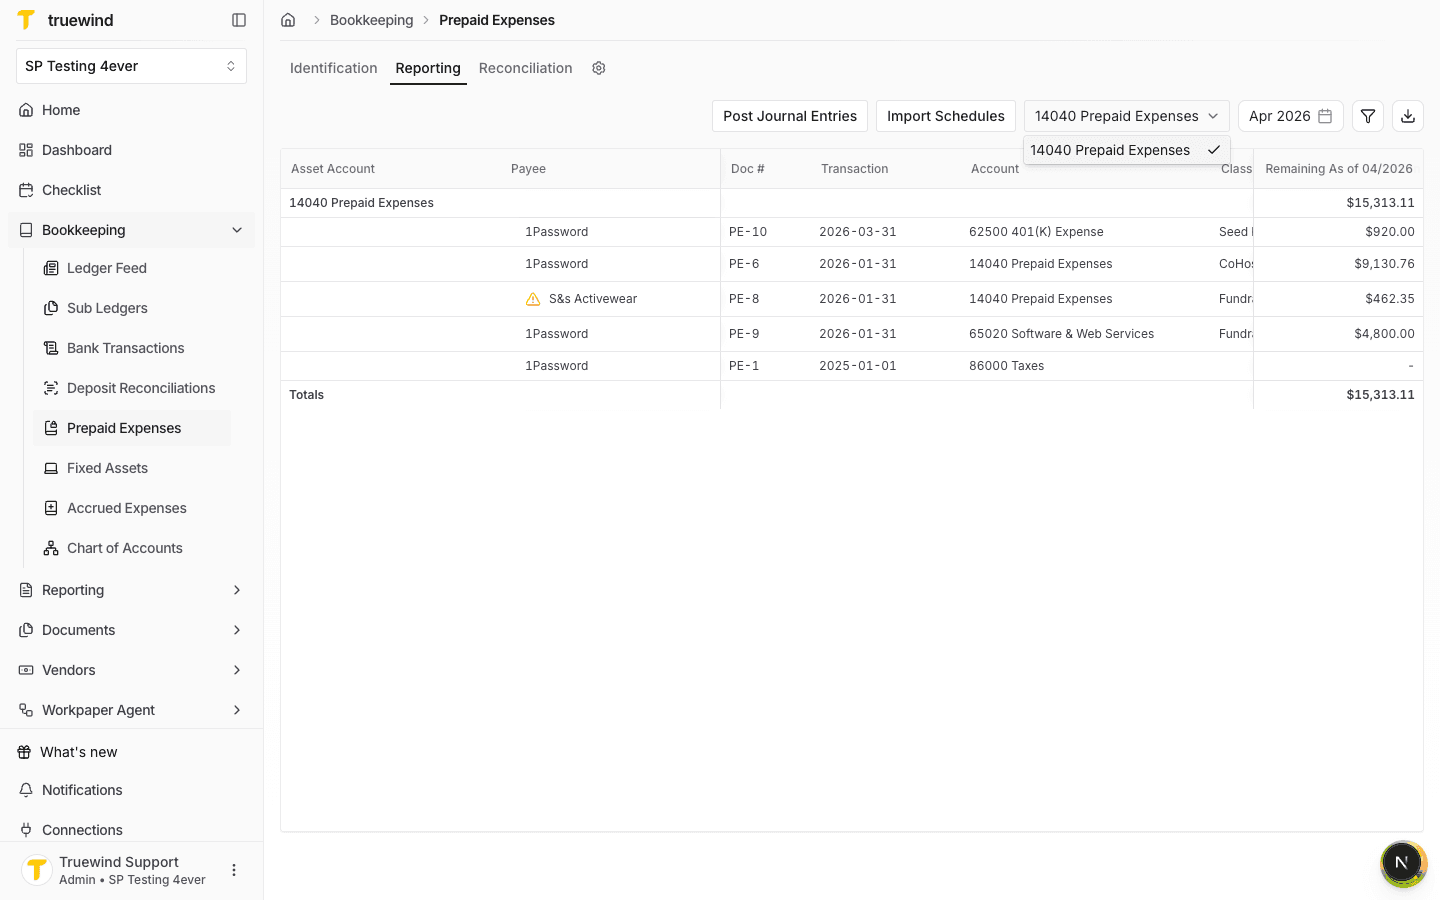
Use the prepaid account selector to confirm you are viewing the intended balance sheet account.
Step 4
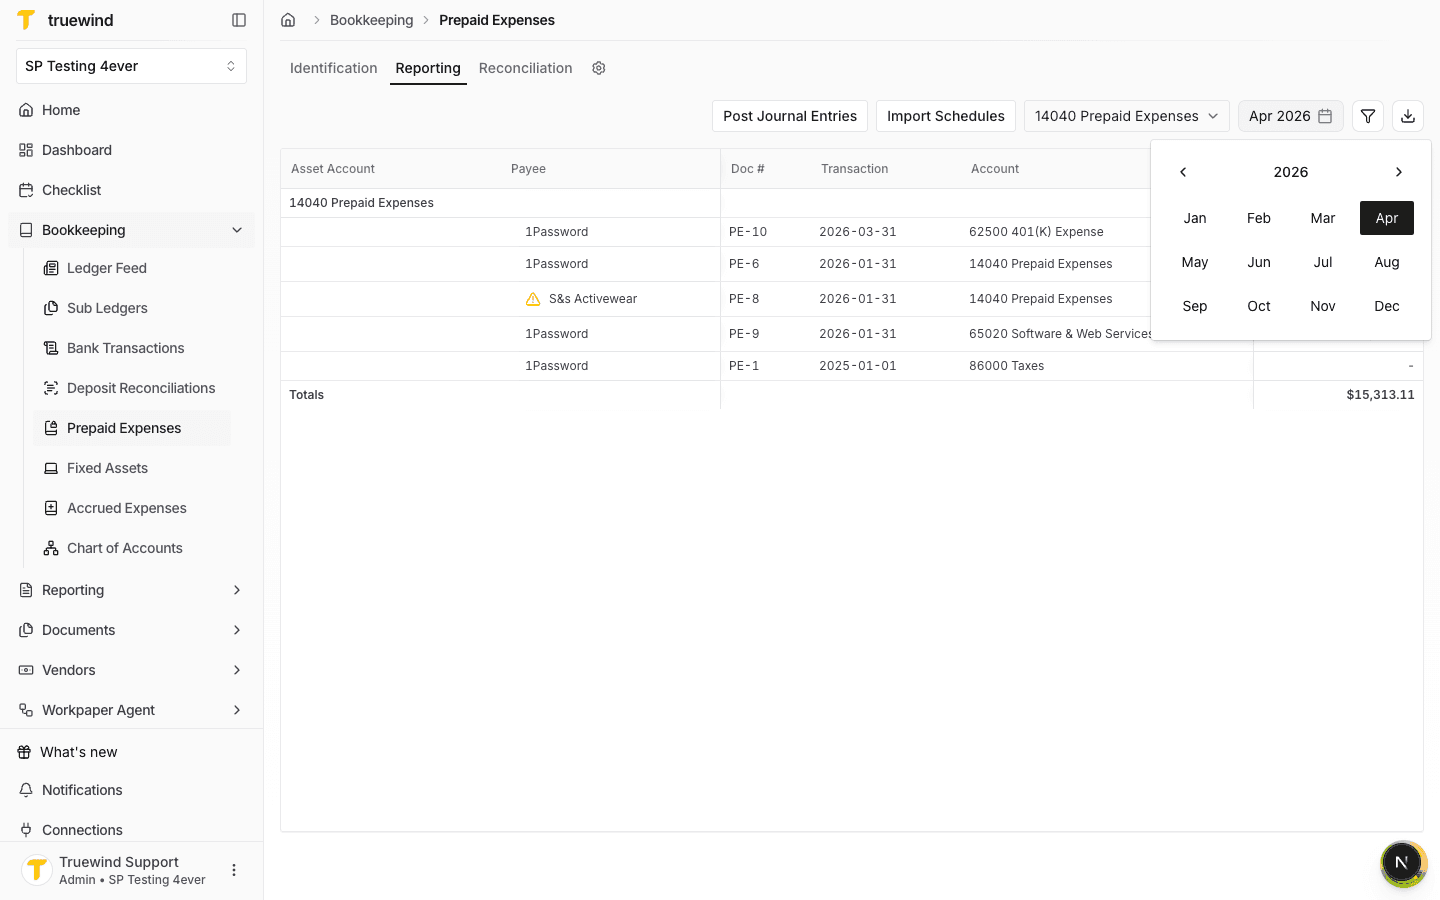
Select the month you want to review so the reporting grid shows schedules and remaining balances as of that period.
Step 5
Check each schedule row for payee, document number, source transaction, account, class, status, and service dates.
Step 6
Scroll across the grid to compare monthly amortization amounts and the remaining balance for the selected term date.
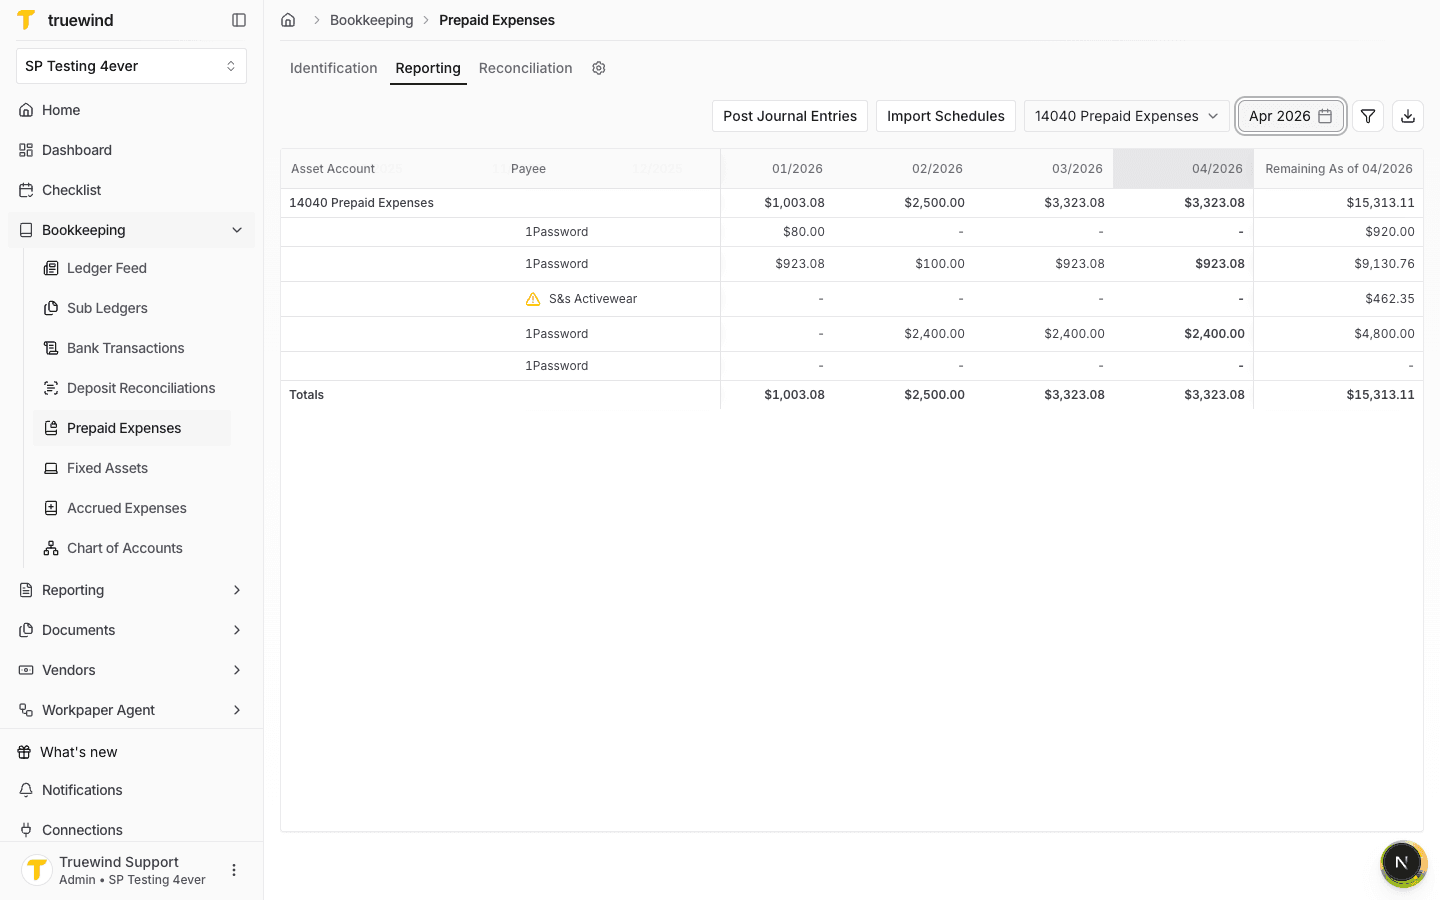
Use the term date filter before reviewing schedule rows so the monthly amounts and remaining balances match the period you intend to reconcile.
Was this helpful?
Need more help?
Ask for human help about this article and provide any feedback.