Good follow-up check
After saving, confirm the bill-related transaction appears in Reporting and is ready for amortization posting when appropriate.
Ask the support agent
Just ask a direct question or search related articles from the Knowledge Base.
Support Center / Prepaid Expenses / Manage
Create a prepaid schedule from a bill-related transaction when the cost should amortize over time, resulting in a schedule that moves out of Identification and into prepaid tracking.
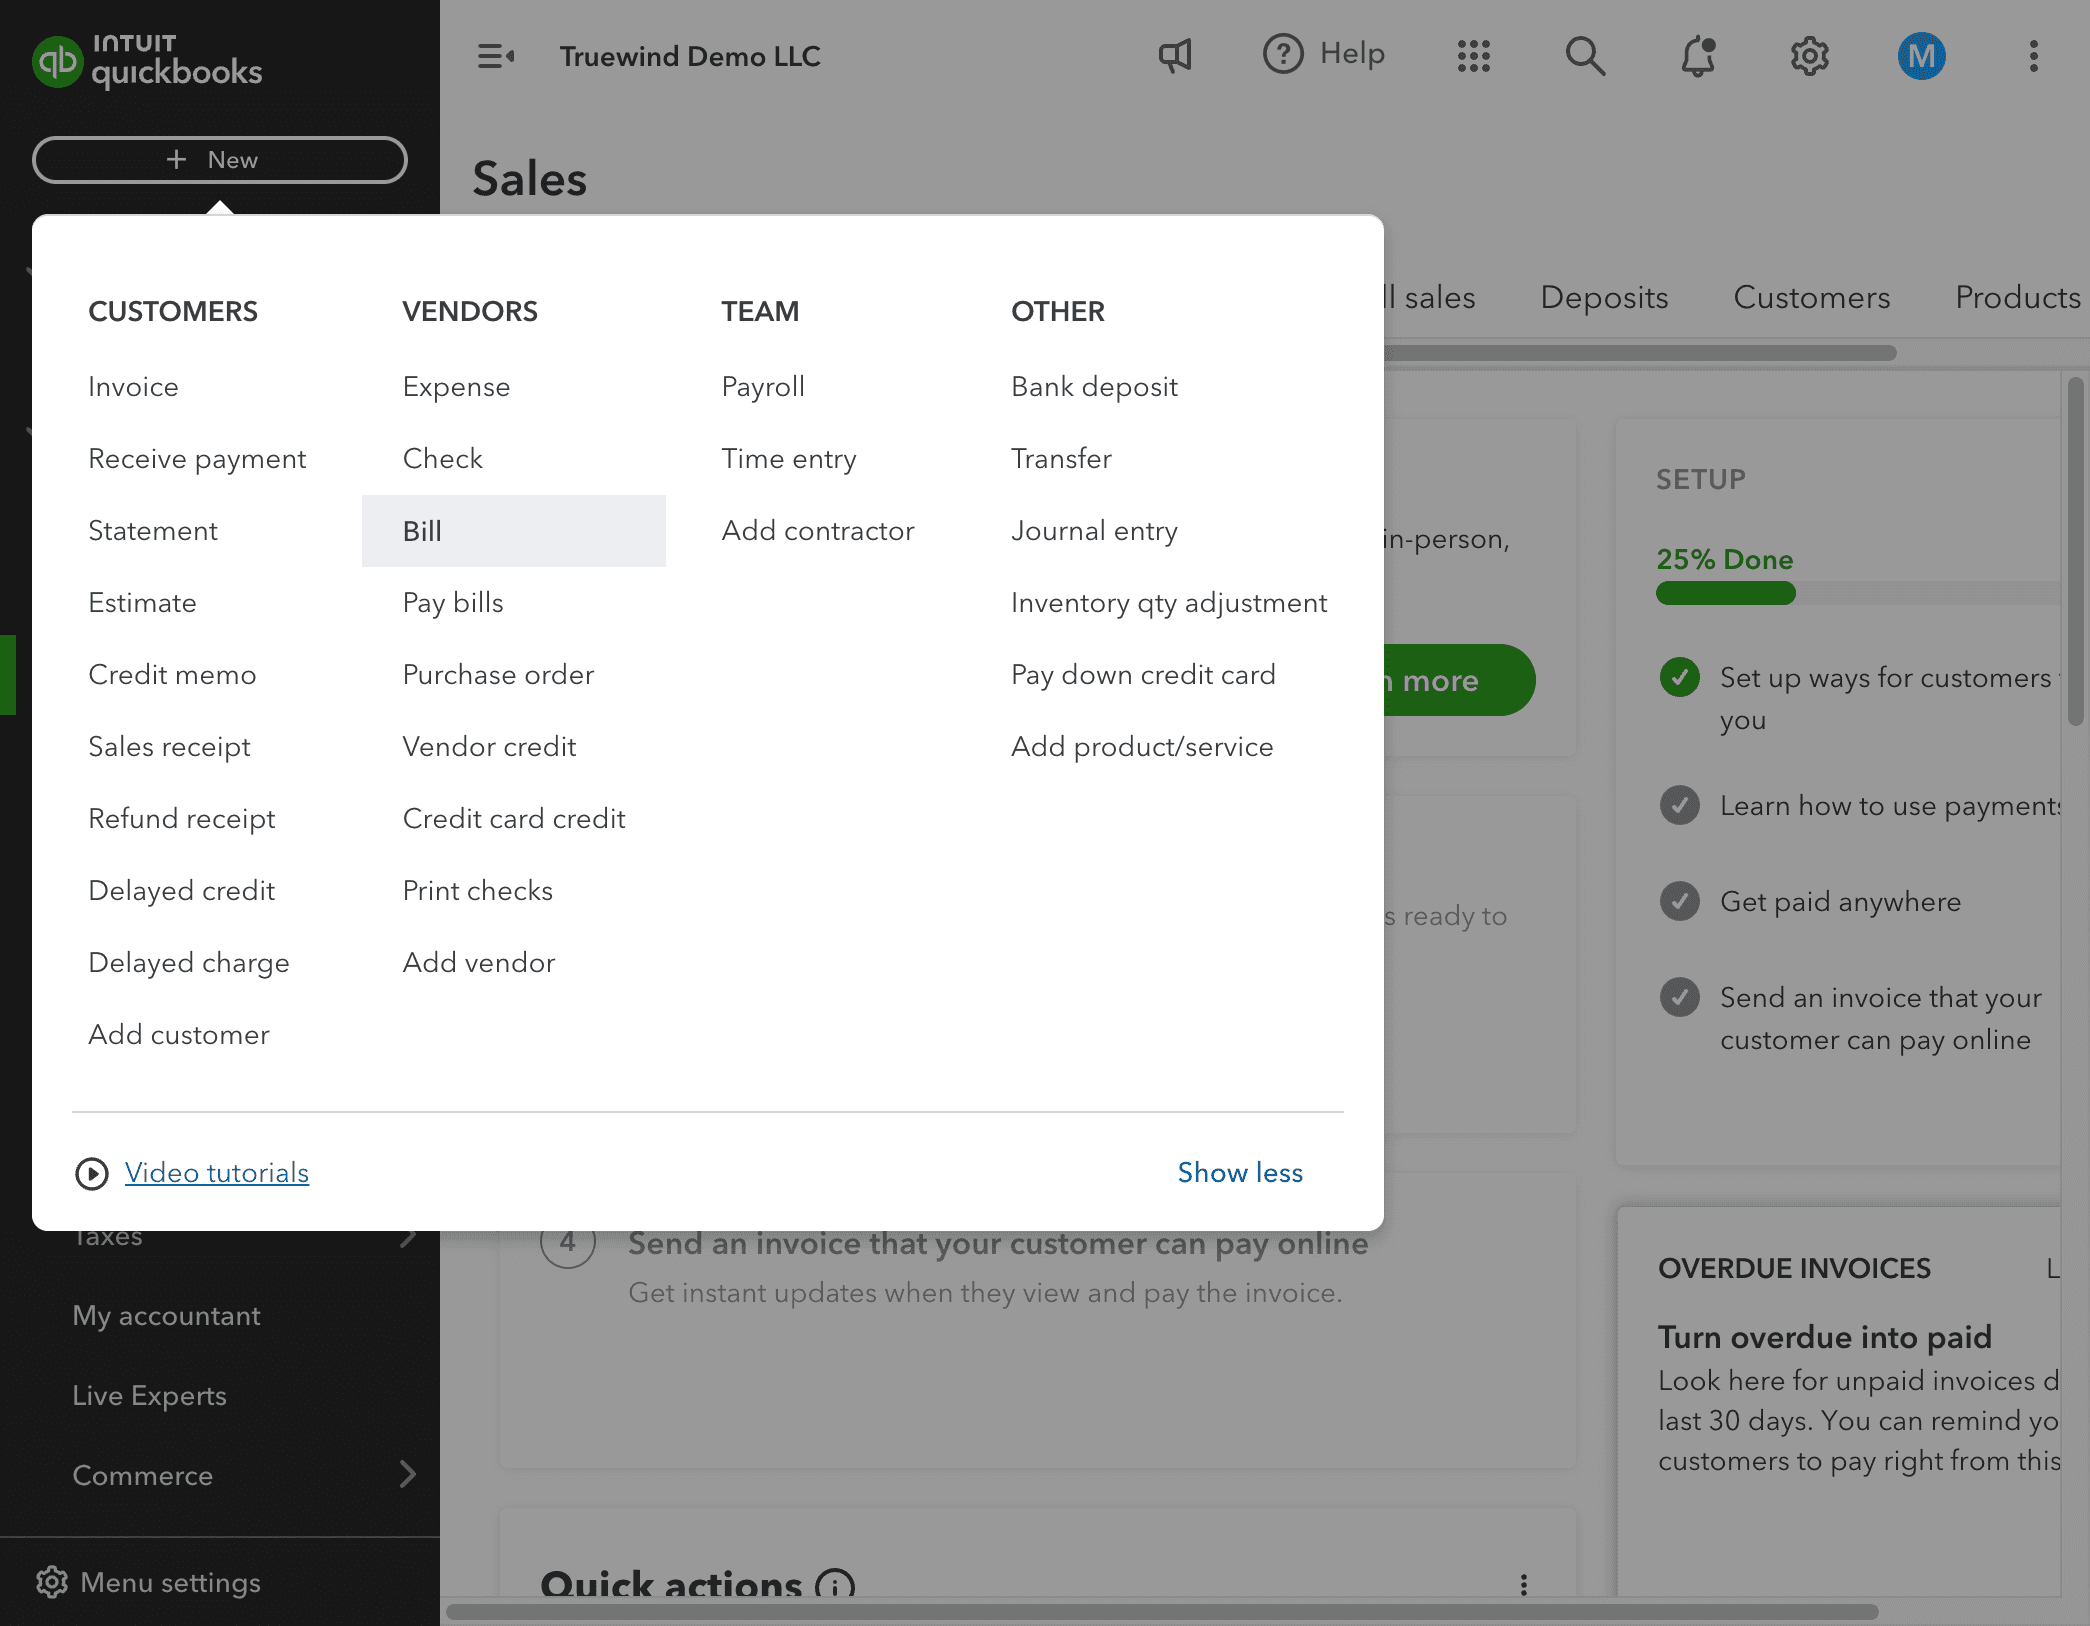
Step 1
Use the highlighted control to continue through the workflow.
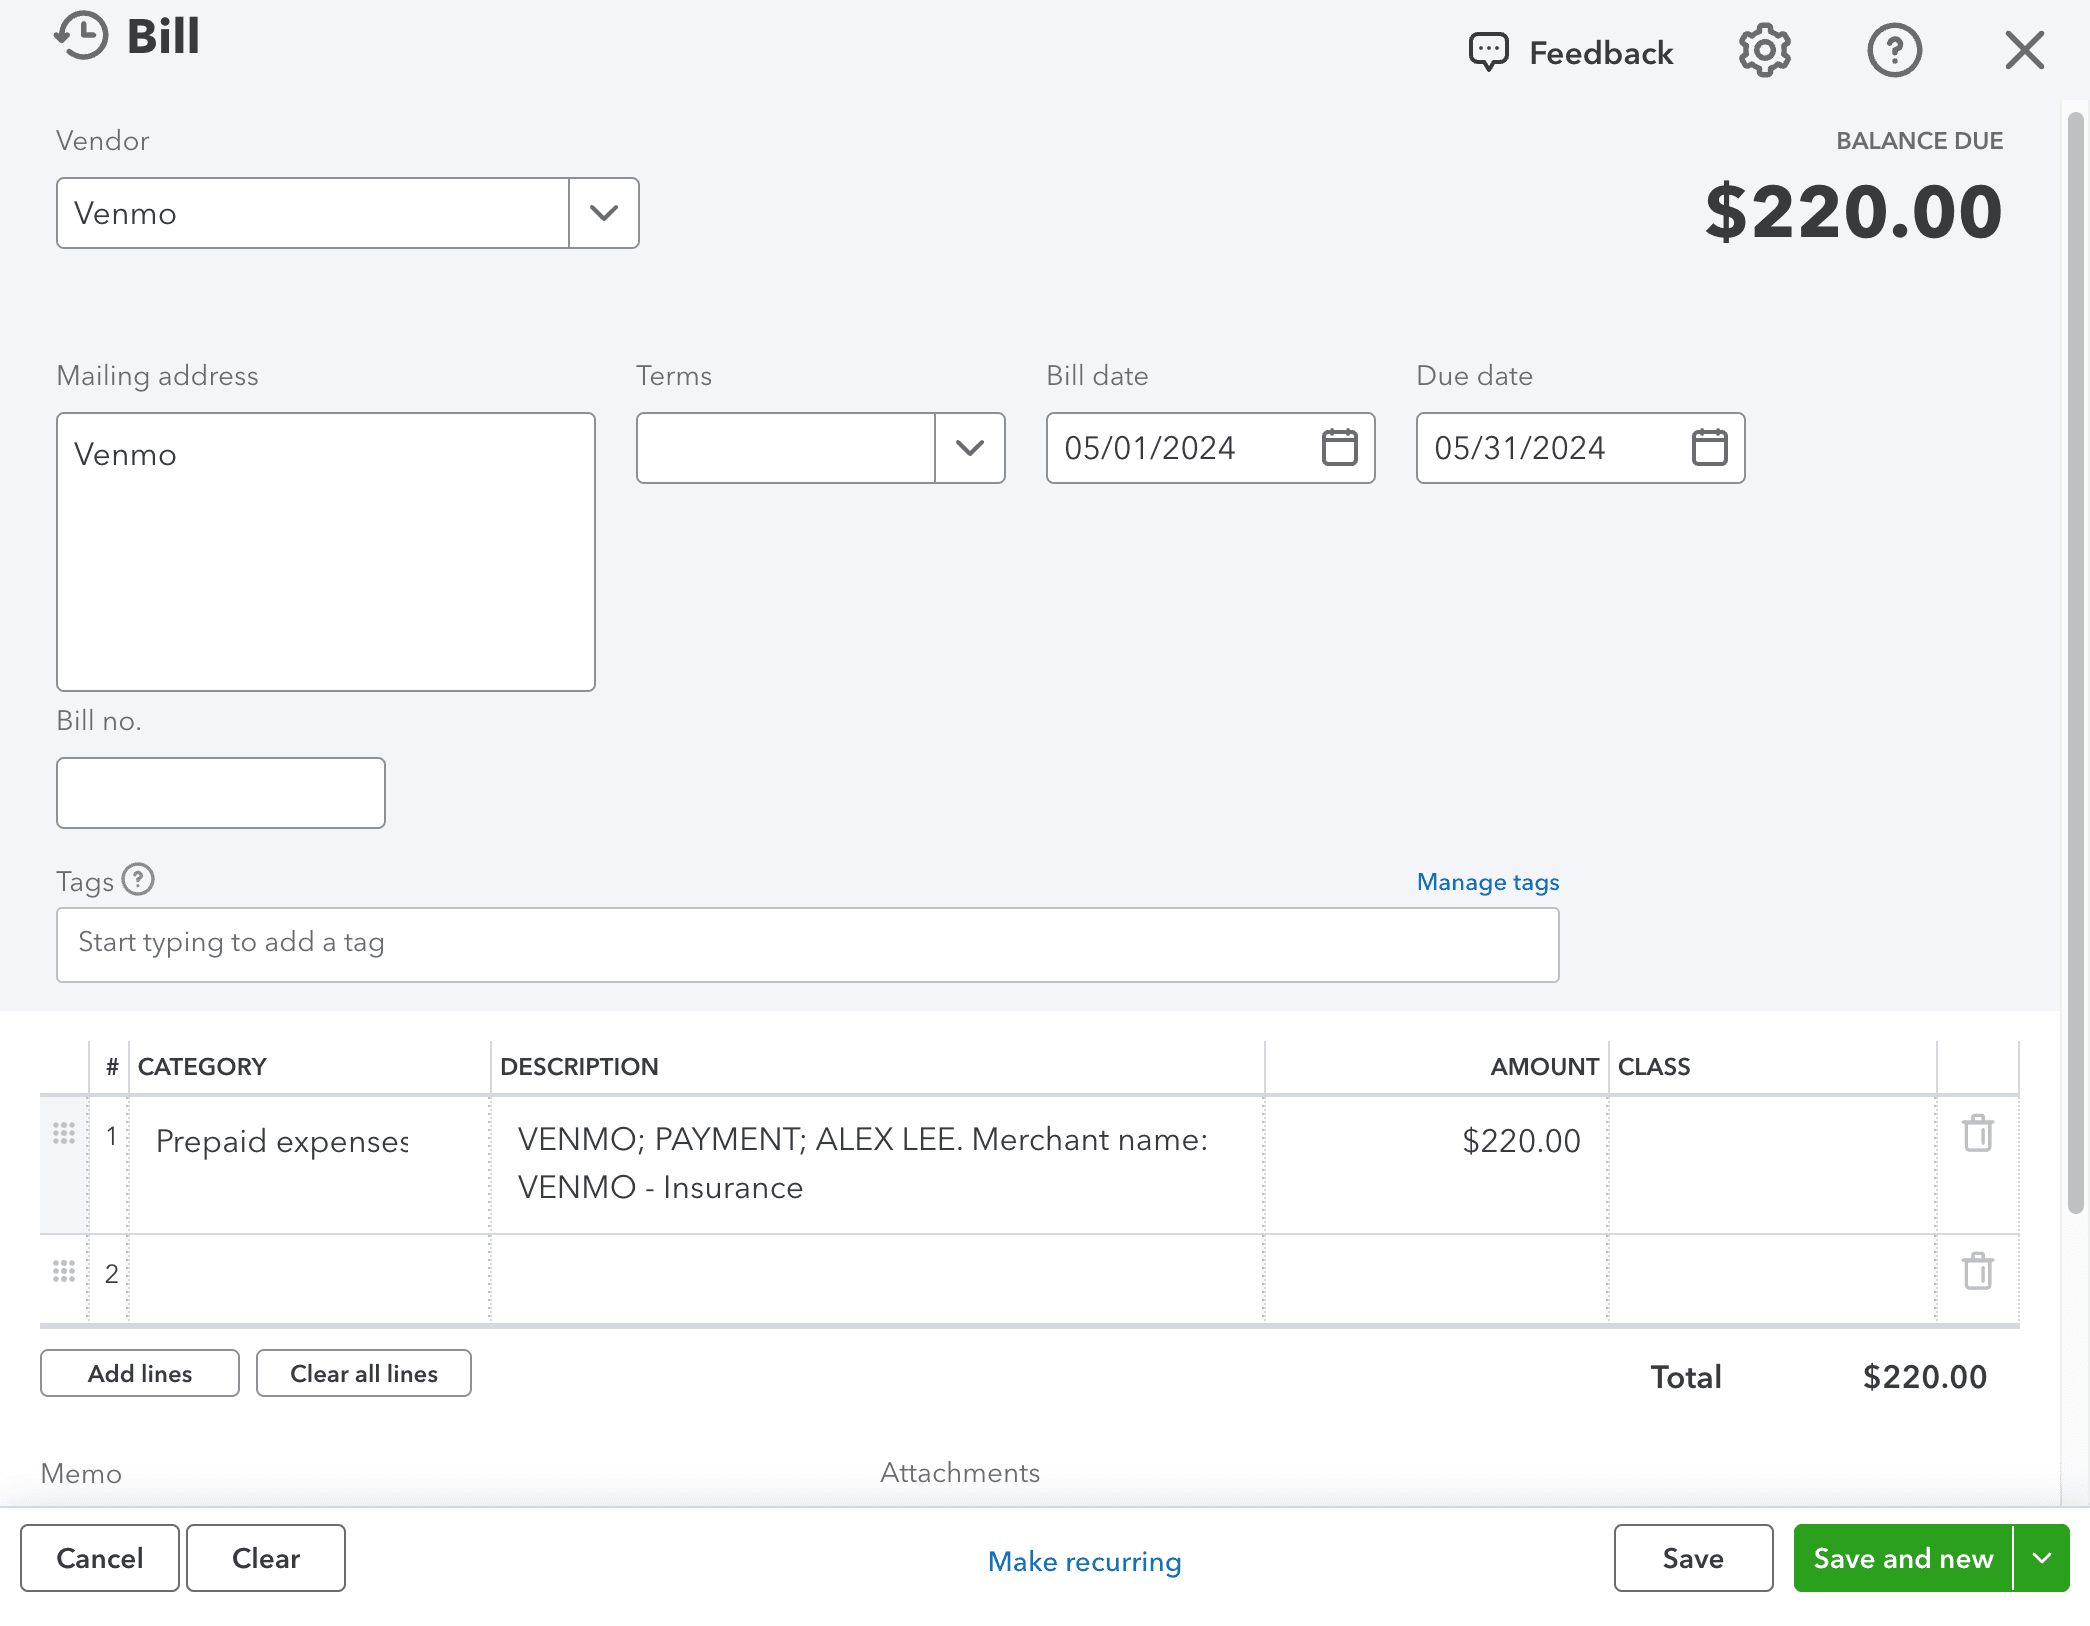
Step 2
Enter the required values carefully so the schedule and journal-entry details calculate correctly.
Step 3
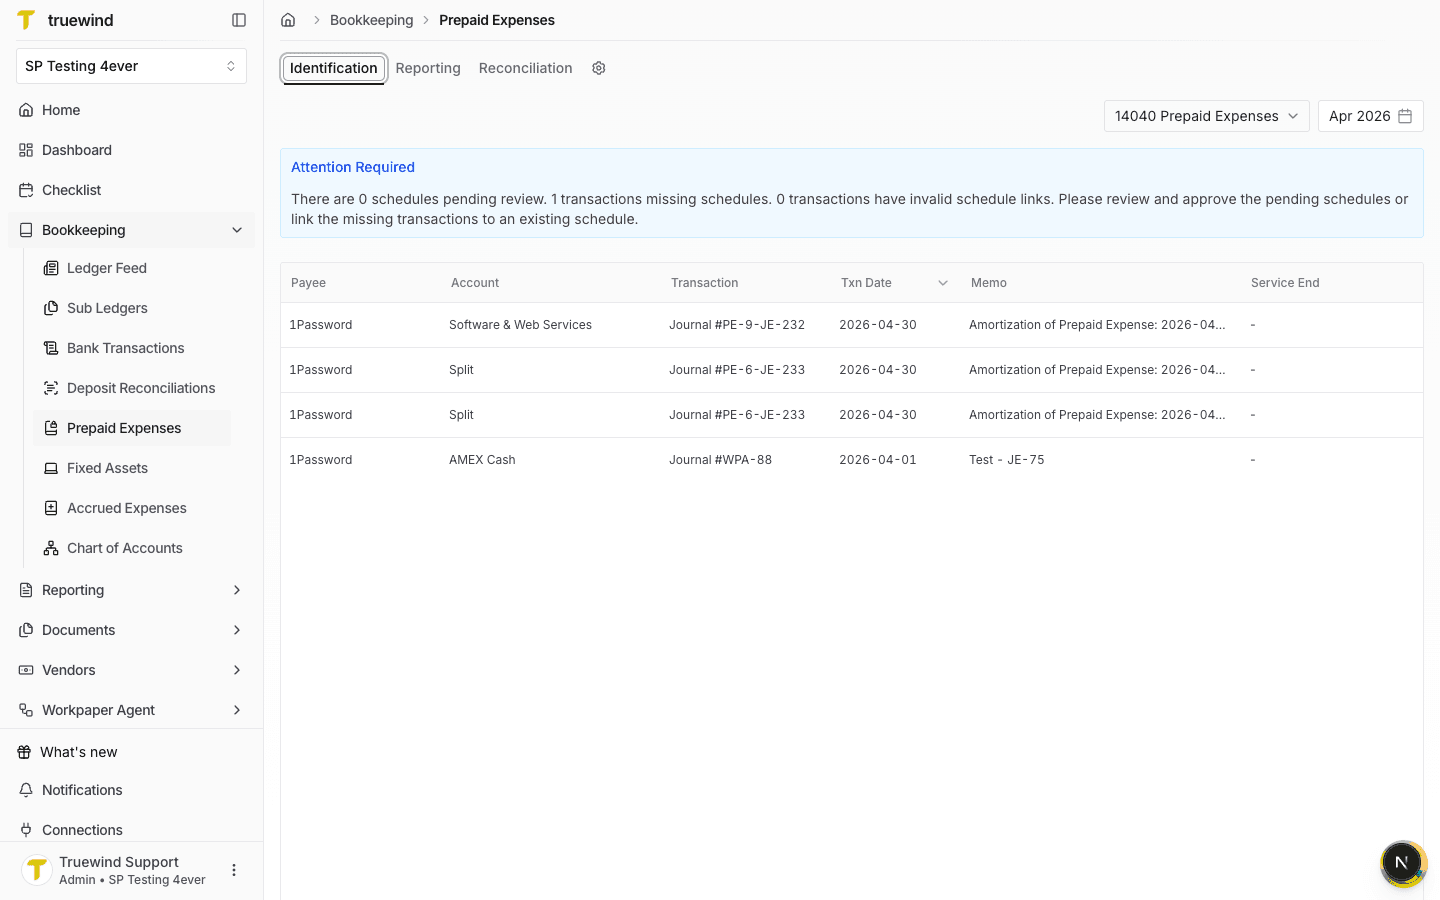
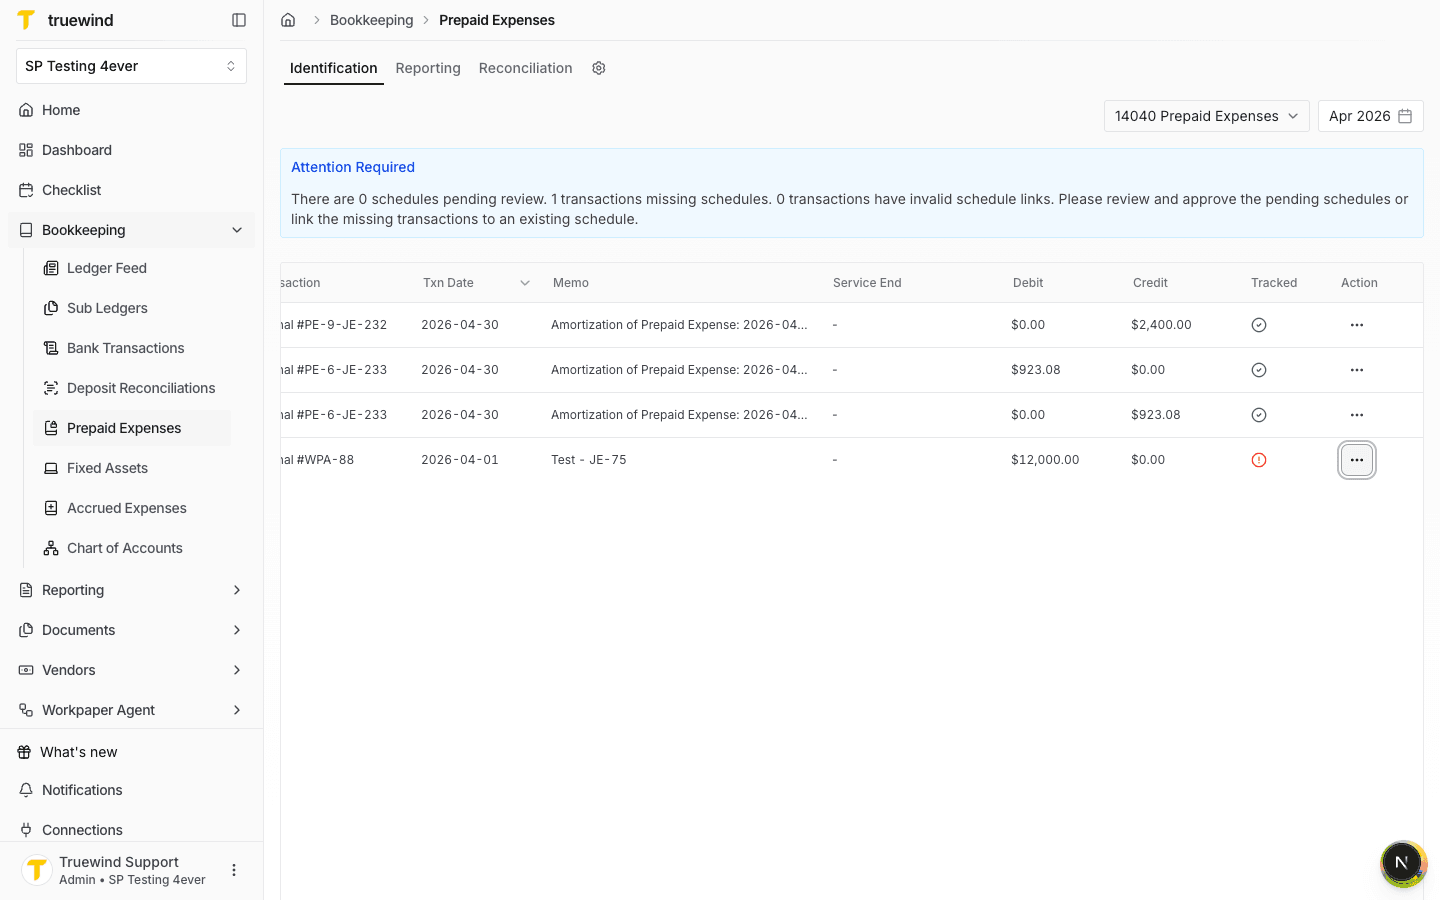
In Truewind, go to Bookkeeping > Prepaid Expenses and keep Identification selected for the prepaid account you want to review.
Step 4
Use the attention banner and transaction table to find bill-related transactions that still need a prepaid schedule or schedule link.

Step 5
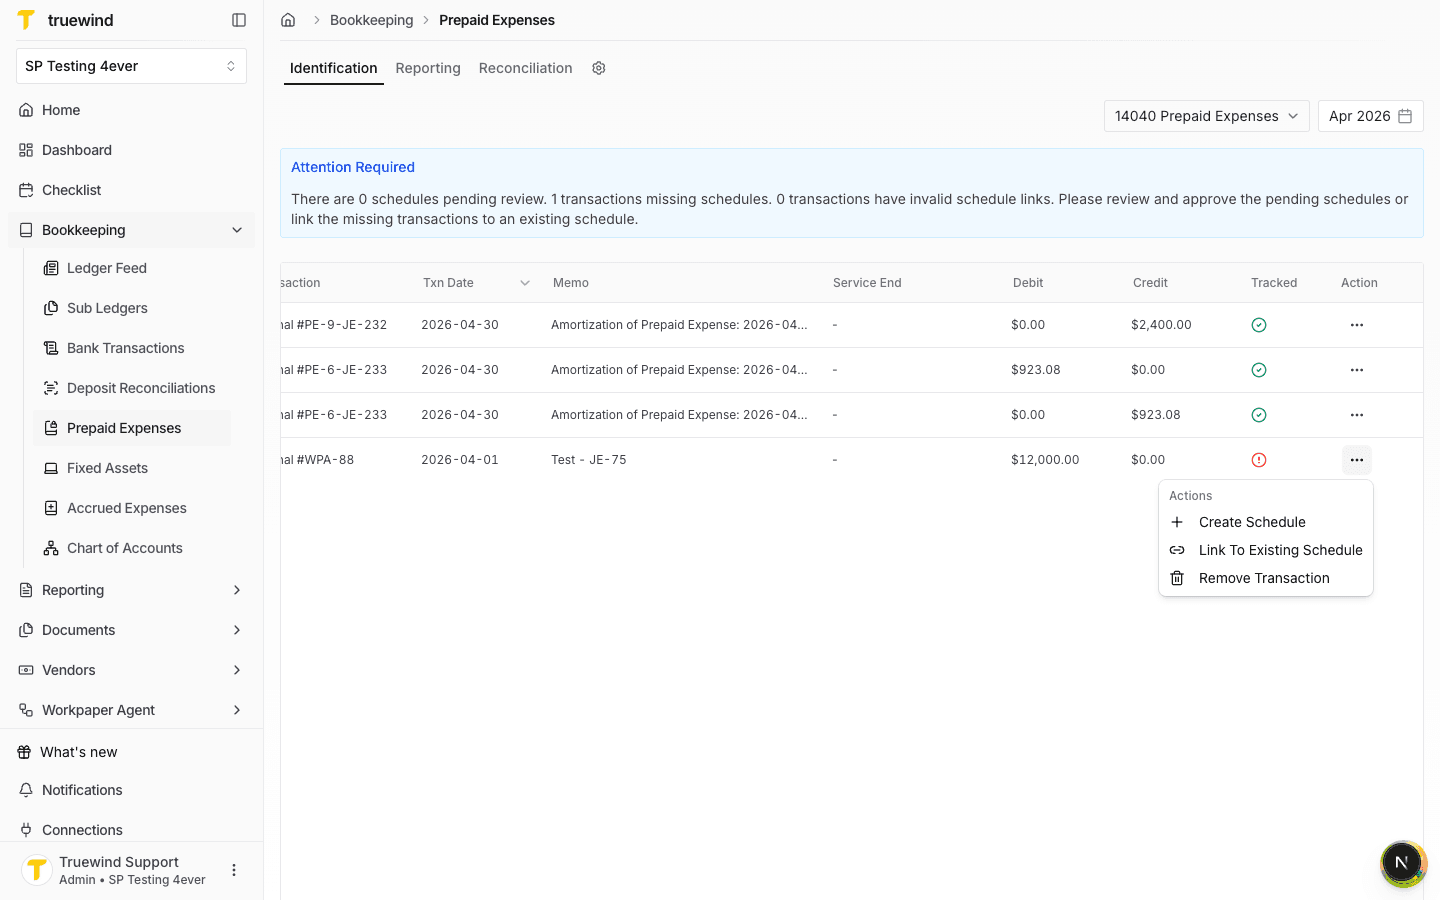
Open the row action menu for the transaction that should be converted into a prepaid schedule.
Step 6
Select Create Schedule when the transaction needs a new schedule, or link it to an existing schedule if one already exists.

Step 7
Confirm the transaction status changes after the schedule is created or linked, then continue to Reporting to verify the schedule.
Step 8
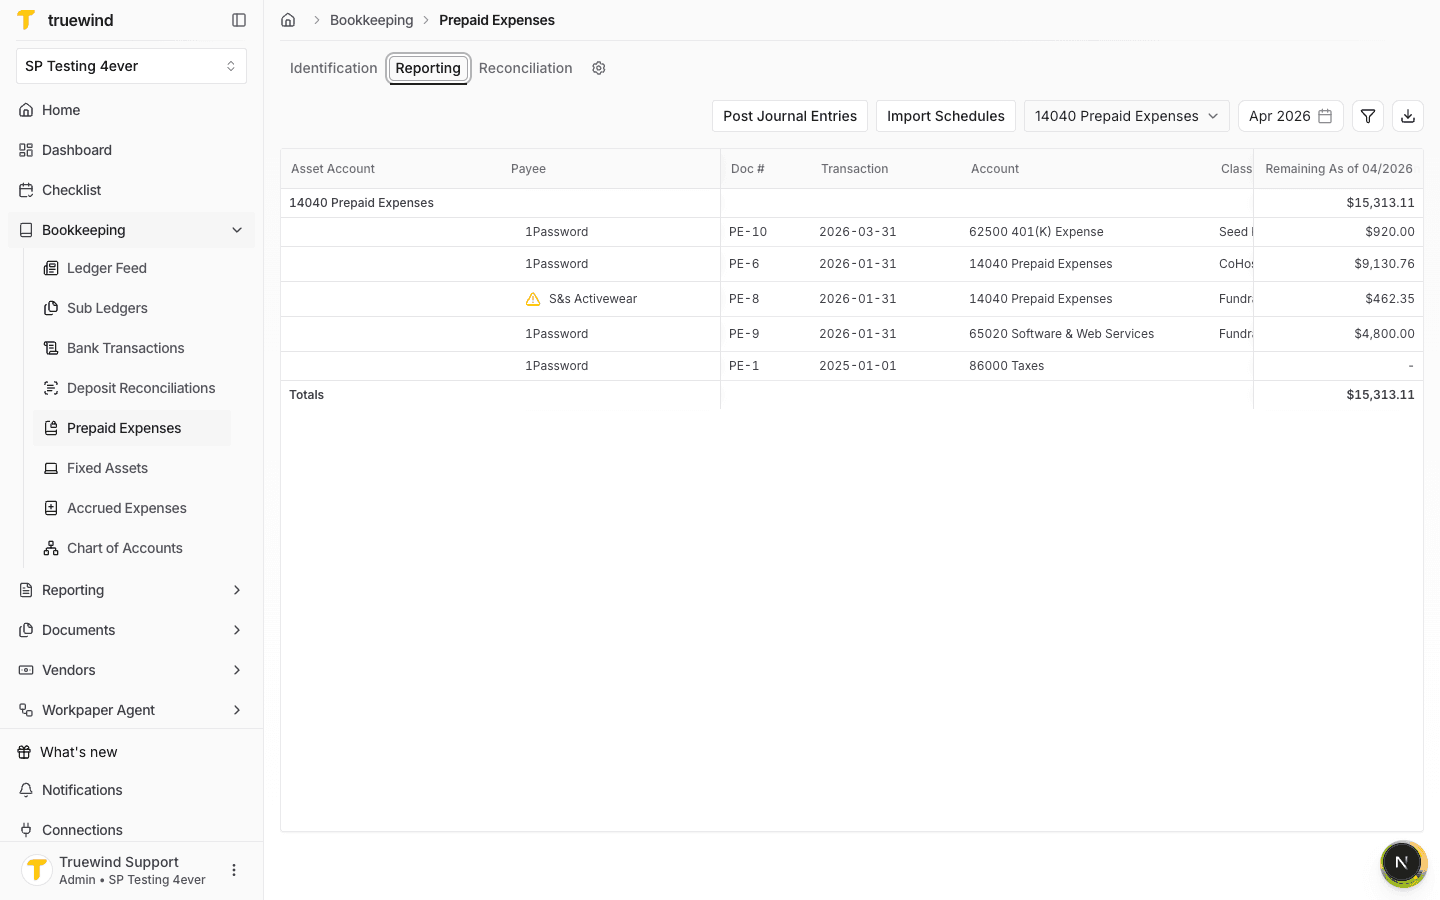
Switch to Reporting for the same prepaid account and accounting period to review schedules that are available for amortization posting.
Step 9
Confirm the schedule appears in the reporting table with the expected payee, document number, account, and remaining balance.

Step 10
Use the schedule list and Post Journal Entries control to verify the schedule is ready for the next amortization posting step when appropriate.

After saving, confirm the bill-related transaction appears in Reporting and is ready for amortization posting when appropriate.
Was this helpful?
Need more help?
Ask for human help about this article and provide any feedback.