
When to use this workflow
Use this when a new debit transaction belongs on an existing schedule for the same month rather than needing its own schedule.
Ask the support agent
Just ask a direct question or search related articles from the Knowledge Base.
Support Center / Prepaid Expenses / Manage
Add another Prepaid Expense transaction to an existing schedule when related costs should amortize together, resulting in a combined schedule amount.
Step 1
Go to Bookkeeping > Prepaid Expenses and keep Identification selected for the prepaid account you want to review.
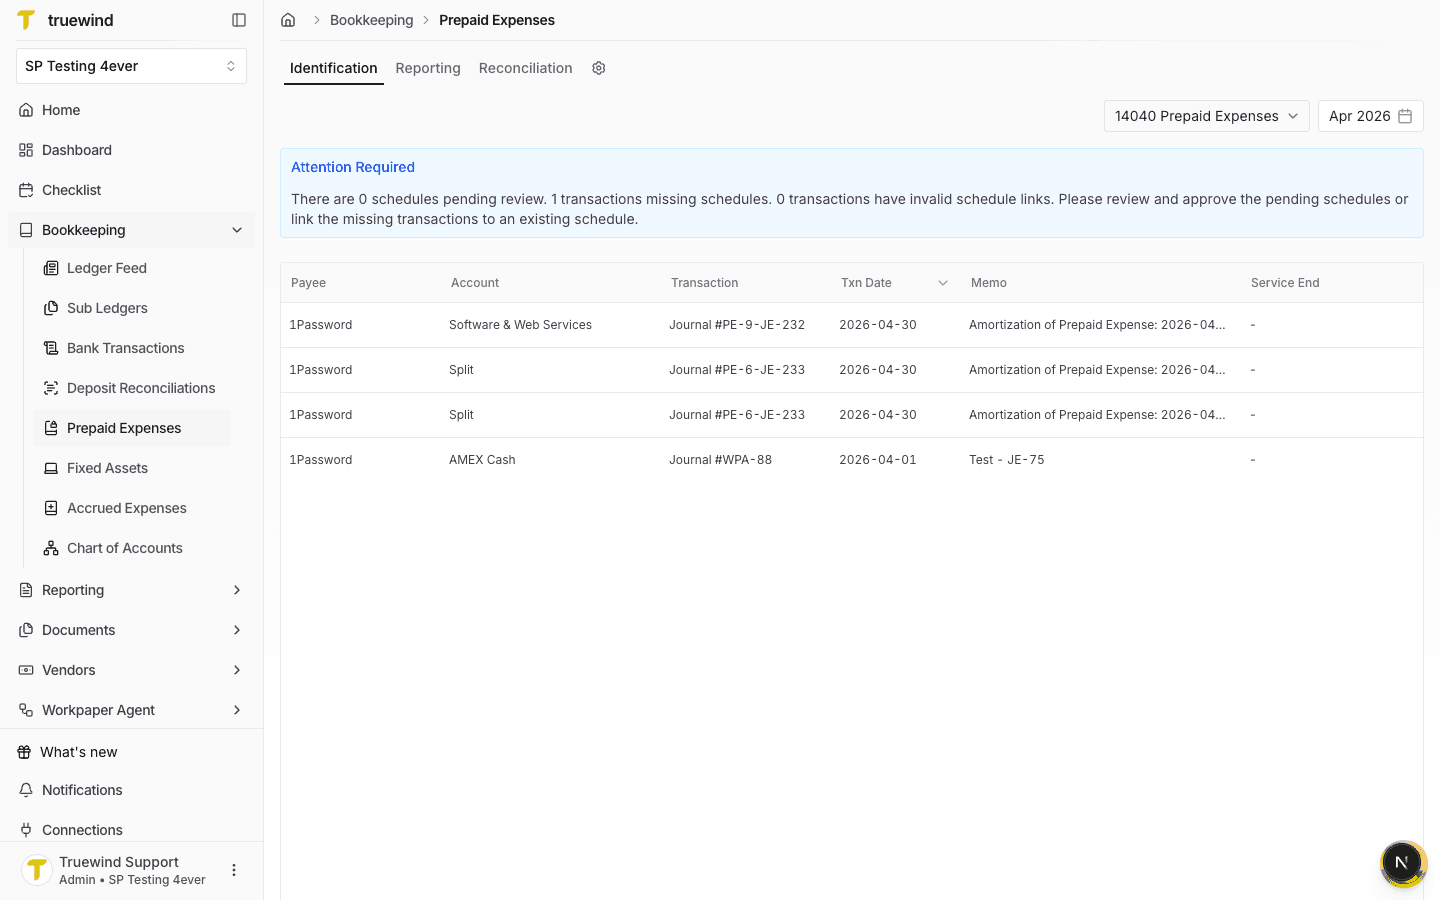
Step 2
Find the transaction that belongs on an existing schedule and confirm it is not already tracked.
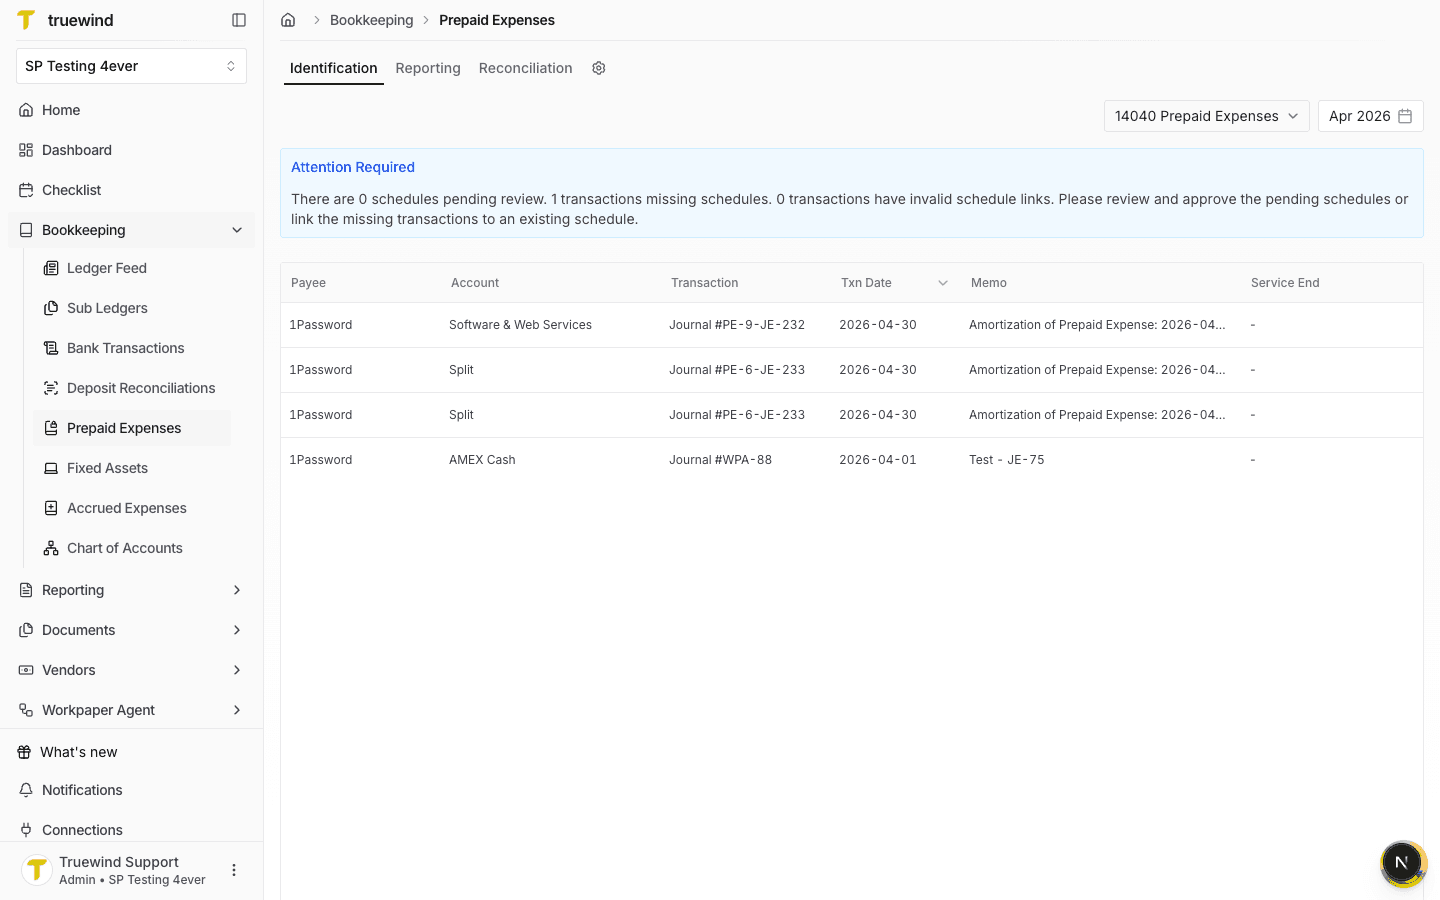
Step 3
Use the row action menu for the transaction that should be added to an existing schedule.
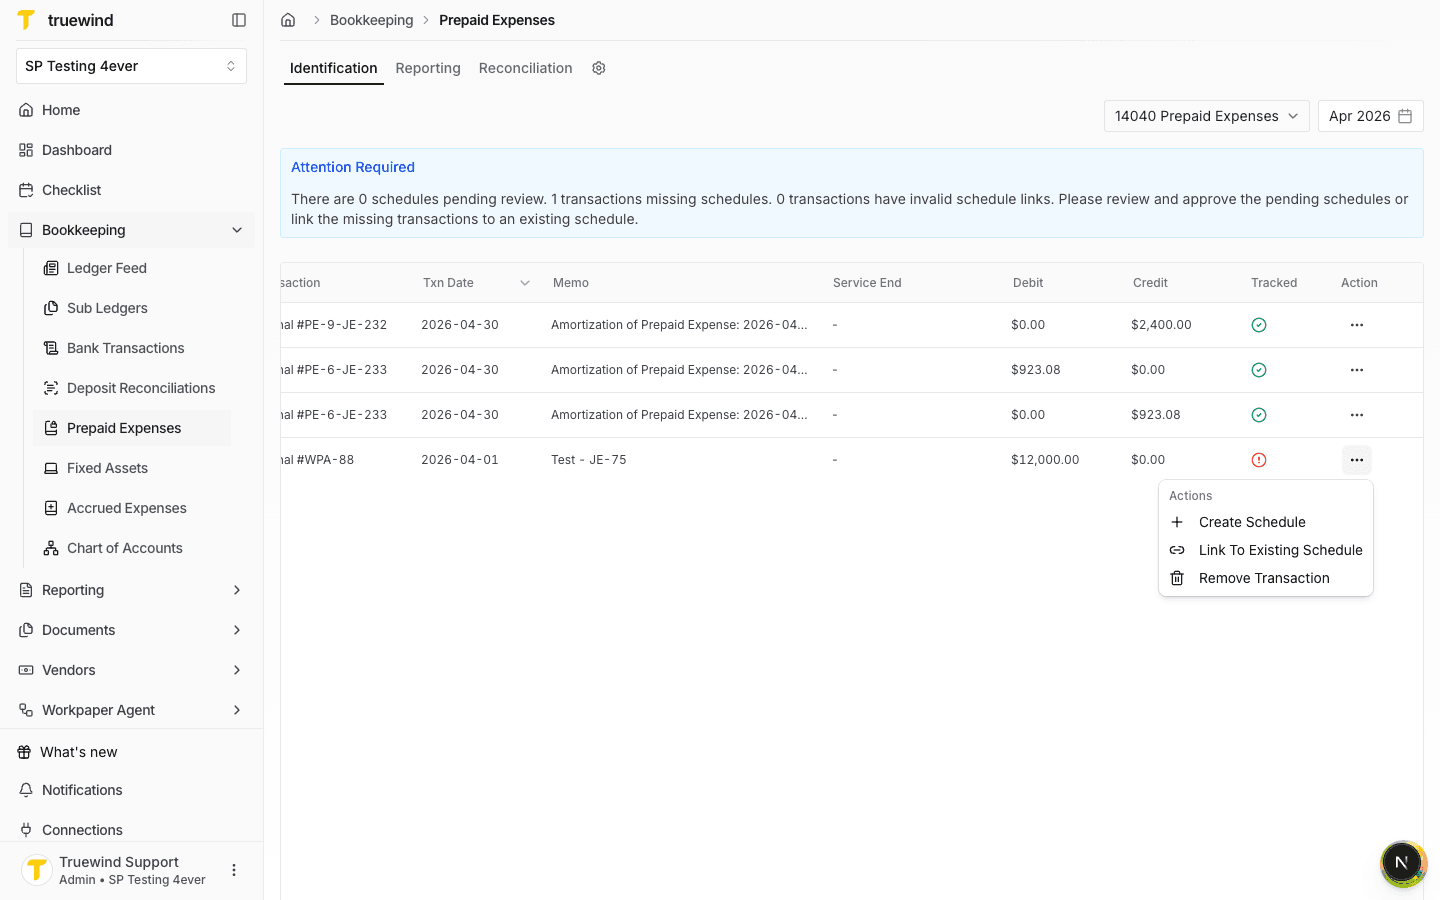
Step 4
Select Link To Existing Schedule when the cost should be attached to a schedule that already exists.
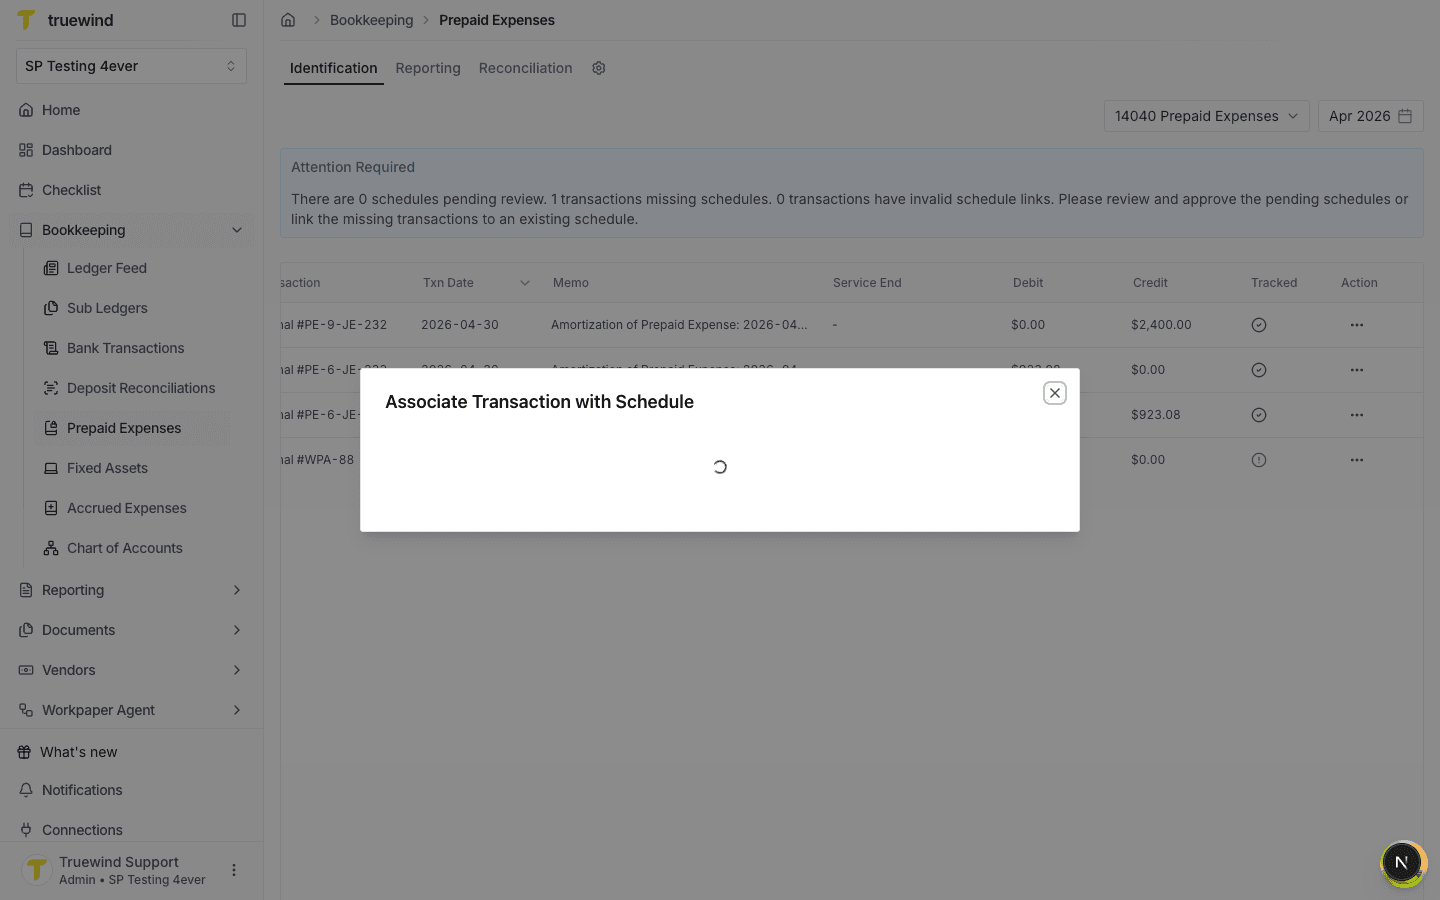
Step 5
Check the payee, amount, and transaction date before choosing the schedule to link.
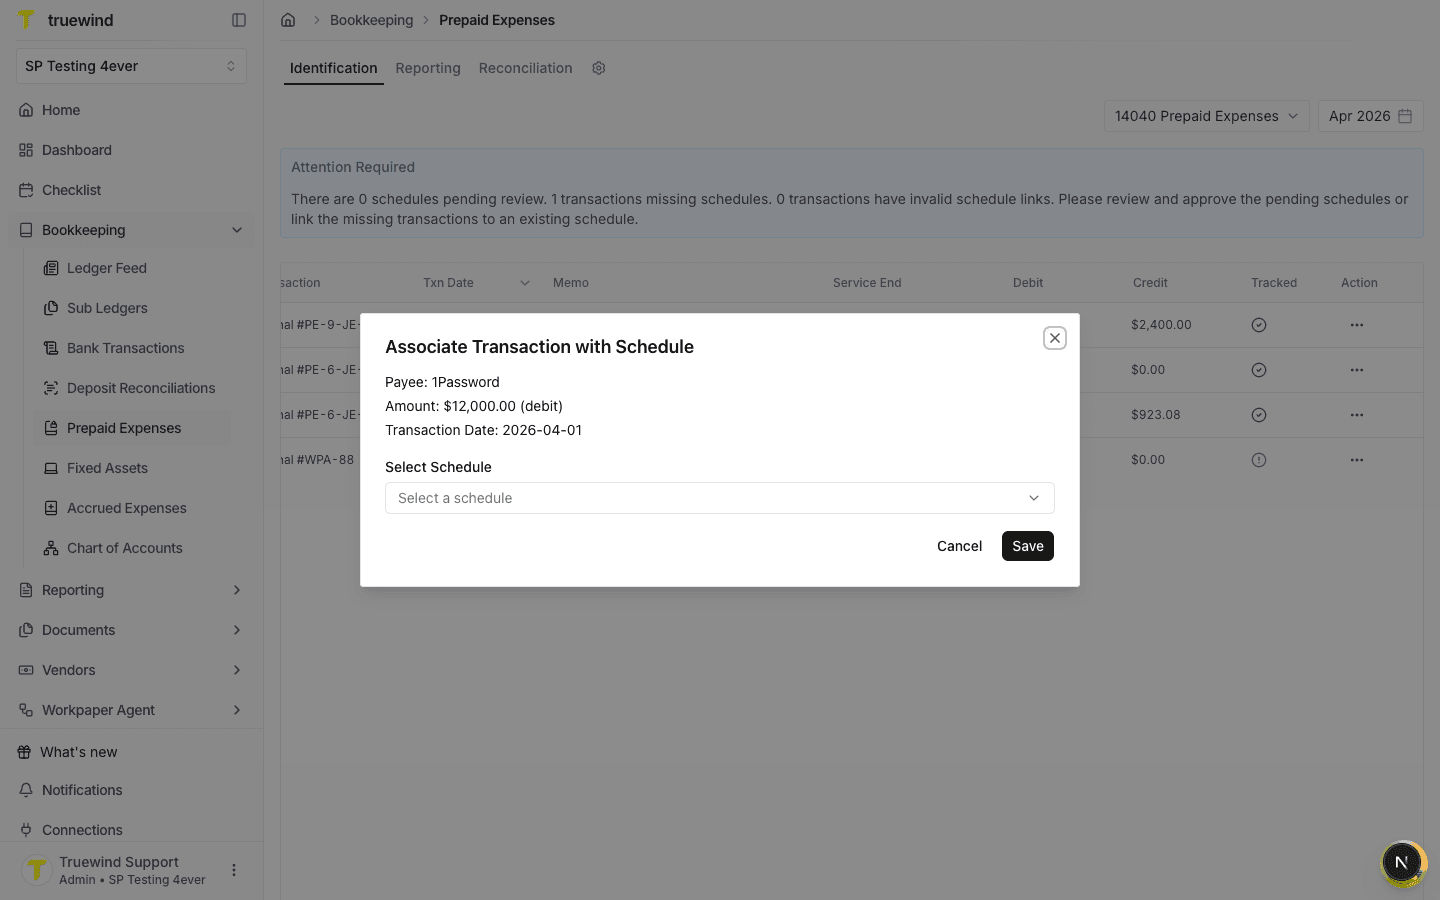
Step 6
Open the schedule selector to see schedules available for the transaction period and prepaid account.
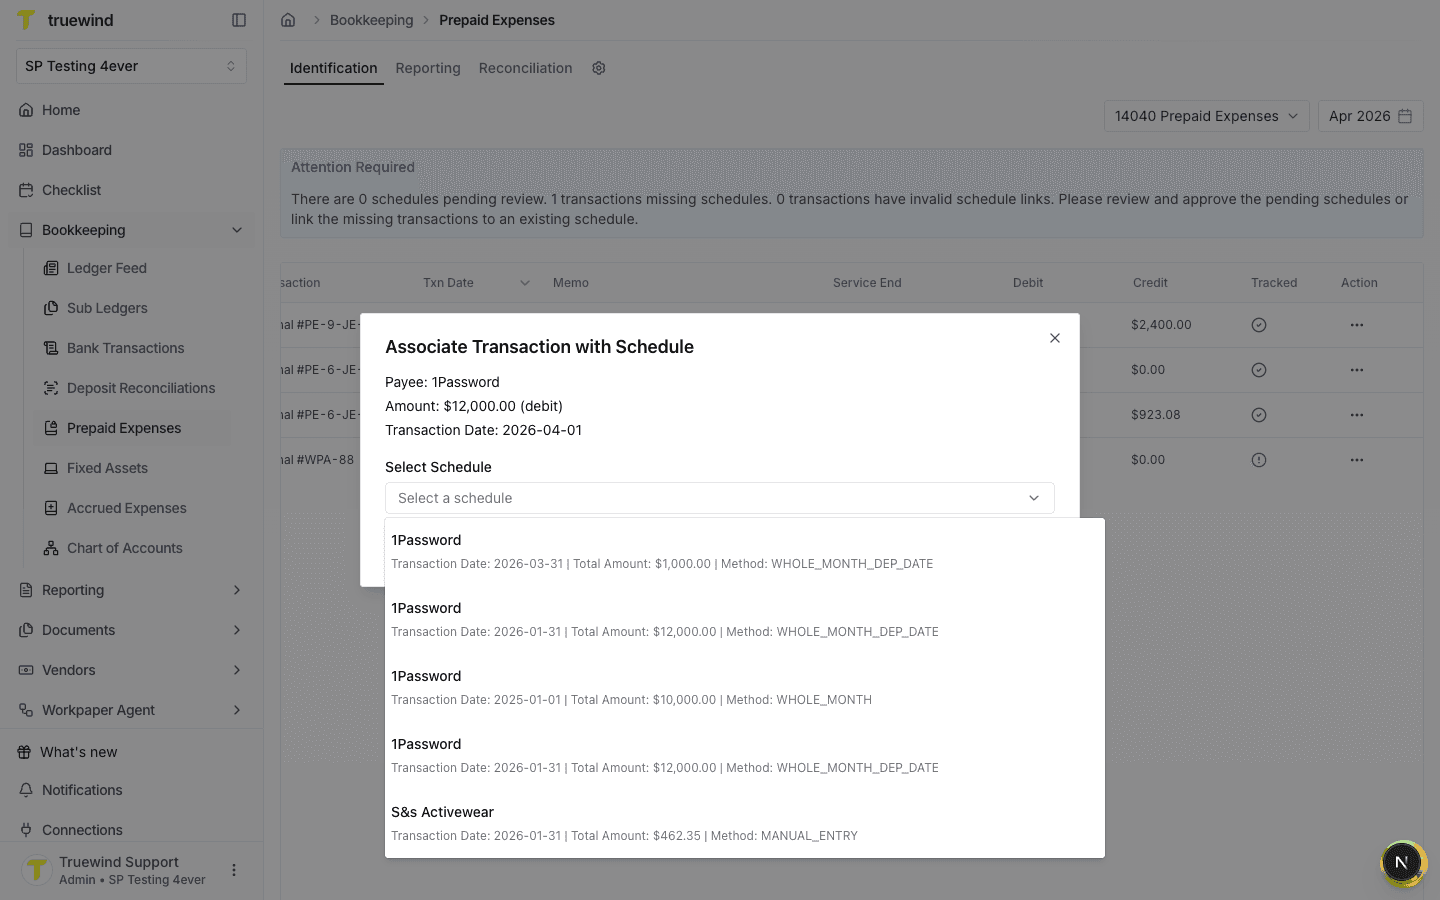
Step 7
Choose the schedule that should receive the additional prepaid expense transaction.
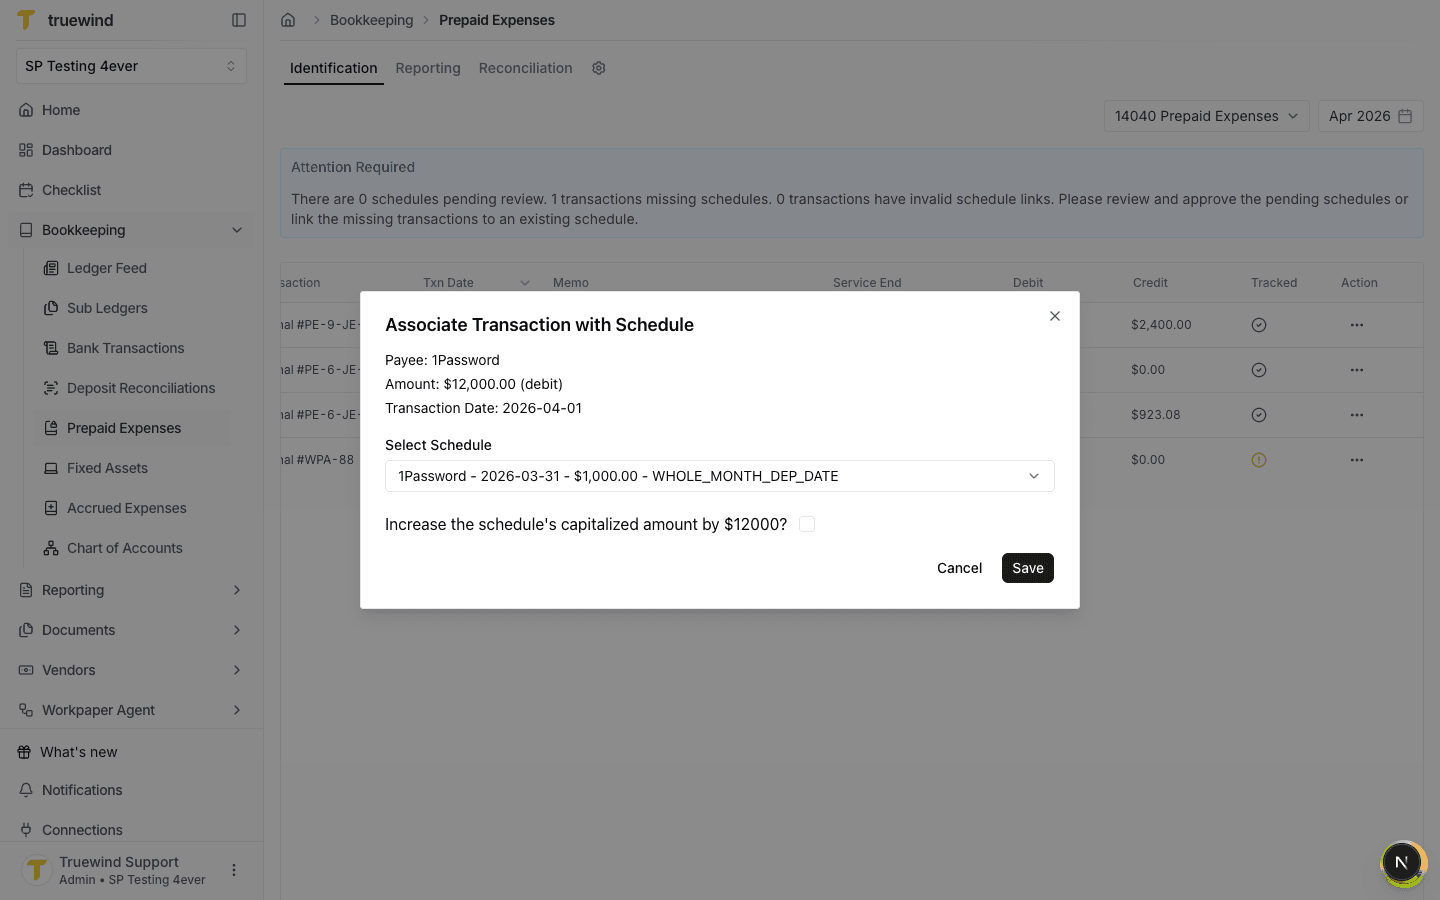
Step 8
Decide whether to increase the schedule capitalized amount, then save only after the selected schedule and amount treatment are correct.
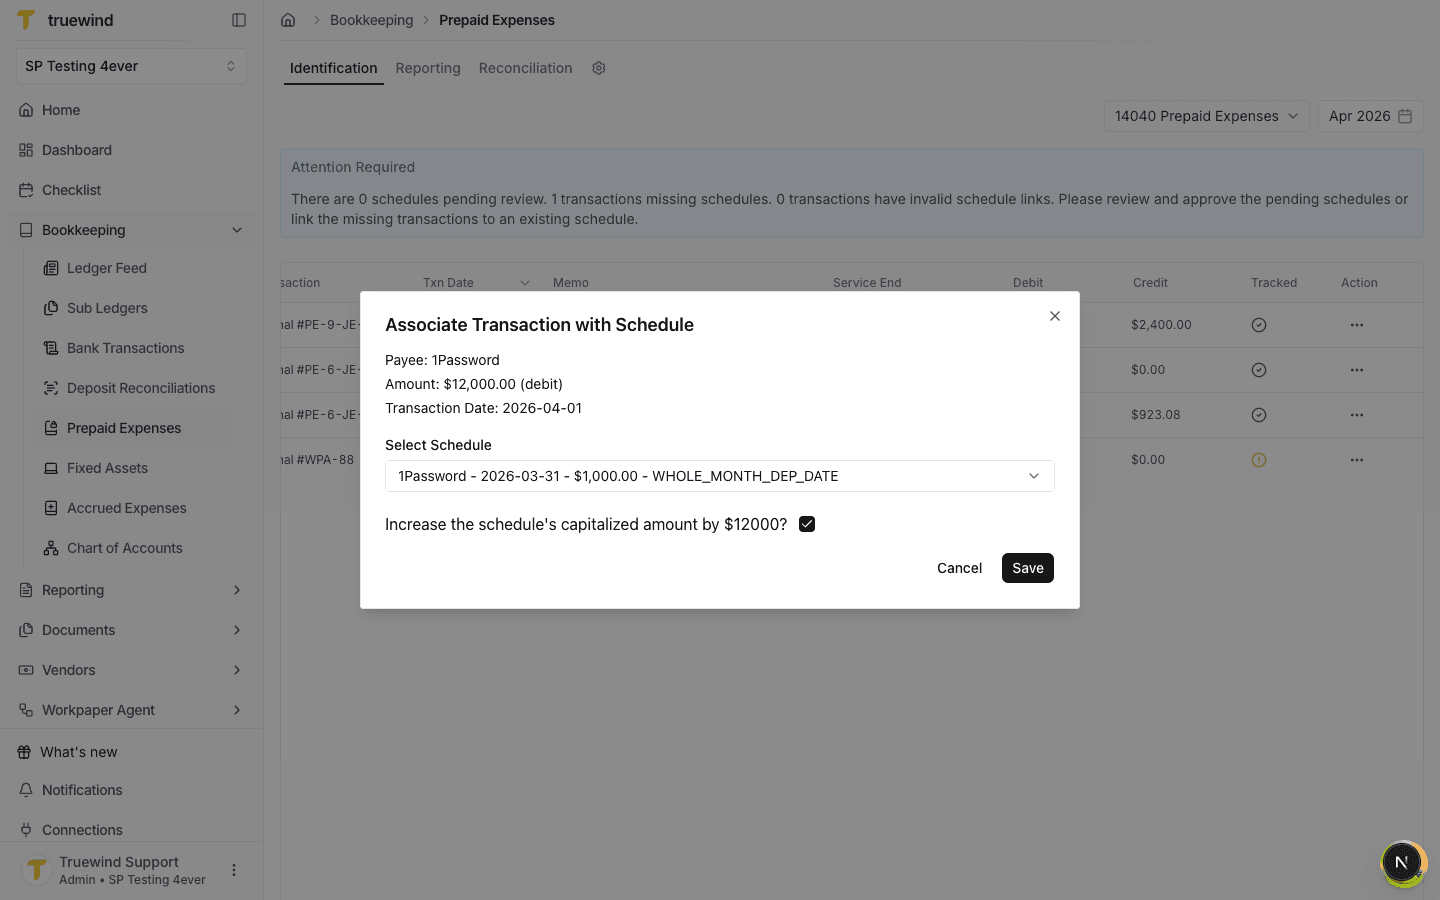
Step 9
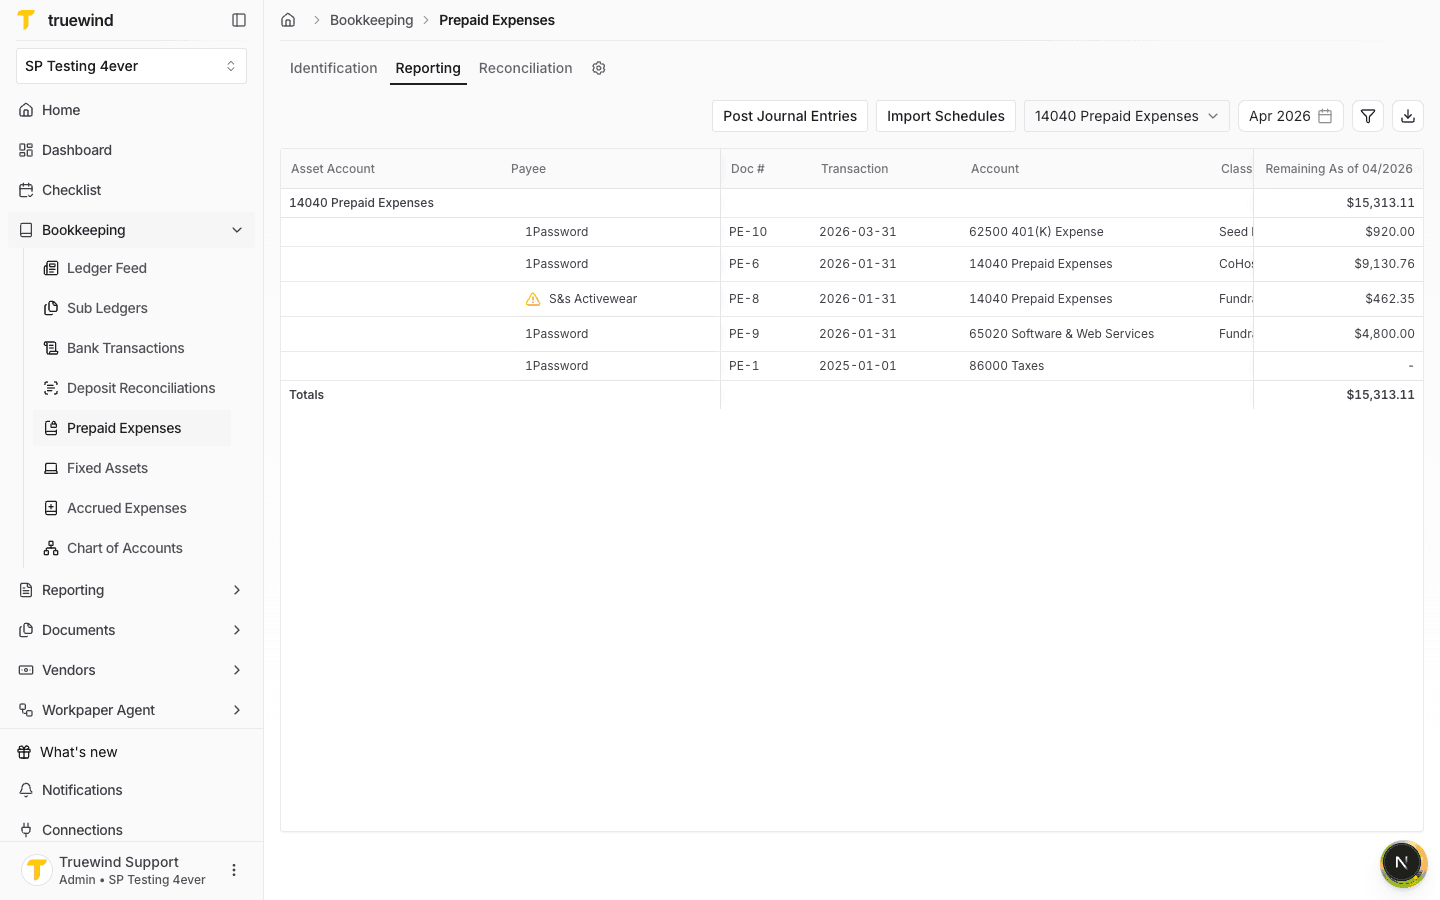
After saving, switch to Reporting for the same prepaid account and accounting period.
Step 10
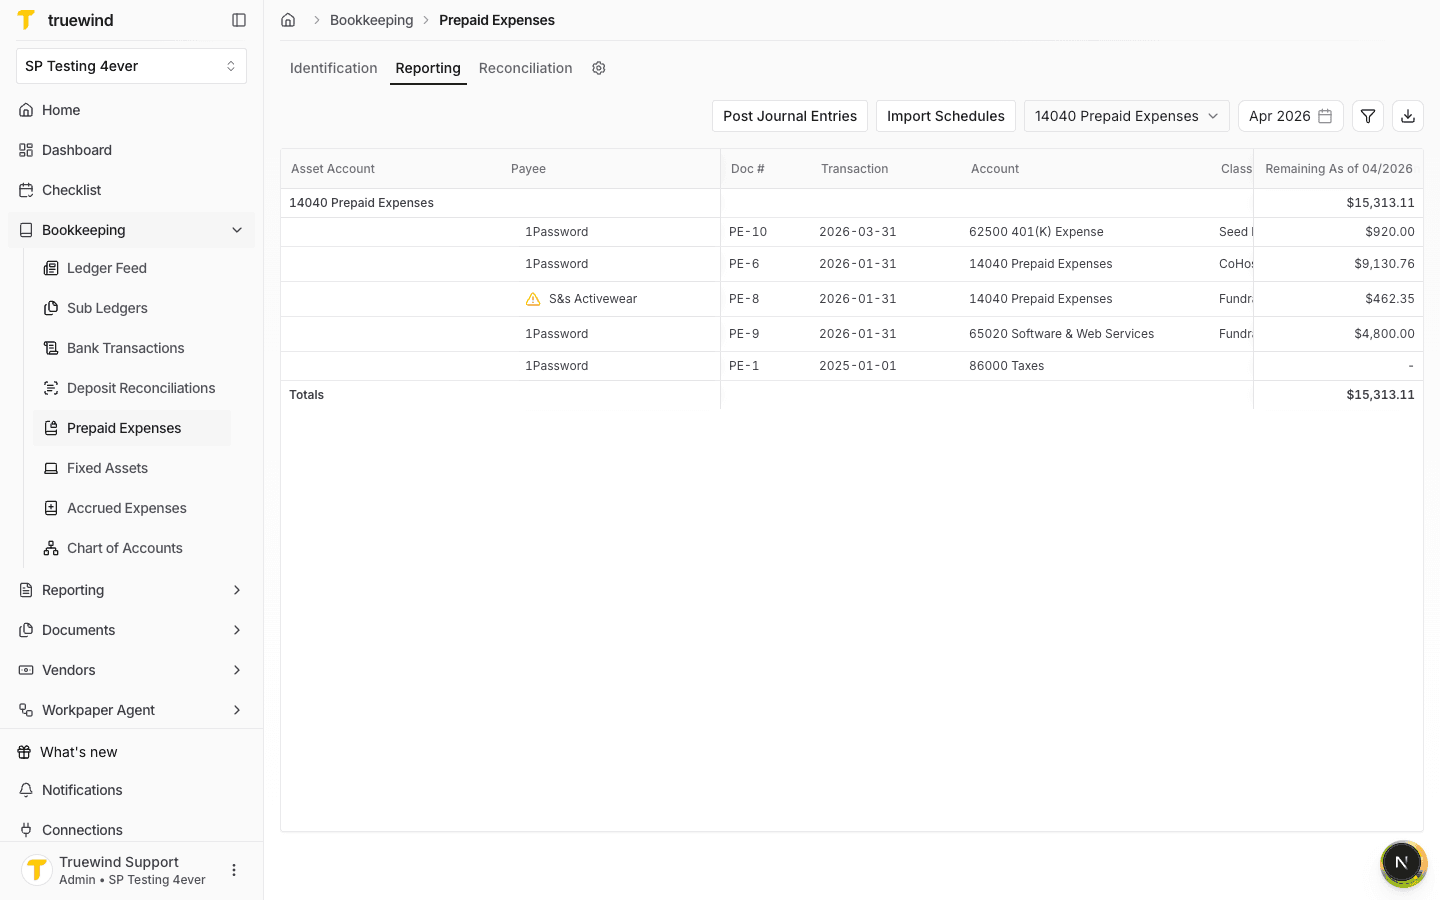
Find the schedule you updated and confirm the table shows the expected payee, document number, account, and remaining balance.
Step 11
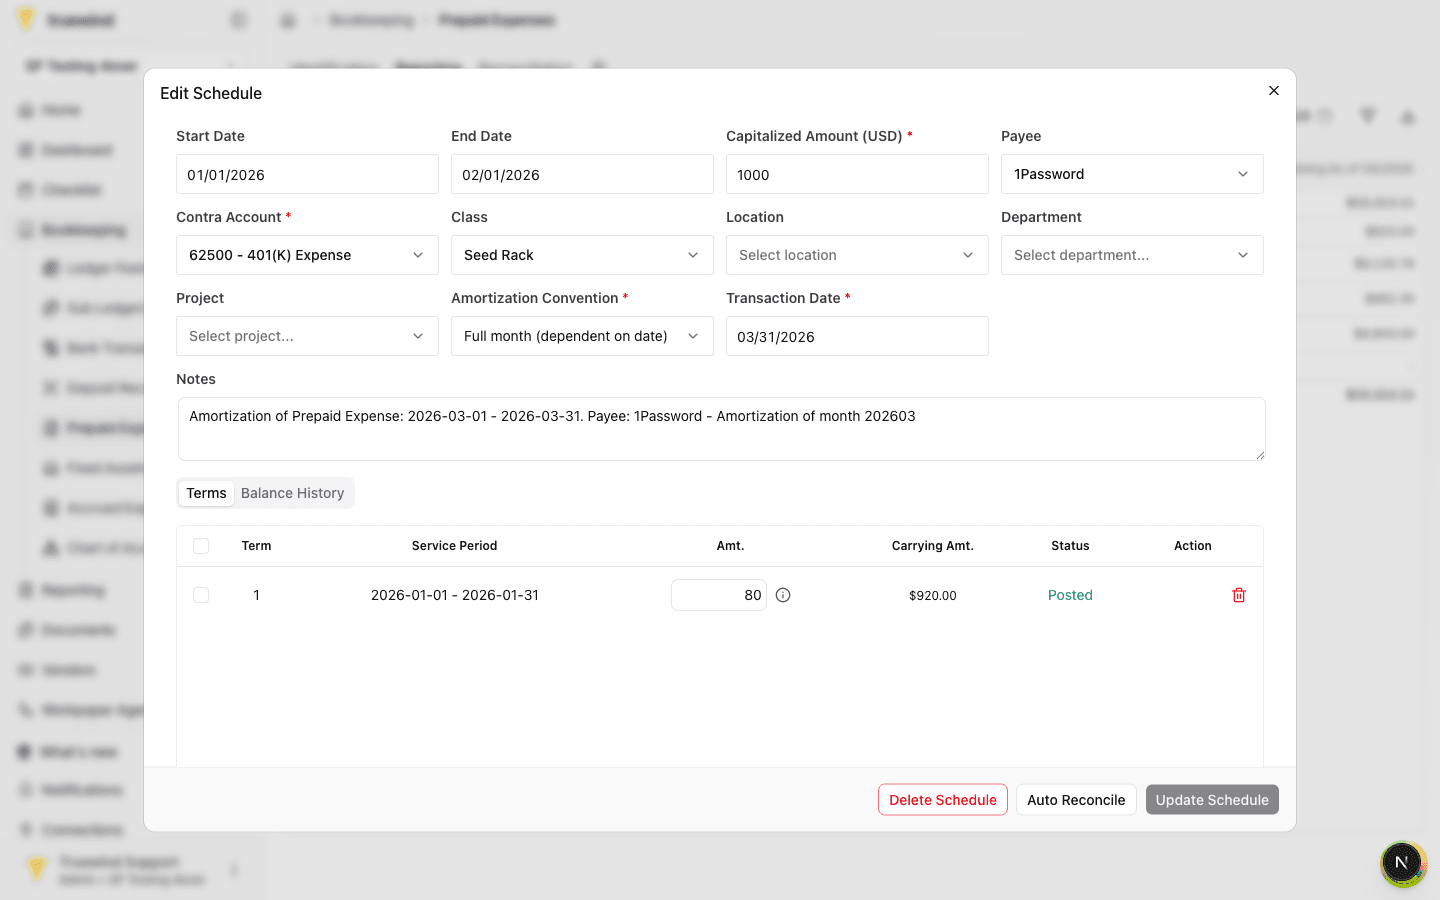
Select the schedule row to review the schedule fields, capitalized amount, and amortization method.
Step 12
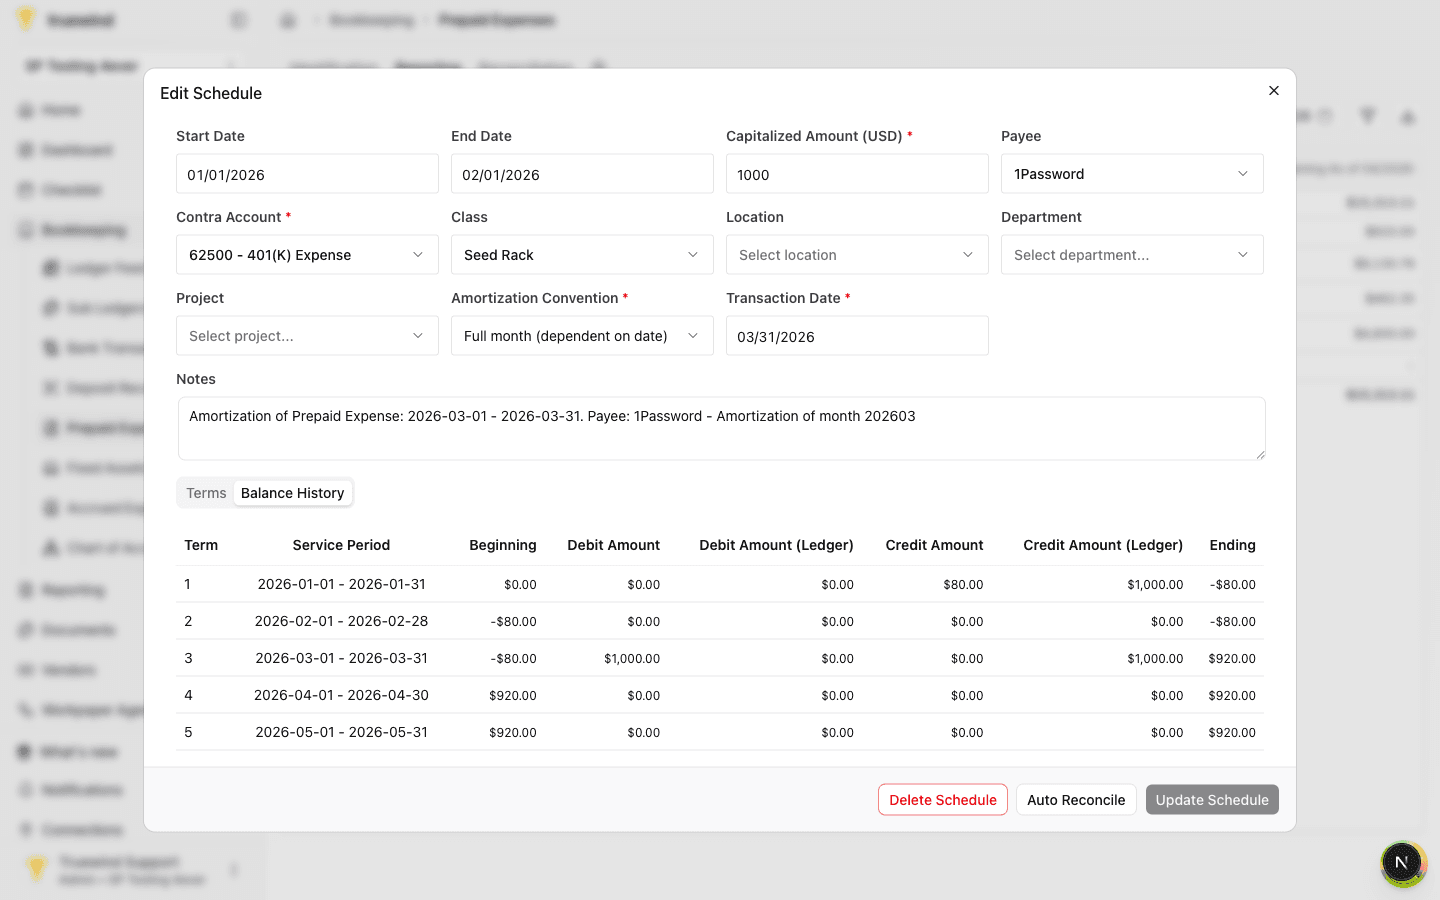
Use Balance History to confirm the schedule balance reflects the linked transaction as expected before posting future amortization.
Use this when a new debit transaction belongs on an existing schedule for the same month rather than needing its own schedule.
Was this helpful?
Need more help?
Ask for human help about this article and provide any feedback.