
Ask the support agent

Just ask a direct question or search related articles from the Knowledge Base.

Support Center / Prepaid Expenses / Manage

Create a Prepaid Expense schedule using identification

Create a prepaid schedule from the Identification tab when a transaction should amortize over time, resulting in a tracked schedule instead of an unreviewed candidate.

Workflow

Step 1

Open Prepaid Expenses

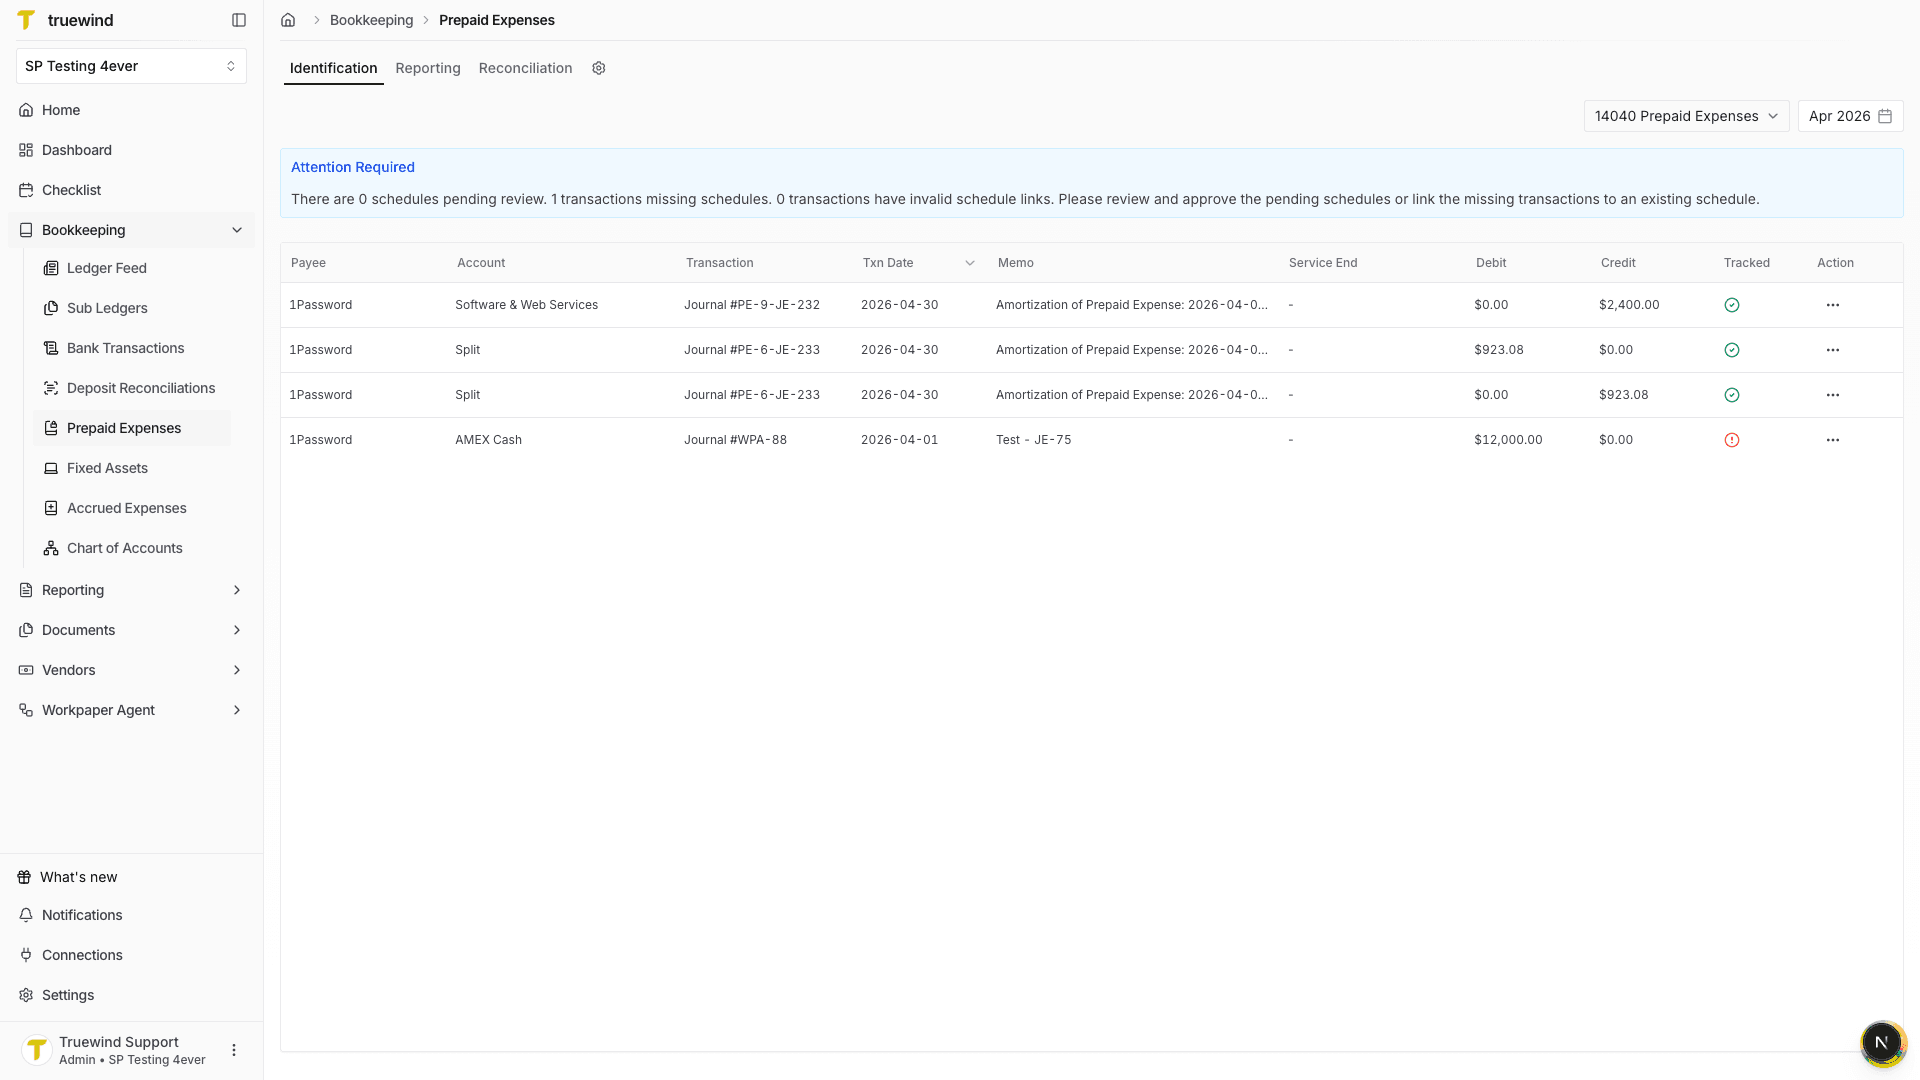
Start in Bookkeeping > Prepaid Expenses and keep the Identification tab selected for the prepaid account you want to review.

Screenshot showing Prepaid Expenses with the Identification tab selected

Step 2

Review identification

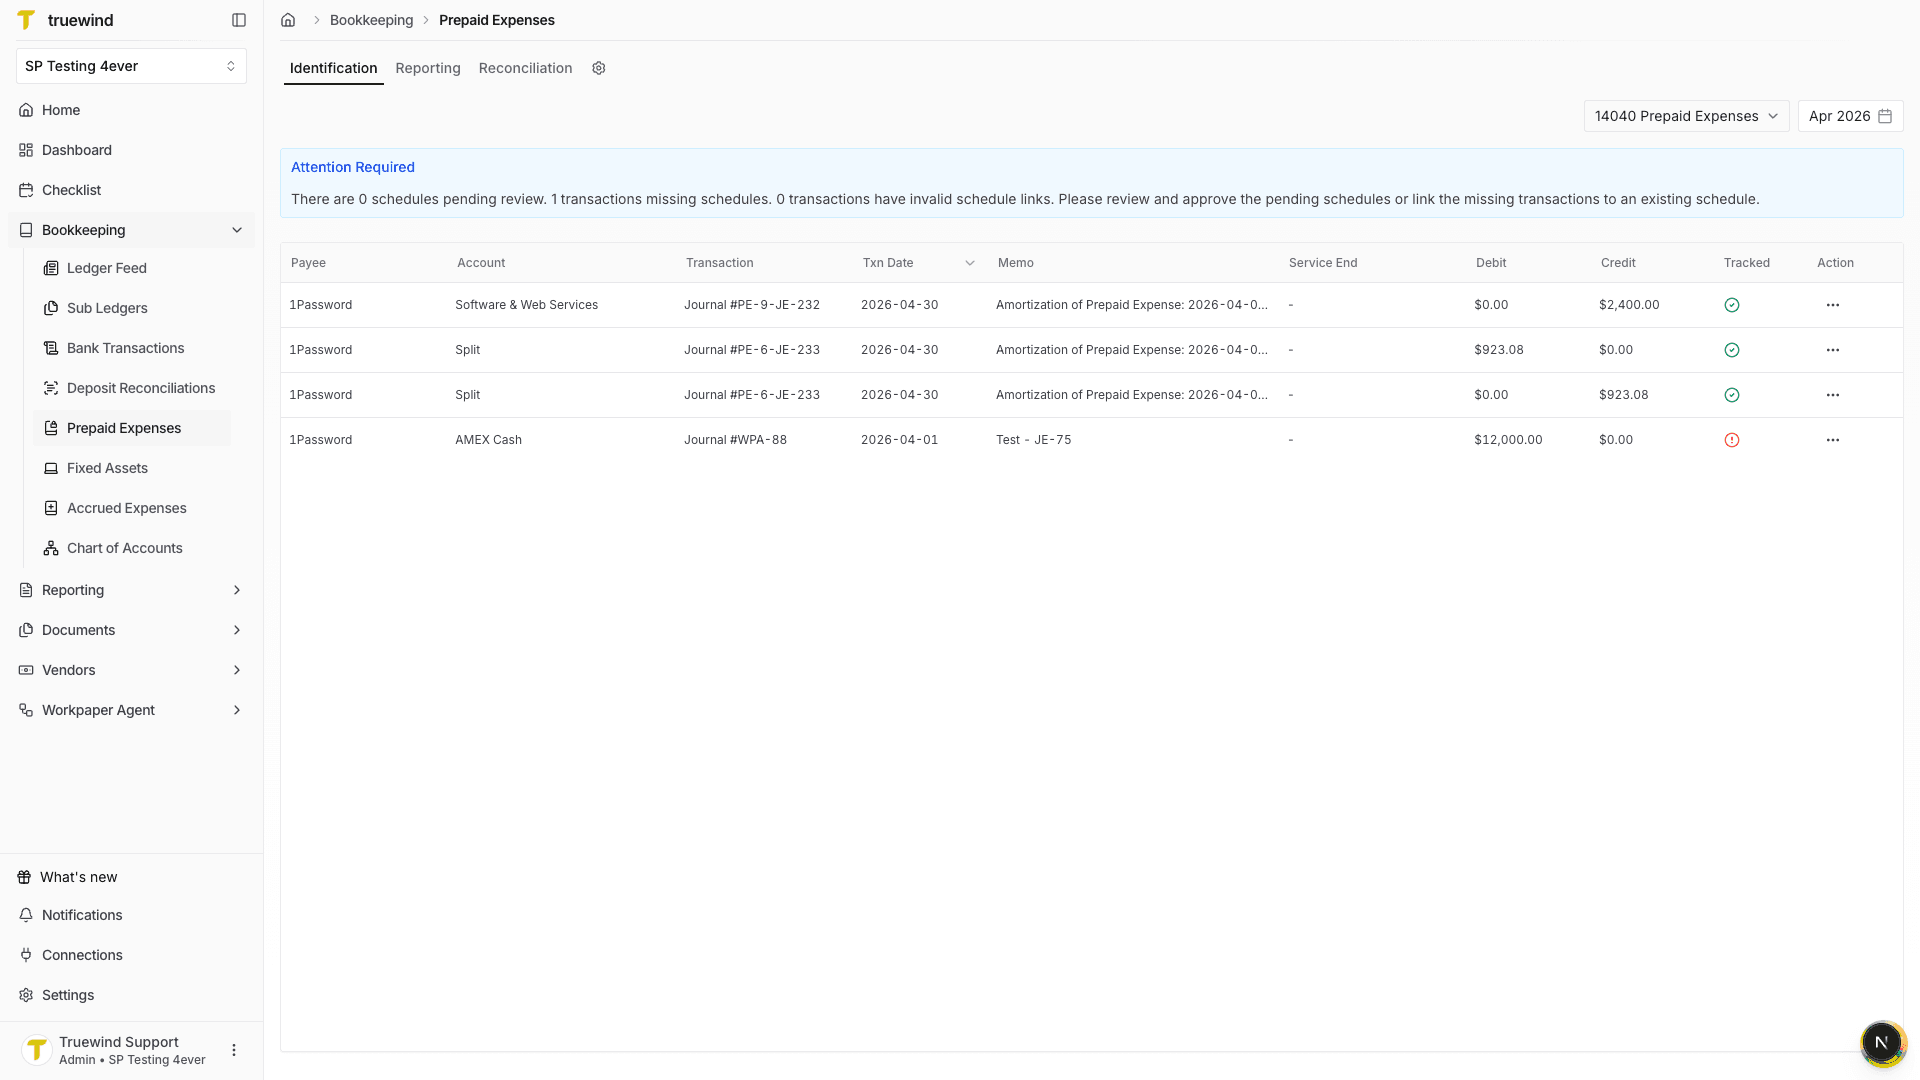
Use the attention message and Tracked column to find transactions that still need a schedule or an existing schedule link.

Screenshot showing missing schedule work on the Identification tab

Step 3

Open schedule action

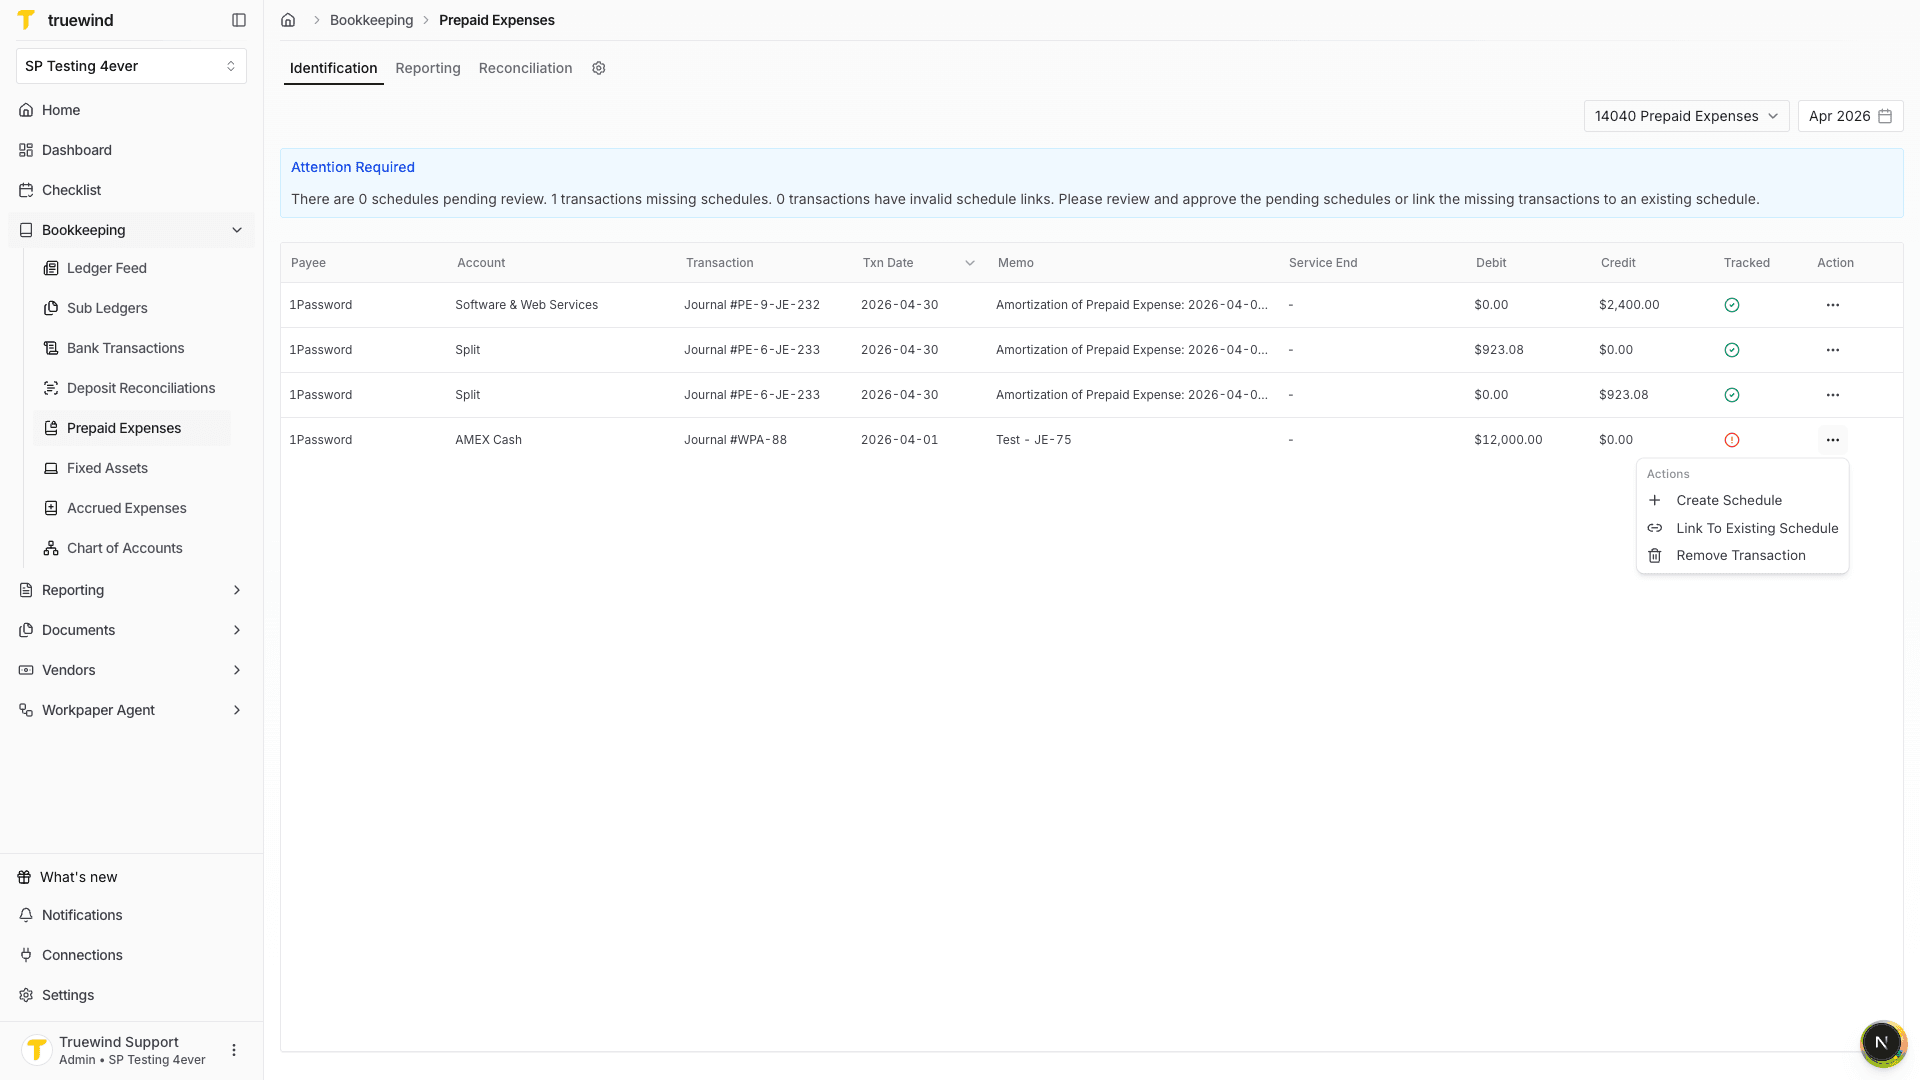
Open the action menu on the transaction that is not tracked, then choose Create Schedule.

Screenshot showing the Create Schedule action for an untracked transaction

Step 4

Open schedule form

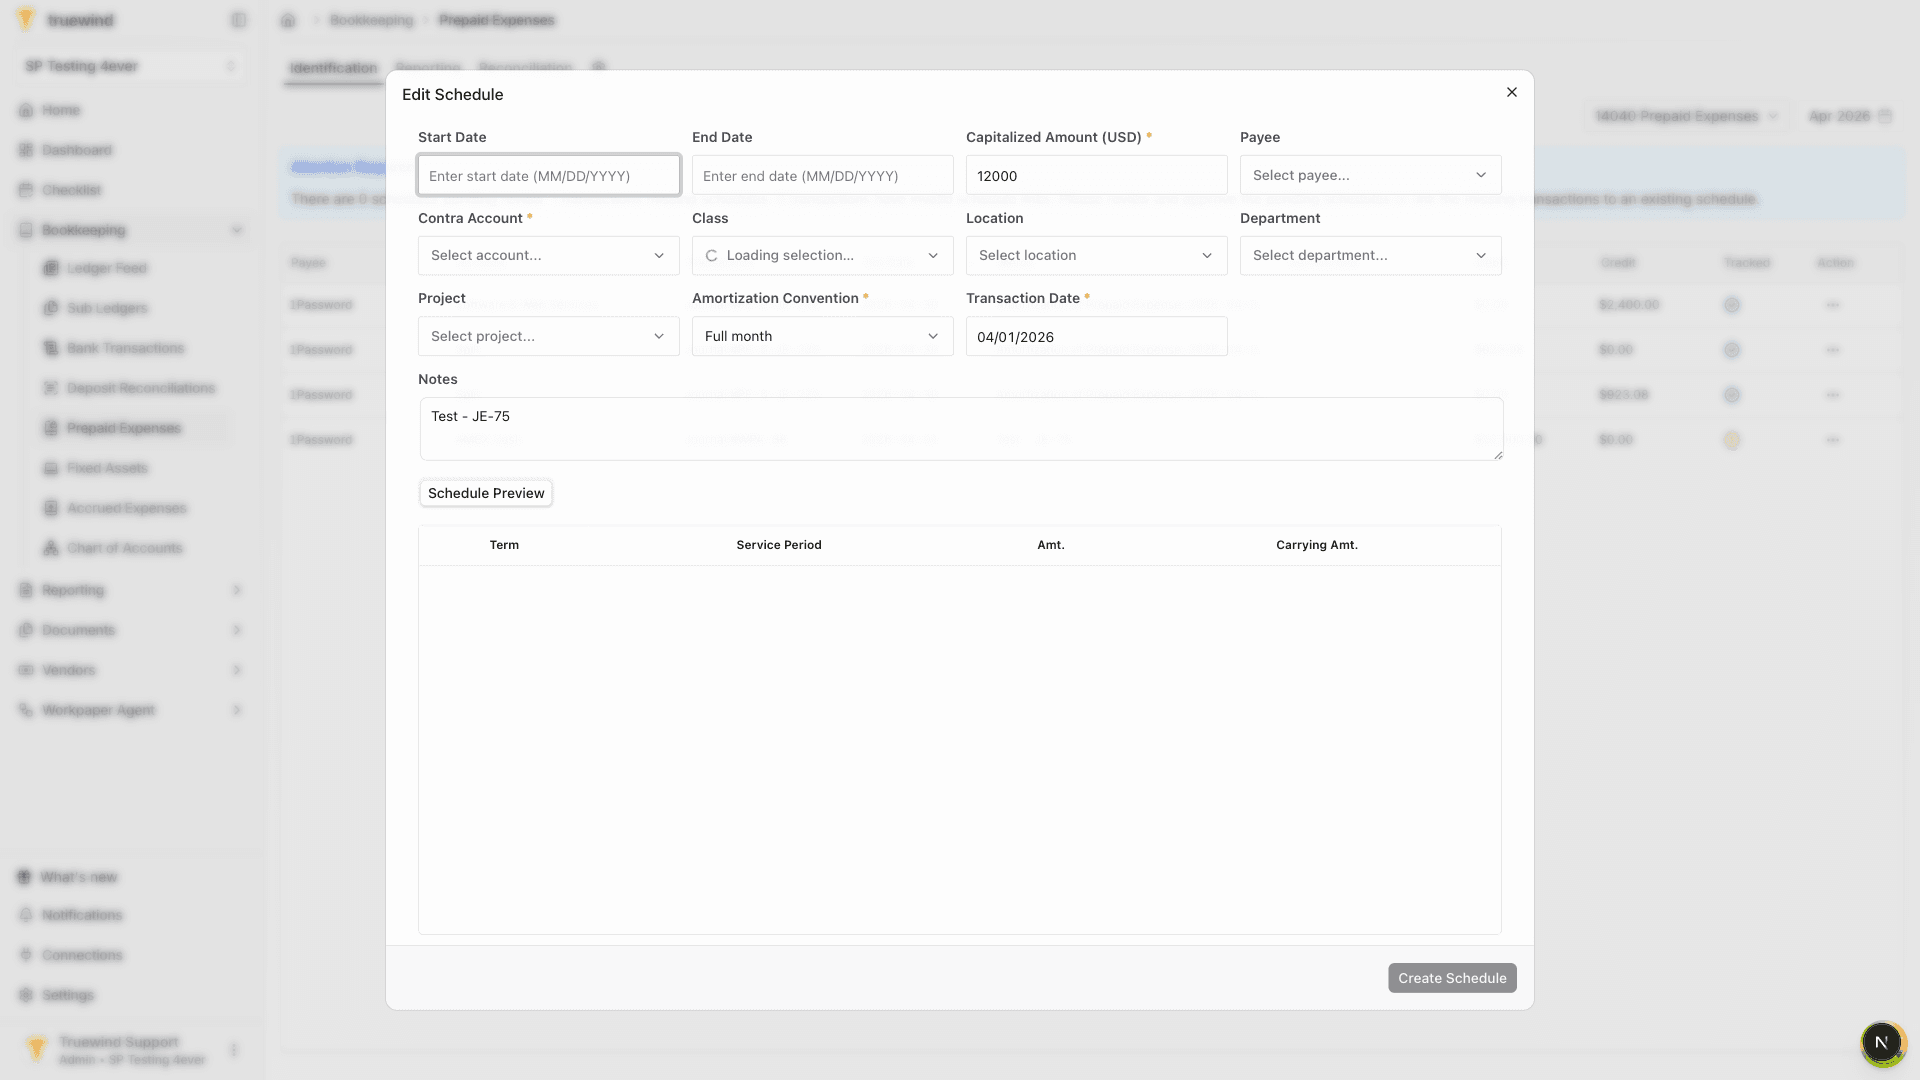
Review the transaction details Truewind prefilled, including amount, payee, class, transaction date, and notes.

Screenshot showing the prepaid schedule form opened from Identification

Step 5

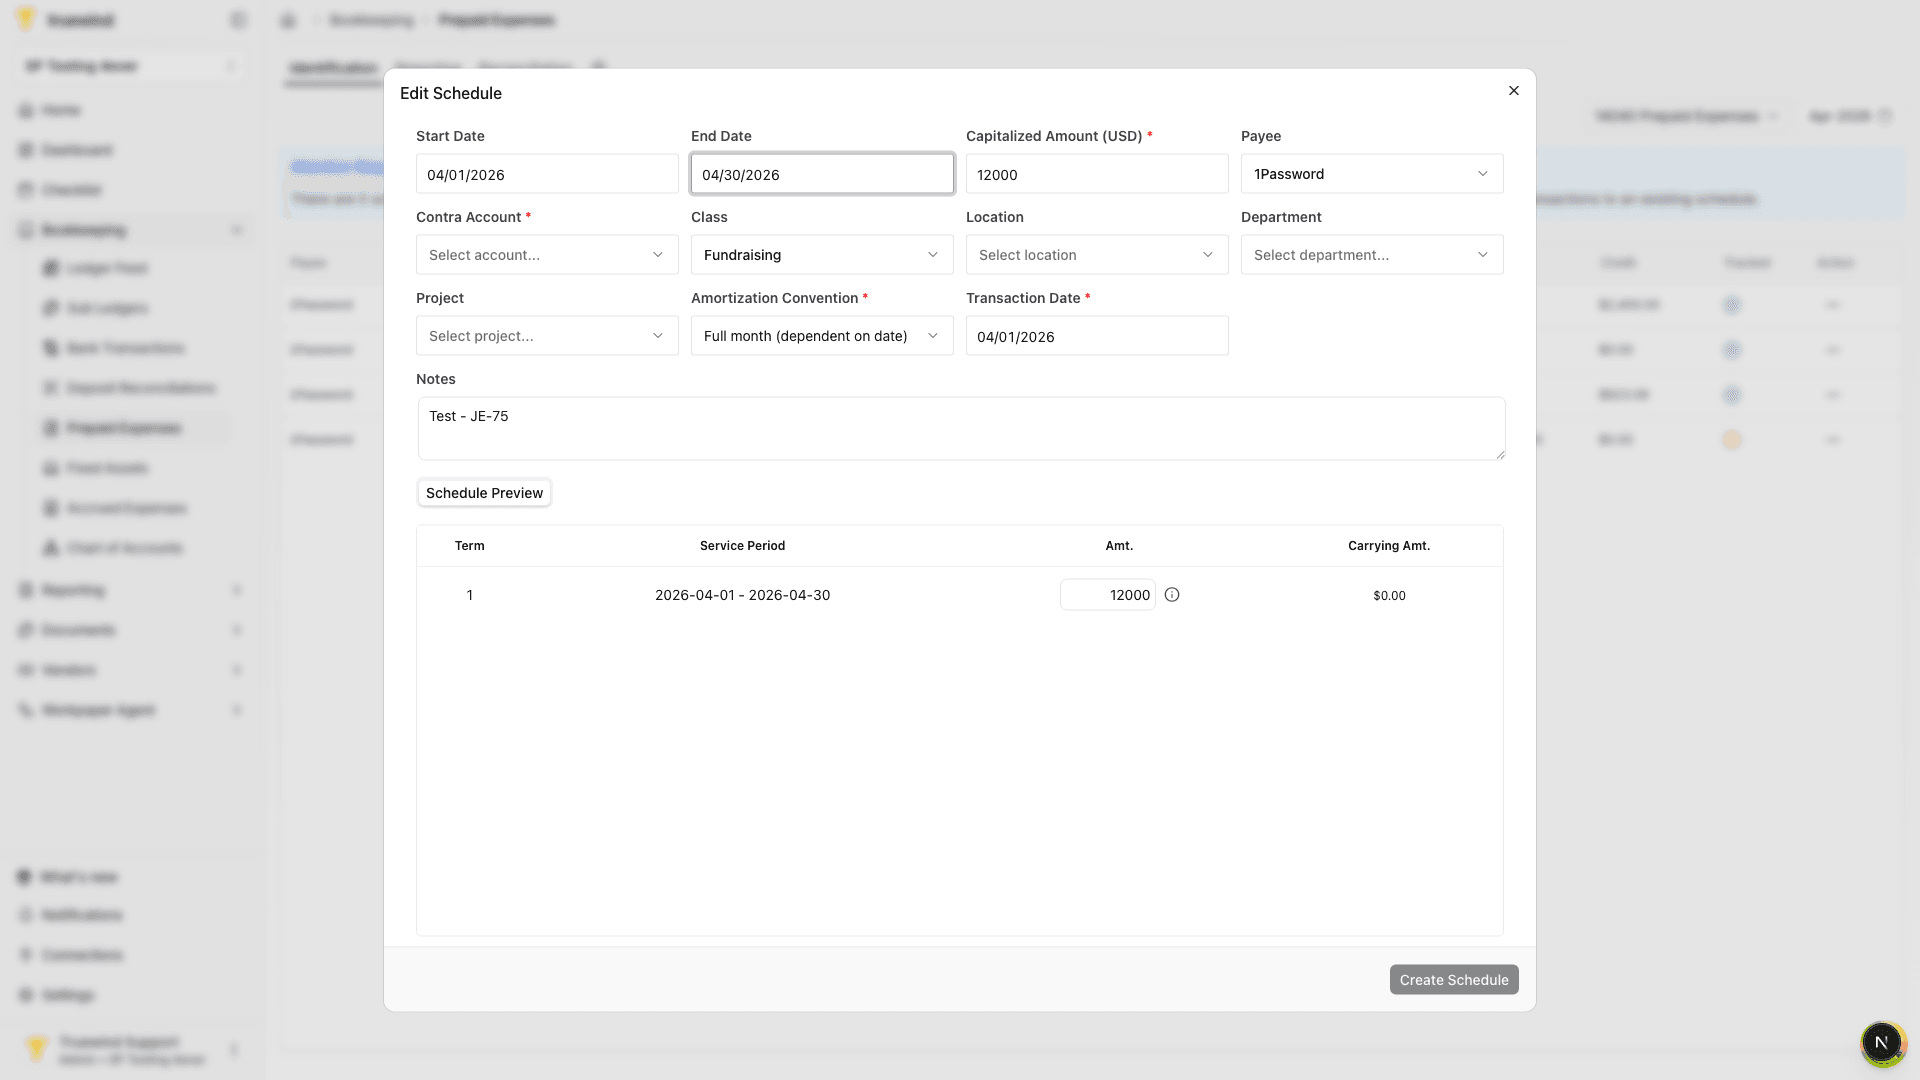
Enter service period

Add the start and end dates for the period that should be amortized, then review any required account or dimension fields.

Screenshot showing service period dates entered in the schedule form

Step 6

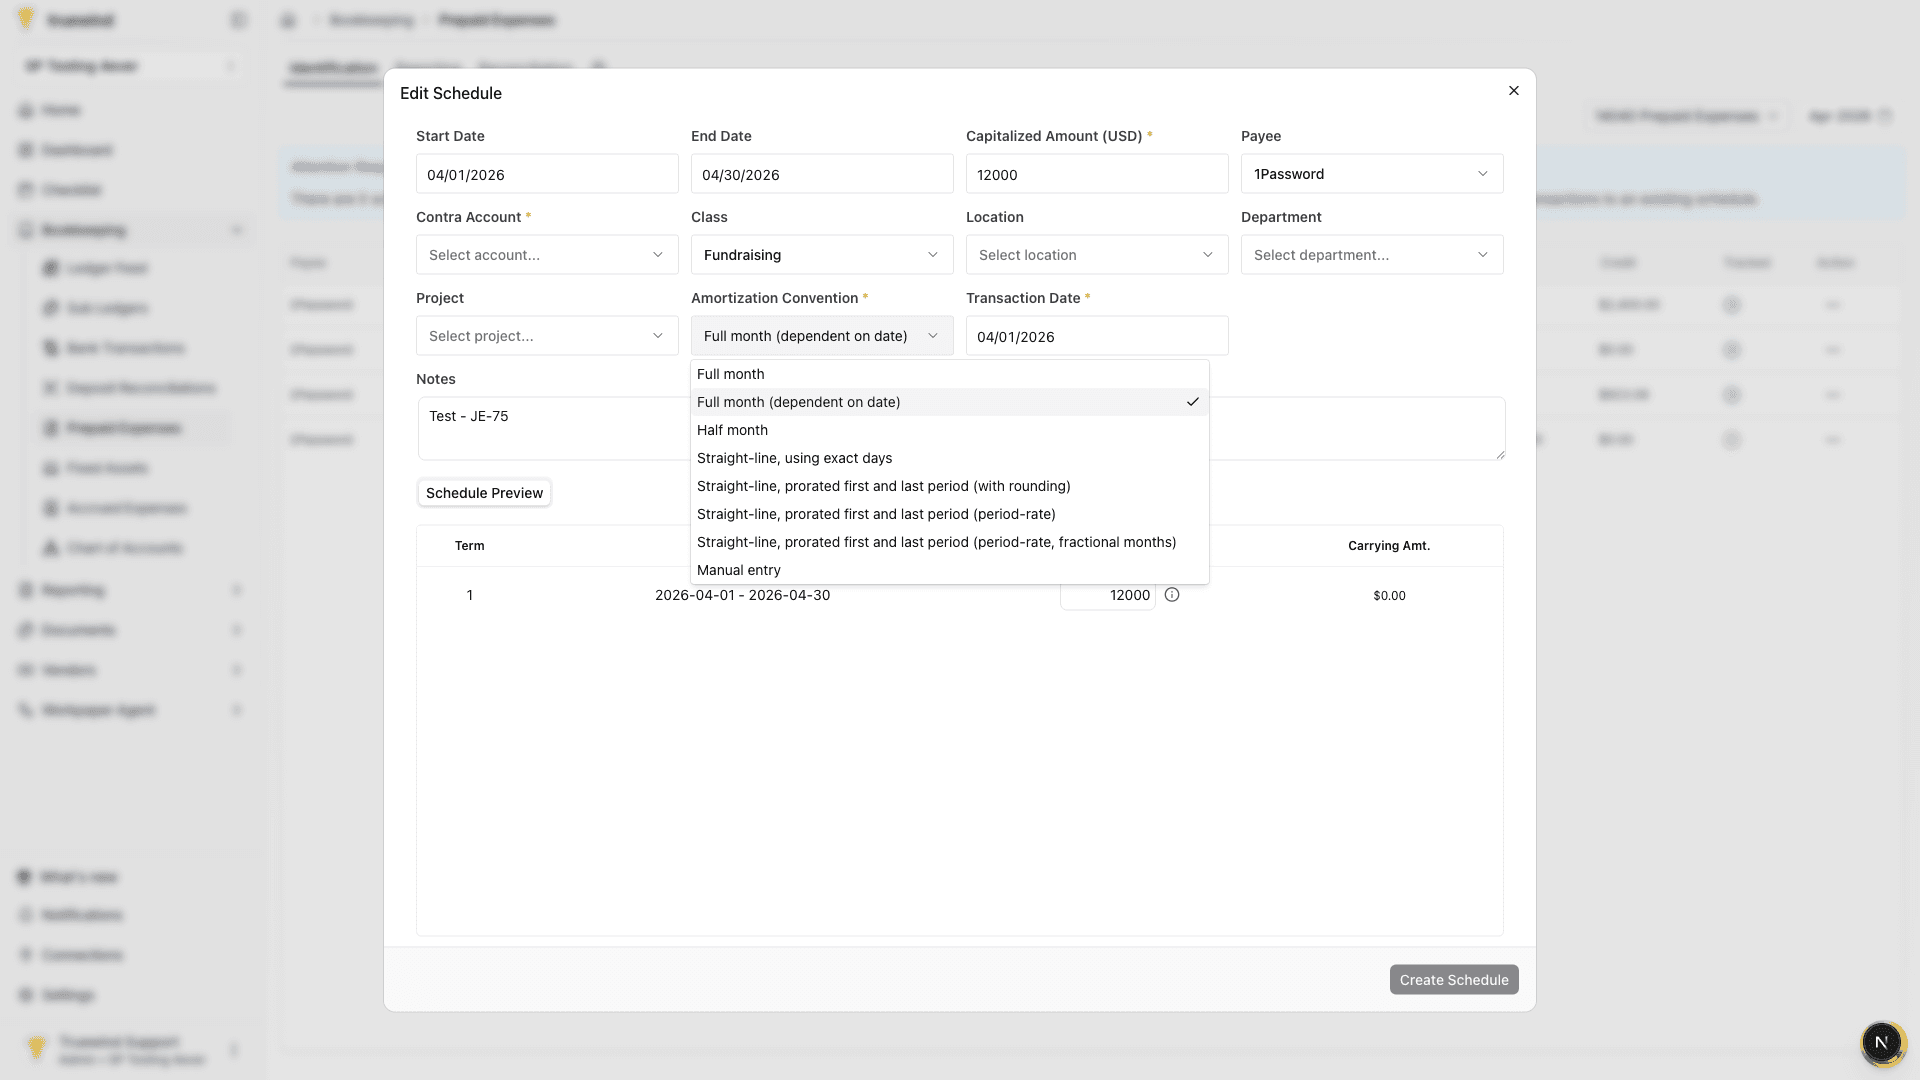
Select convention

Choose the amortization convention that matches how the prepaid expense should be recognized over the service period.

Screenshot showing amortization convention options in the schedule form

Step 7

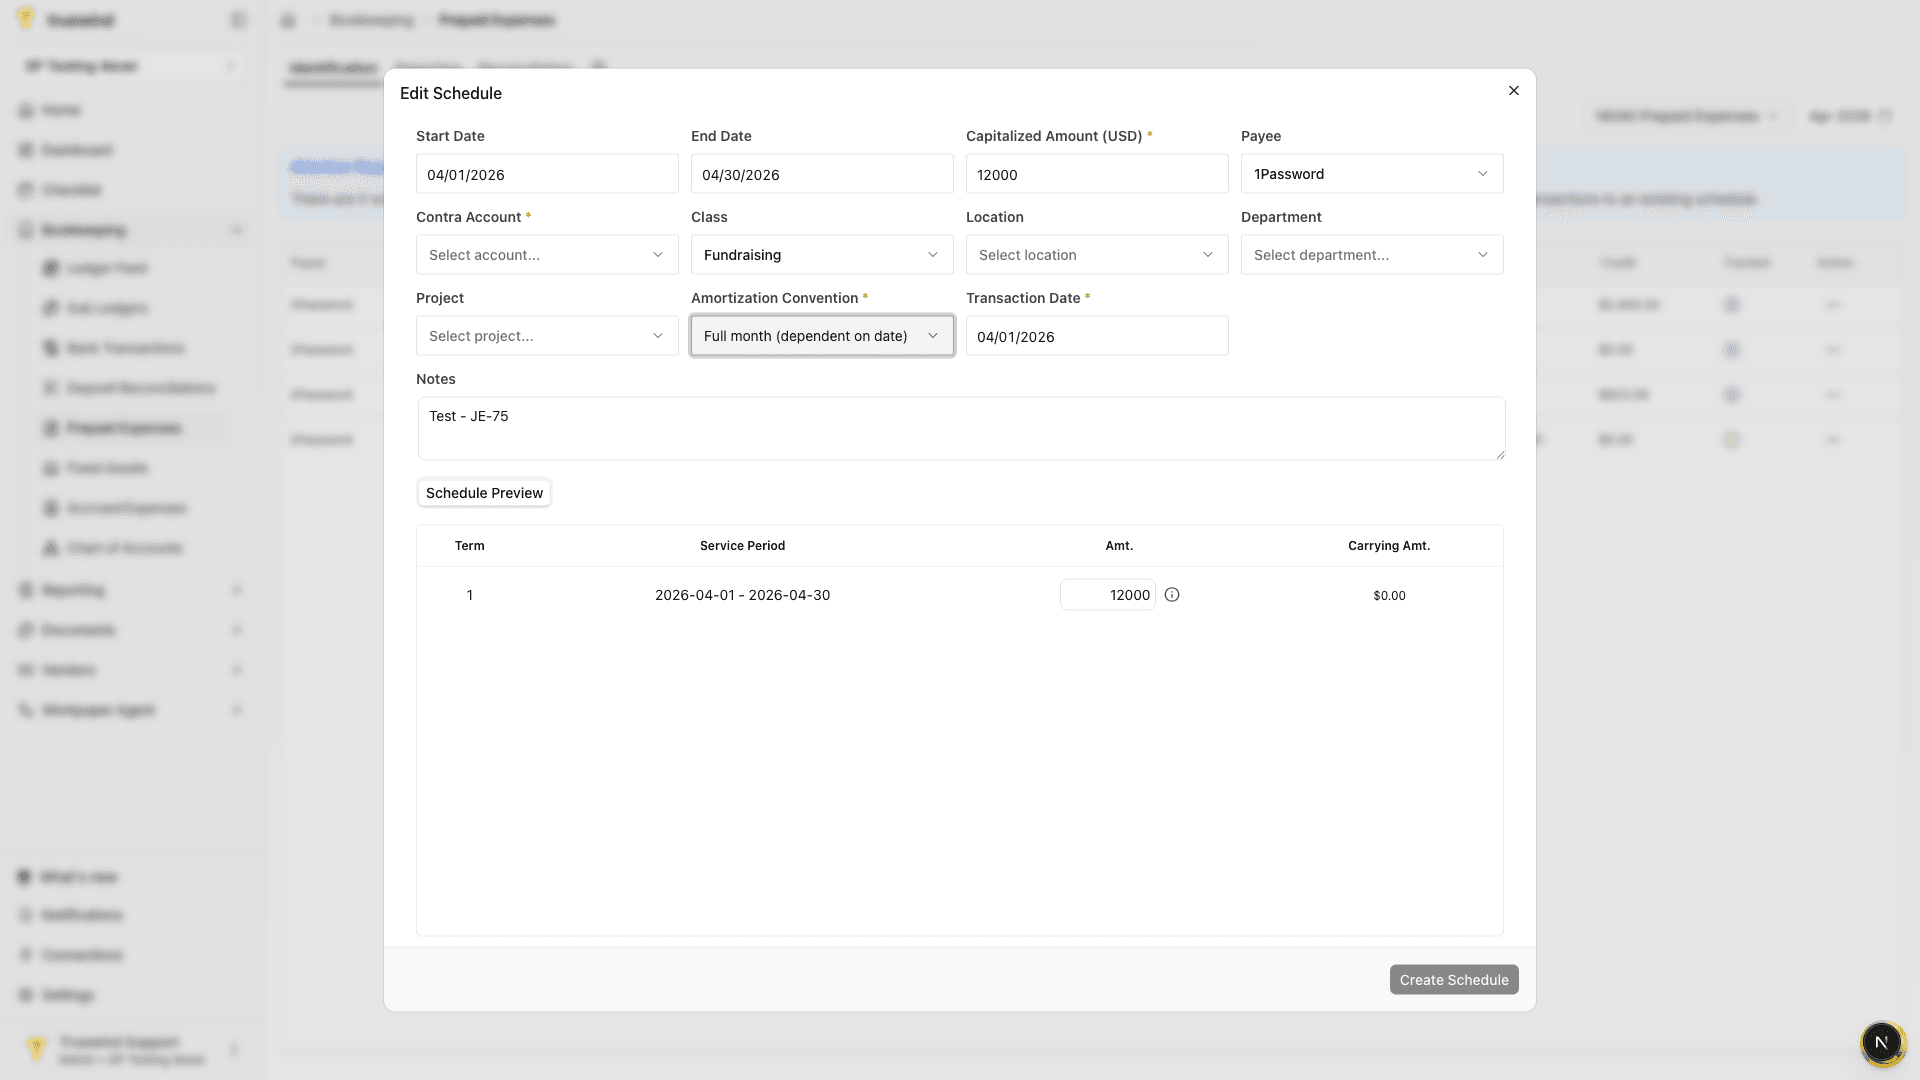
Review preview

Confirm the calculated term, service period, amount, and carrying amount before saving the schedule.

Screenshot showing the schedule preview after the service period is entered

Step 8

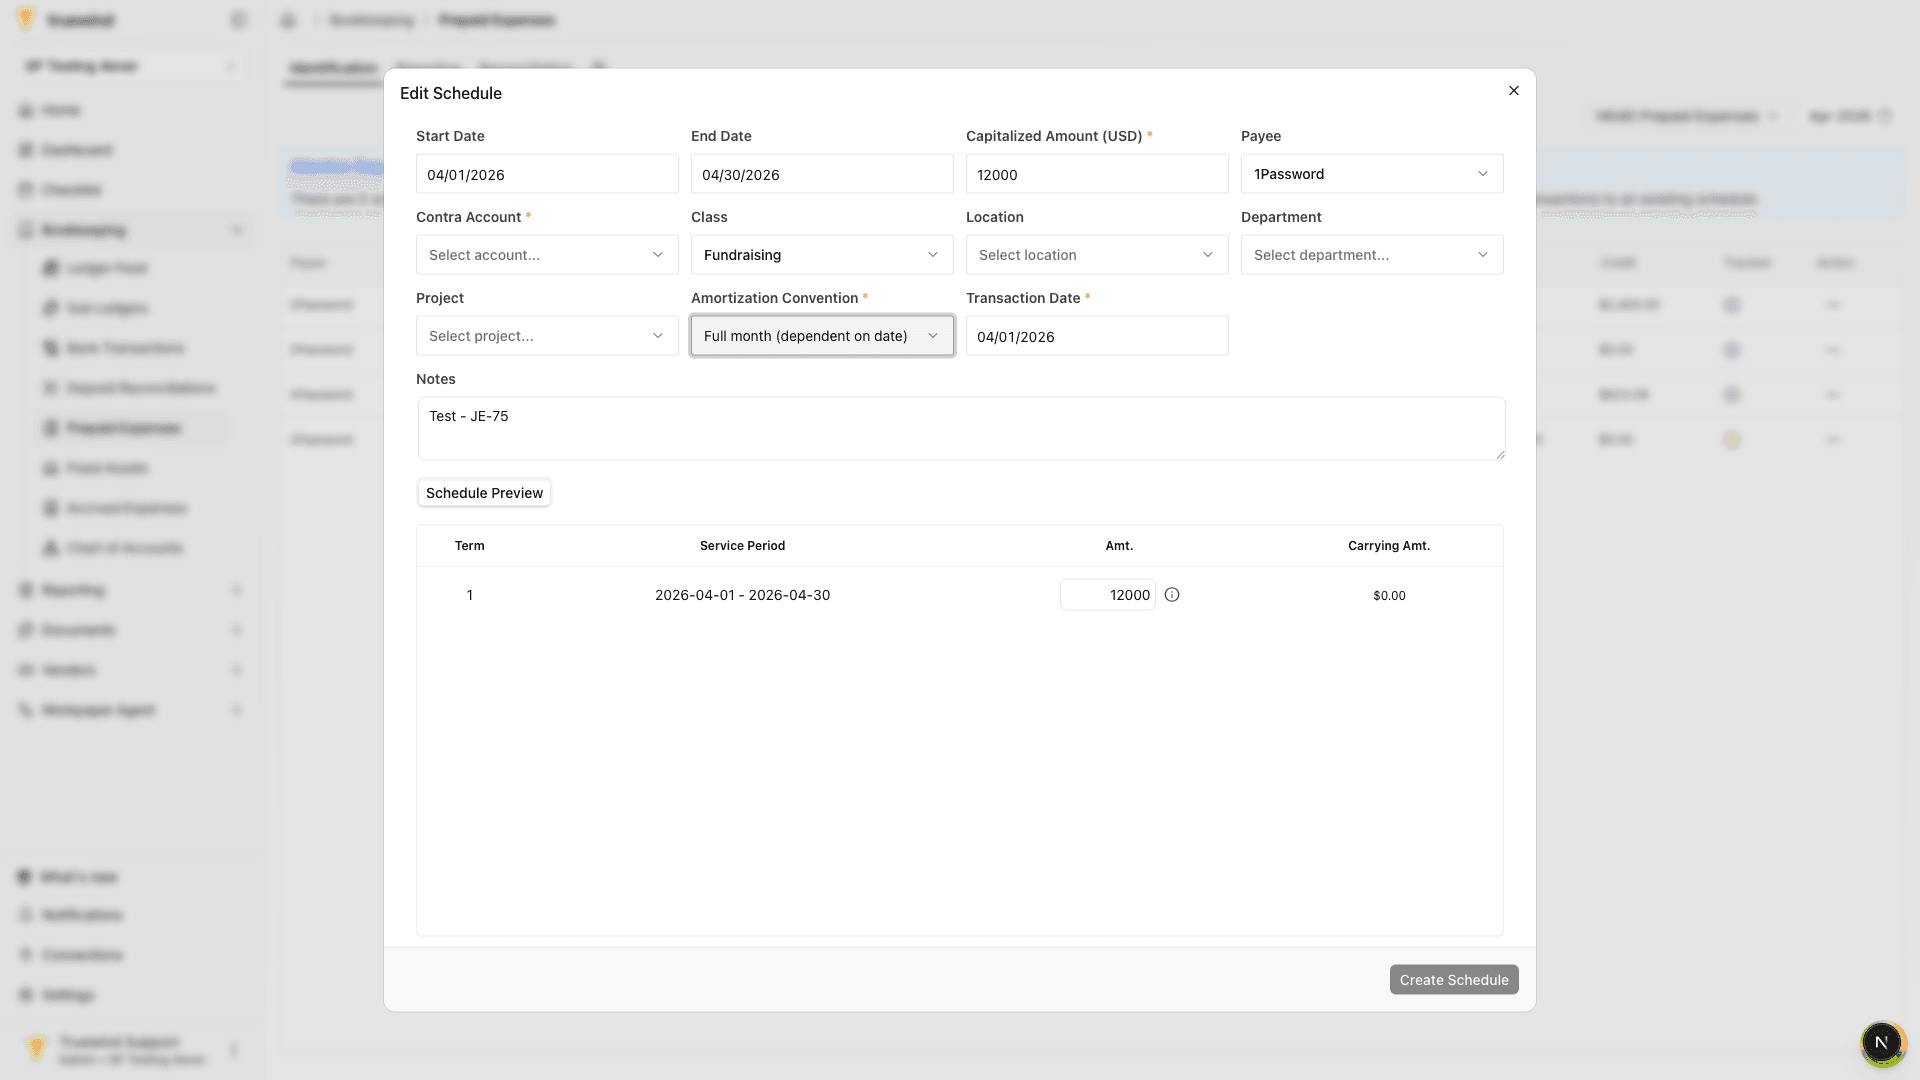
Create schedule

When the required fields are complete, use Create Schedule to save the schedule and link it back to the transaction.

Screenshot showing the Create Schedule button in the schedule form

Step 9

Open Reporting

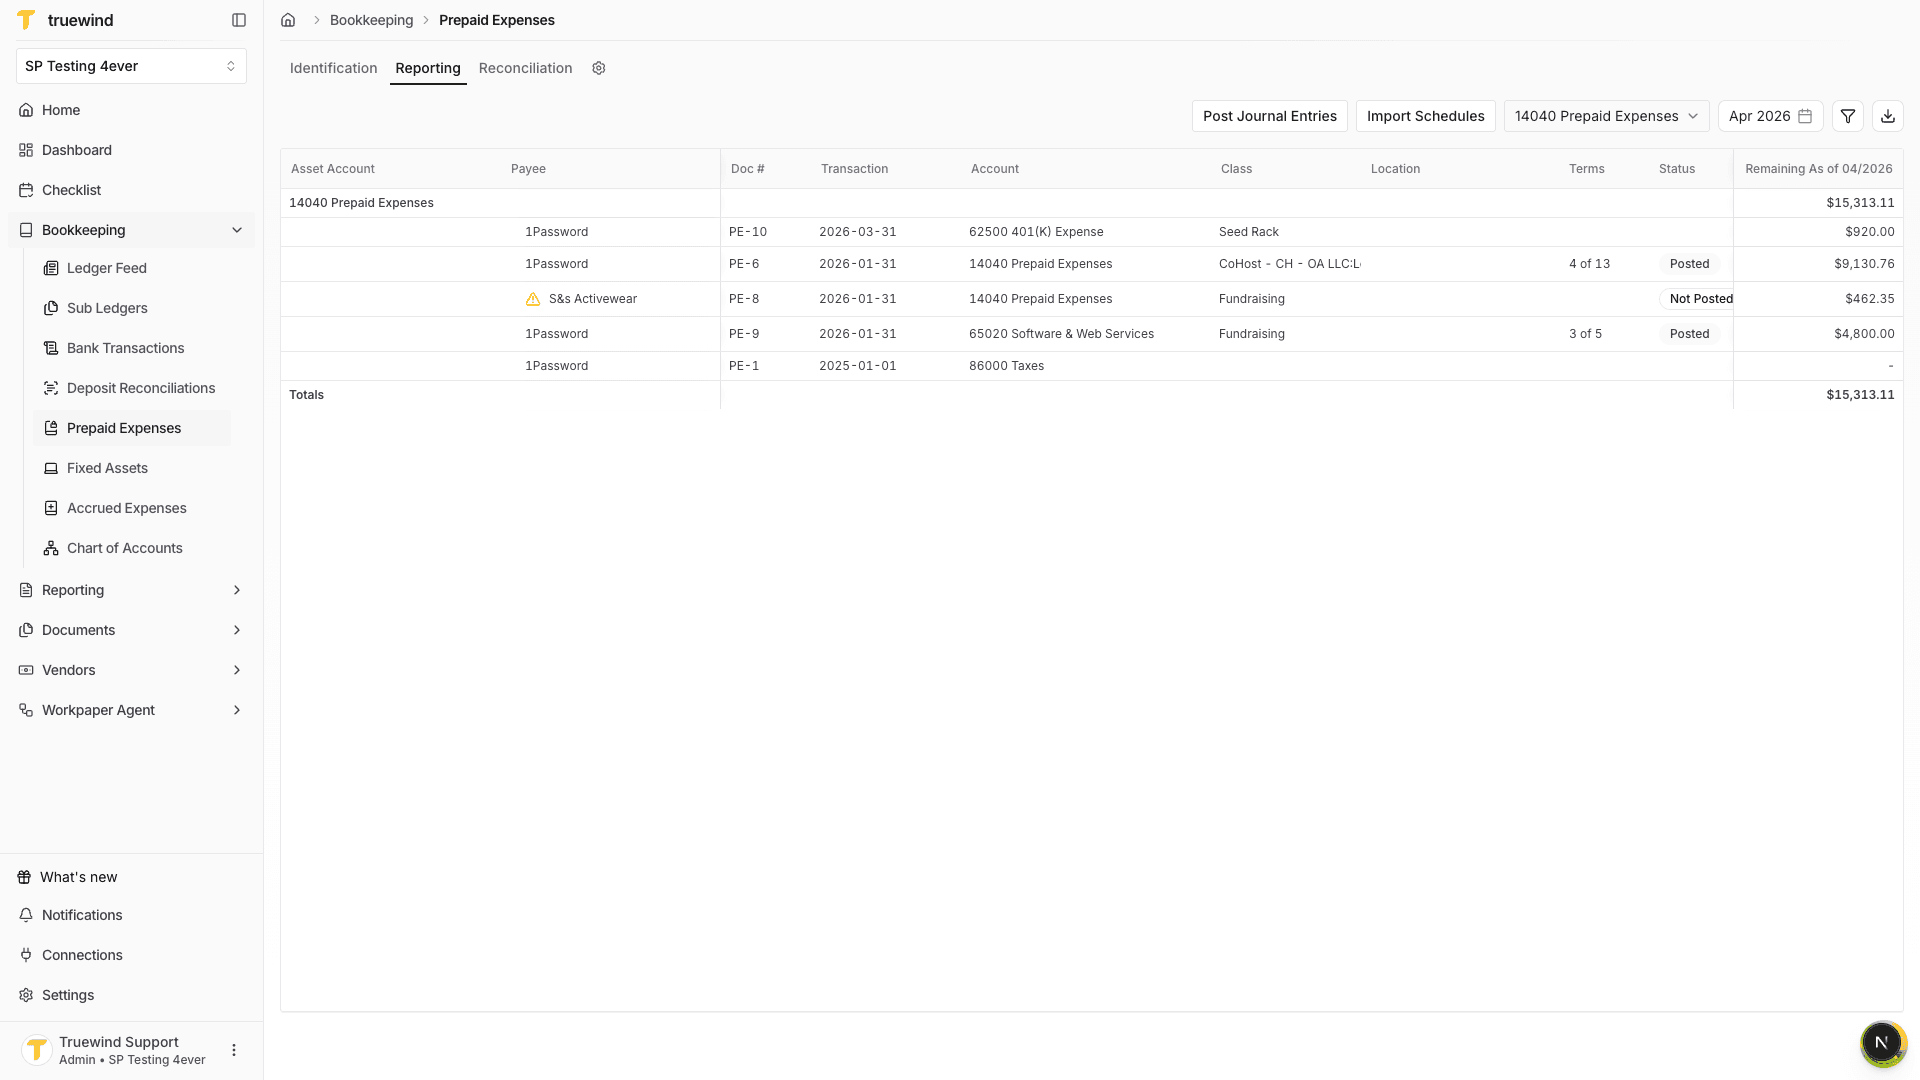
After the schedule is created, move to Reporting for the prepaid account and period you want to review.

Screenshot showing the Prepaid Expenses Reporting tab

Step 10

Review schedule

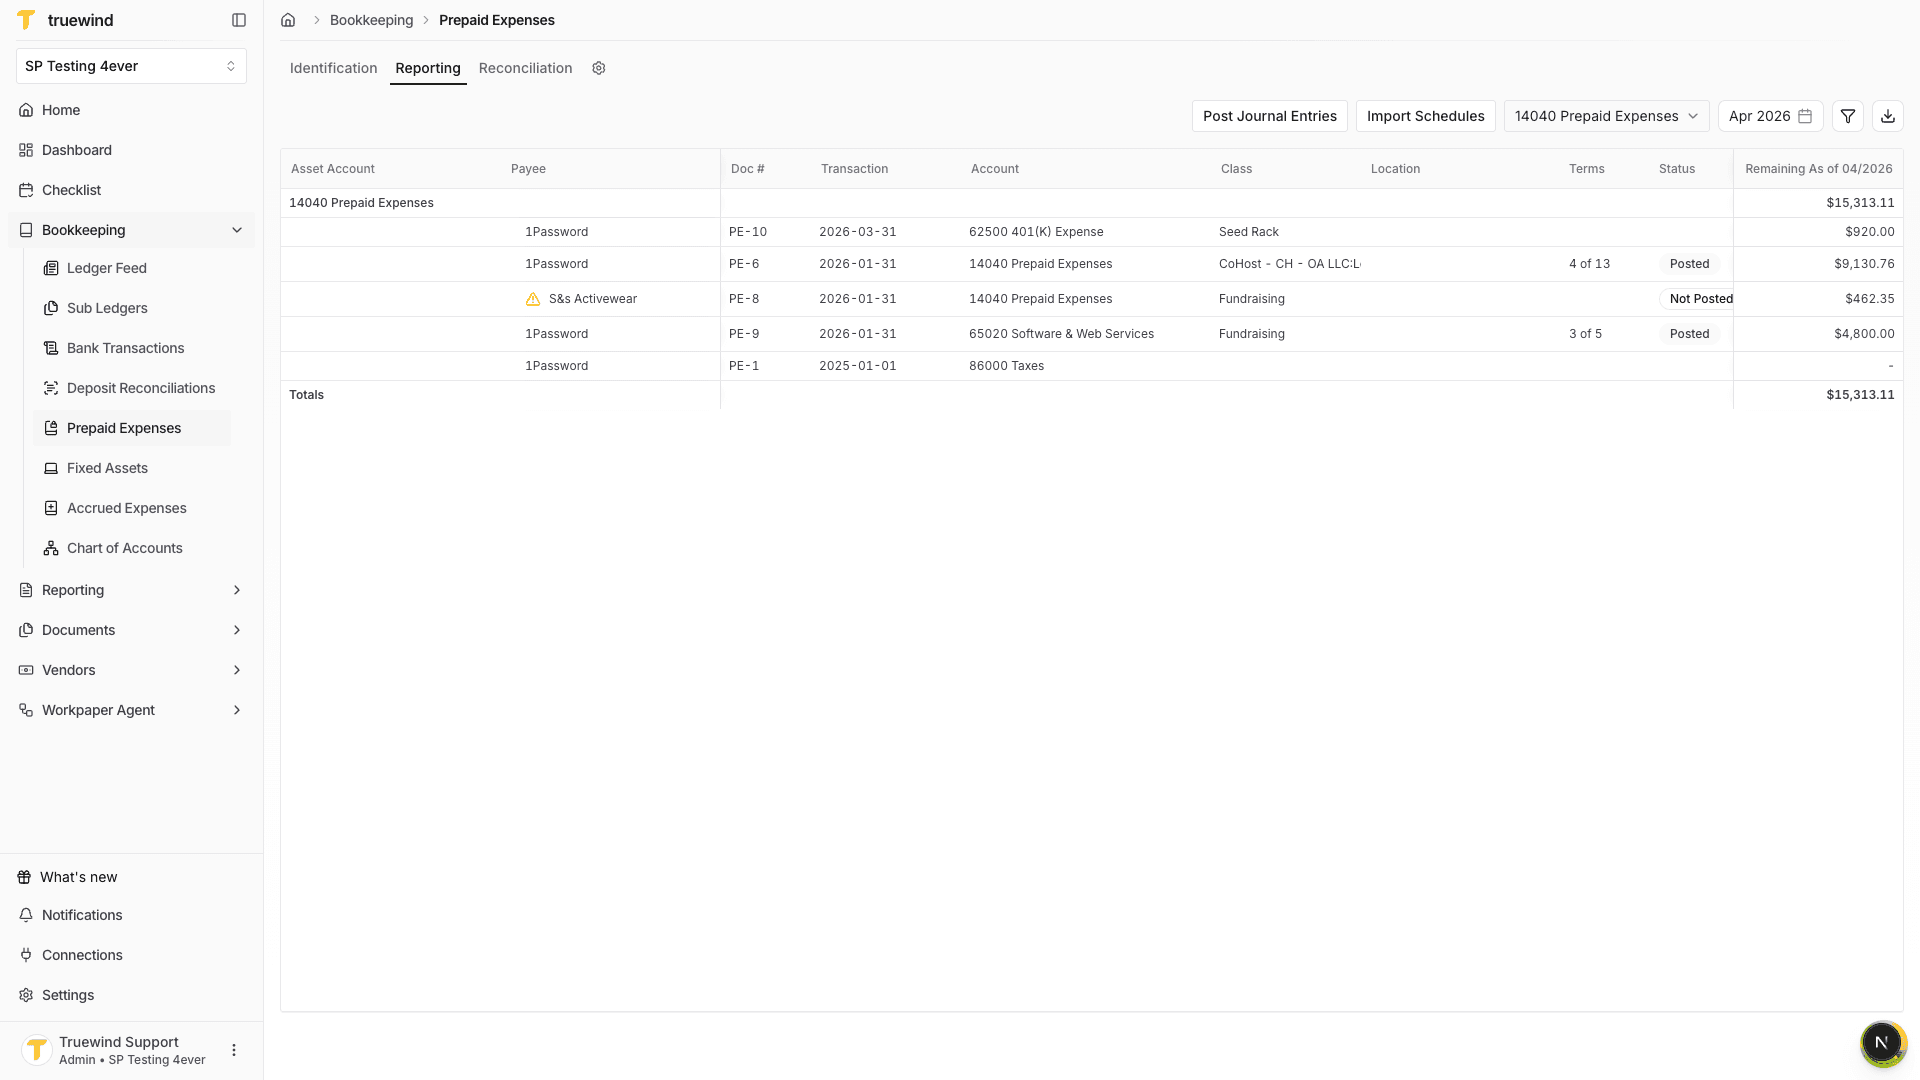
Confirm the schedule appears with the expected payee, account, term status, and remaining balance before posting journal entries.

Screenshot showing prepaid schedules and balances in Reporting

Why Identification matters

The Identification tab is the fastest way to turn newly surfaced prepaid candidates into schedules in the current UI. Use it when Truewind identifies a prepaid transaction that needs a new schedule or a link to an existing one.

Was this helpful?

Need more help?

Ask for human help about this article and provide any feedback.