Before posting
Review the selected schedule and term before posting the amortization journal entry to QuickBooks.
Ask the support agent
Just ask a direct question or search related articles from the Knowledge Base.
Support Center / Prepaid Expenses / Journal Entries
Post amortization from a prepaid schedule when the term is ready, resulting in a journal entry linked back to QuickBooks.
Step 1
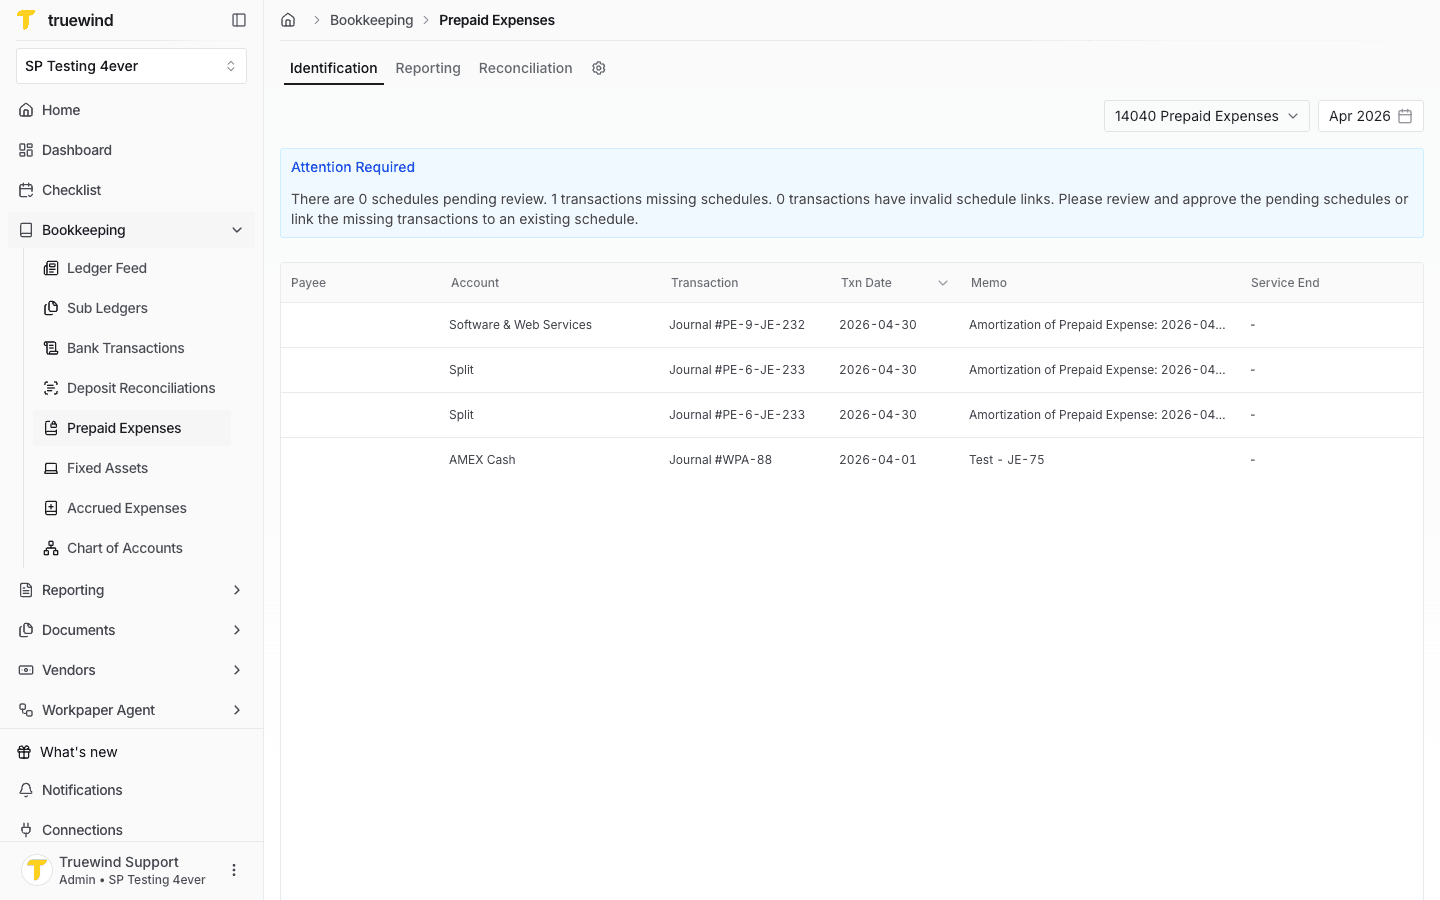
Start in Bookkeeping > Prepaid Expenses and confirm you are reviewing the correct prepaid account.
Step 2
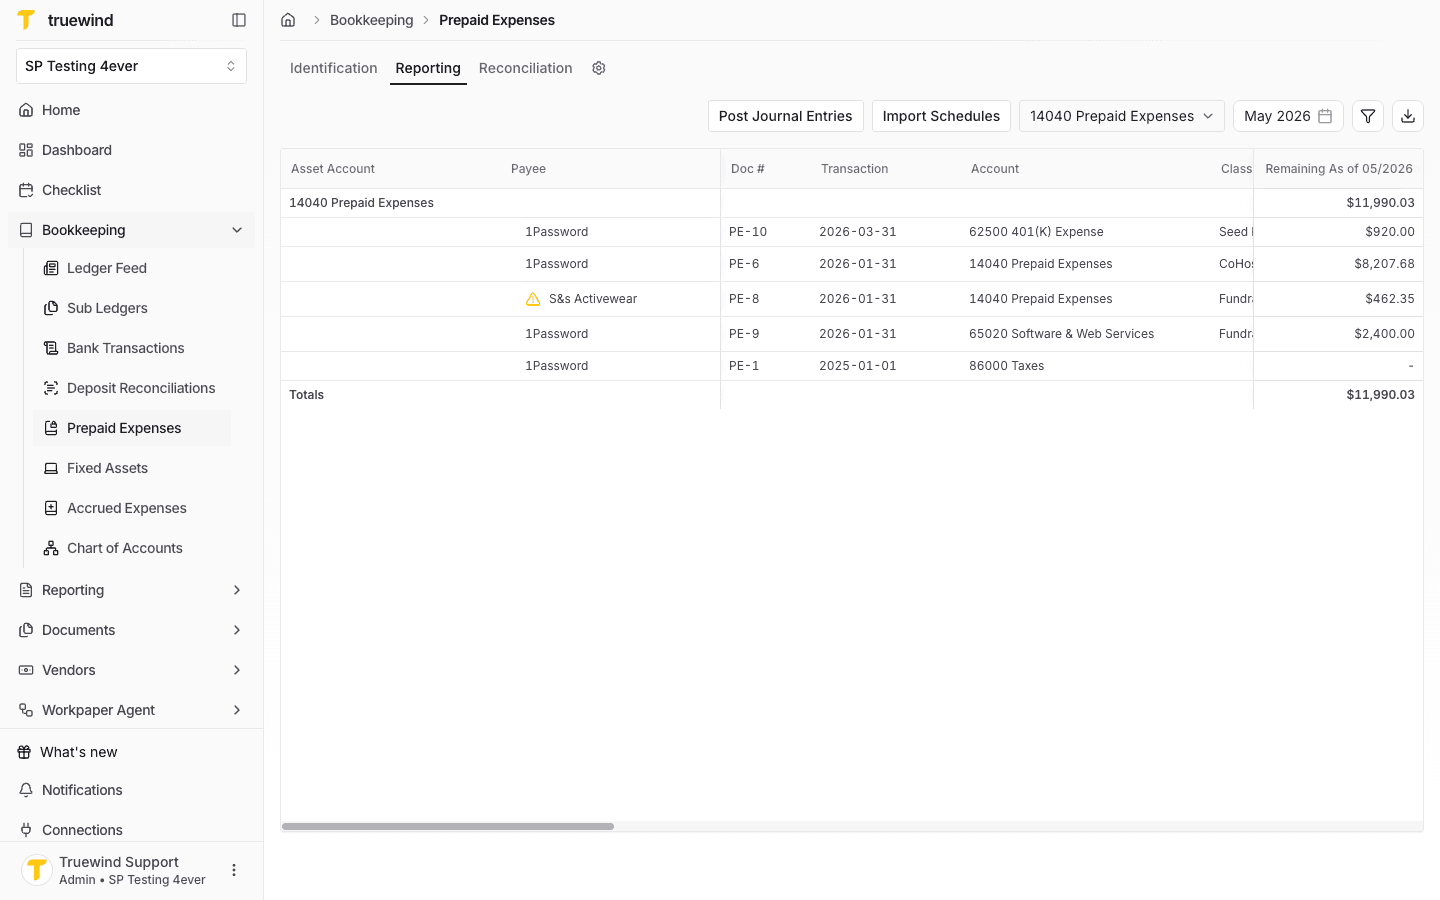
Use Reporting to review prepaid schedules by month before posting amortization entries.

Step 3
Choose the schedule that contains the amortization term you want to send to QuickBooks.
Step 4
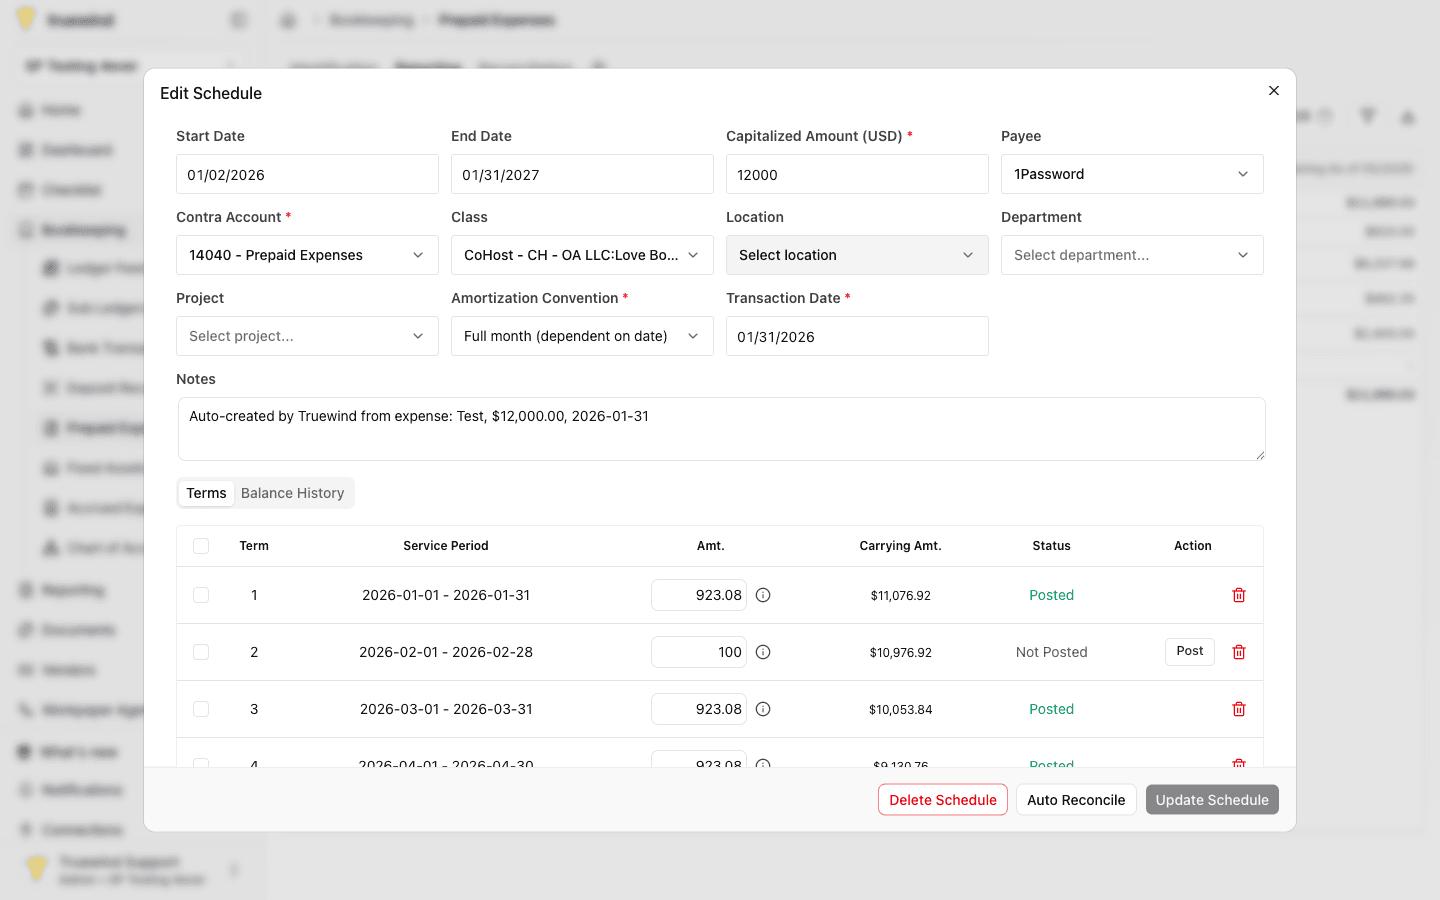
Check the schedule settings, term amount, carrying amount, and status before opening the posting action.
Step 5
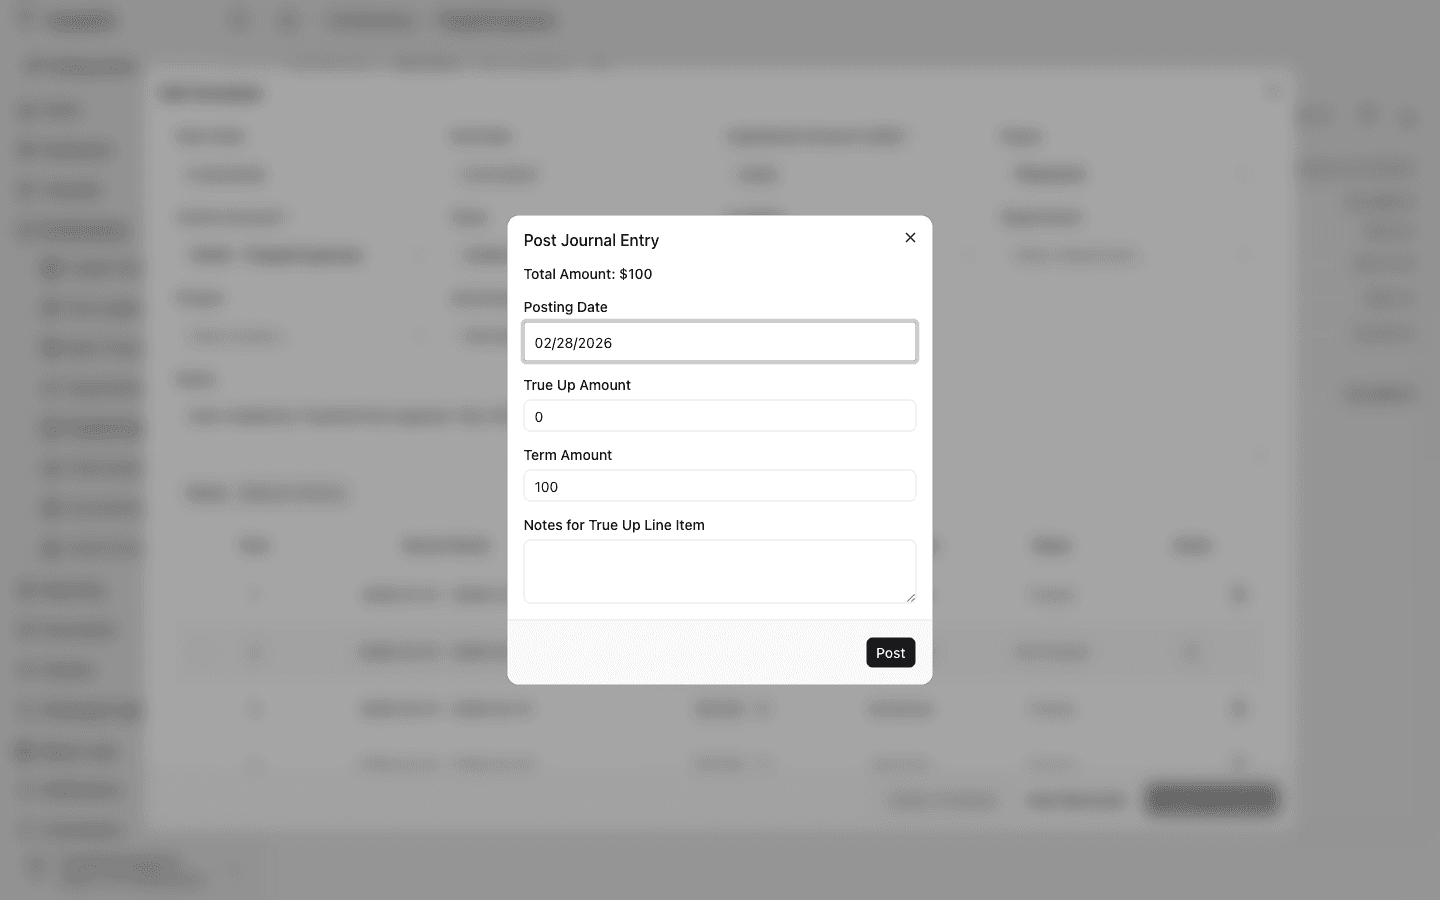
Confirm the posting date, true-up amount, term amount, and notes before submitting the journal entry.
Step 6
After posting, use the schedule list to confirm the relevant prepaid schedule is still visible for follow-up review.

Step 7
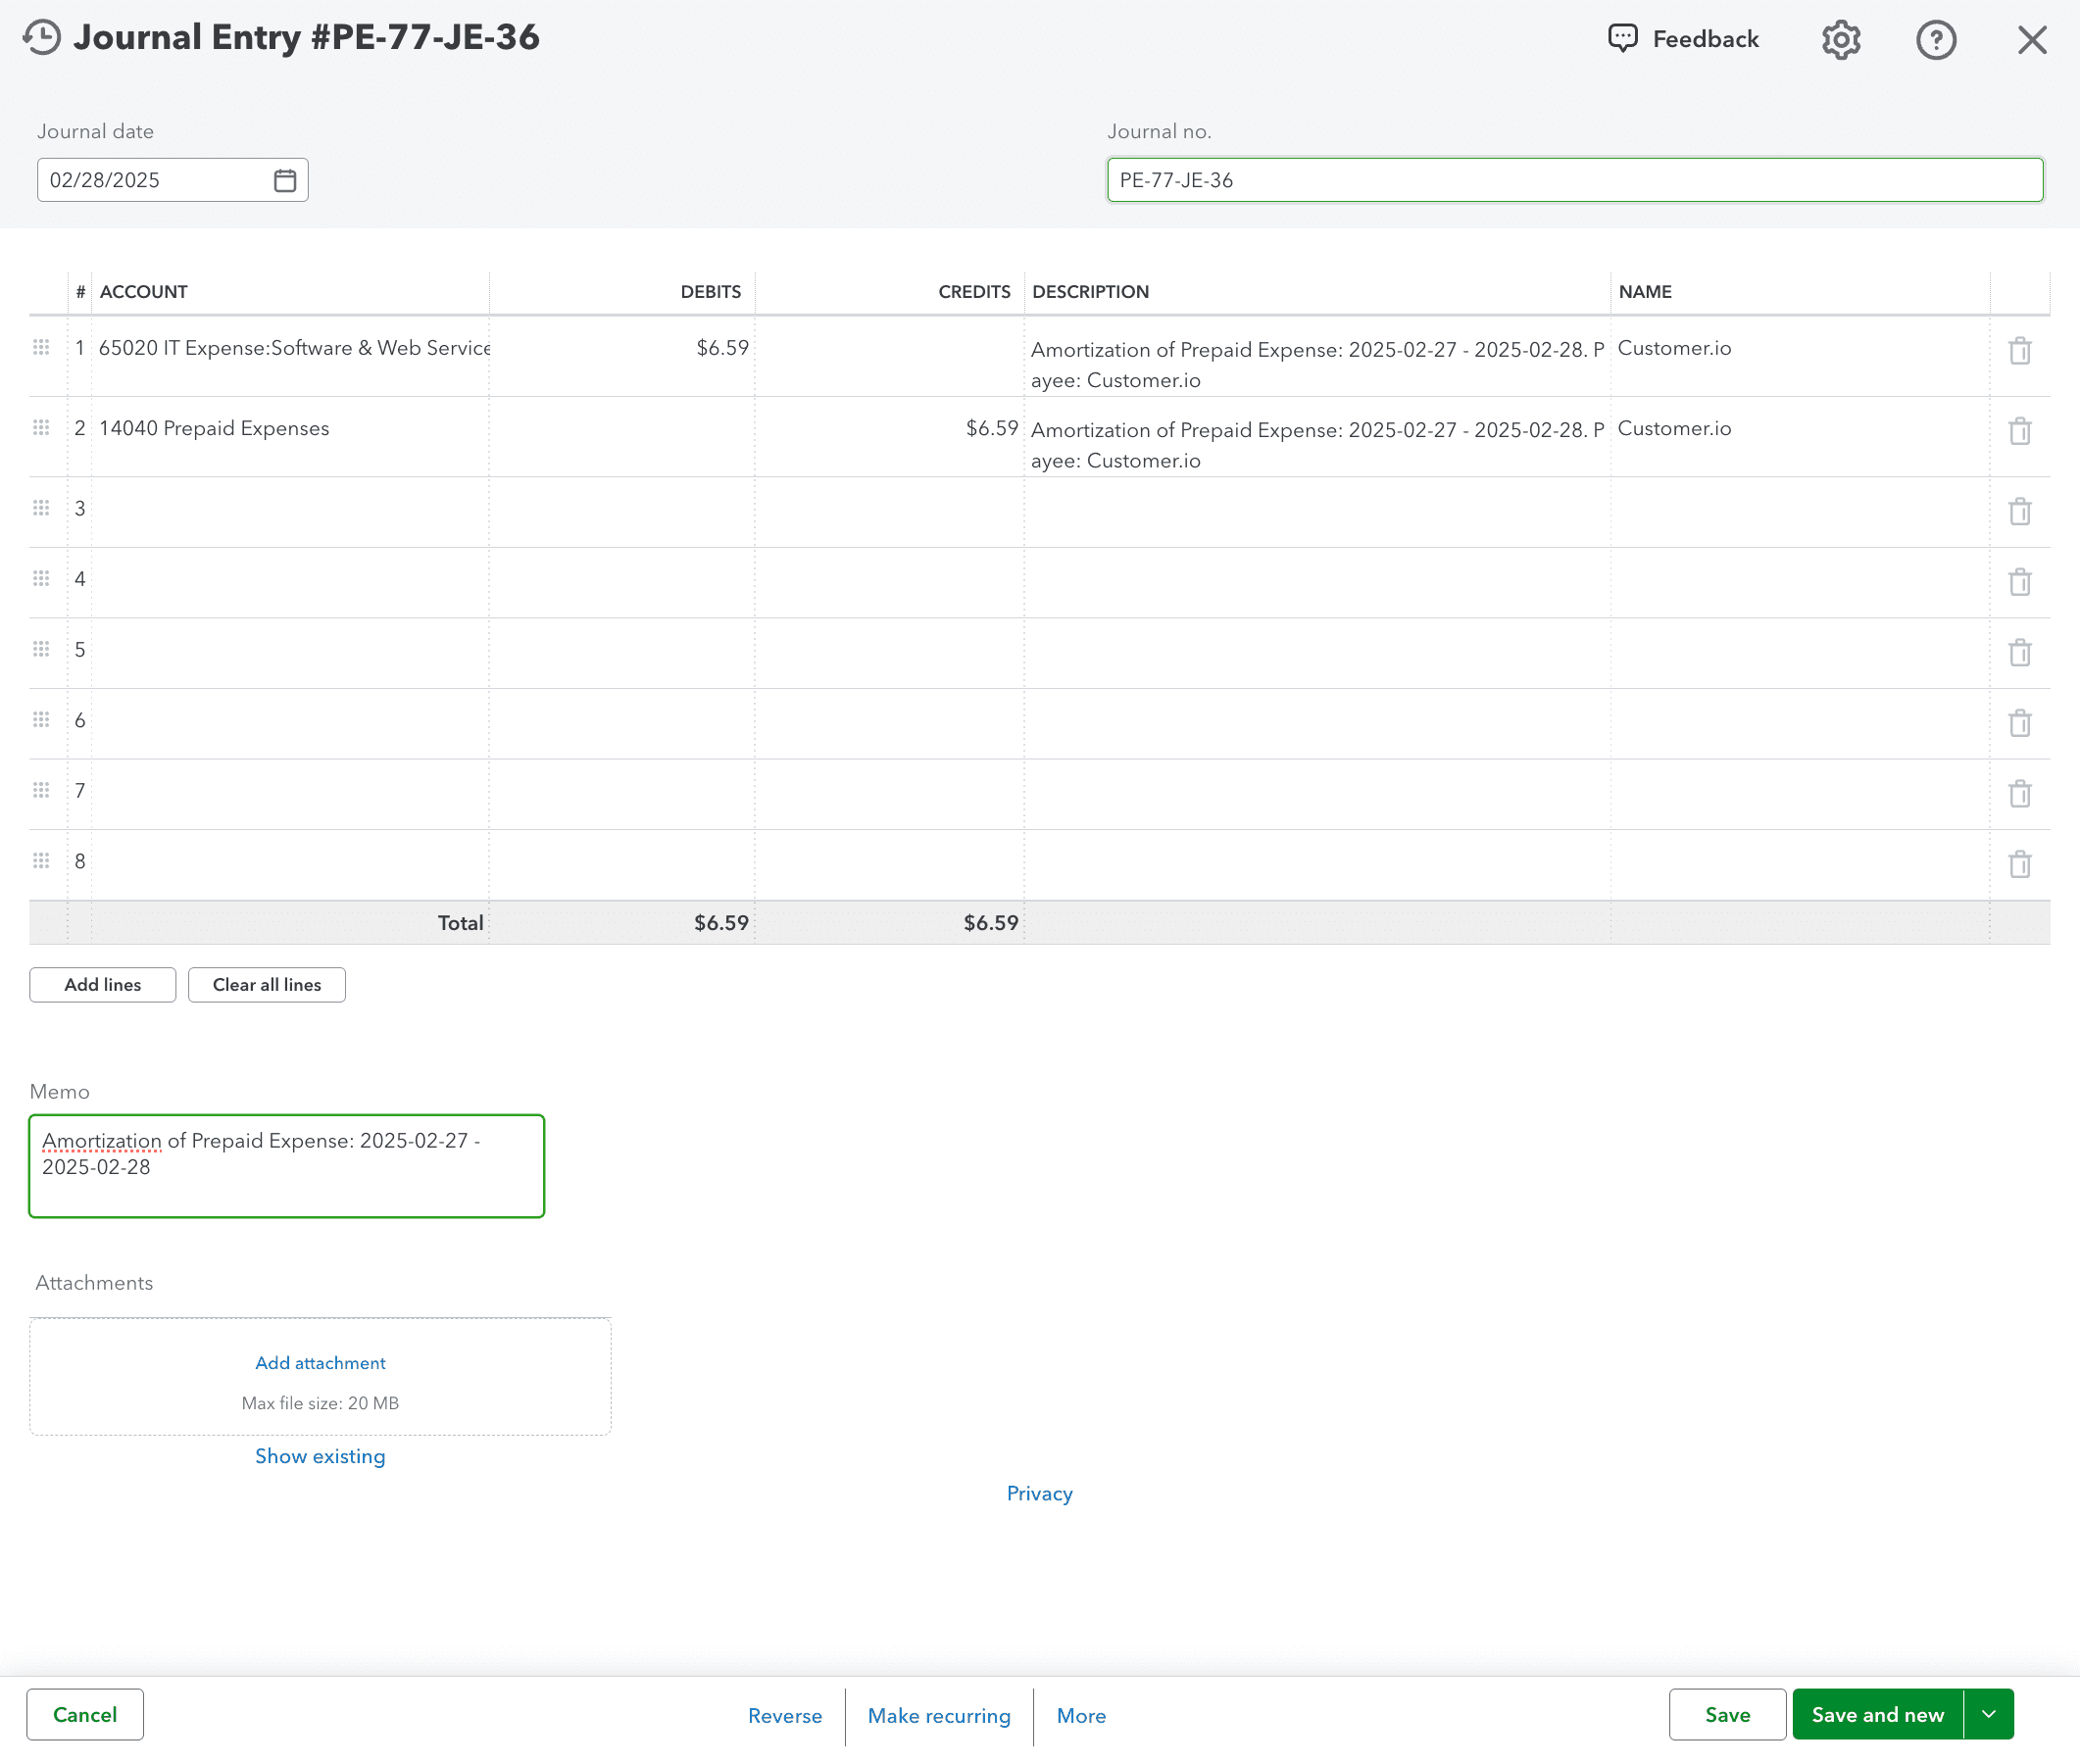
Open the linked QuickBooks journal entry and verify the debit, credit, and memo details match the posted amortization term.
Review the selected schedule and term before posting the amortization journal entry to QuickBooks.
Was this helpful?
Need more help?
Ask for human help about this article and provide any feedback.