
Before importing
Prepare payee, transaction date, expense account, total amount, service period, prepaid account, and calculation method values before opening the import panel.
Ask the support agent
Just ask a direct question or search related articles from the Knowledge Base.
Support Center / Prepaid Expenses / Import/Export
Import existing prepaid schedules from Reporting when legacy schedules need to move into Truewind, resulting in imported schedules that appear in the current prepaid workflow.
Step 1
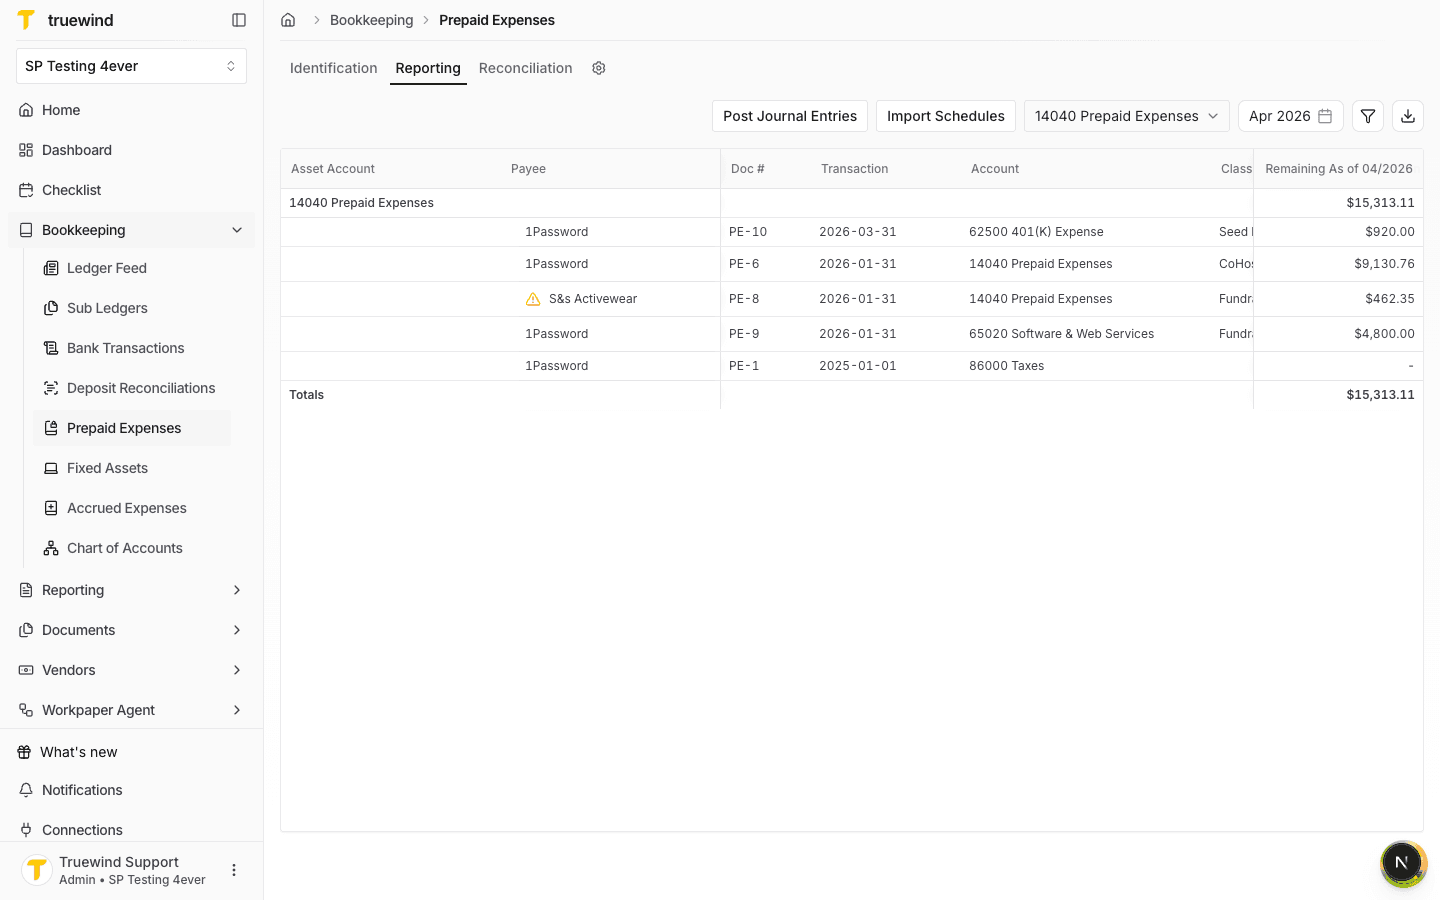
Start in Bookkeeping > Prepaid Expenses and open Reporting so the import action and existing schedule rows are visible.
Step 2
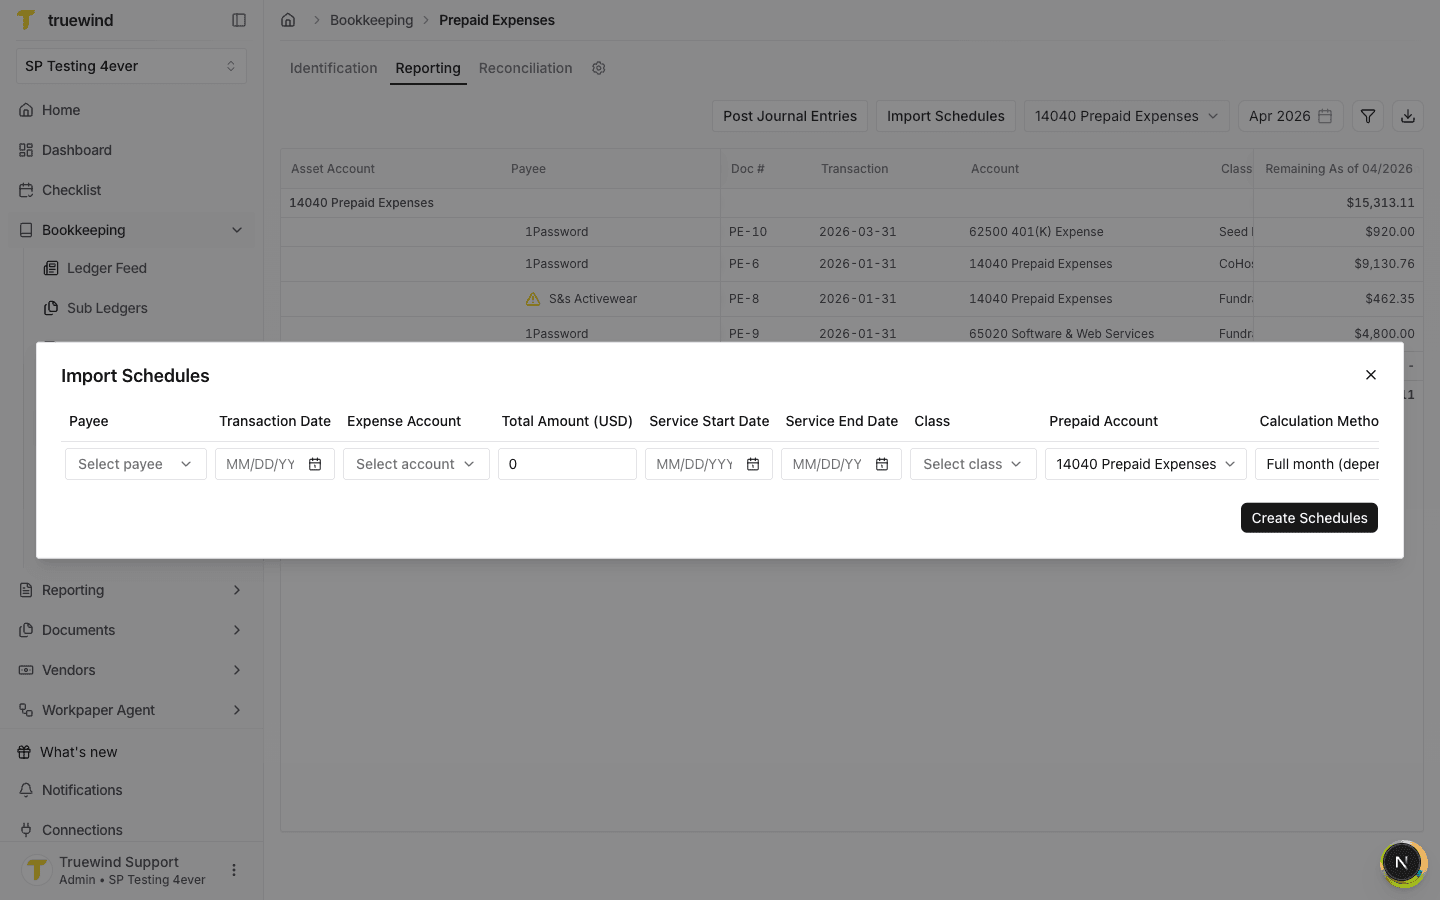
Use Import Schedules when legacy prepaid schedule details need to be entered directly into Truewind.
Step 3
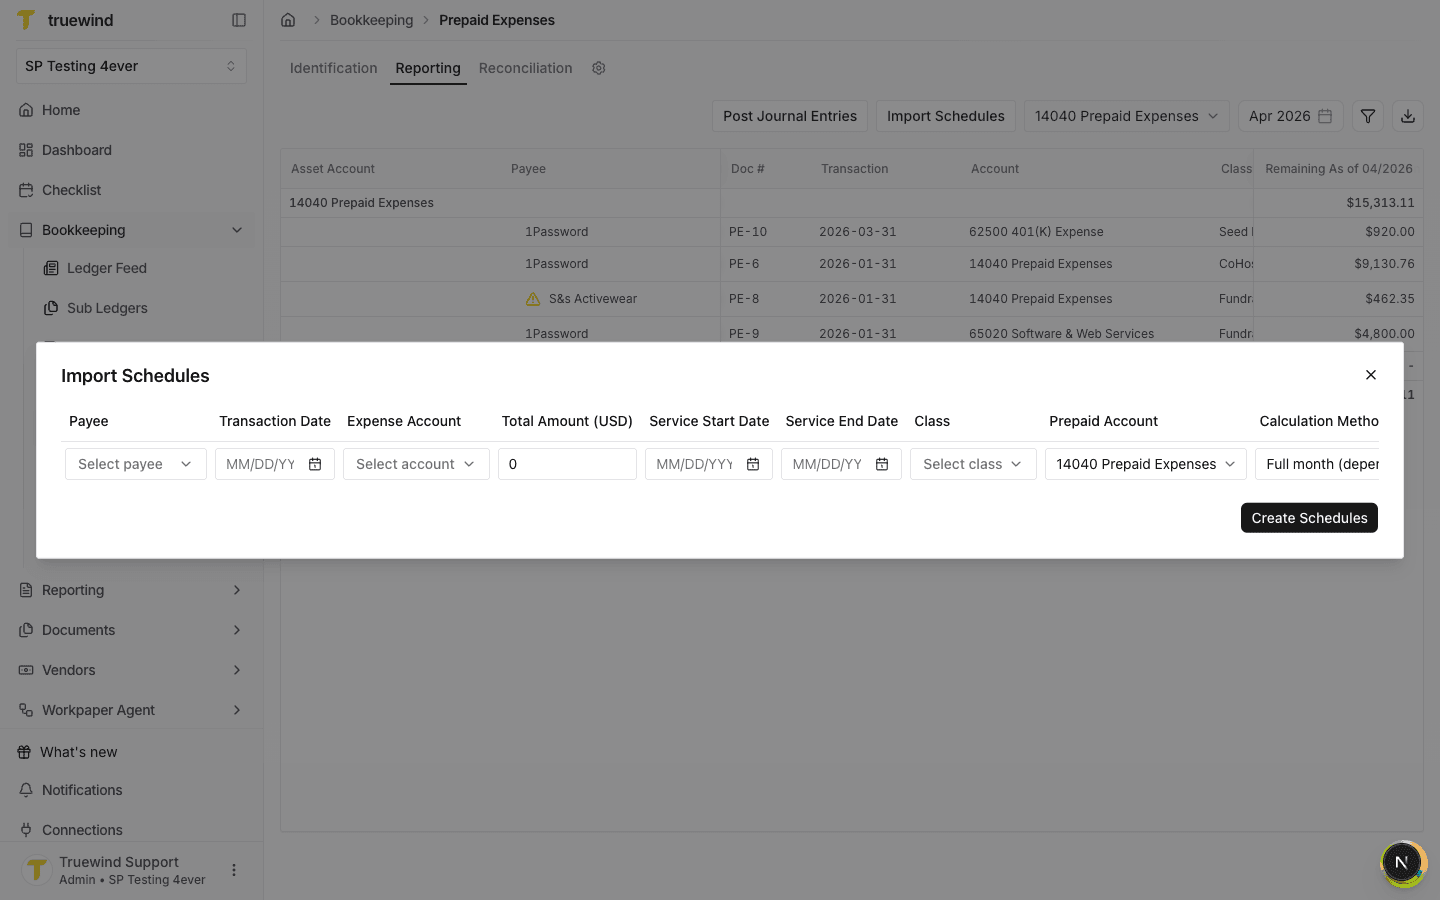
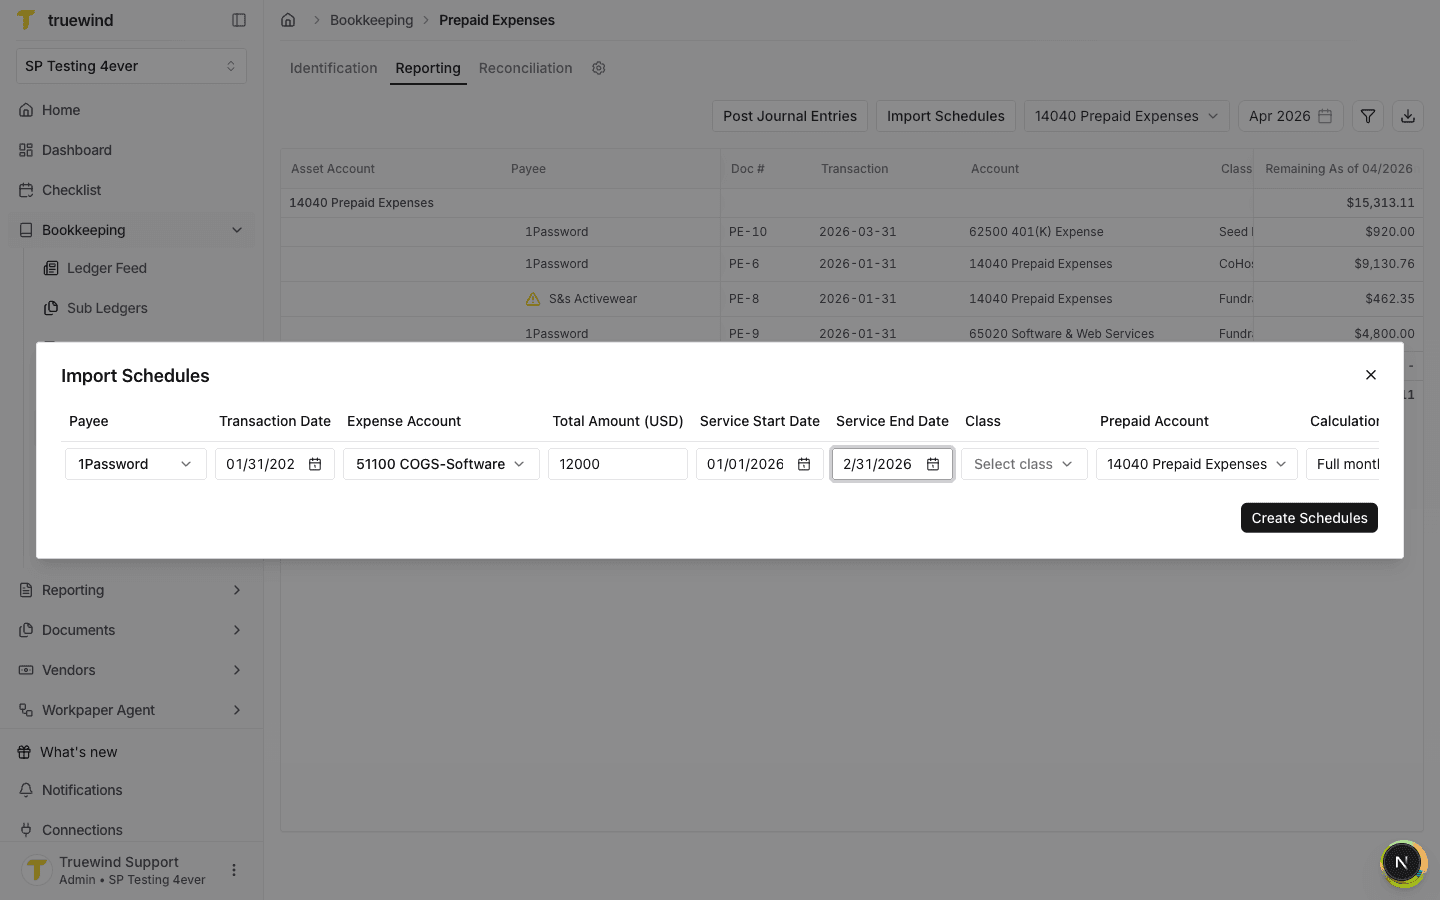
The import row expects payee, transaction date, expense account, amount, service dates, class, prepaid account, and calculation method.
Step 4
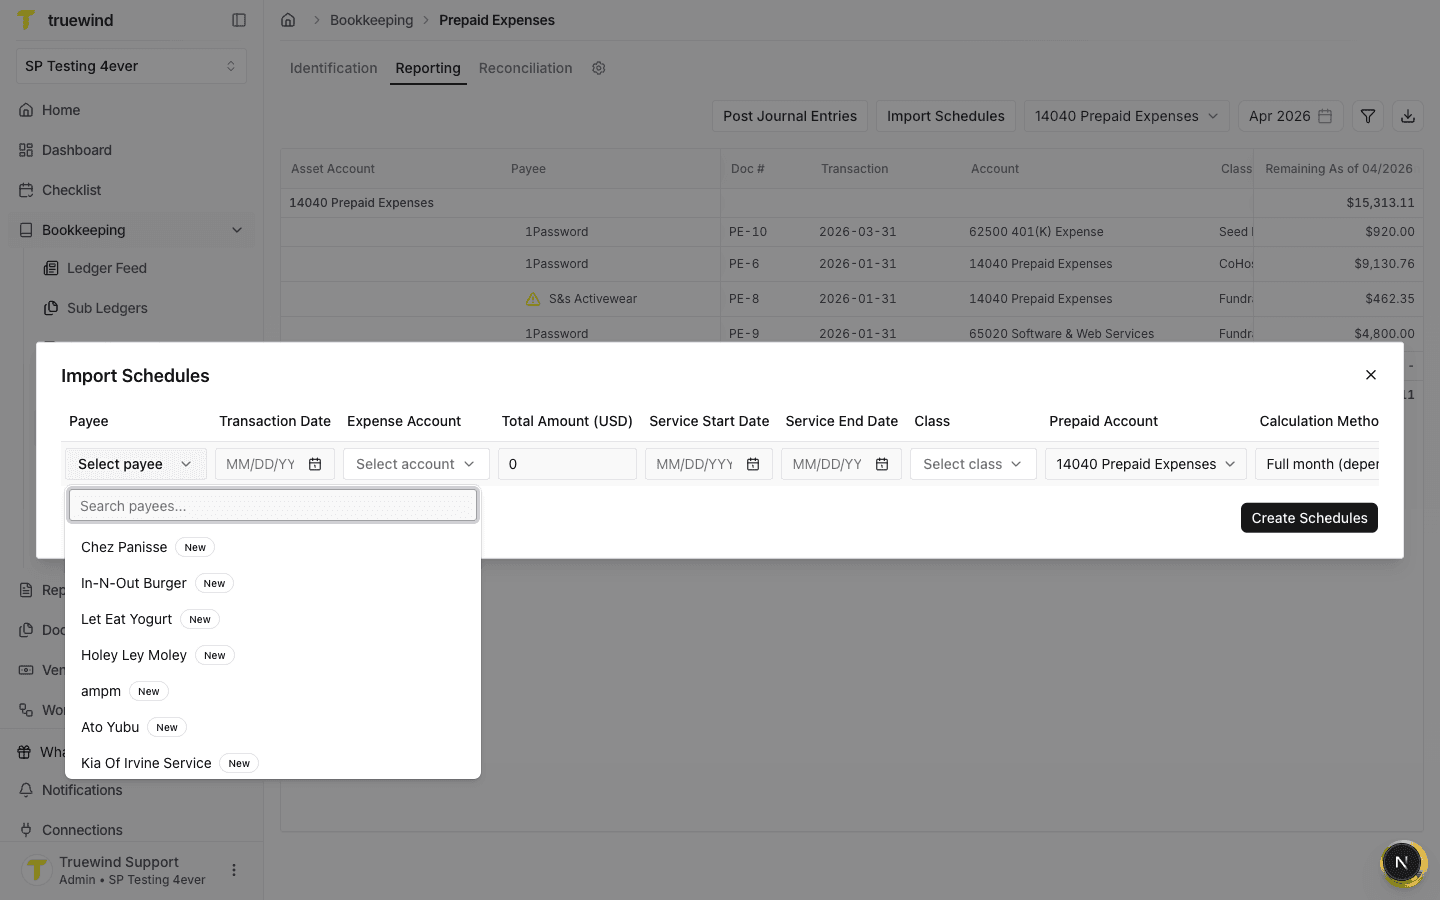
Choose the vendor or create a new payee from the dropdown before entering the rest of the schedule details.
Step 5
Add the source transaction date, expense account, total amount, service period, prepaid account, and any relevant class.
Step 6
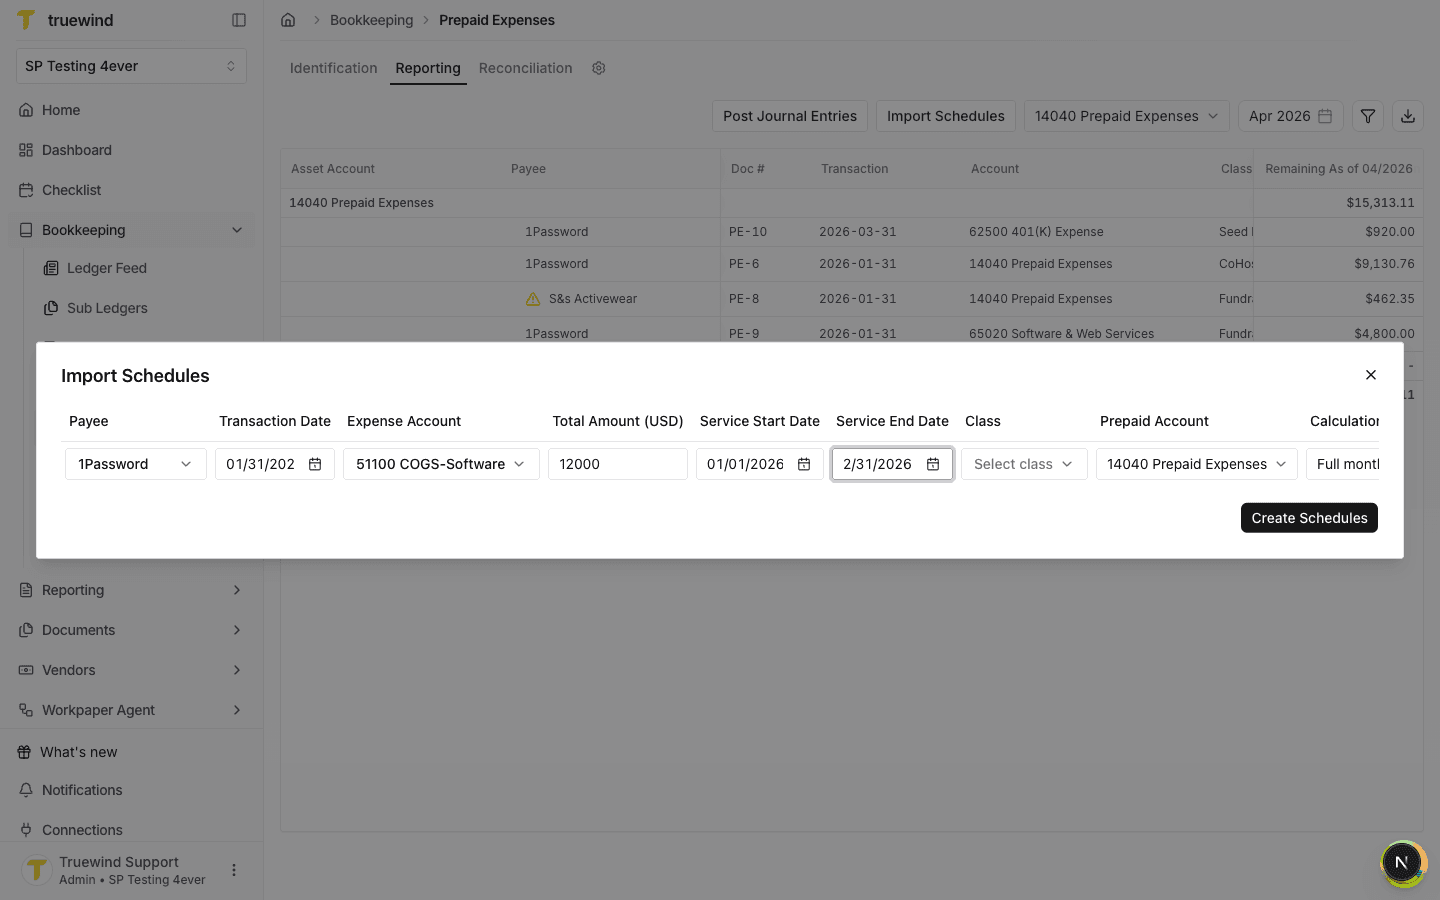
Confirm the import row is complete and the calculation method is correct before creating schedules.
Step 7
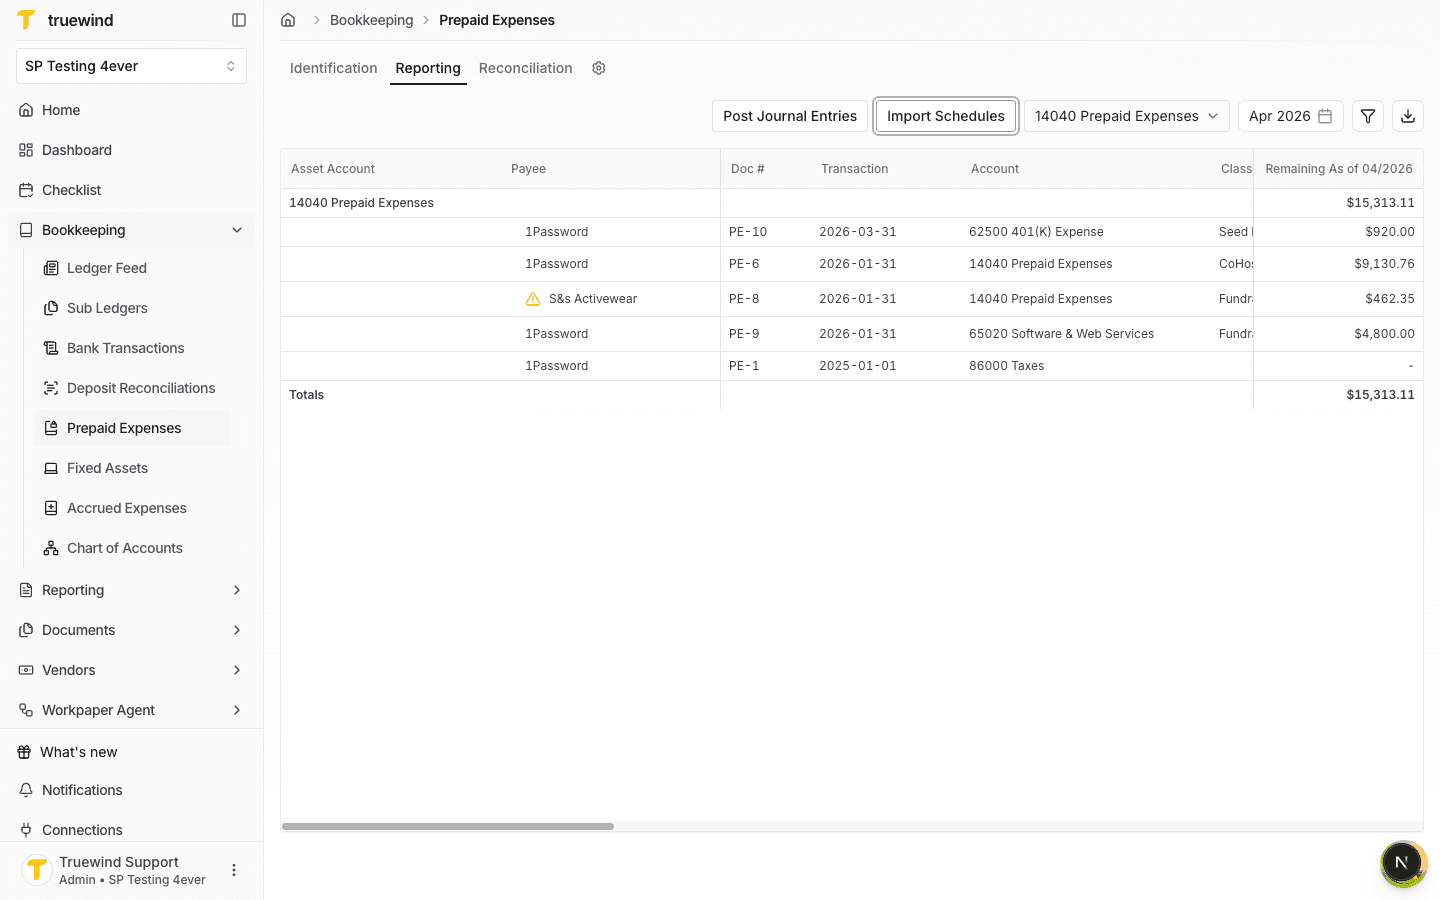
After schedules are created, return to Reporting and confirm the rows appear under the selected prepaid account and term date.
Step 8
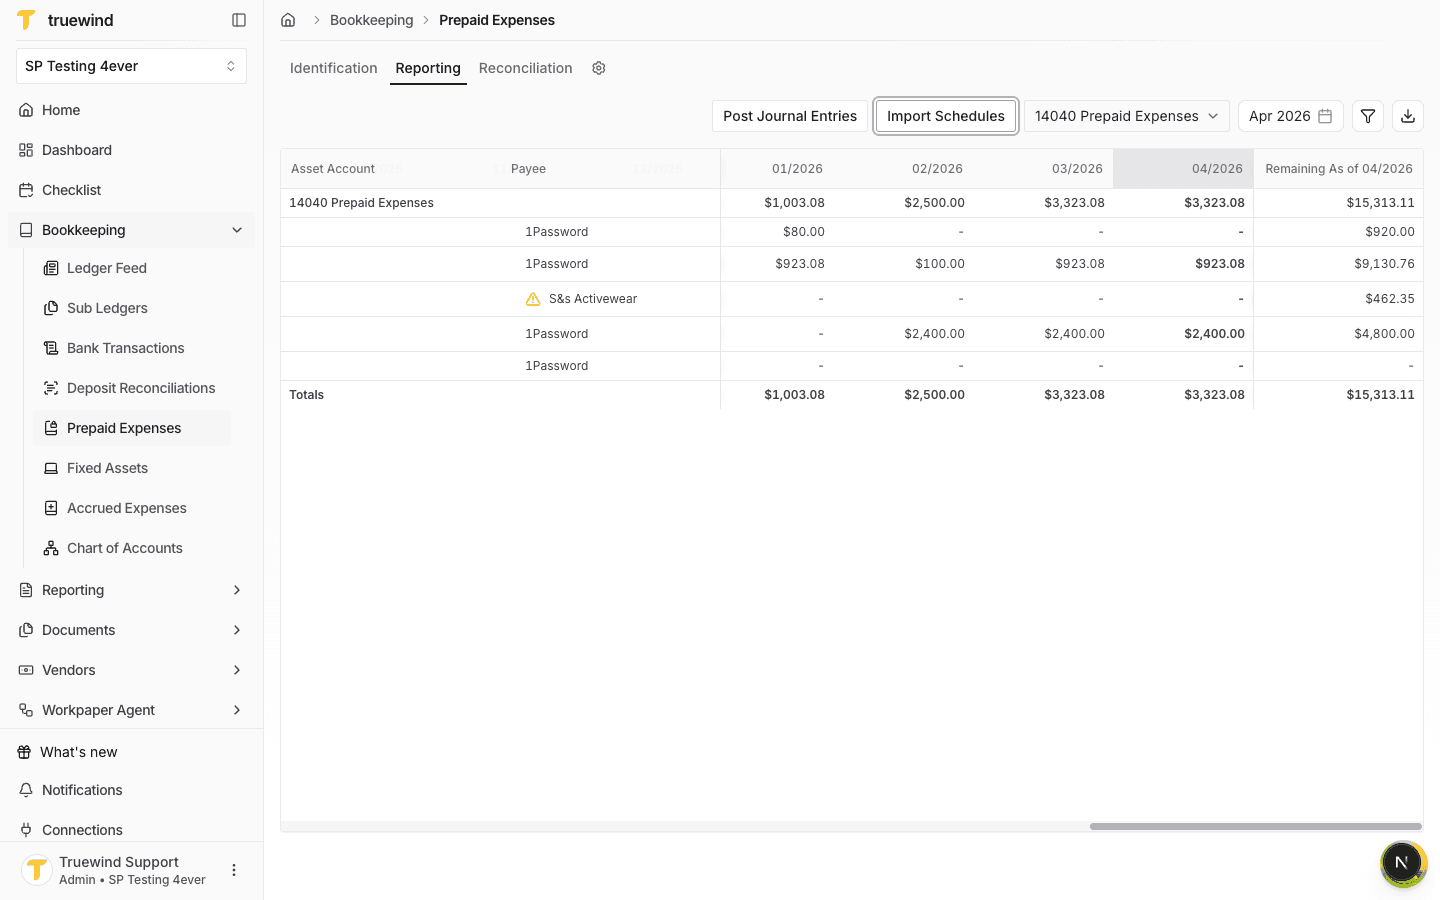
Scroll across the Reporting grid to verify monthly amounts and remaining balances for the imported schedule.
Prepare payee, transaction date, expense account, total amount, service period, prepaid account, and calculation method values before opening the import panel.
Was this helpful?
Need more help?
Ask for human help about this article and provide any feedback.