
Learn about AI for accountingJoin live workshops

Ask the support agent

Just ask a direct question or search related articles from the Knowledge Base.

Support Center / Checklist / Overview

Organize Checklist tasks with groups

New

Create Checklist groups from the task list or Settings, assign new tasks, and regroup existing tasks. Understand how removing a group choice differs from changing a task’s assignment.

Workflow

Step 1

Choose the organization and period

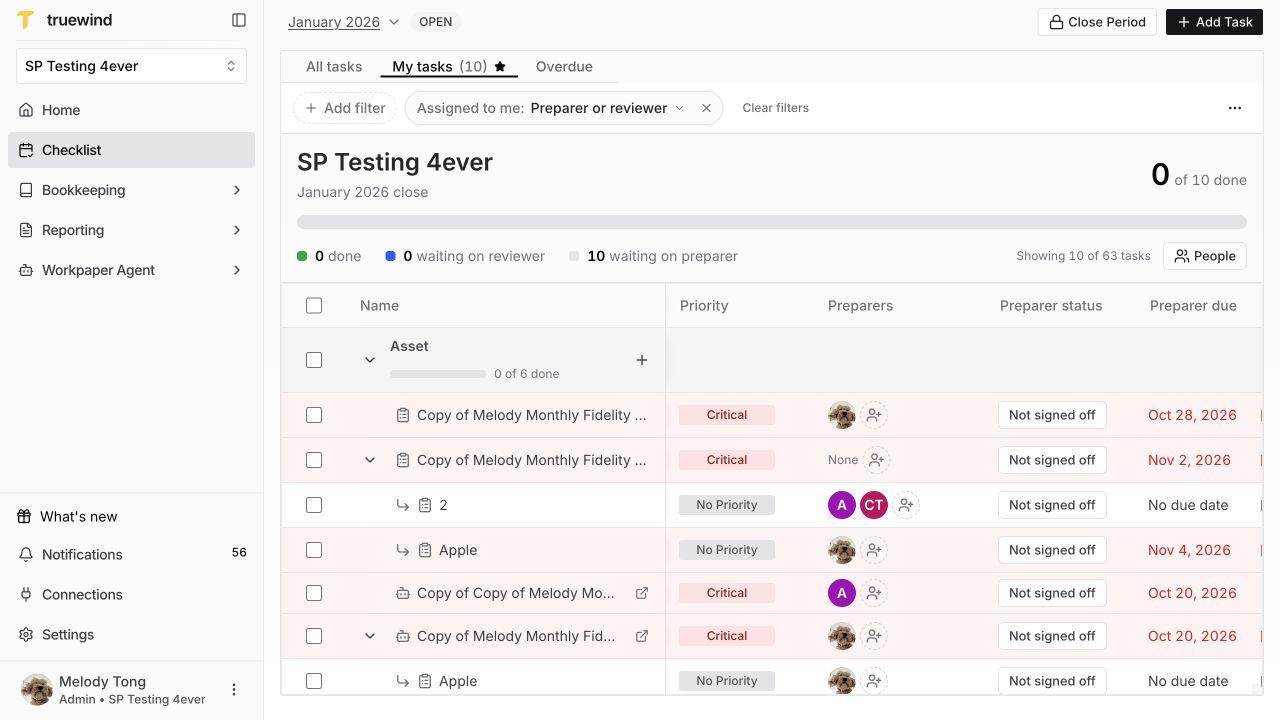
Open Checklist and confirm the organization in the sidebar. Use the period picker at the top to choose the close you are organizing.

Expand a group with its arrow to see the tasks underneath. Group headings show progress and task counts. Tasks without a group appear under Ungrouped, after the named groups. The screenshots use a demonstration organization; choose your own close period.

Current Checklist with the period picker, named group headings without pencil icons, and task counts.

Step 2

Add a group from Checklist

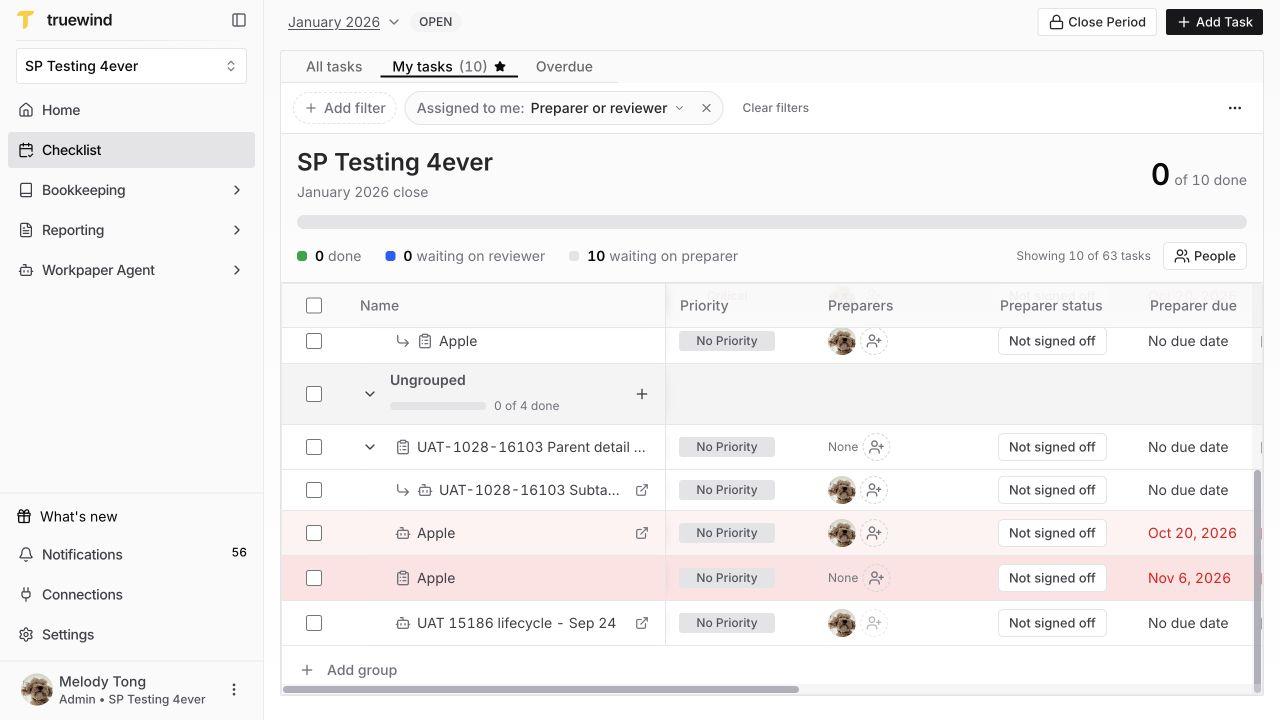
Scroll to the bottom of the Checklist table and click + Add group. You do not need to open Settings first.

The Create a checklist group dialog opens. Continue to Step 3 to name the group. If the group already exists, skip to Step 4 to add a task.

Bottom of Checklist showing Ungrouped and the Add group entry point.

Step 3

Name and create the group

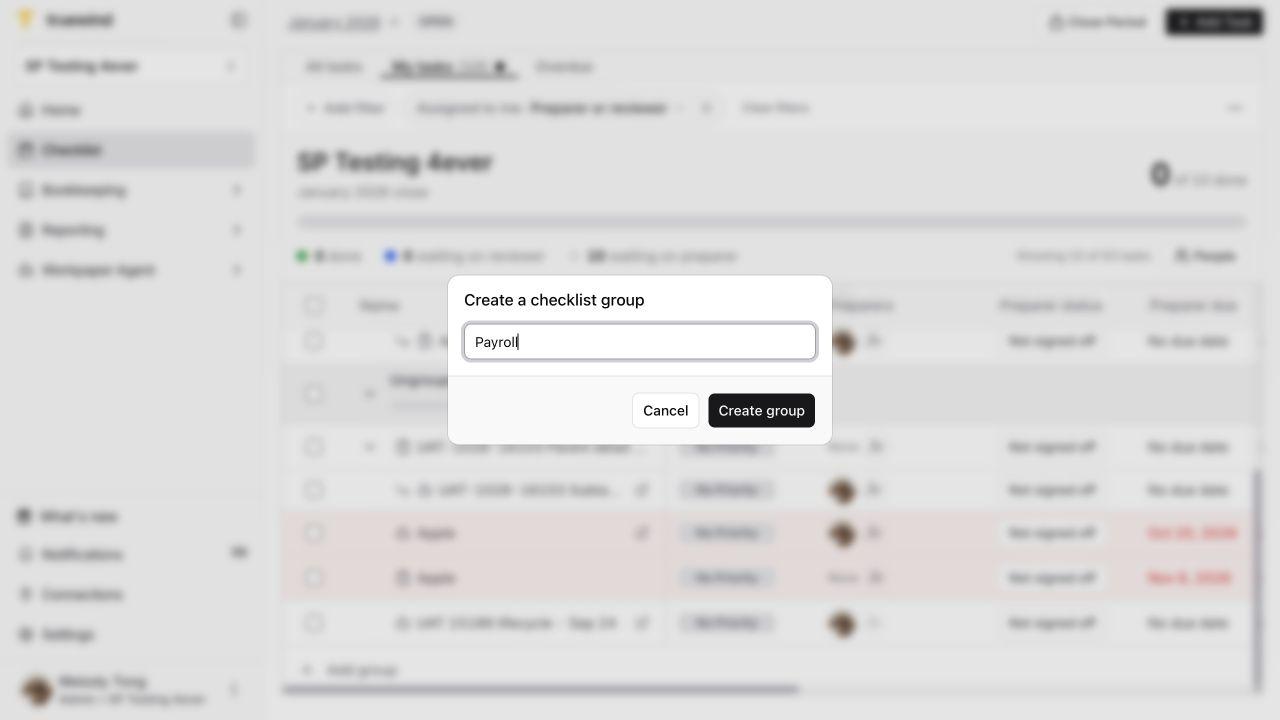
Enter a clear name, such as Payroll, then click Create group.

Use a unique name of 80 characters or fewer. Leading and trailing spaces are trimmed, and names that differ only by capitalization count as duplicates. Creating the group does not create or move any tasks.

The screenshot shows an unsaved Payroll example.

Create a checklist group dialog with Payroll entered and Create group available.

Step 4

Assign a group to a new task

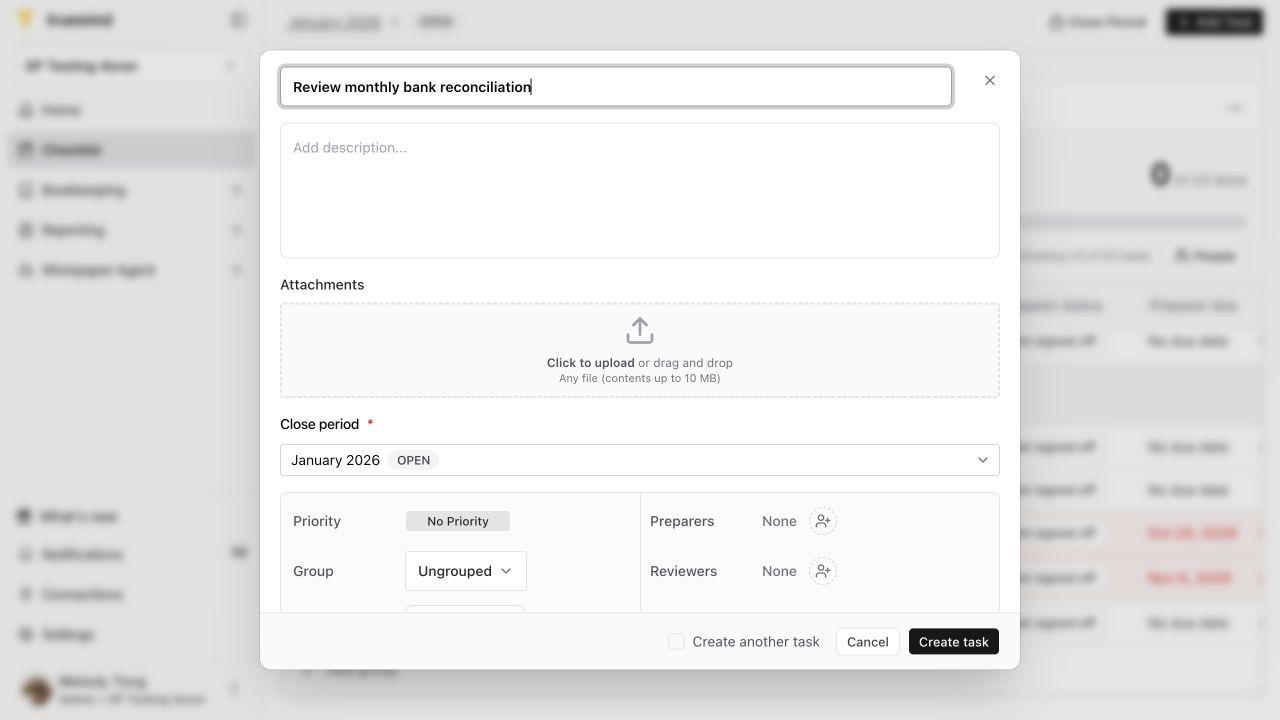
Select Add Task, or Add task on the intended group row. Confirm Group, Close period, name, owners, and deadlines before saving. New top-level tasks start with Recurring selected; clear it for a one-time task. Select Create task, then verify the task appears under the intended heading.

Current Create checklist task form with Group, Close period, and role assignments.

Step 5

Choose a new group for an existing task

Open the task by clicking its name in Checklist. Under Details, click its Group value to open Edit group.

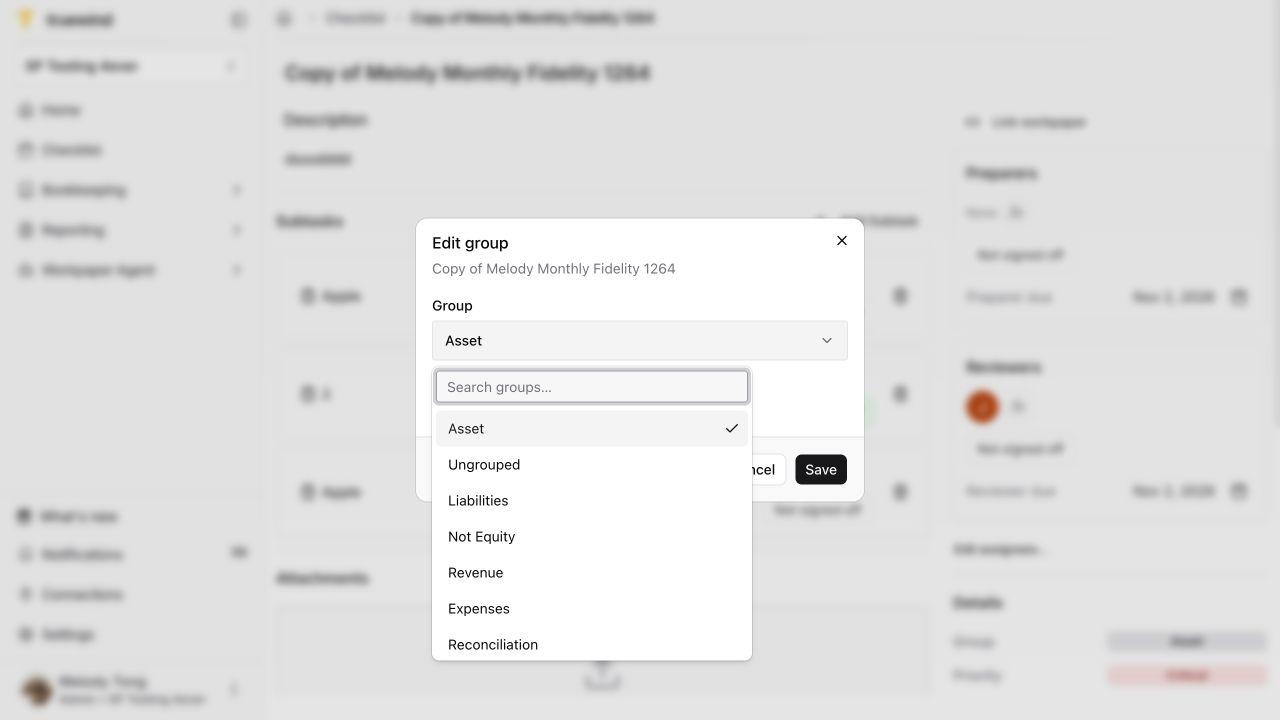
Open the group picker and choose the destination. For example, move a cash reconciliation task to Reconciliation. Select Ungrouped when the task should have no named group. This changes the grouping of the existing task without creating a duplicate.

The screenshot shows the group picker open before choosing a destination.

Current Edit group dialog with destination choices open.

Step 6

Save and verify the grouping

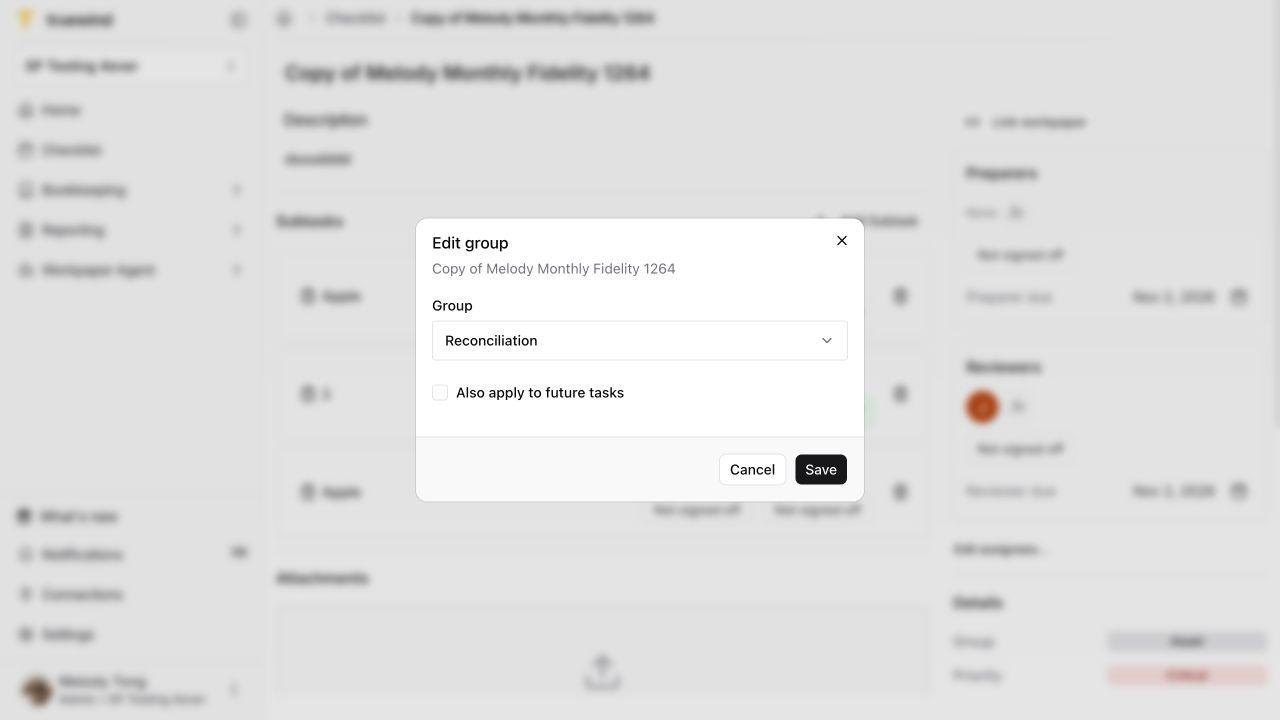
Confirm the task name and selected destination, then review Also apply to future tasks if available. A later protected task can prevent future changes; the dialog explains the restriction and can link to that task. Select Save for the intended scope.

Return to Checklist and confirm the same task is under the destination group with the expected owners and dates. The screenshot shows an unsaved destination choice.

Current group review with Reconciliation selected and the optional future-task scope before saving.

Step 7

Optional — Manage group choices

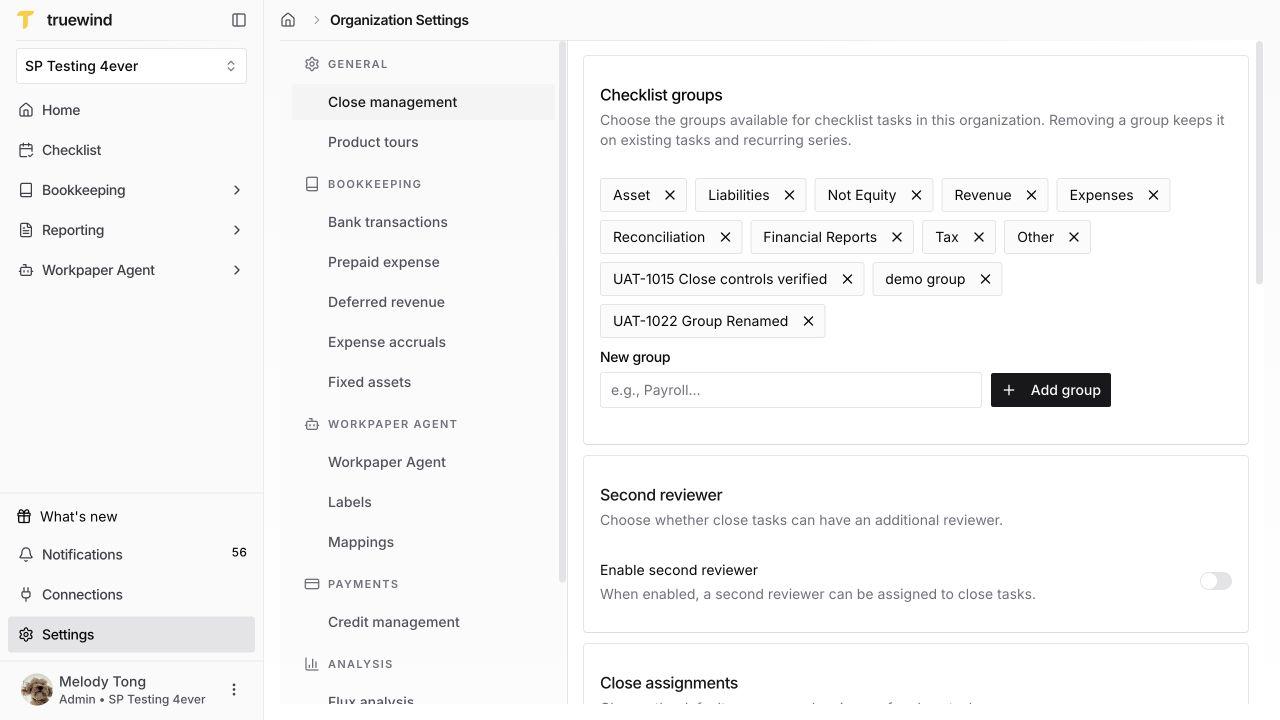
Open Settings → Close management → Checklist groups. To add a group here instead of using Checklist, enter New group and click Add group.

To rename a group here, double-click its name, or focus the name and press F2. Enter the new name and select Save, or use Cancel rename to leave it unchanged. To remove a choice from Settings, use the × beside its name. Settings removal keeps the group on existing tasks and recurring series, as the panel explains. It does not regroup those tasks or stop their recurrence.

Use Steps 5–6 to move an existing task. Read the retained-assignment explanation before removing a choice.

Current Close management showing group names without pencil icons, removal controls, New group, Add group, and the retained-assignment explanation.

Step 8

Optional — Rename a Checklist group

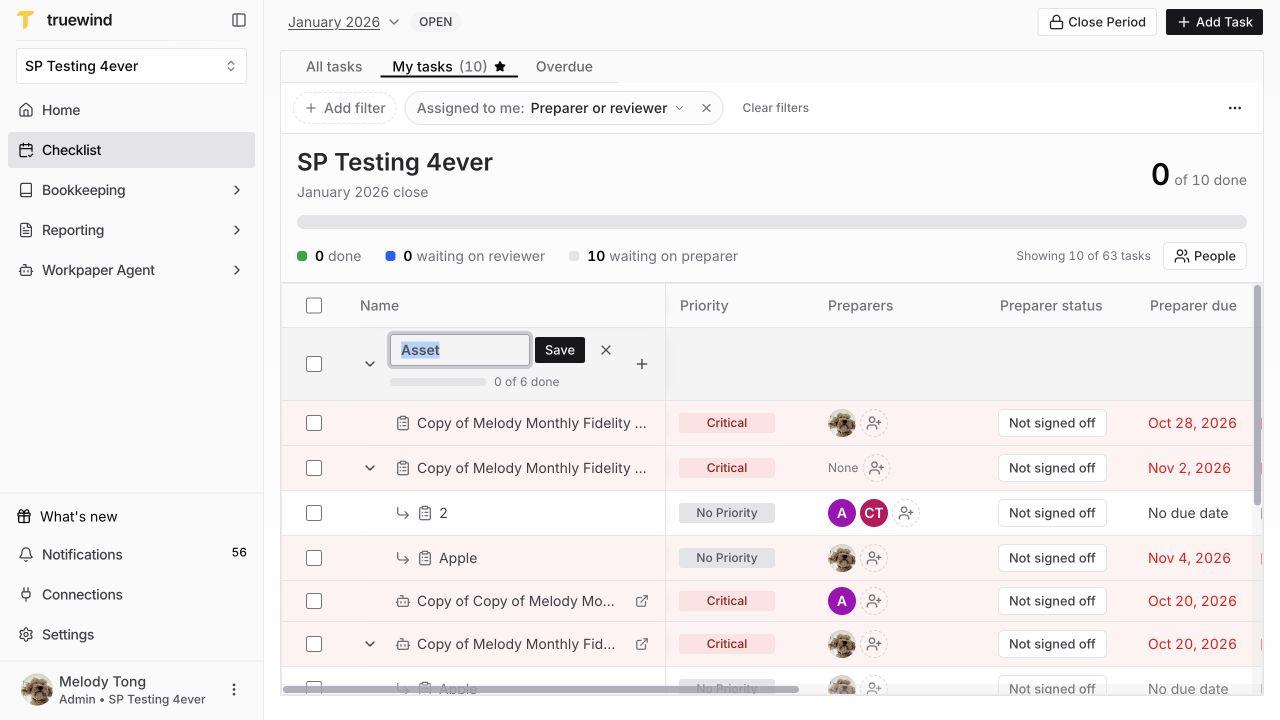
In Checklist, double-click the group heading, or focus it and press F2. The name becomes an editable field with Save and Cancel rename controls; there is no pencil beside the Checklist heading.

Enter a unique name of 80 characters or fewer, then select Save and verify the updated heading. This changes the organization’s group label. Use Cancel rename to leave it unchanged. The system Ungrouped section cannot be renamed. The screenshot shows the editor open with the original name; no rename has been saved.

Checklist group heading in inline rename mode after F2, with the original name selected, Save, and Cancel rename.

When to use this workflow

Use groups to keep related close tasks together, such as payroll reviews, bank reconciliations, or financial reporting. Start by defining the groups your team needs, then assign new tasks or regroup existing tasks.

Groups belong to the organization; tasks belong to a close period. Confirm both before making changes. If you previously used categories, the current interface calls them groups.

Before you begin

Choose a consistent naming convention and check for an existing group before adding another. You need access to manage group choices and to edit the task you want to regroup.

For the full task setup process, see Create a Checklist task. This guide focuses on the group choice and the resulting organization of tasks.

Review habit

After saving, find the same task under its destination group and check its close period, owners, and due date. Do not delete and recreate a task just to change its group. Keeping the existing task preserves the work your team is already tracking.

Rename a group from Checklist

Double-click the group heading, or focus it and press F2, to rename it. Enter a unique name of 80 characters or fewer and select Save. Use Cancel rename to leave the name unchanged. Renaming changes the label used across the organization. The same controls are available in Settings → Close management → Checklist groups.

The system Ungrouped section cannot be renamed. To move a task out of a named group, use its Group field and select Ungrouped. Removing an available choice in Settings retains existing assignments.

FAQ

Are groups the same as the former categories?

Yes. The interface now uses Group, Add group, and Ungrouped consistently. Use a task’s Group field to change where it appears in Checklist.

Where can I create a group?

Use + Add group at the bottom of Checklist, or New group and Add group in Settings → Close management → Checklist groups. Both entry points configure groups for the selected organization.

What does Ungrouped mean?

Ungrouped means the task has no named group. It is the default in the main Add Task form and an option in the existing-task group picker. The system Ungrouped section appears after named groups.

Can I create a group before adding tasks?

Yes. Add tasks when needed; a group heading alone does not create work.

Why is a removed group still visible on a task?

Remove in Close management changes the available choices and retains existing task and recurring-series assignments. Edit the task’s Group to move it.

Can I rename a group?

In Checklist, double-click a named group heading, or focus it and press F2. Enter the new name and select Save; use Cancel rename to leave it unchanged. The same double-click or F2 controls are available in Settings → Close management → Checklist groups. Renaming changes the organization’s group label without creating a replacement group. The system Ungrouped section cannot be renamed.

Does moving a task change future recurring tasks?

Review the edit dialog before saving. Where Also apply to future tasks is available, select it only when you intend to change the series as well. Do not assume a change to one task changes every future occurrence.

Limitations

Group management depends on access

Use an account with access to manage organization groups. If Add group or Close management is unavailable, ask an administrator to configure the choices. You also need access to edit the task you want to regroup.

Removing a choice does not regroup existing work

Removing a choice in Settings retains existing assignments. Use the task Group editor when you intend to move an existing task, and review any future-task scope before saving.

Grouping does not complete the work

A task’s group is separate from its preparation, review, status, and linked workpaper. Continue the normal close workflow after organizing the list.

Troubleshooting

The group name is rejected.

Enter a nonblank, unique name of 80 characters or fewer. Check for an existing name with different capitalization and follow the validation message.

I cannot find the task after regrouping it.

Confirm the organization and close period, review active filters, and expand the destination group. For Ungrouped, look at the end of the list. Reopen the task to confirm its saved value before creating another task.

A group choice is missing.

Check the organization’s Checklist groups in Close management. A choice removed from Settings can still appear on previously assigned tasks. Use Retry if the picker displays a loading error.

Was this helpful?

Need more help?

Ask for human help about this article and provide any feedback.