What to verify
Review the asset account, purchase date, depreciation start date, method, useful life, and posting status before you rely on the schedule.
Ask the support agent
Just ask a direct question or search related articles from the Knowledge Base.
Support Center / Fixed Assets / Manage
Register a Fixed Asset with depreciation inputs when it should depreciate over time, resulting in a schedule that is ready for review and posting.
Step 1
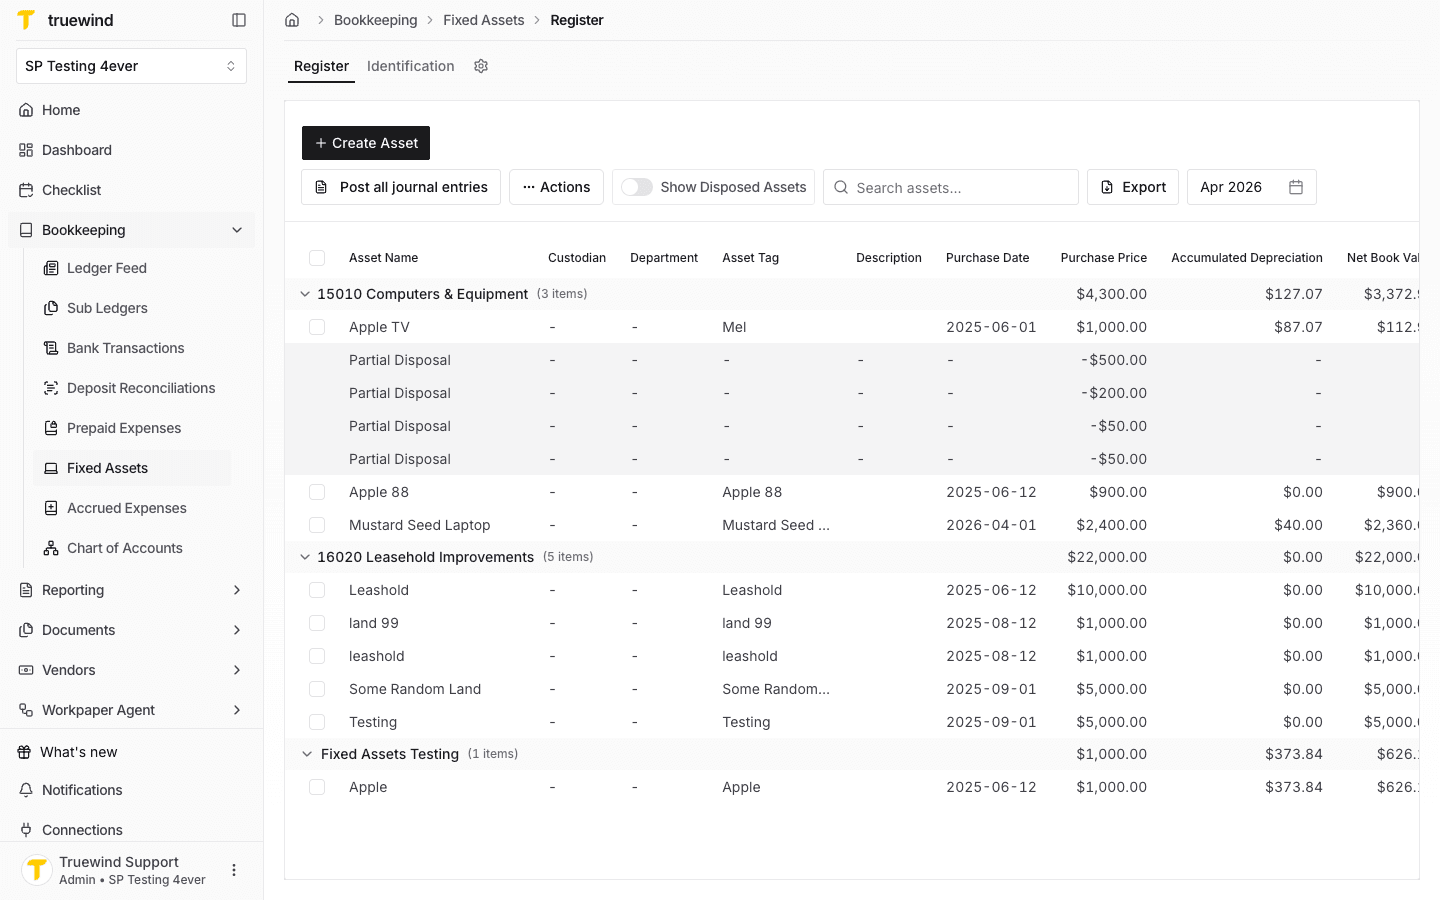
Start in Fixed Assets > Register for the accounting month where you want to review or create schedules.
Step 2
Use Create Asset to open the registration form where schedule inputs are captured.

Step 3
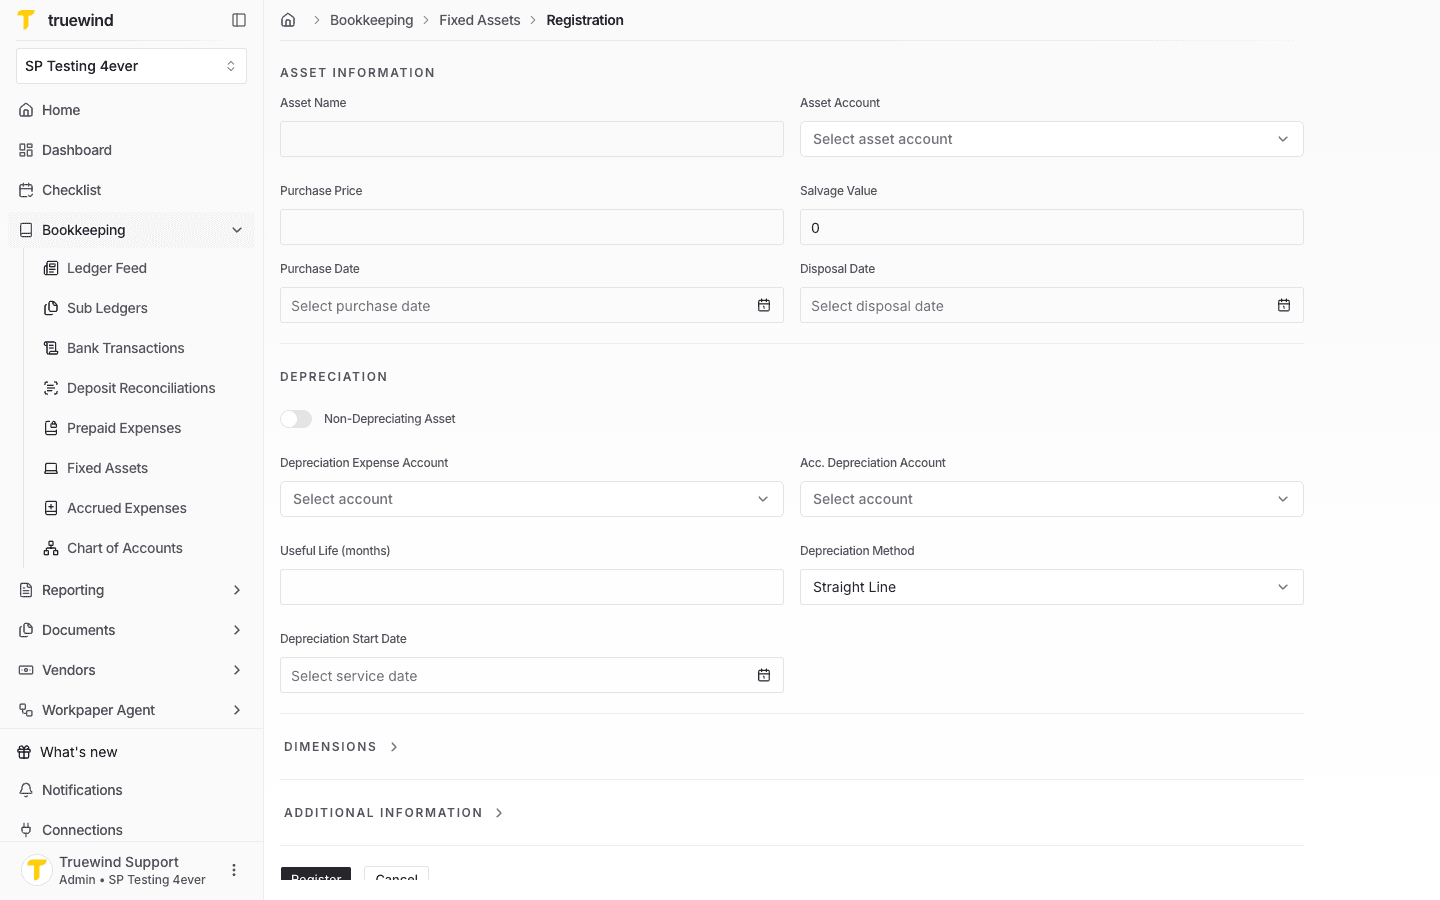
Complete the asset name, asset account, purchase price, salvage value, purchase date, and disposal date if the asset already has one.
Step 4
Enter the depreciation expense account, accumulated depreciation account, useful life, method, and depreciation start date.
Step 5
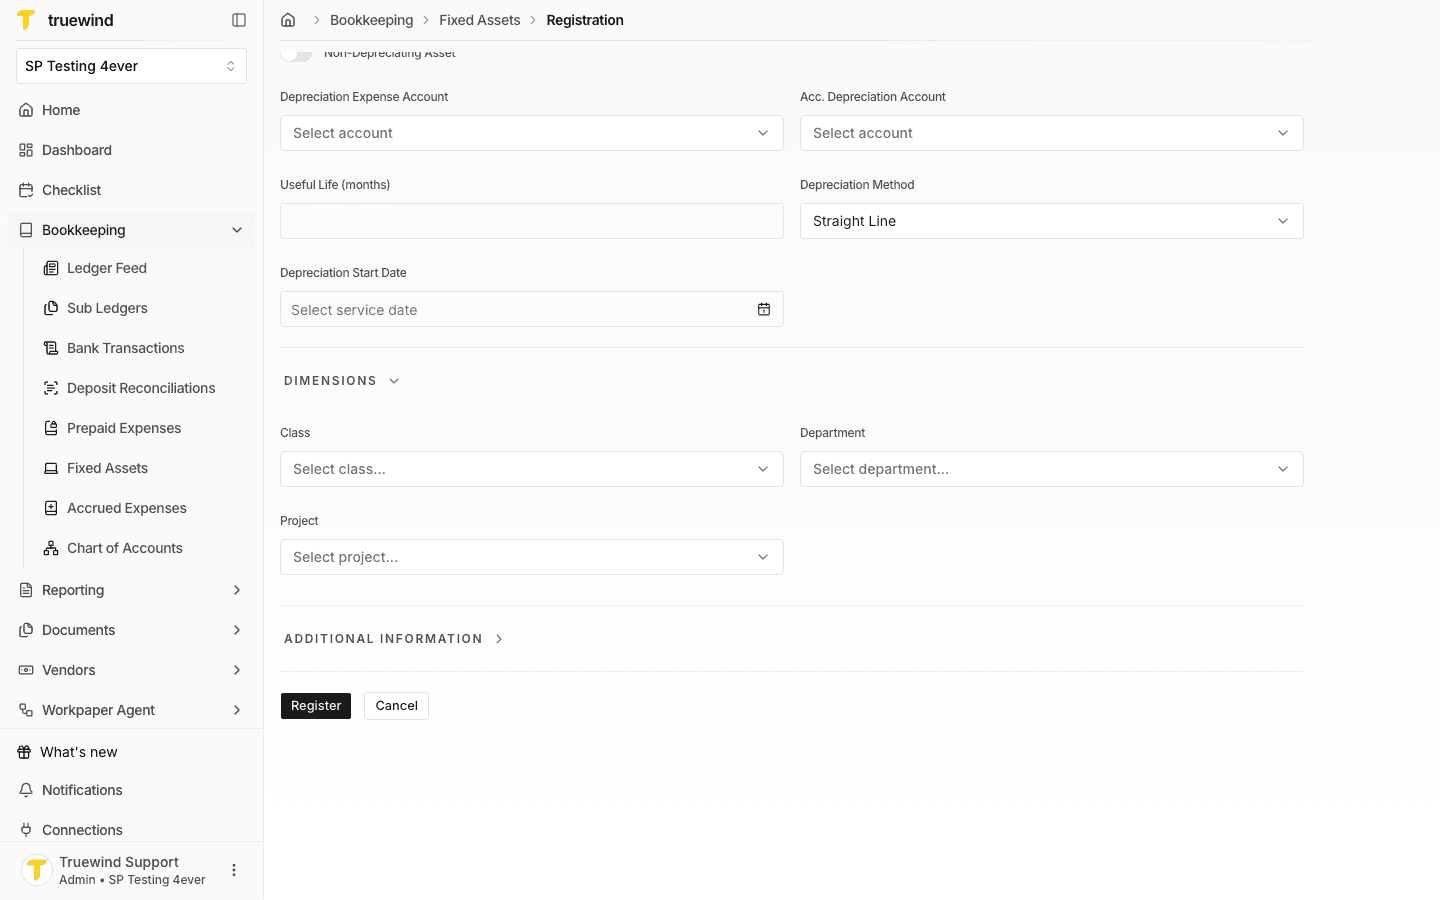
Expand Dimensions and choose the class, department, and project values that should apply to the asset and its depreciation entries.
Step 6
Expand Additional Information to add the asset tag and description before registering the asset.
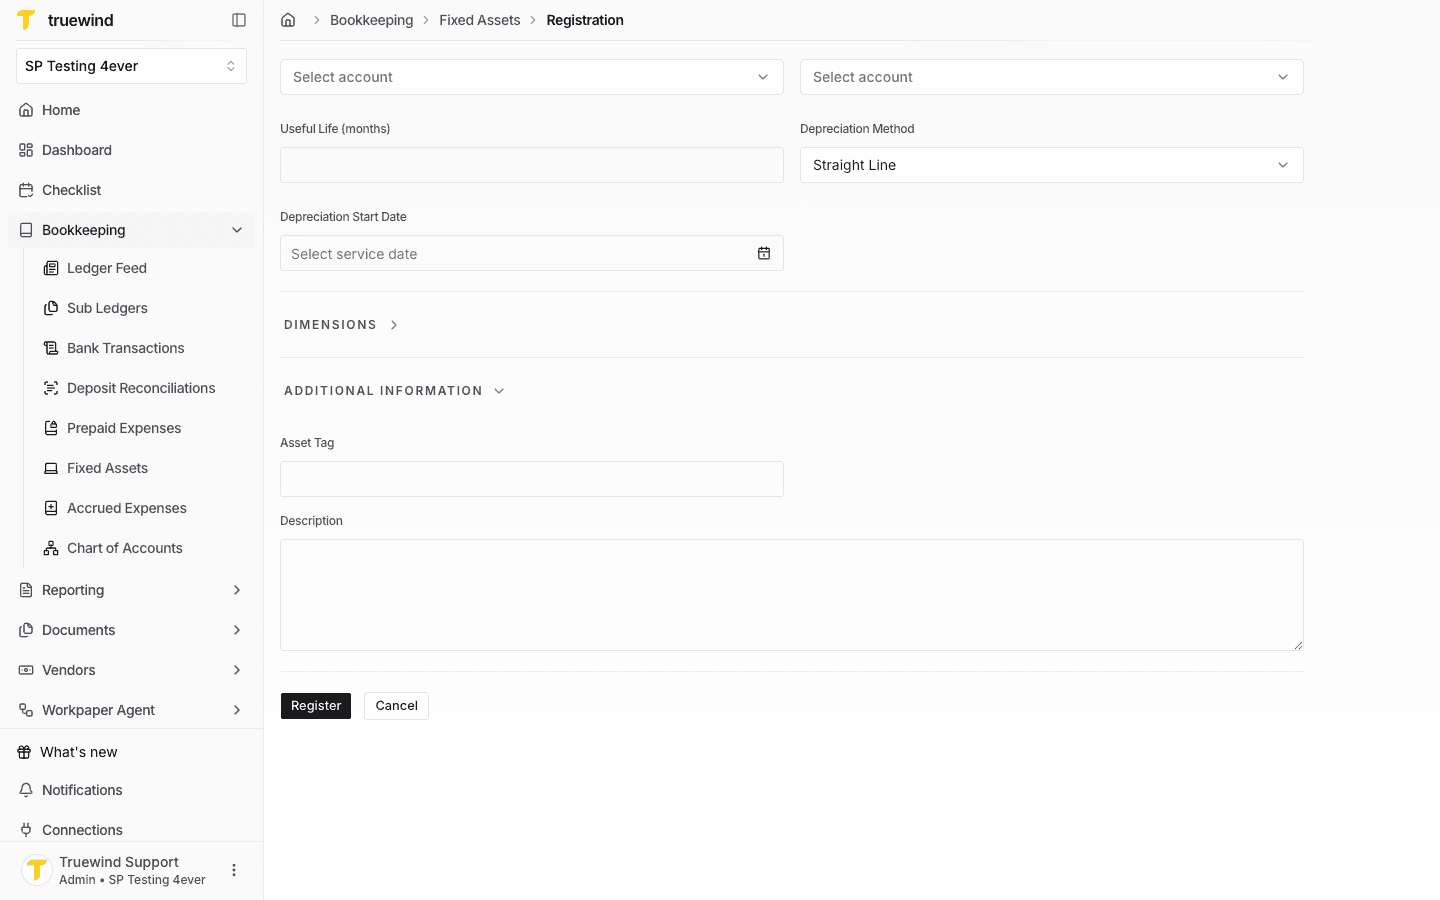
Step 7
Open the asset to confirm the generated terms, accumulated depreciation, net book value, and posting status.
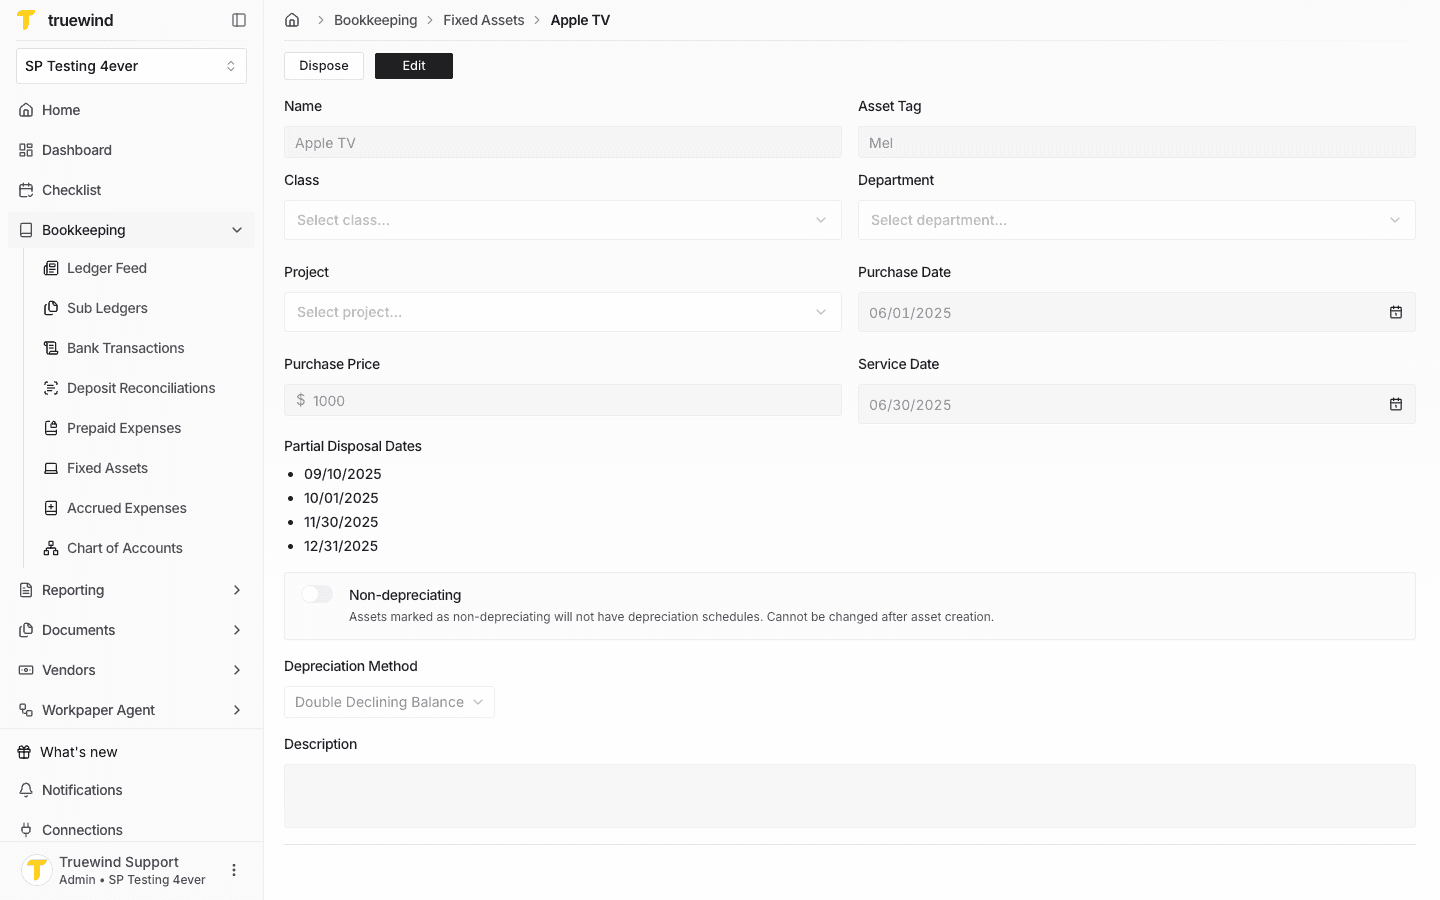
Review the asset account, purchase date, depreciation start date, method, useful life, and posting status before you rely on the schedule.
Was this helpful?
Need more help?
Ask for human help about this article and provide any feedback.