What to verify
- the clearing account is configured before import
- category and payee exceptions are resolved before posting
- the final reference link opens the expected ERP record
Ask the support agent
Just ask a direct question or search related articles from the Knowledge Base.
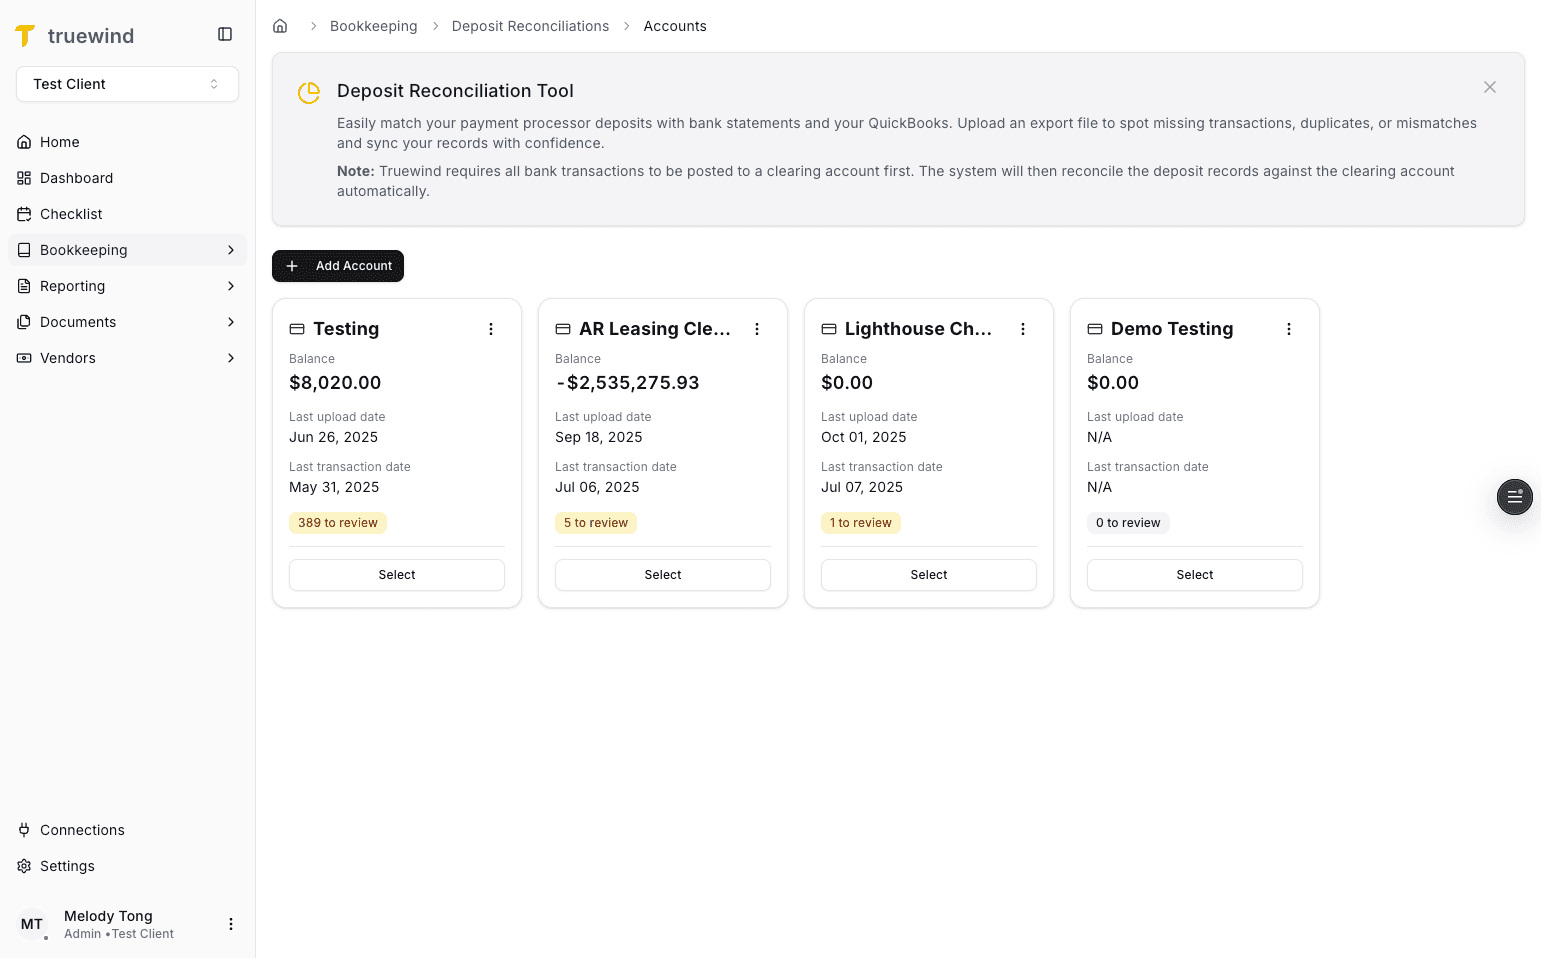
Support Center / Deposit Reconciliation / Overview
Use Deposit Reconciliation when you need to import payout files, resolve mapping exceptions, and post or match deposit activity, resulting in posted or matched deposit records in the ERP.
Step 1
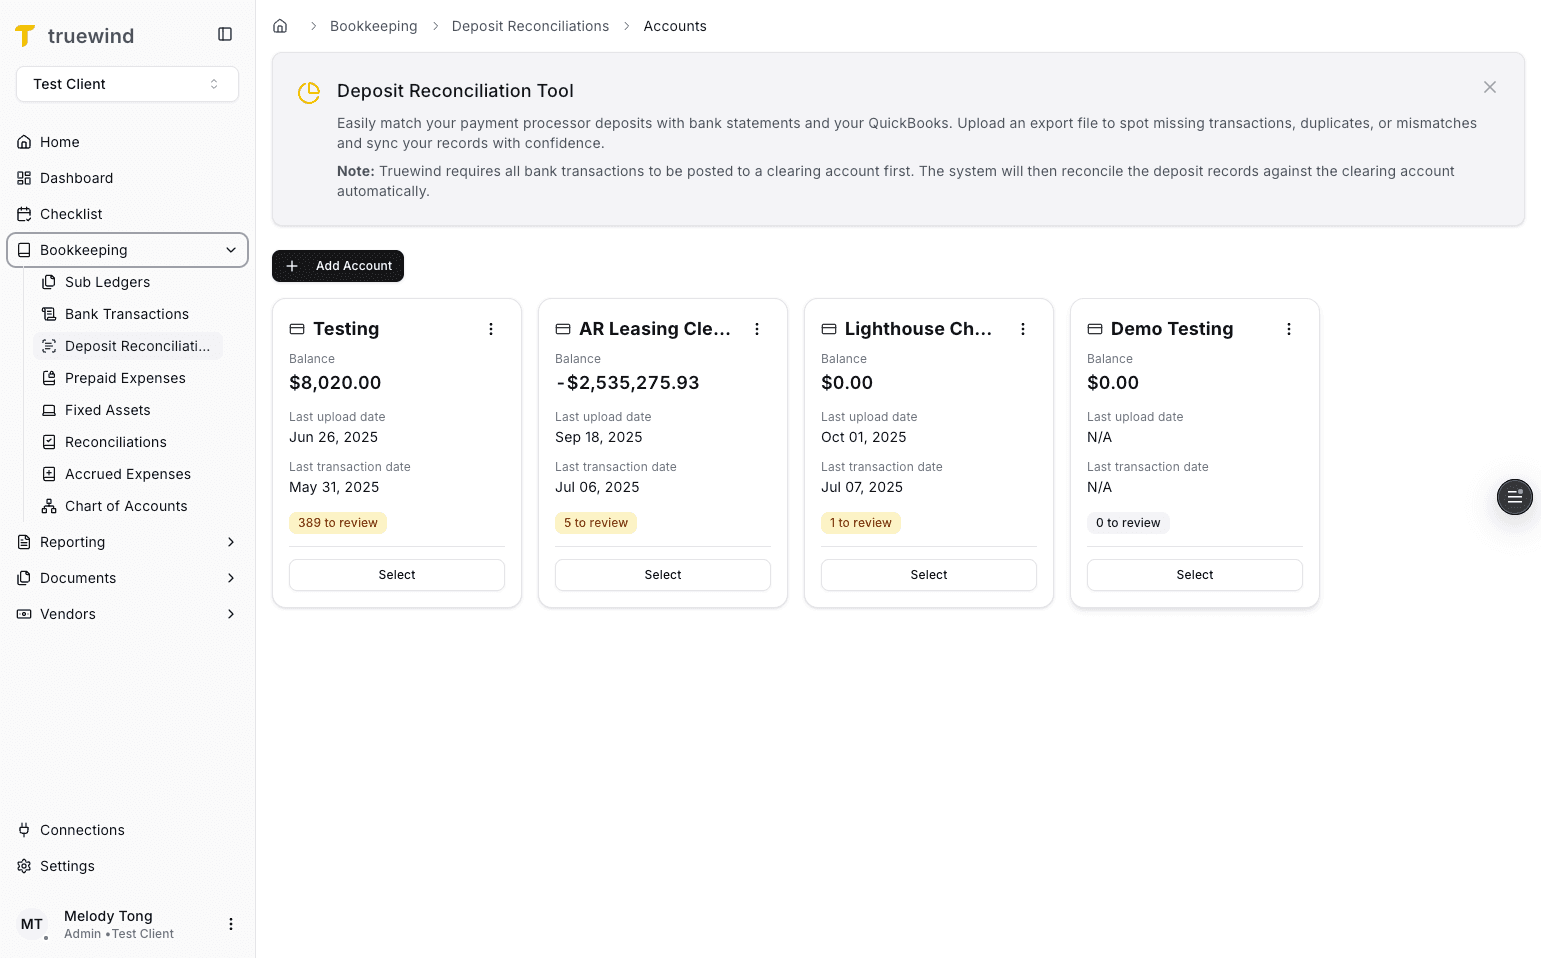
Start in Truewind on Bookkeeping so you can access Deposit Reconciliation.
Step 2
This opens the Deposit Reconciliation workspace where you manage uploads, exceptions, and posting.

Step 3
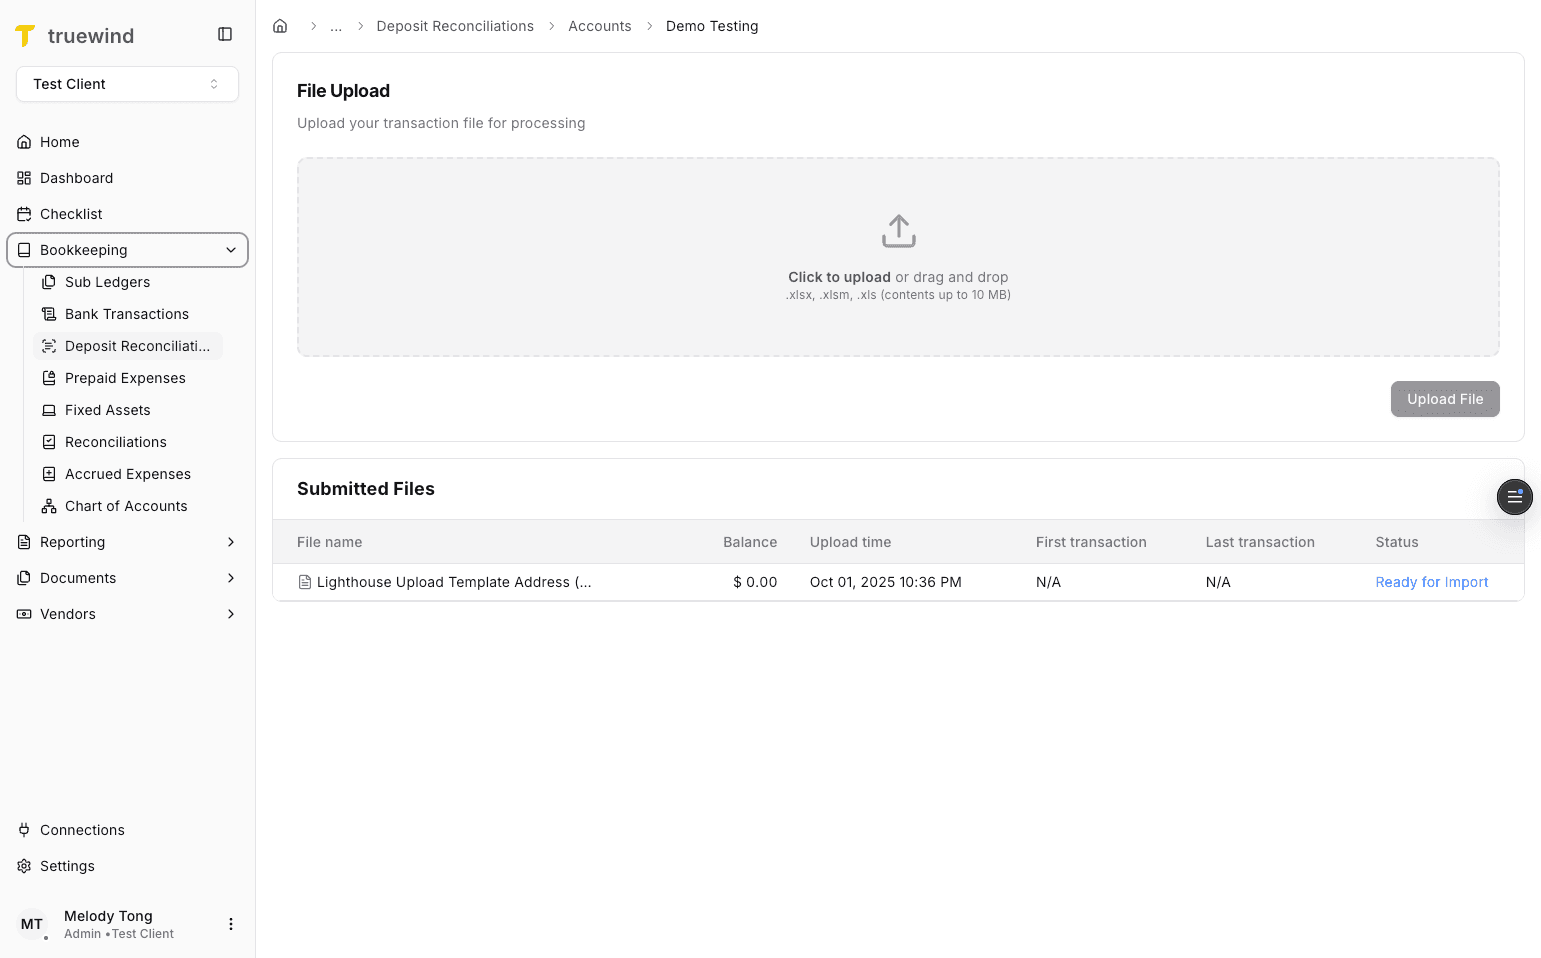
Deposit Reconciliation depends on a configured clearing account, so finish that setup before importing a file.
Step 4
Start the import by selecting or dragging in the file you want to reconcile.
Step 5
Move into the Ready for Import state after the file upload is accepted.
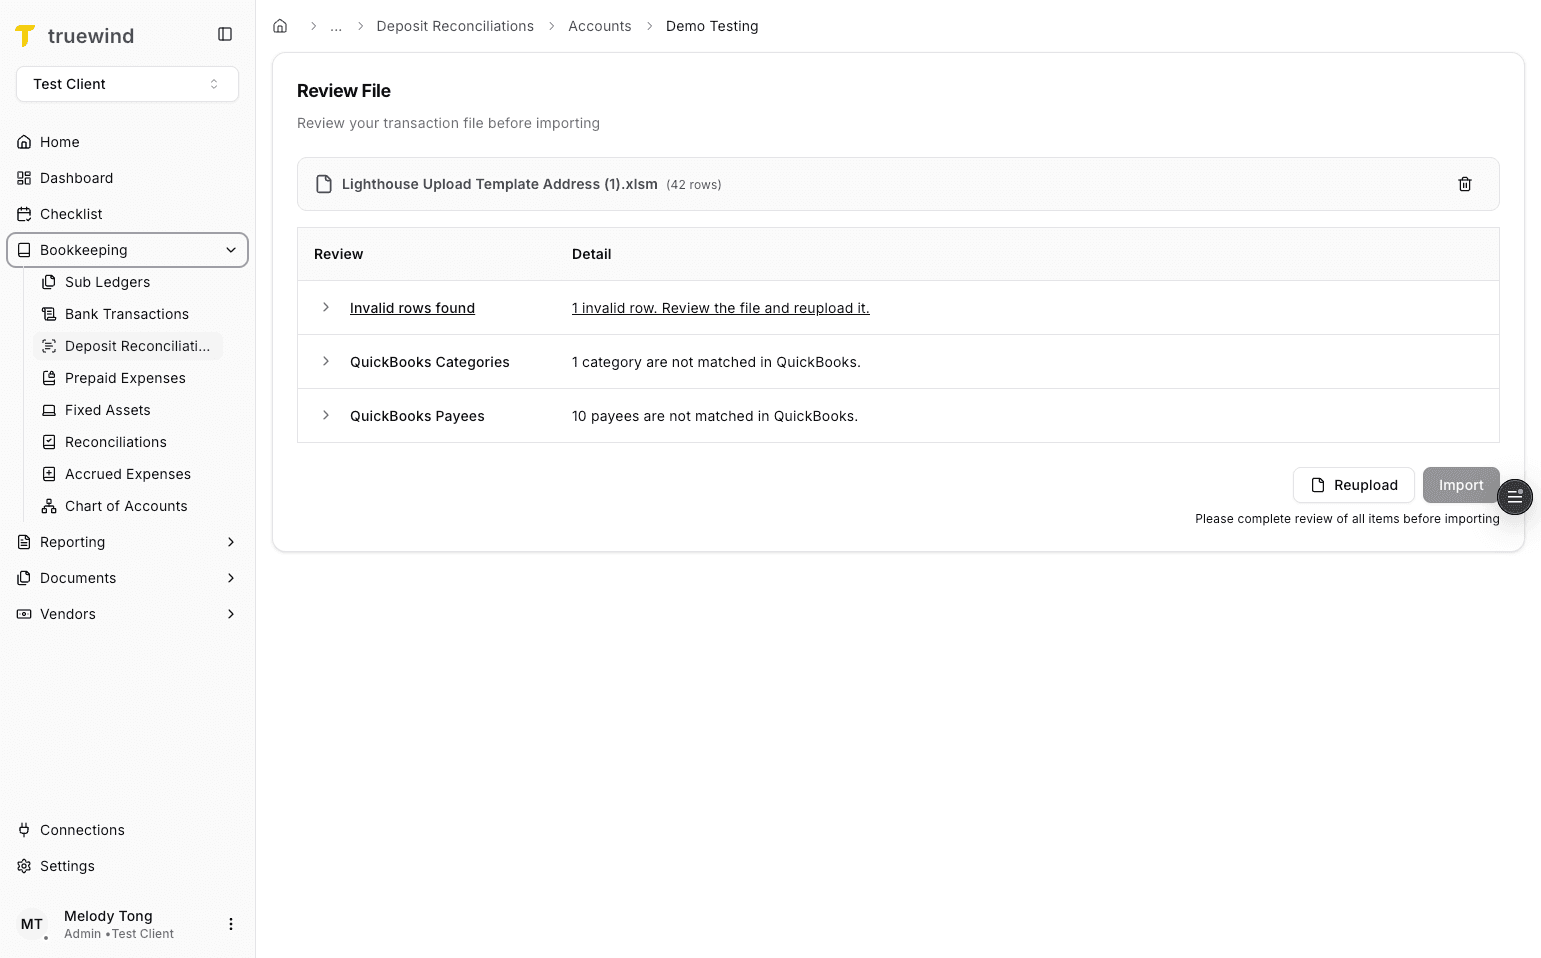
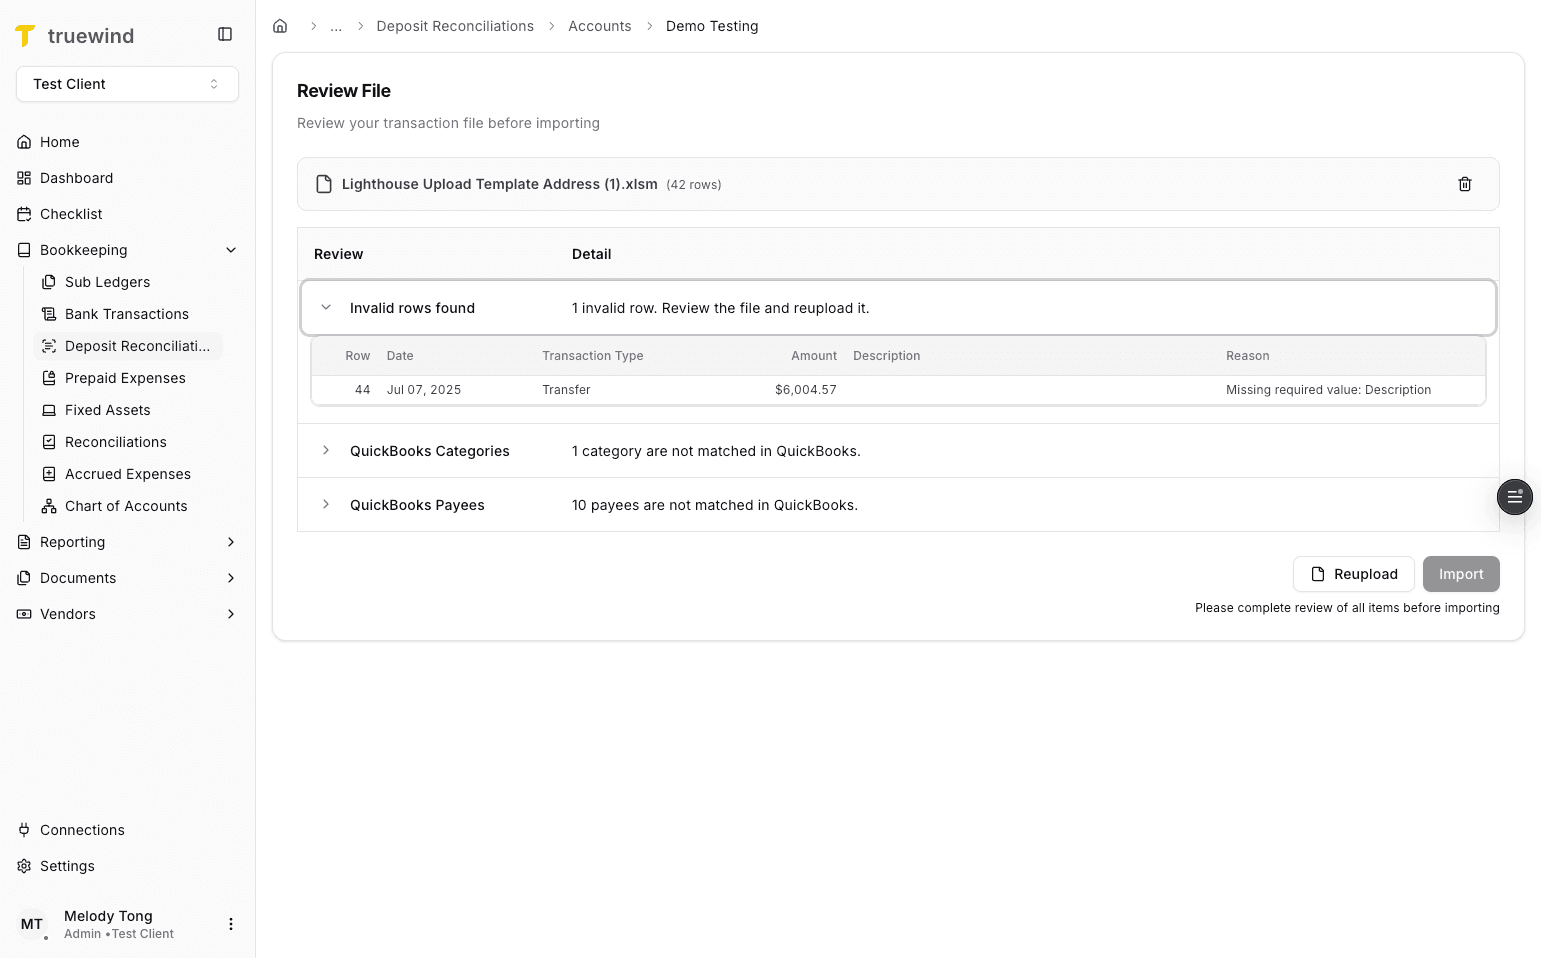
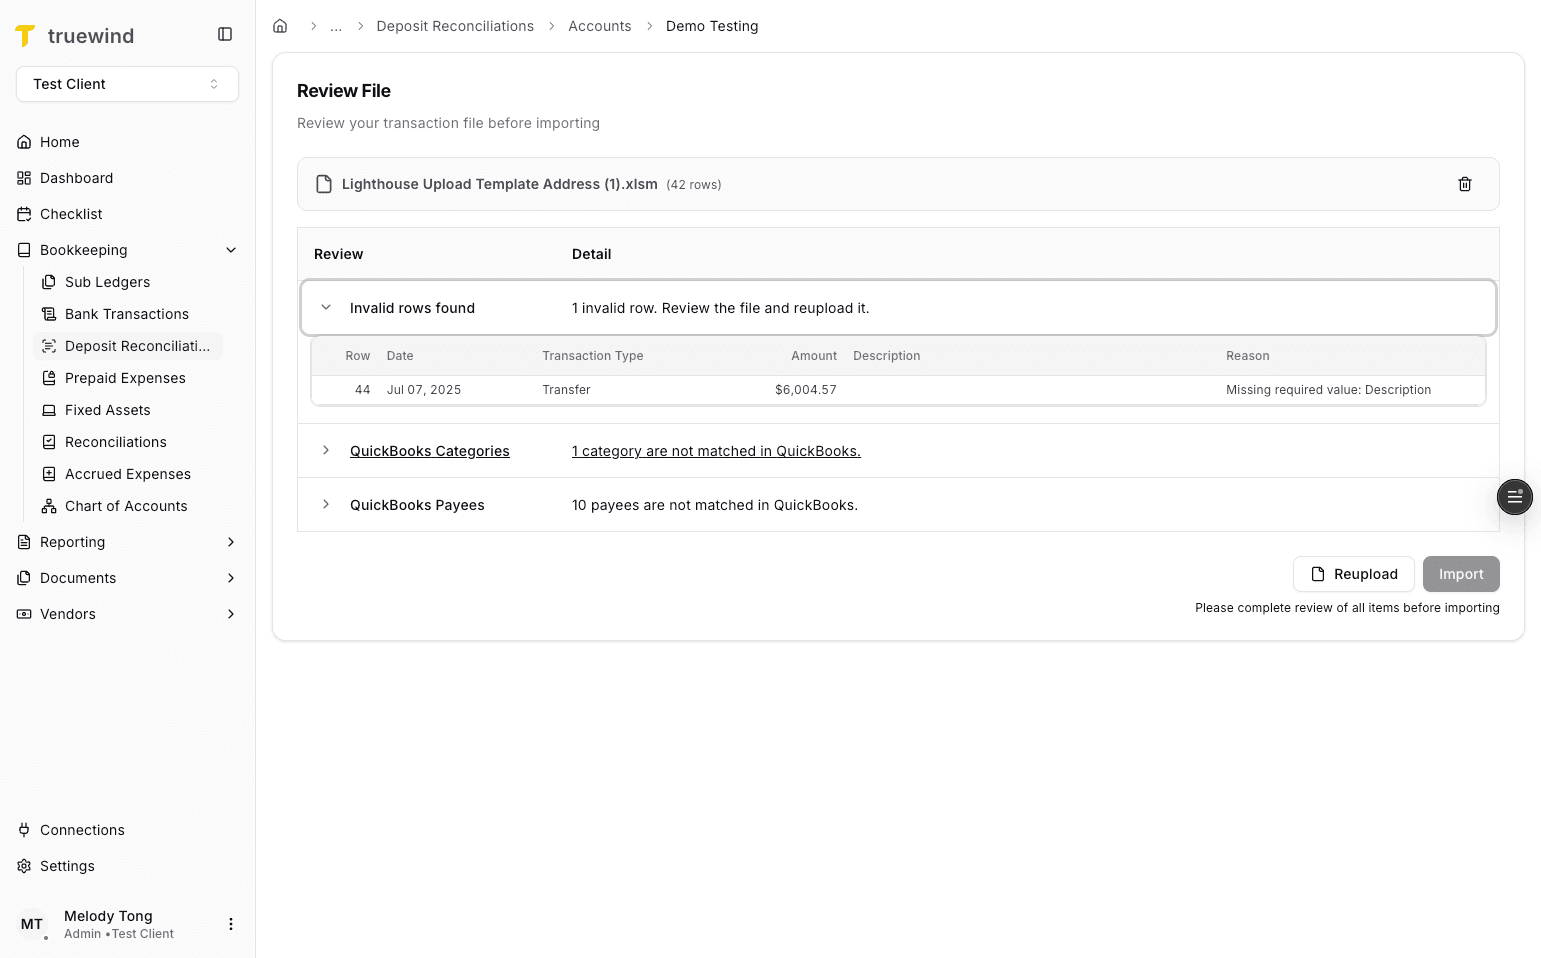
Step 6
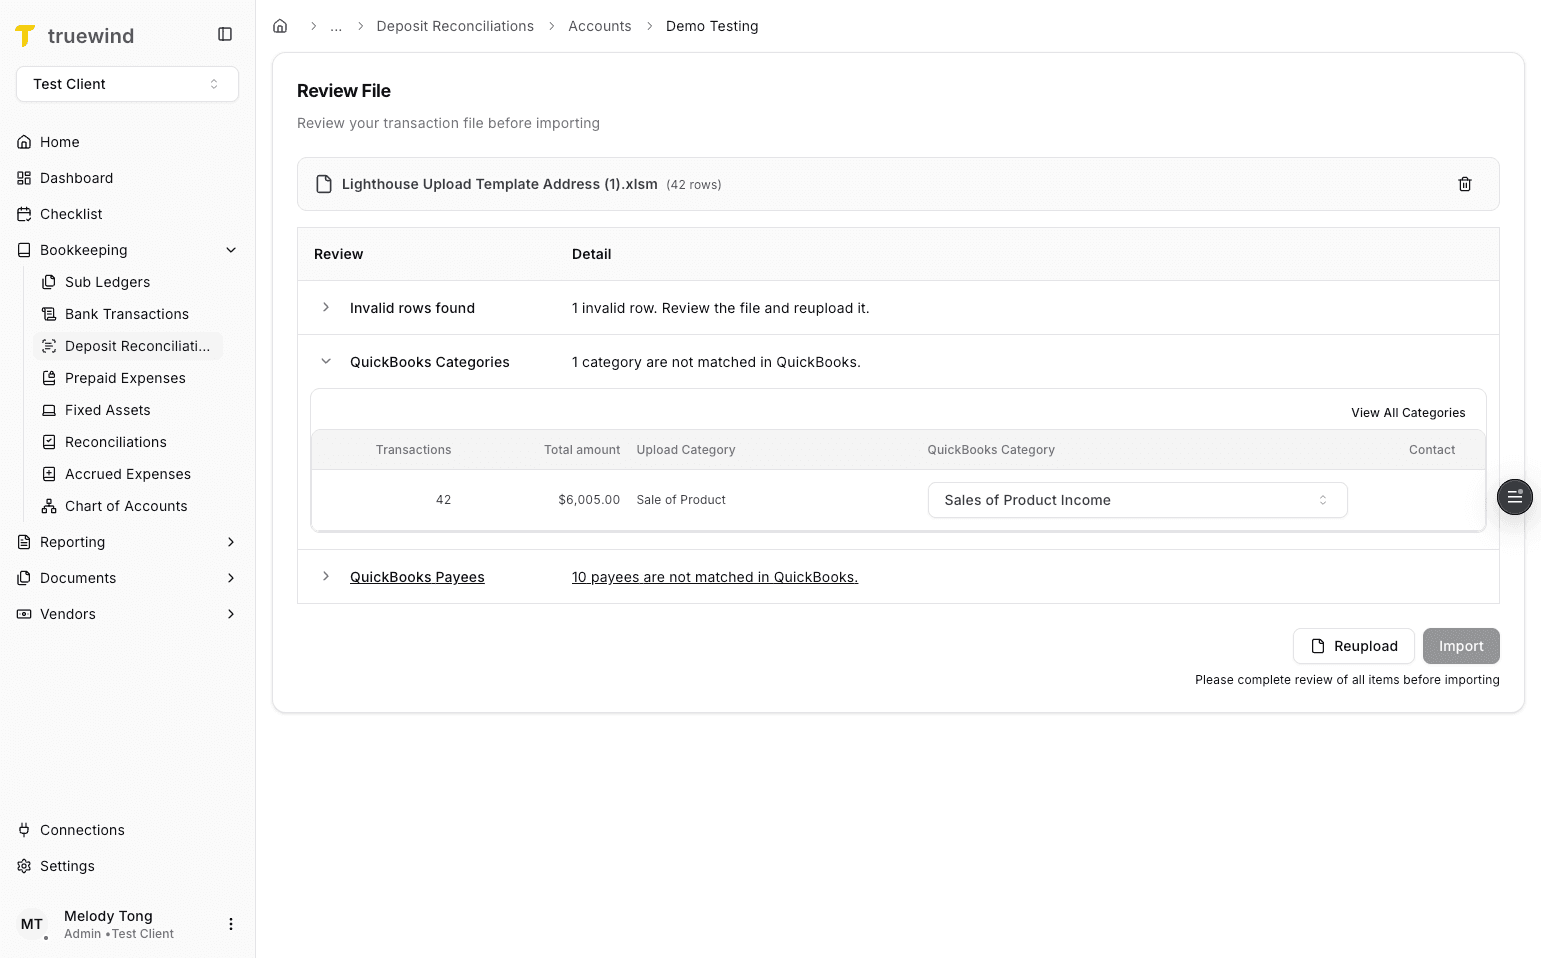
Resolve any import issues shown here before continuing with the upload.
Step 7
Fill in the upload description so the staged file is easier to track later.
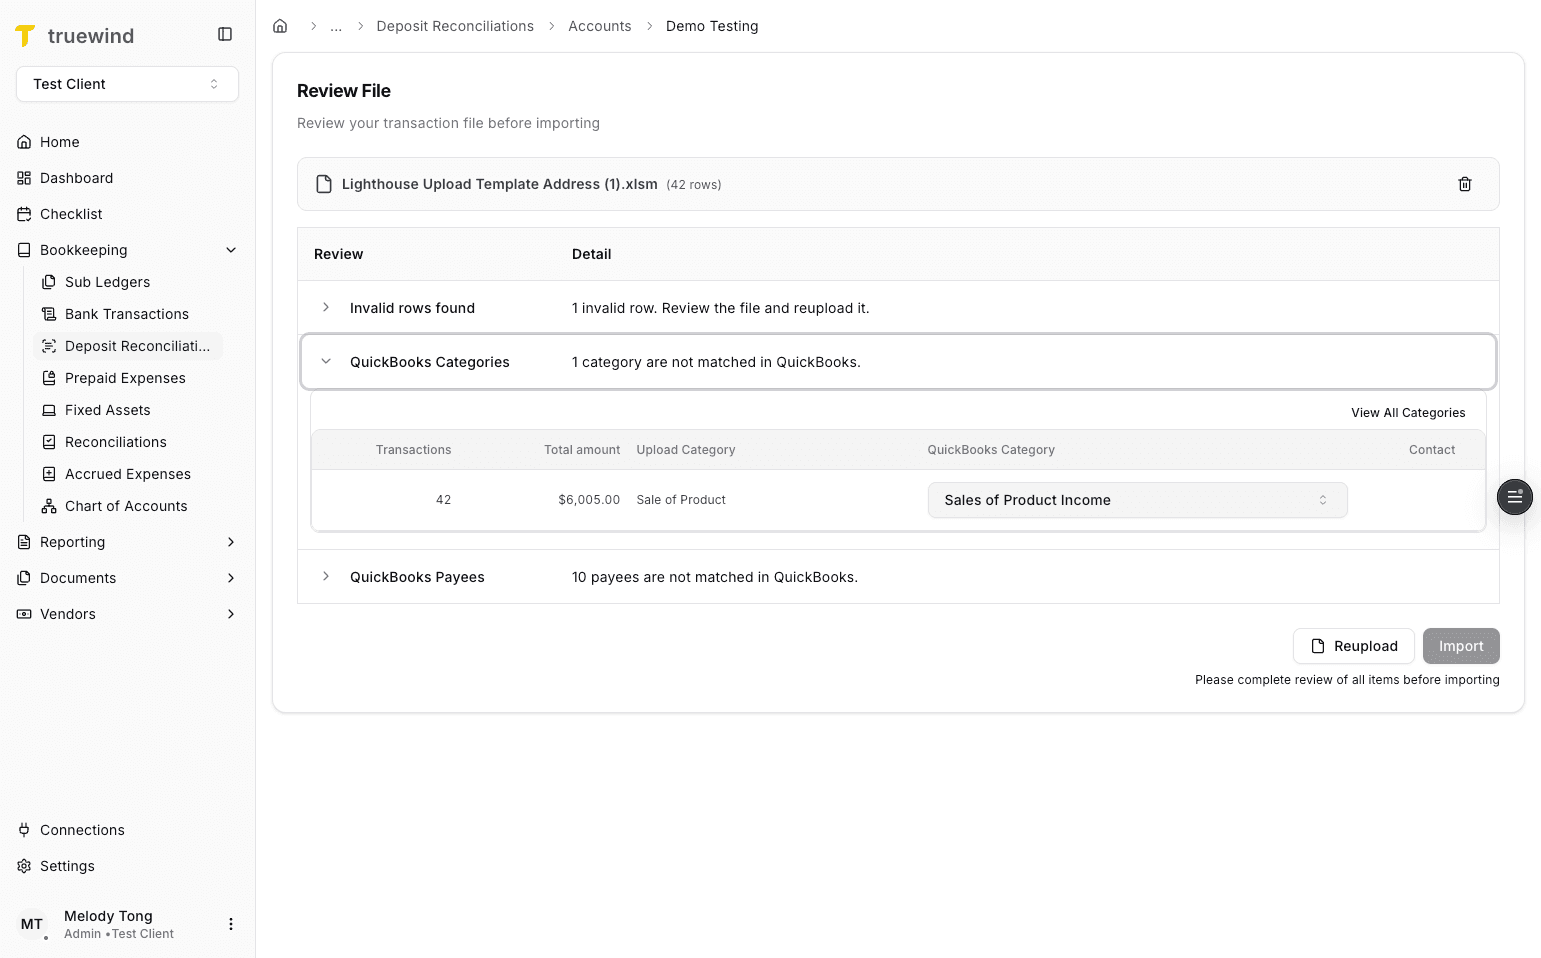
Step 8
Open the category exception list when Truewind cannot map a category automatically.
Step 9
Manually map any category that does not have an exact account match in the ERP.
Step 10
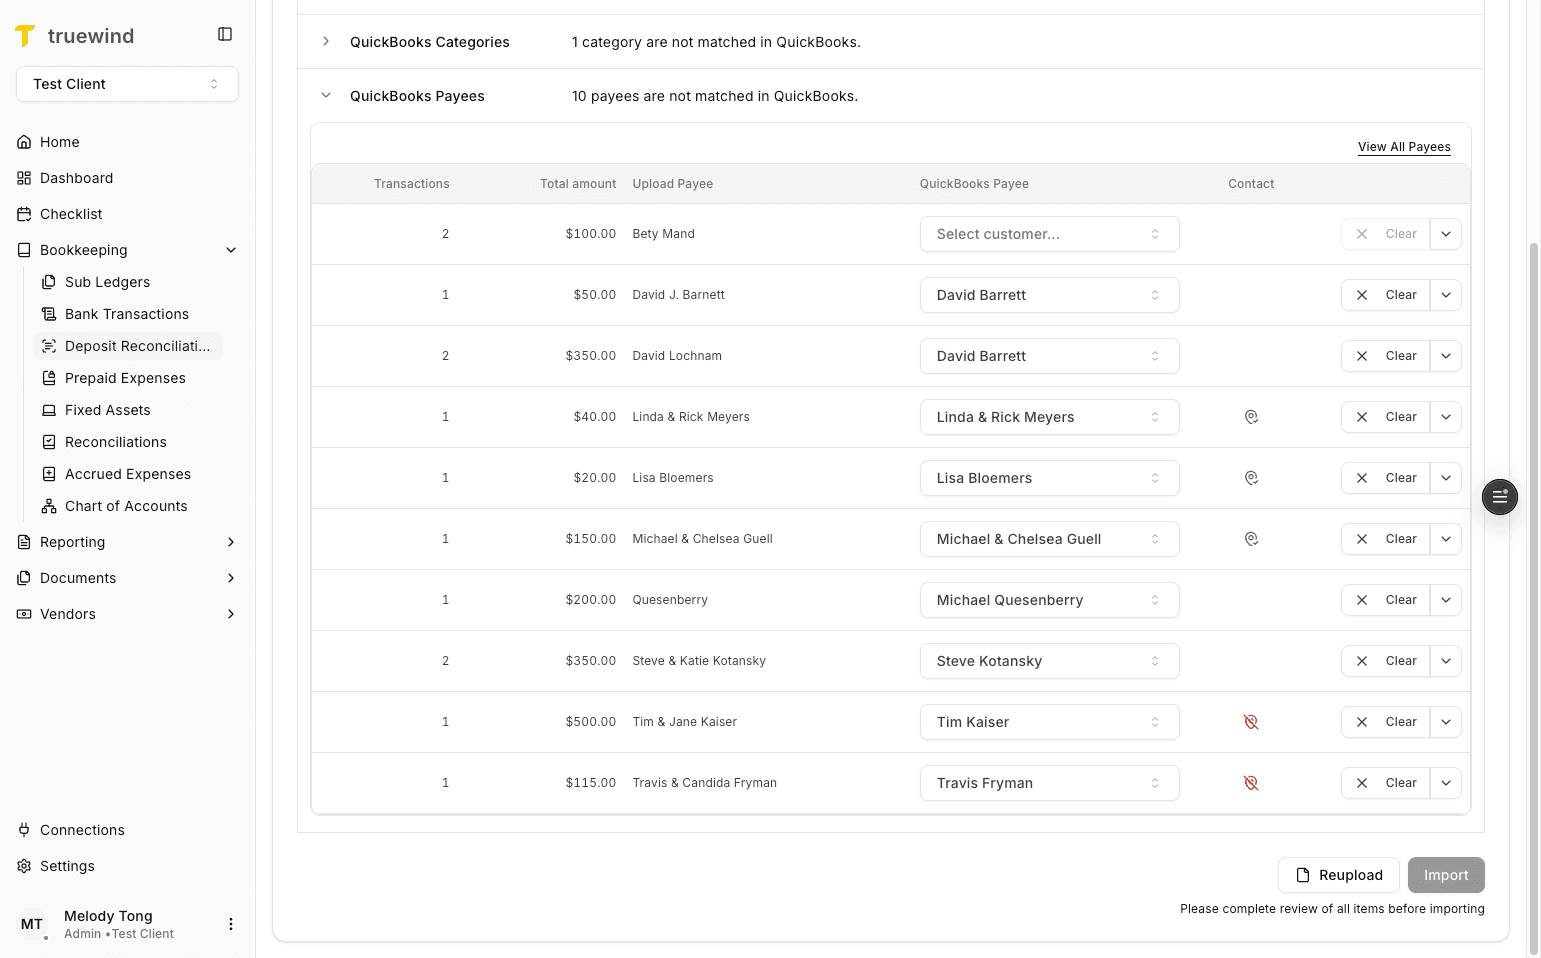
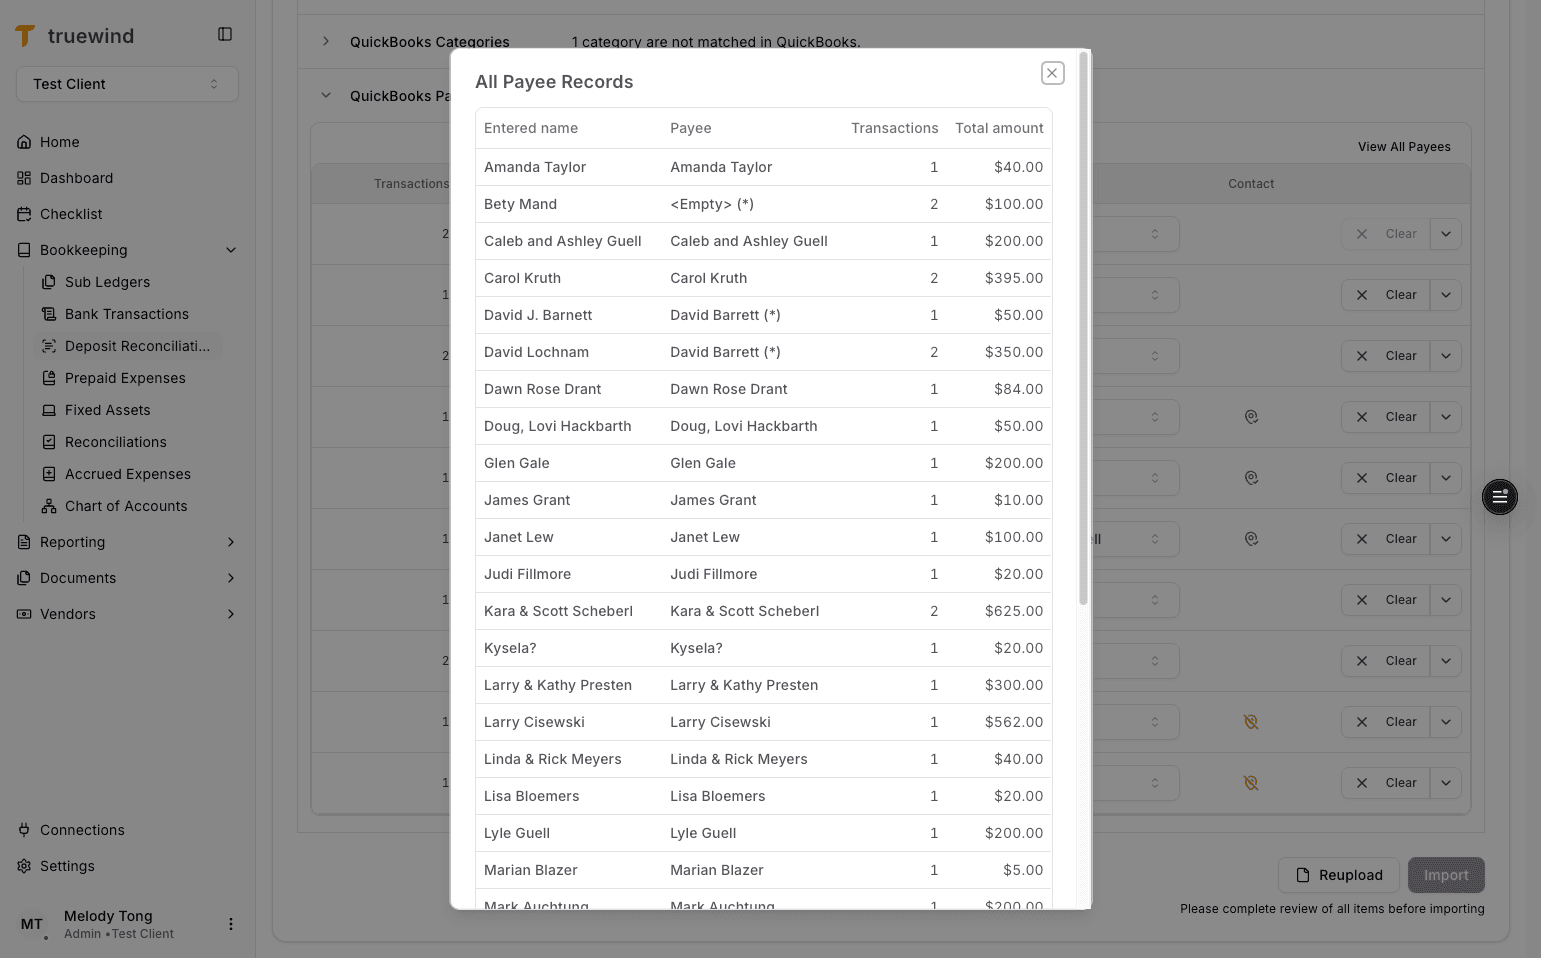
Open the payee exception list when uploaded payees do not auto-match to existing ERP payees.
Step 11
Deposit Reconciliation supports manually matching a payee or creating a new payee with the uploaded contact details.
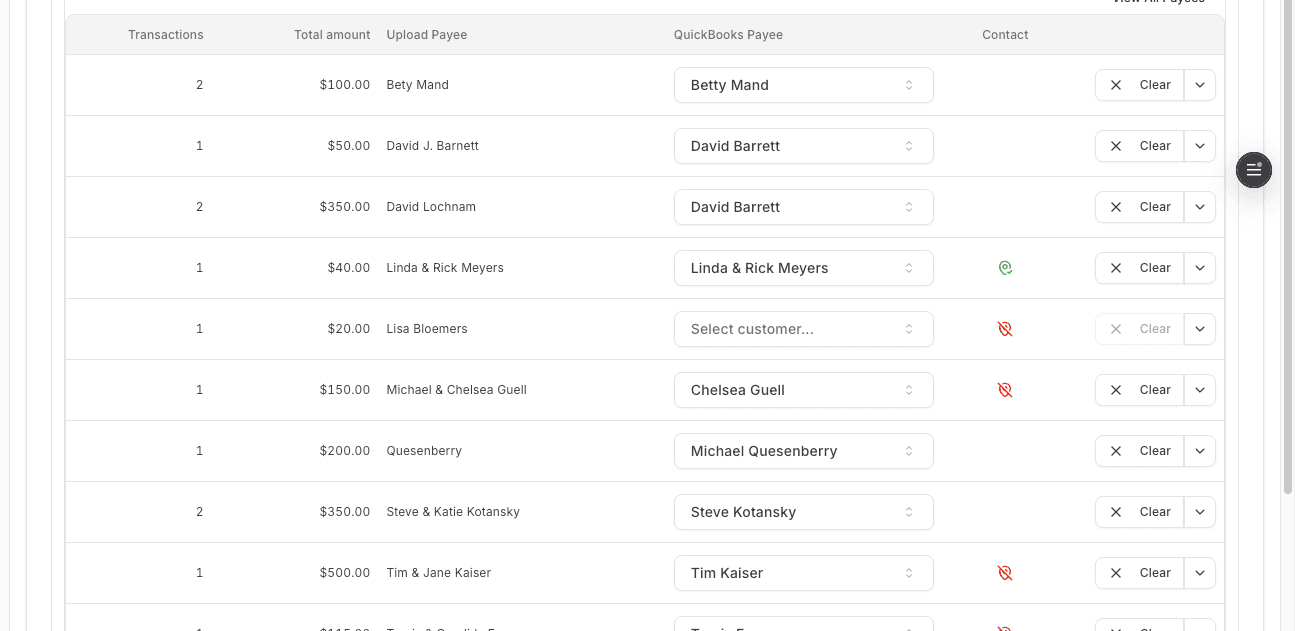
Step 12
Select the correct ERP payee from the dropdown when the uploaded payee already exists.
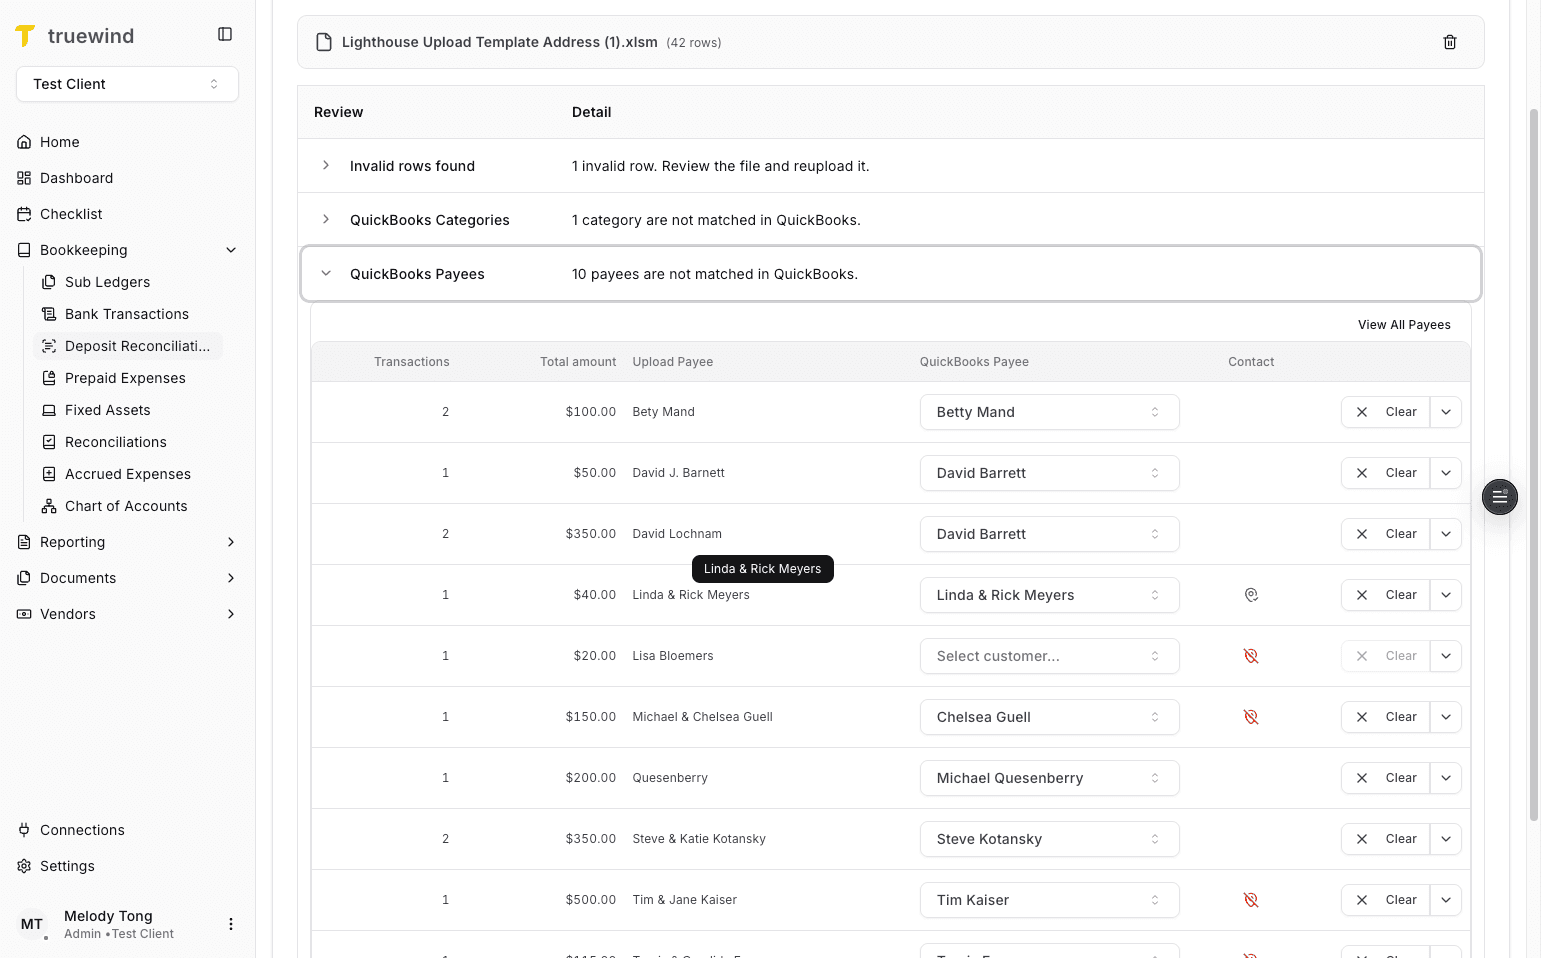
Step 13
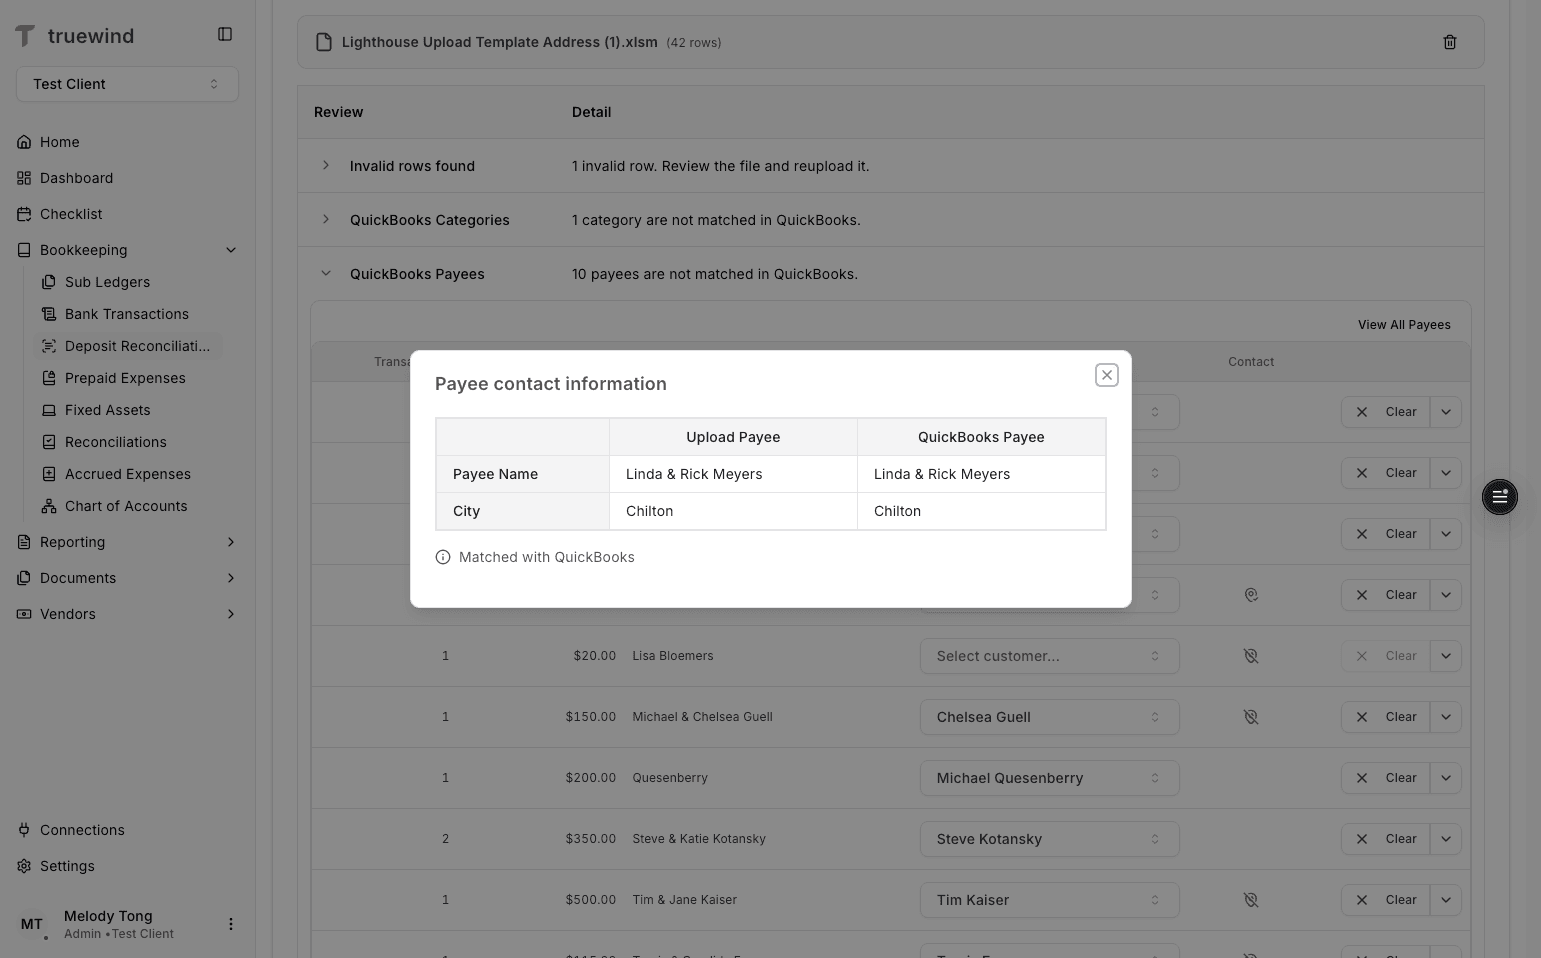
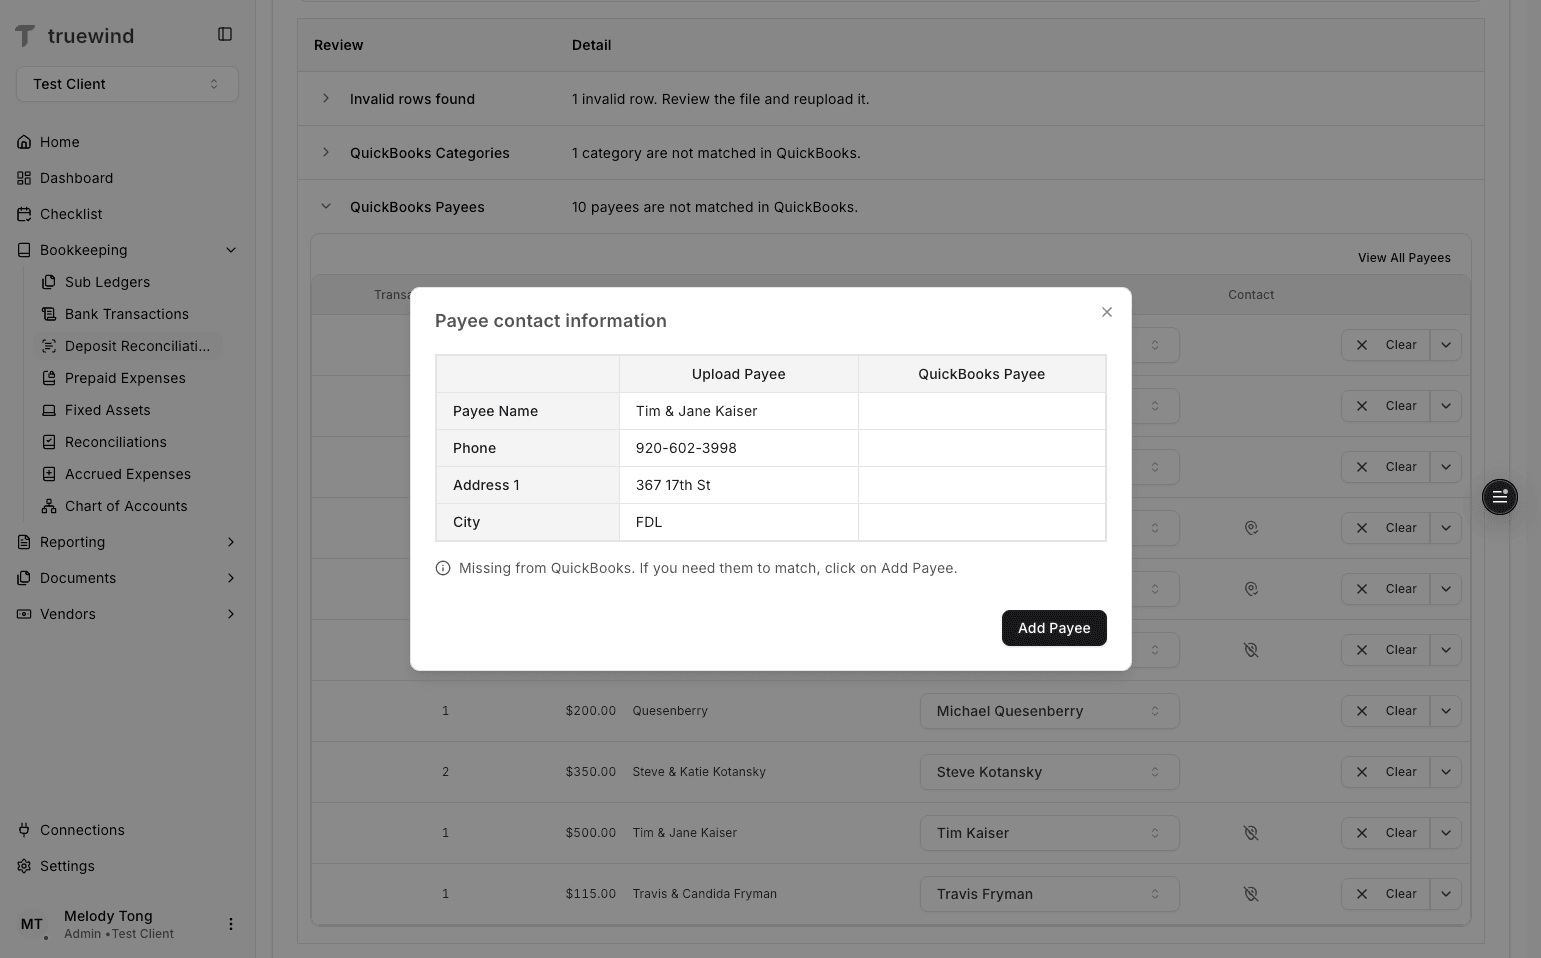
Open the contact details when you need more context before choosing the ERP payee.
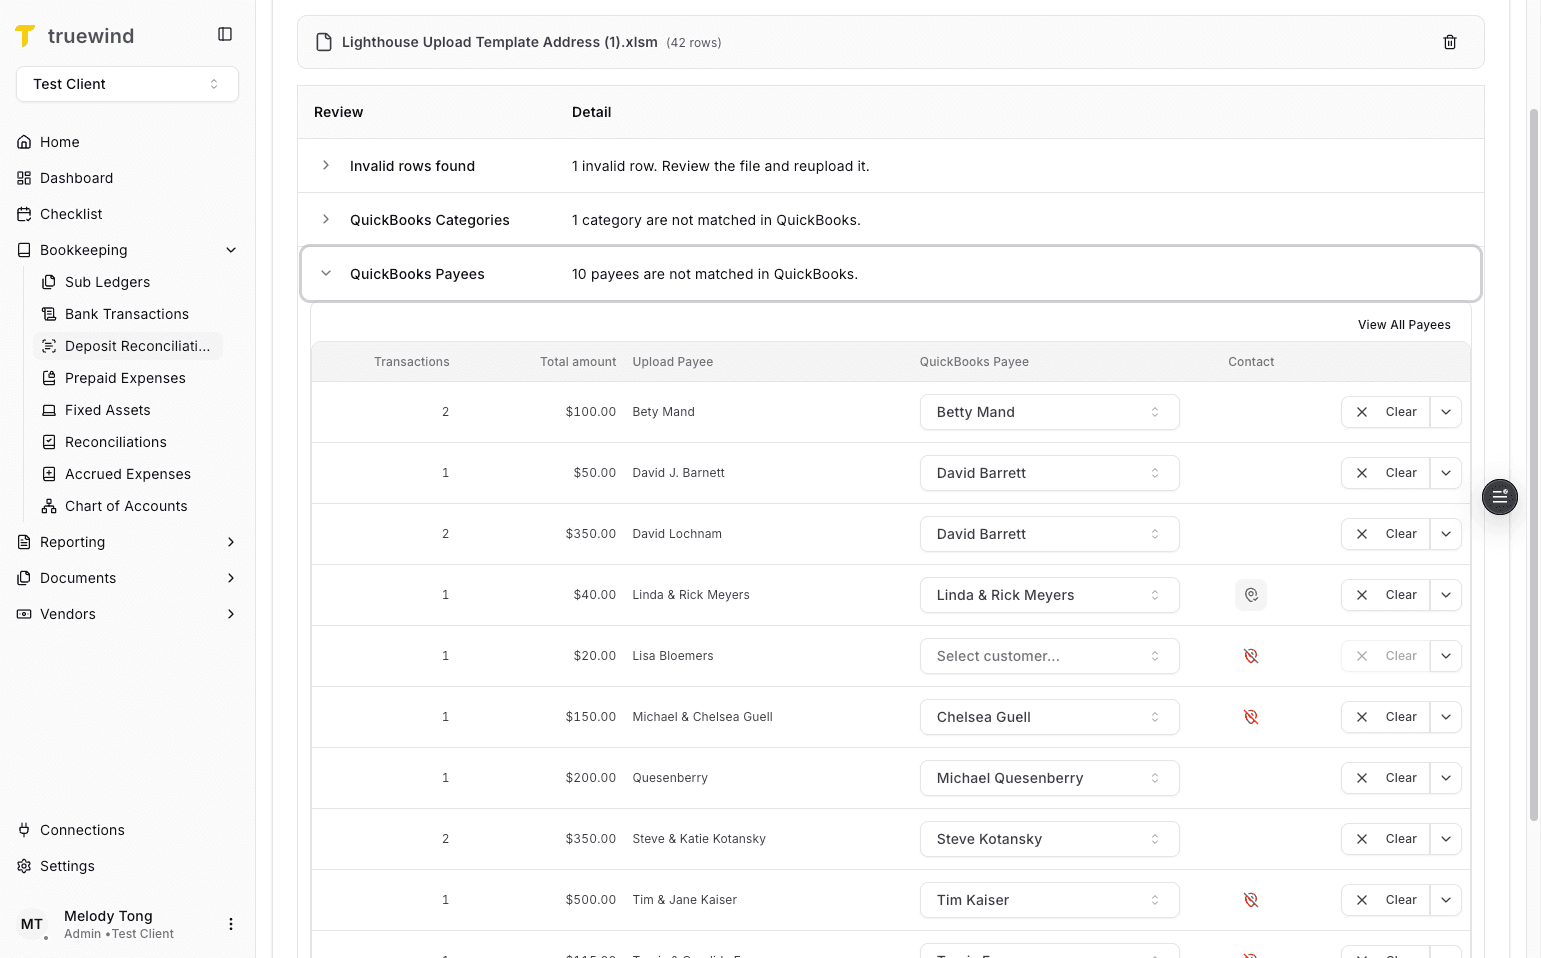
Step 14
Use the green indicator to confirm the uploaded payee information matches the existing ERP record.
Step 15
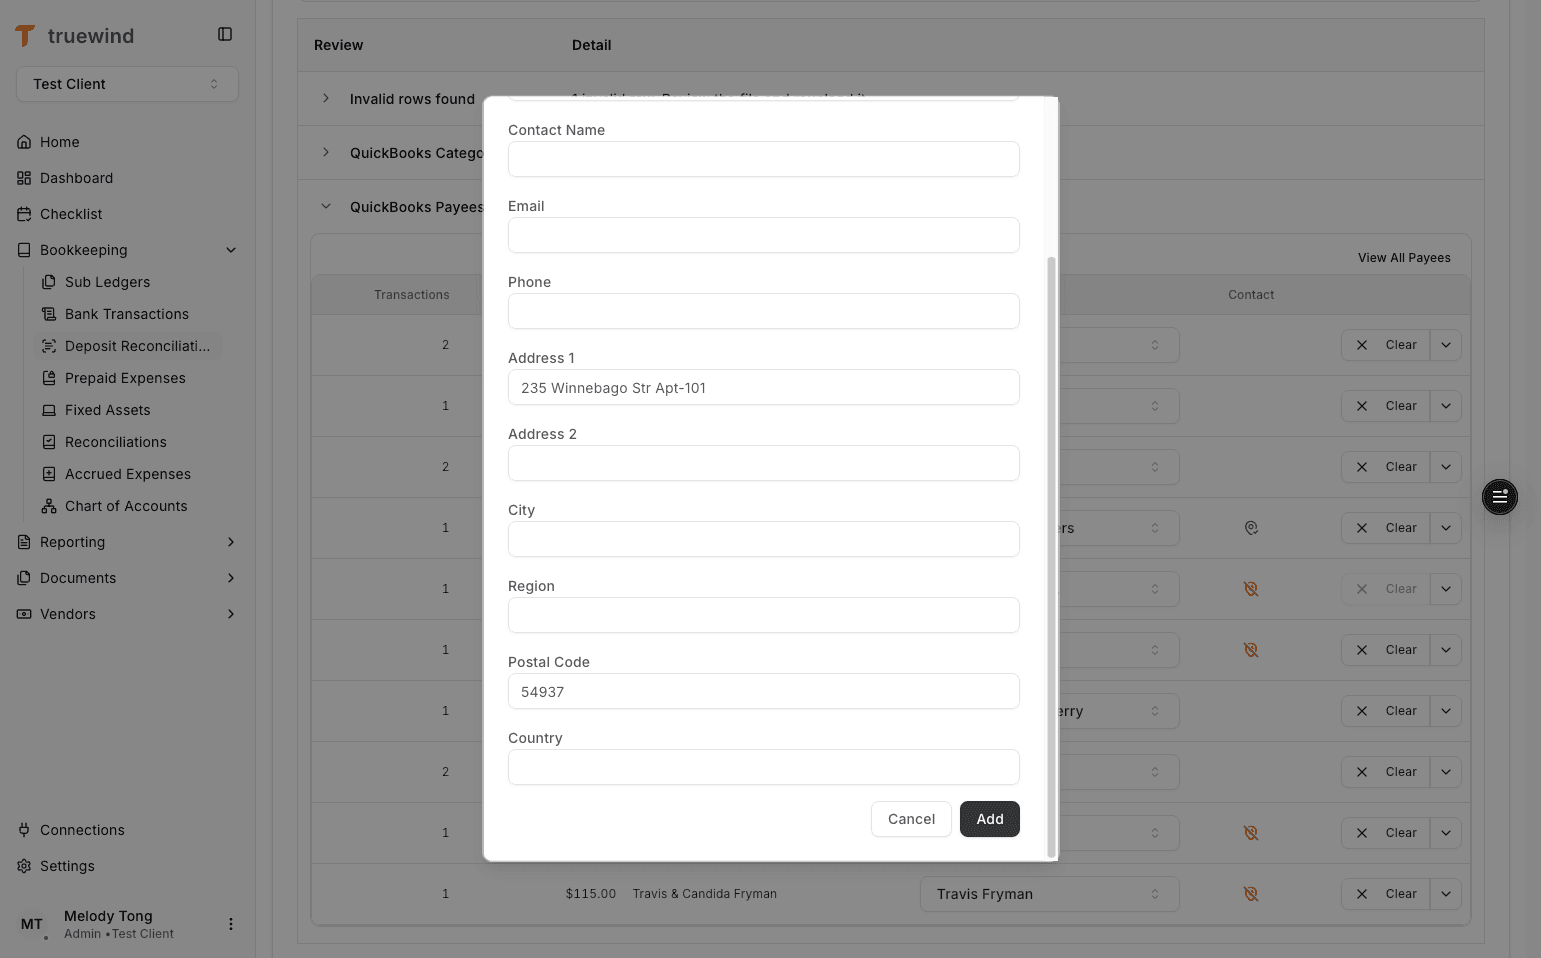
Use Add Payee when the uploaded payee does not exist yet and should be created in the ERP.

Step 16
Uploaded contact or address details can be carried into the new ERP payee profile.

Step 17
Save the new payee only after the imported contact details look correct.
Step 18
Use the add-payee path when the uploaded information should become a new ERP payee instead of matching an existing one.
Step 19
Open the full payee list when you need to audit or compare the available records before mapping.
Step 20
Use the all-records view when you need the full ERP payee context during exception handling.
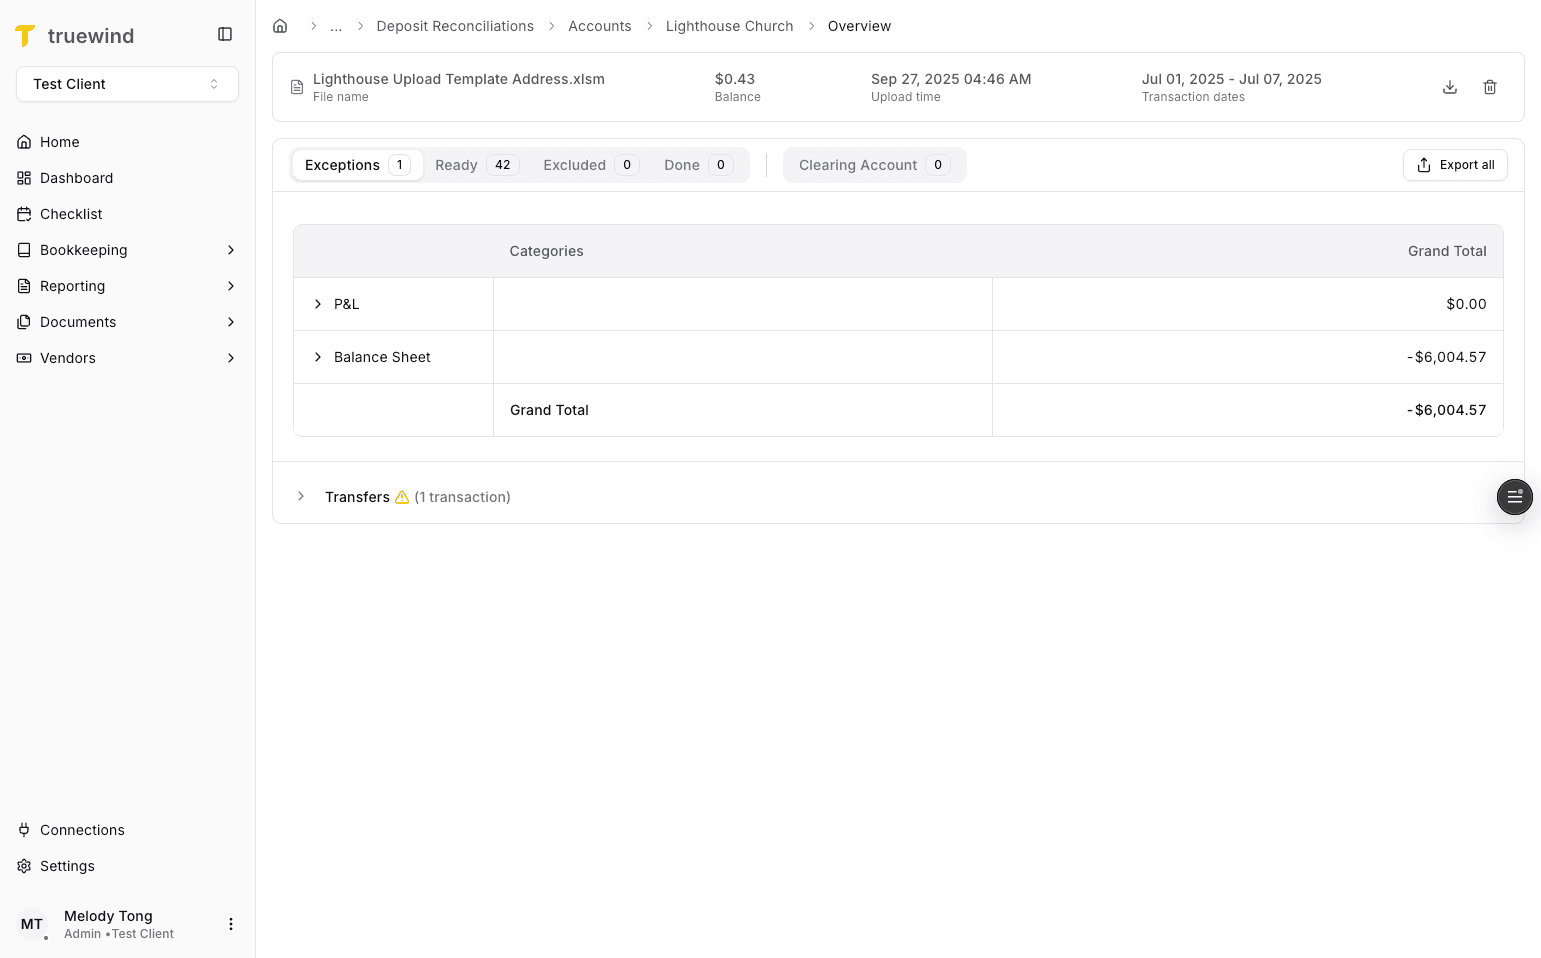
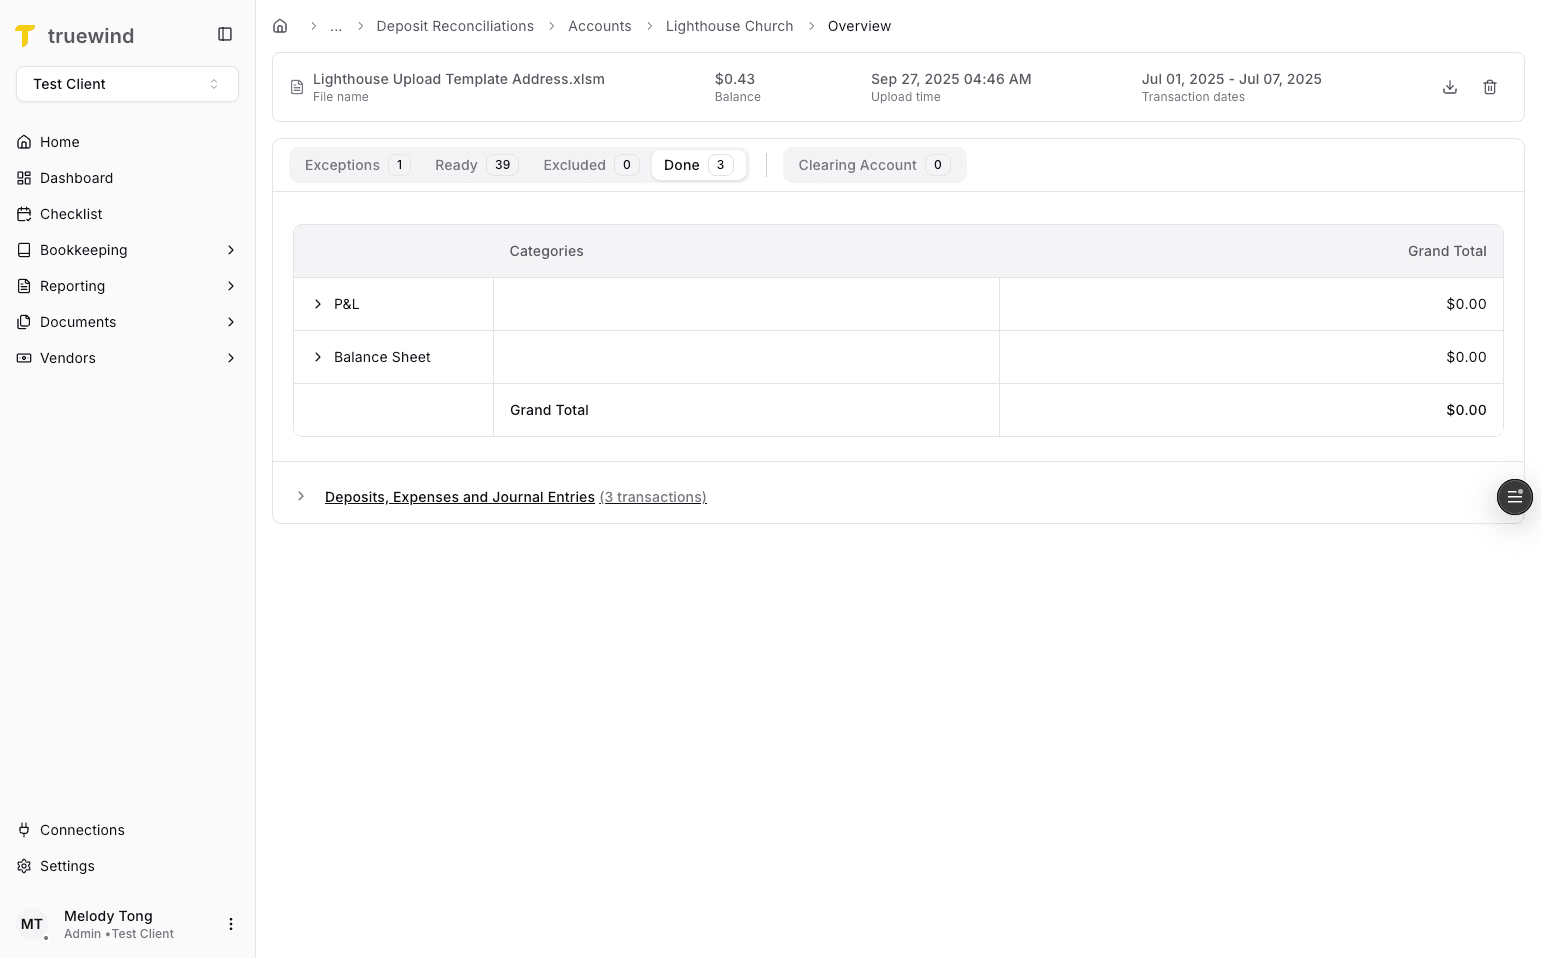
Step 21
The overview summarizes the imported file before you move into unmatched, ready, or done states.

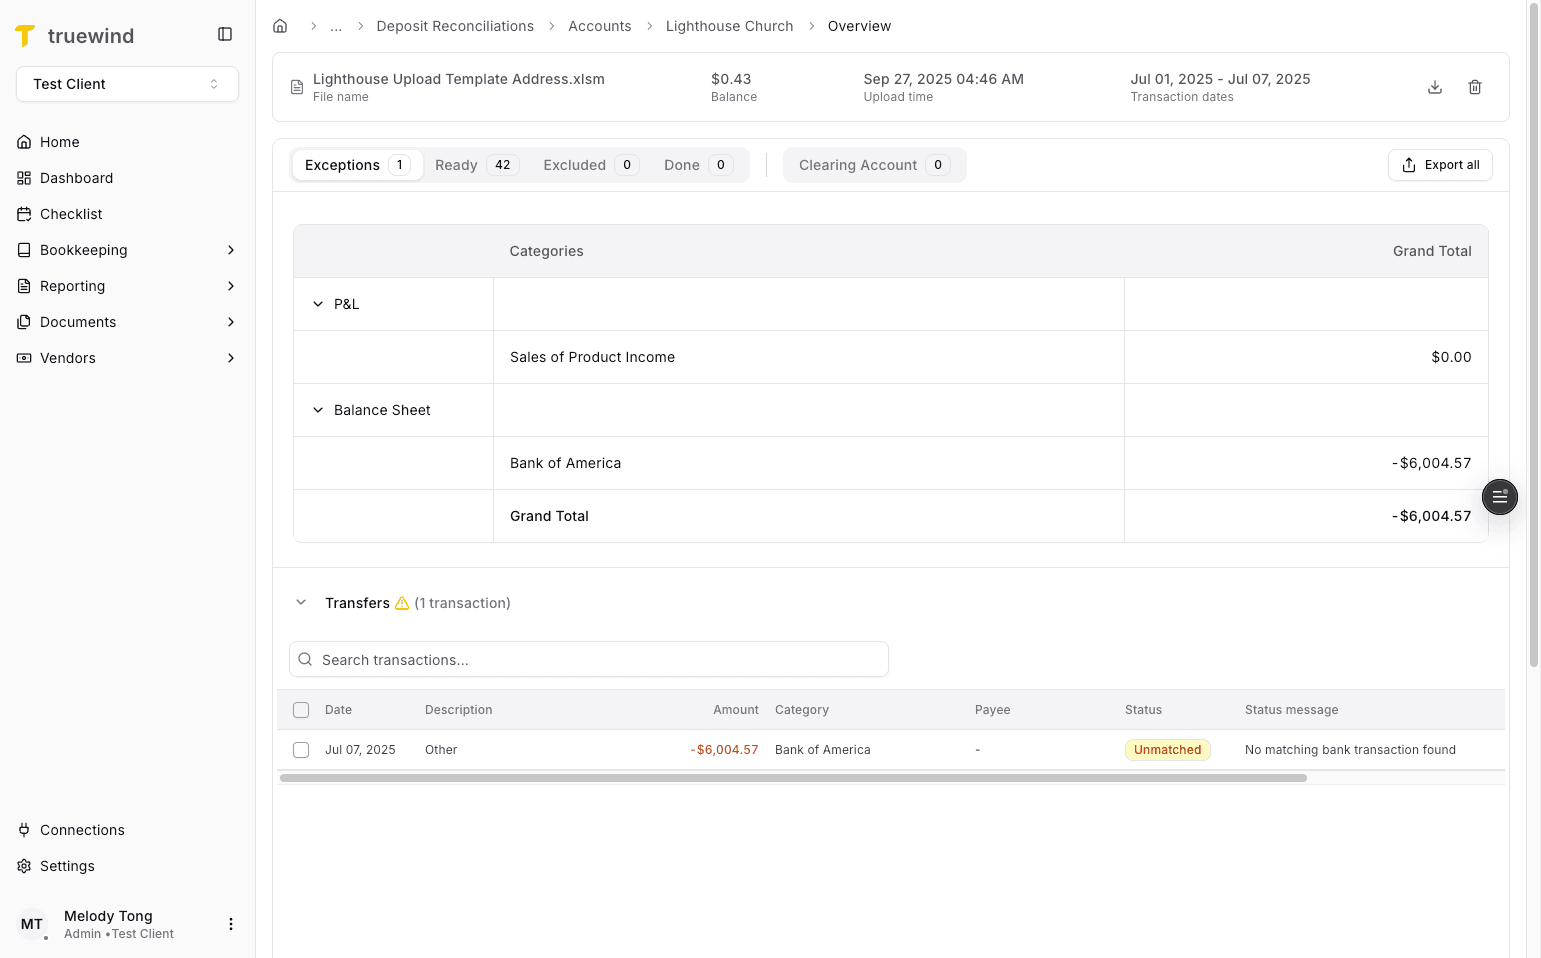
Step 22
Exceptions highlight transfers that were not matched to bank-account transactions automatically.
Step 23
Use the Unmatched tab to resolve deposits that still need manual review.
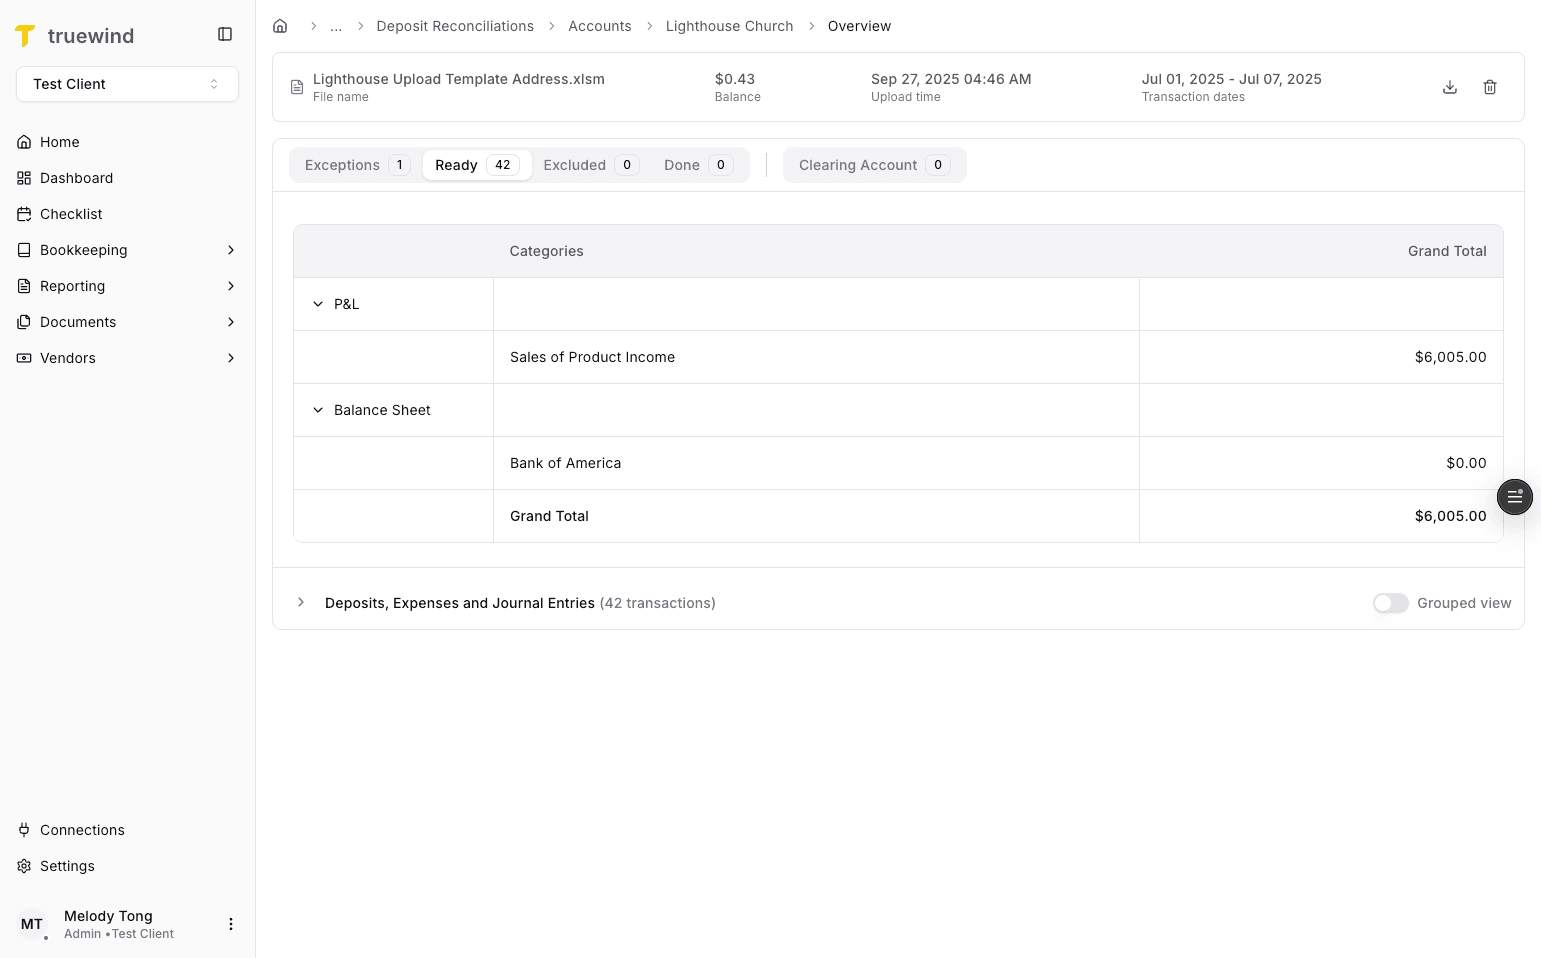
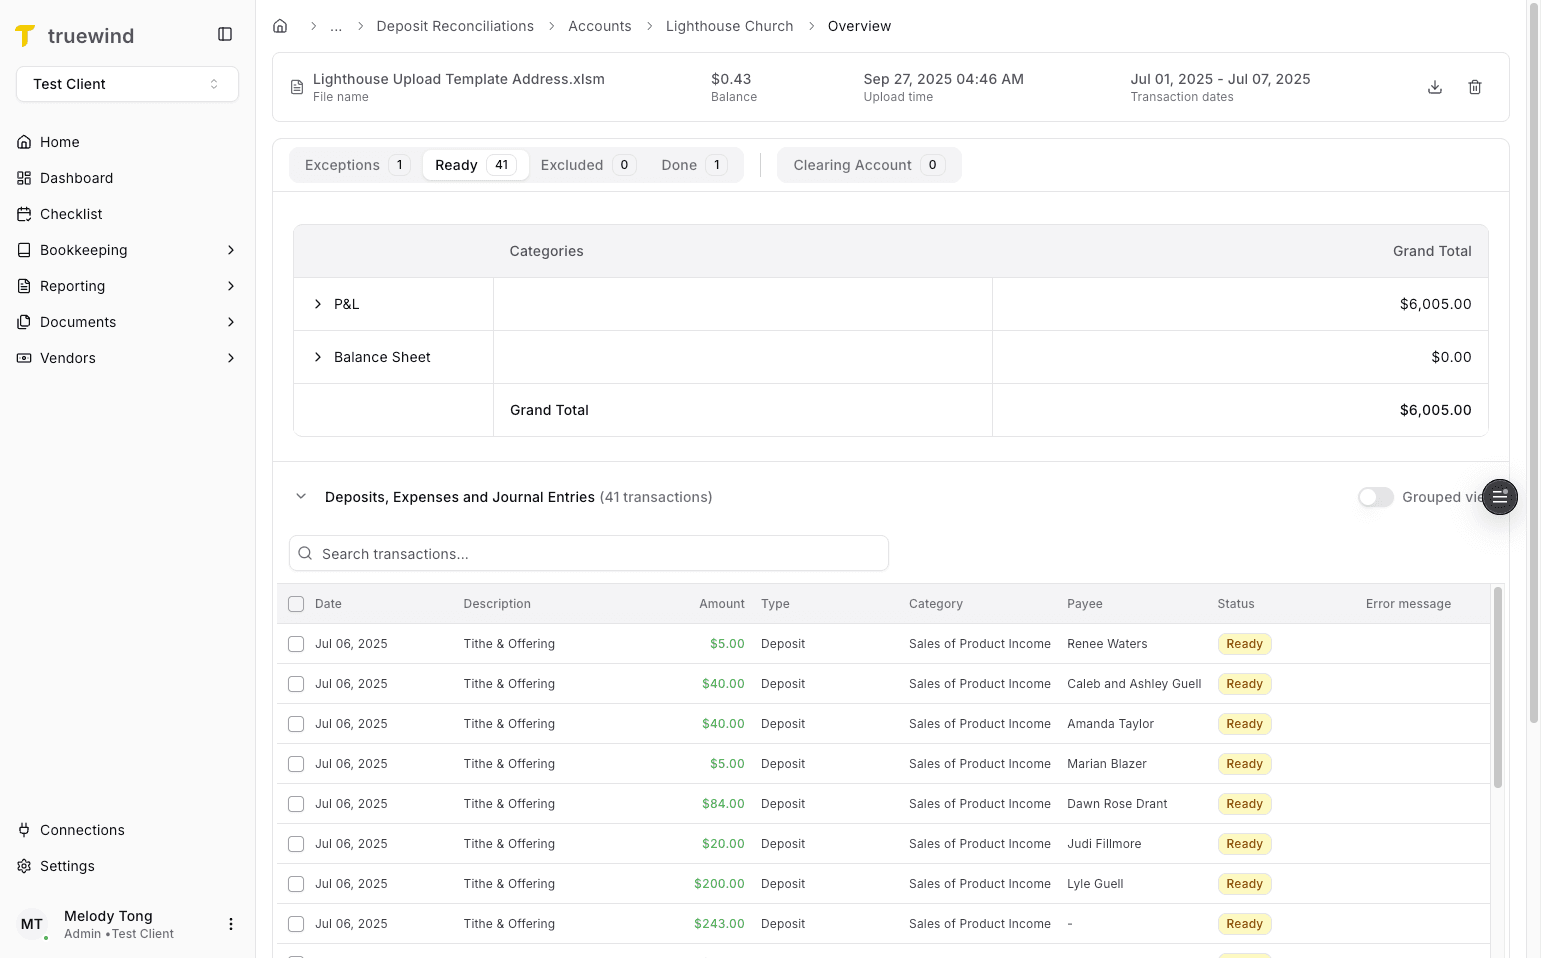
Step 24
The Ready tab contains transactions that are fully prepared to post or match in the ERP.

Step 25
The totals section summarizes the balance for each general-ledger account in the current file.
Step 26
Return to Ready when you are prepared to post or match selected rows.

Step 27
Pick the deposit row you want to post individually first.
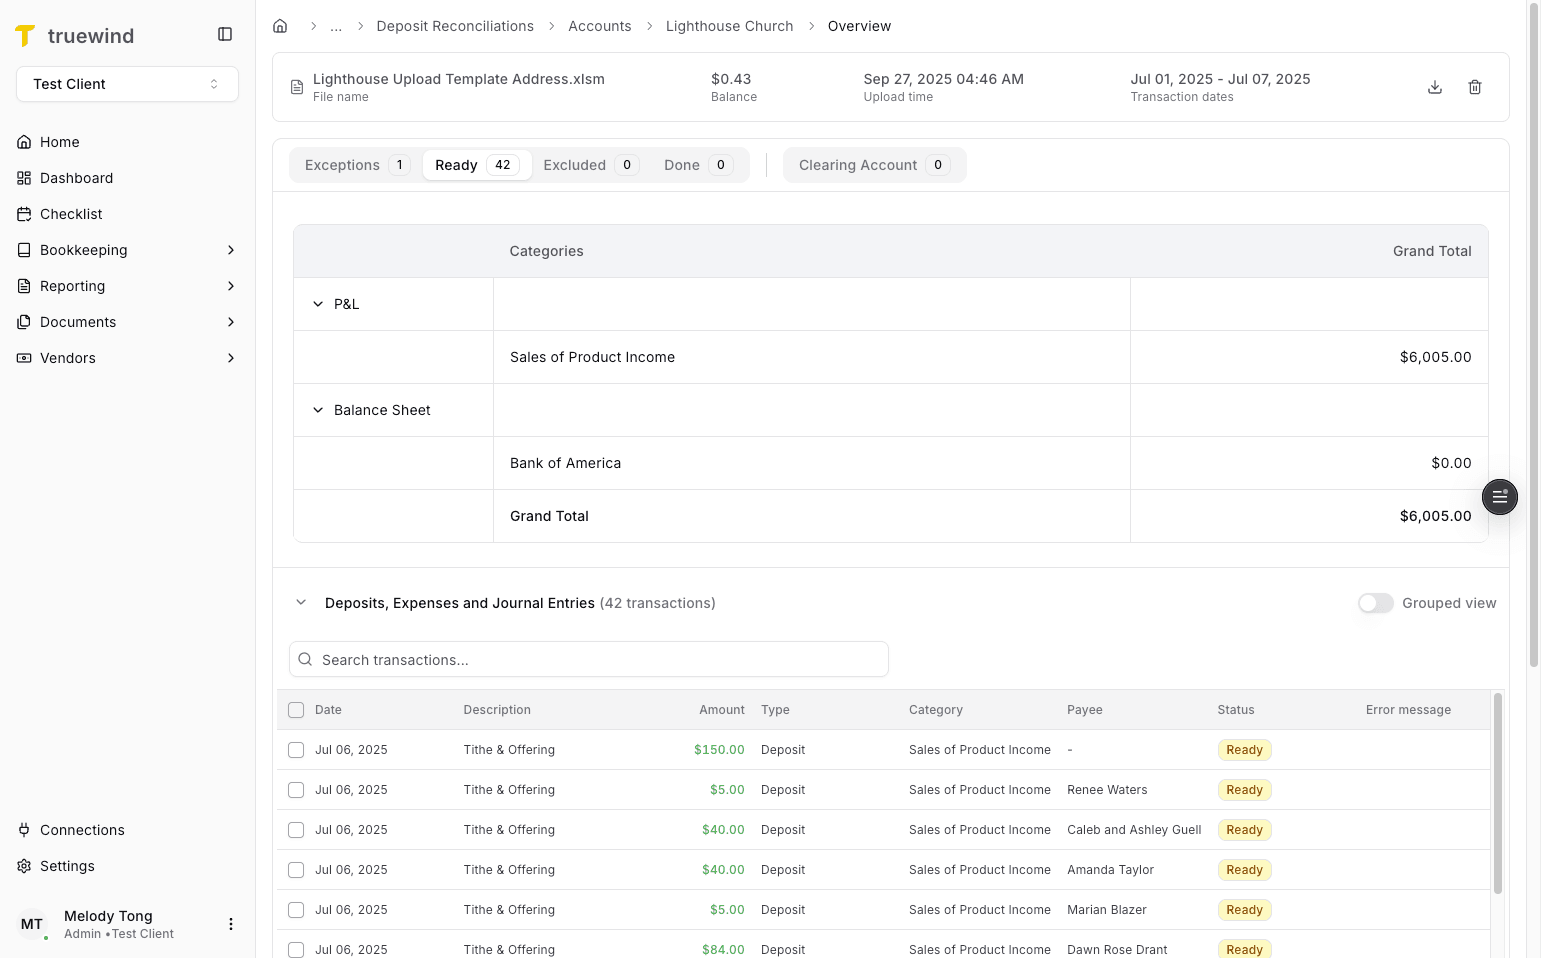
Step 28
Use the individual posting path when you want to send a single deposit to the ERP.
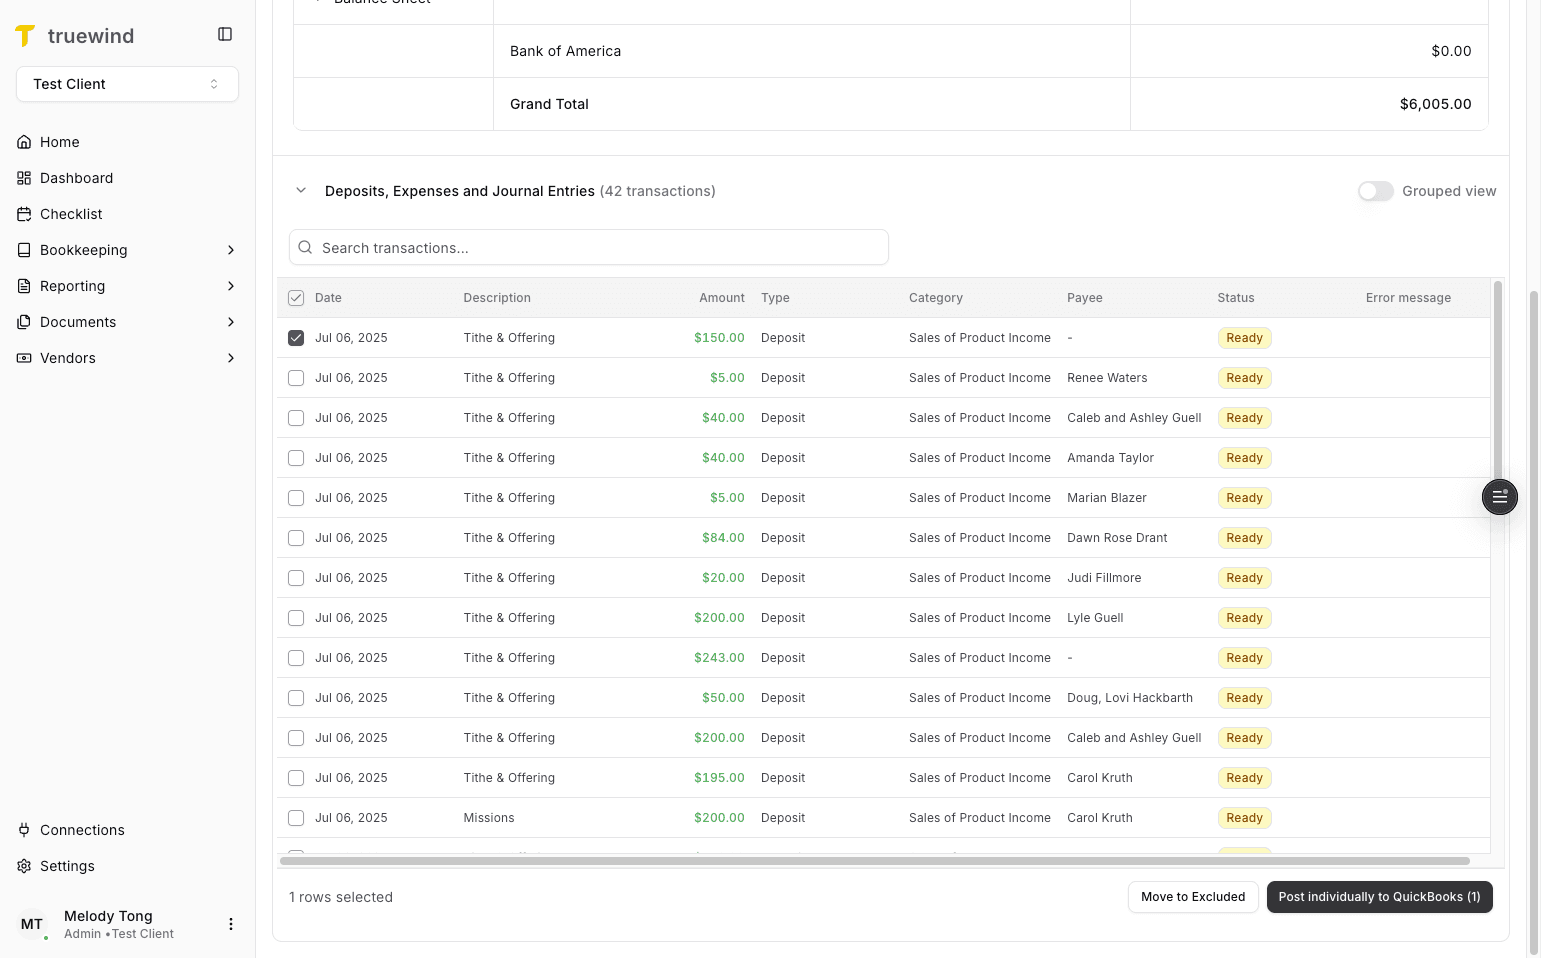
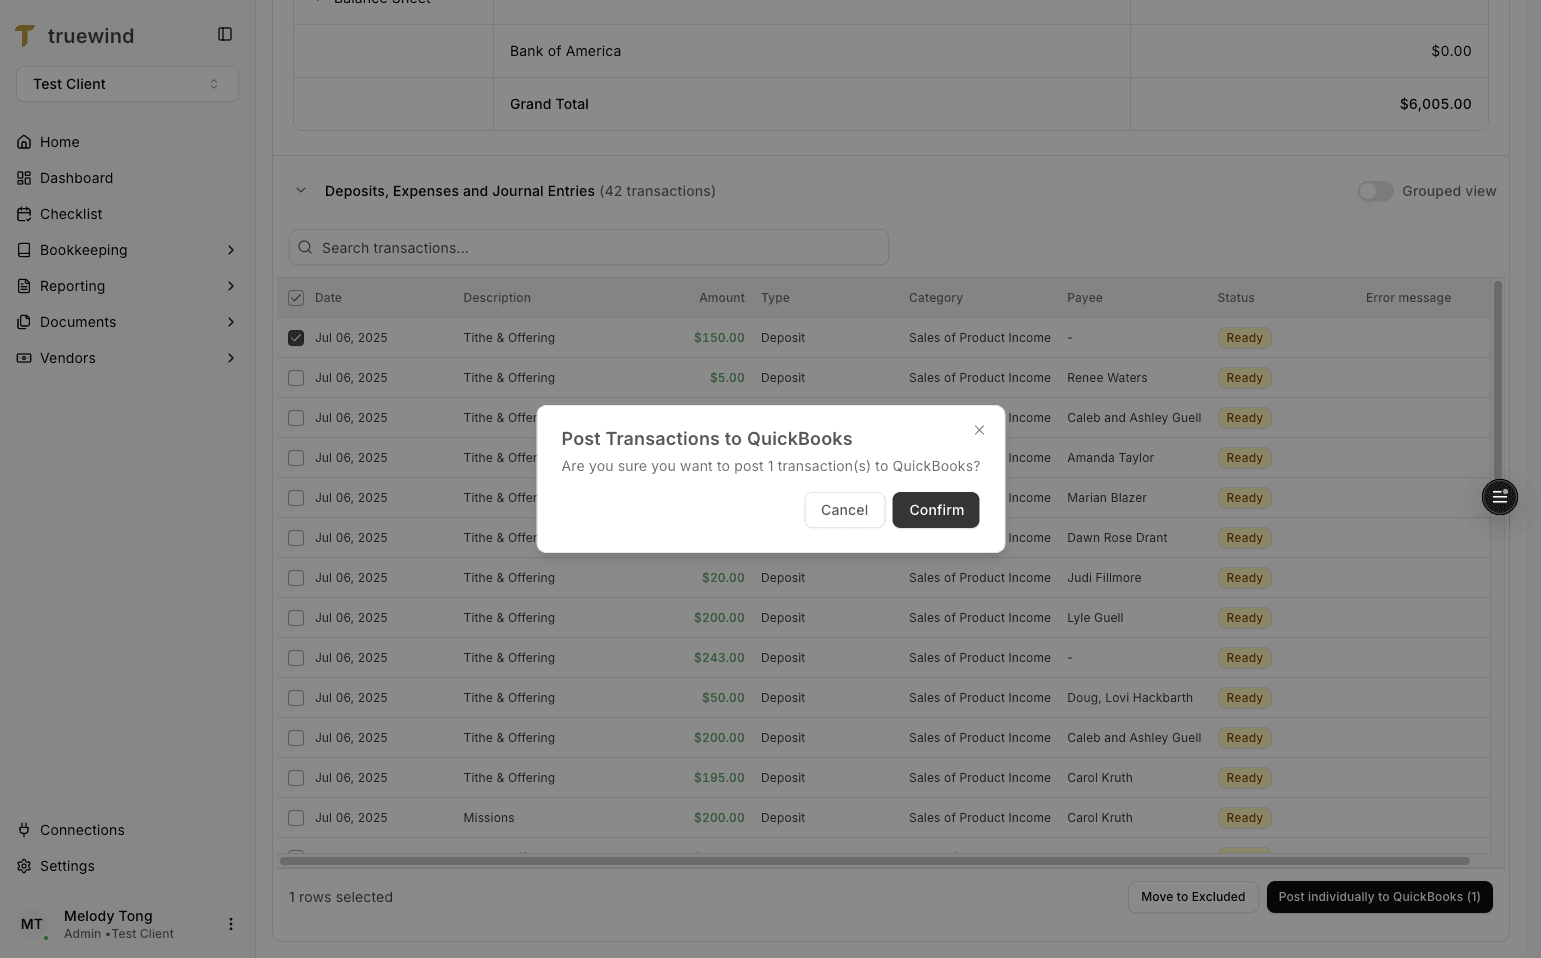
Step 29
Finish the individual post only after the selected row is correct.
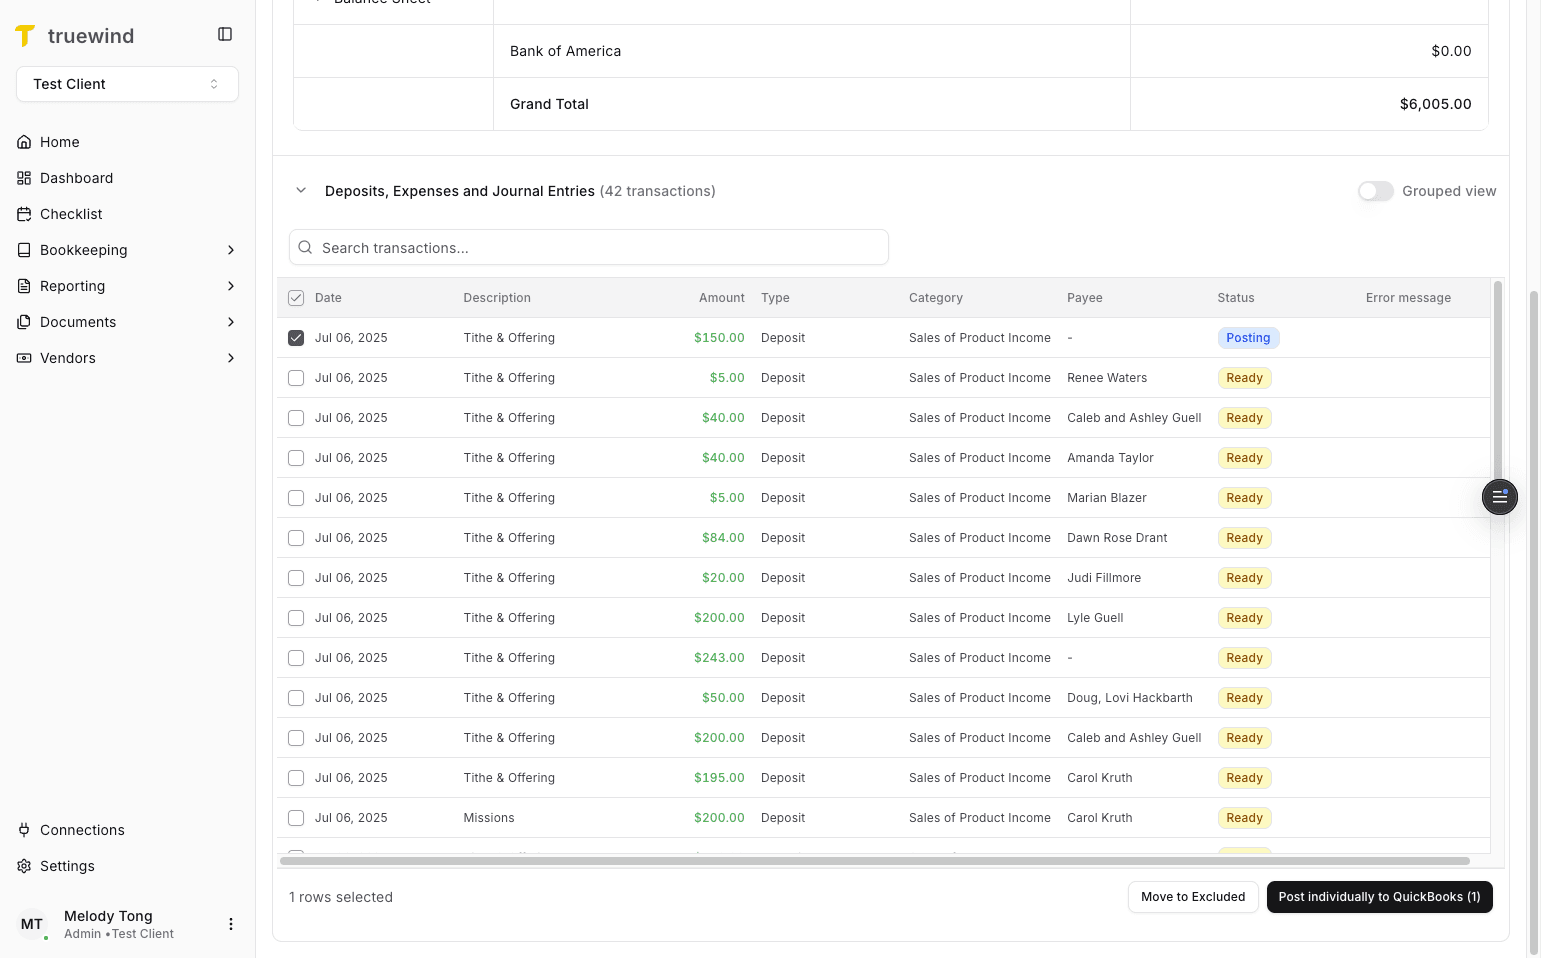
Step 30
The row status should move through Posting and into Posted after the ERP action completes.
Step 31
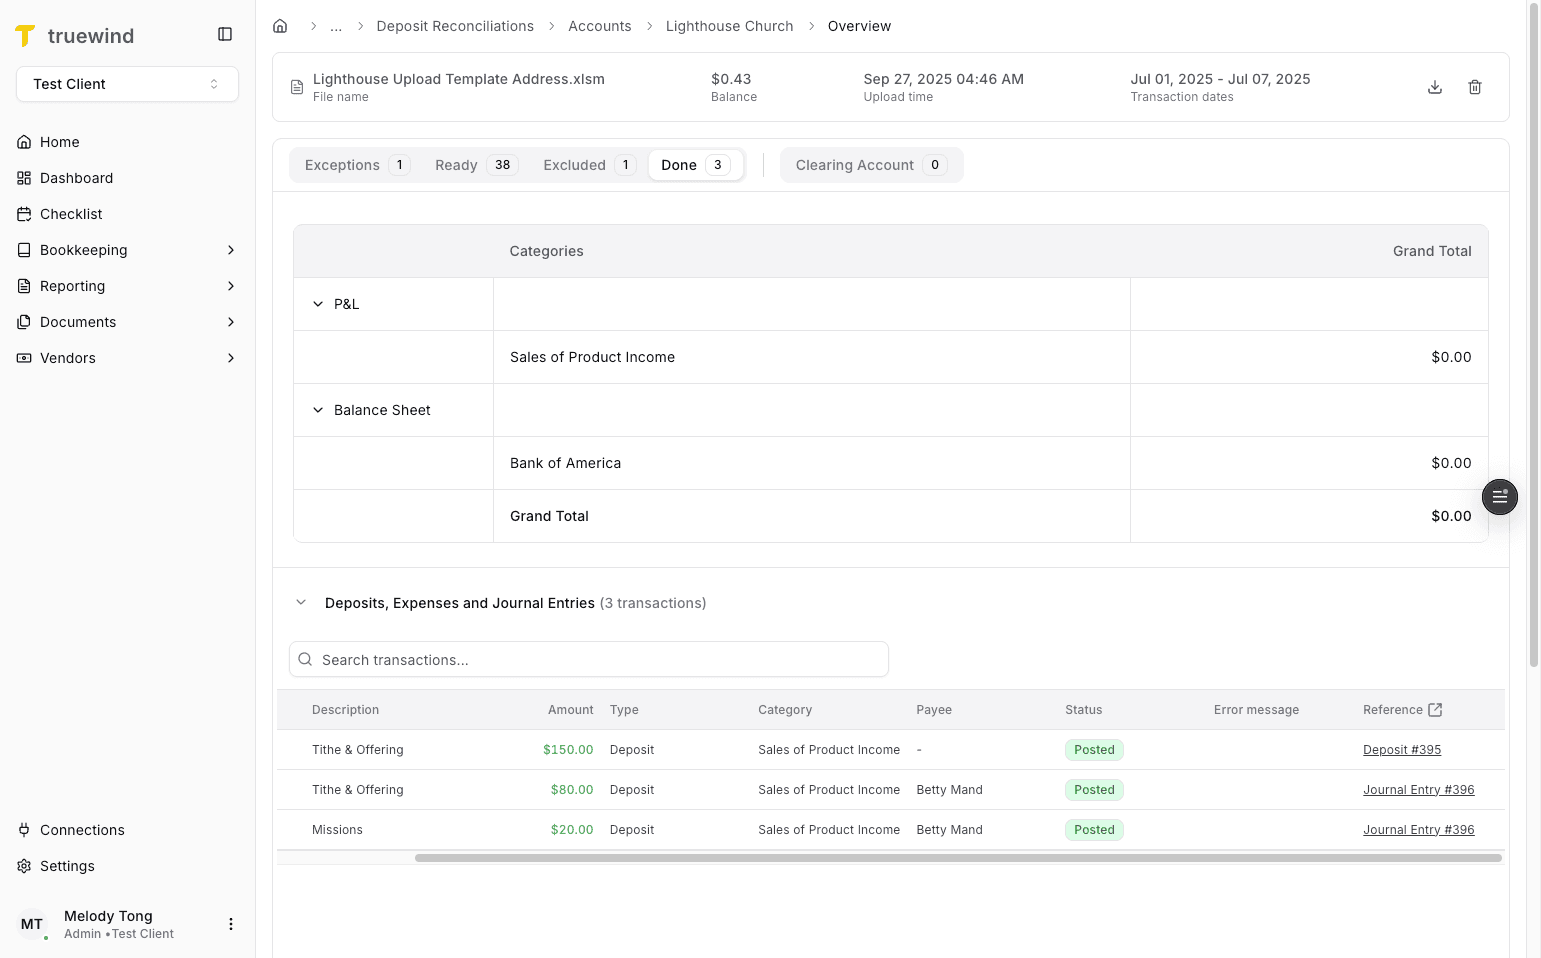
Open the posted-transaction view to verify what was sent to the ERP.

Step 32
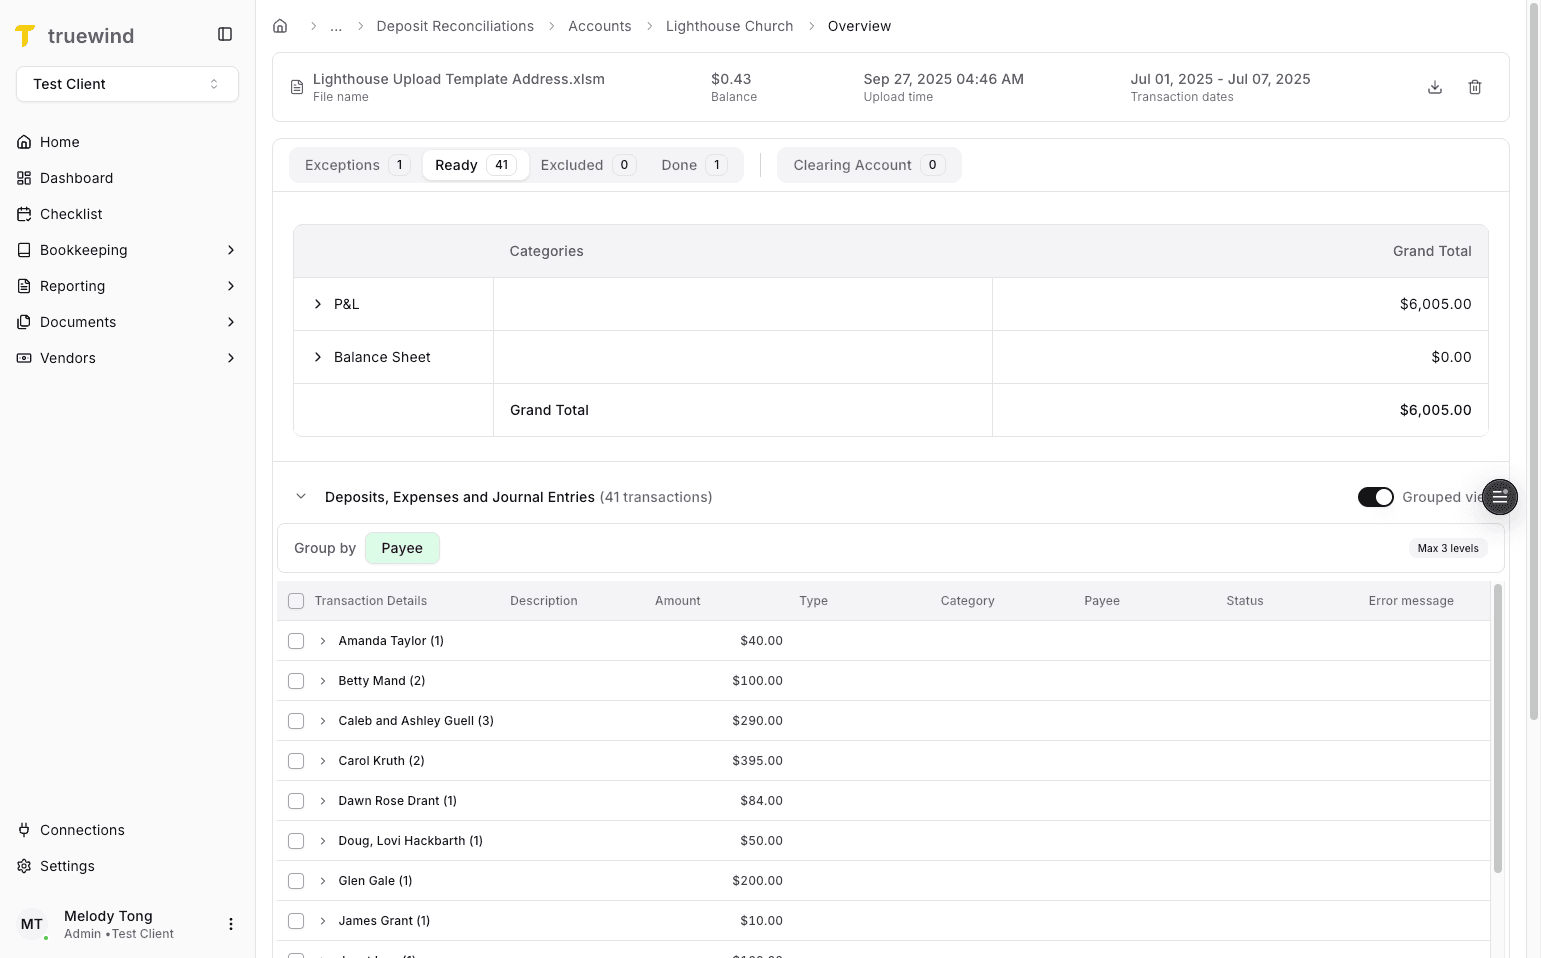
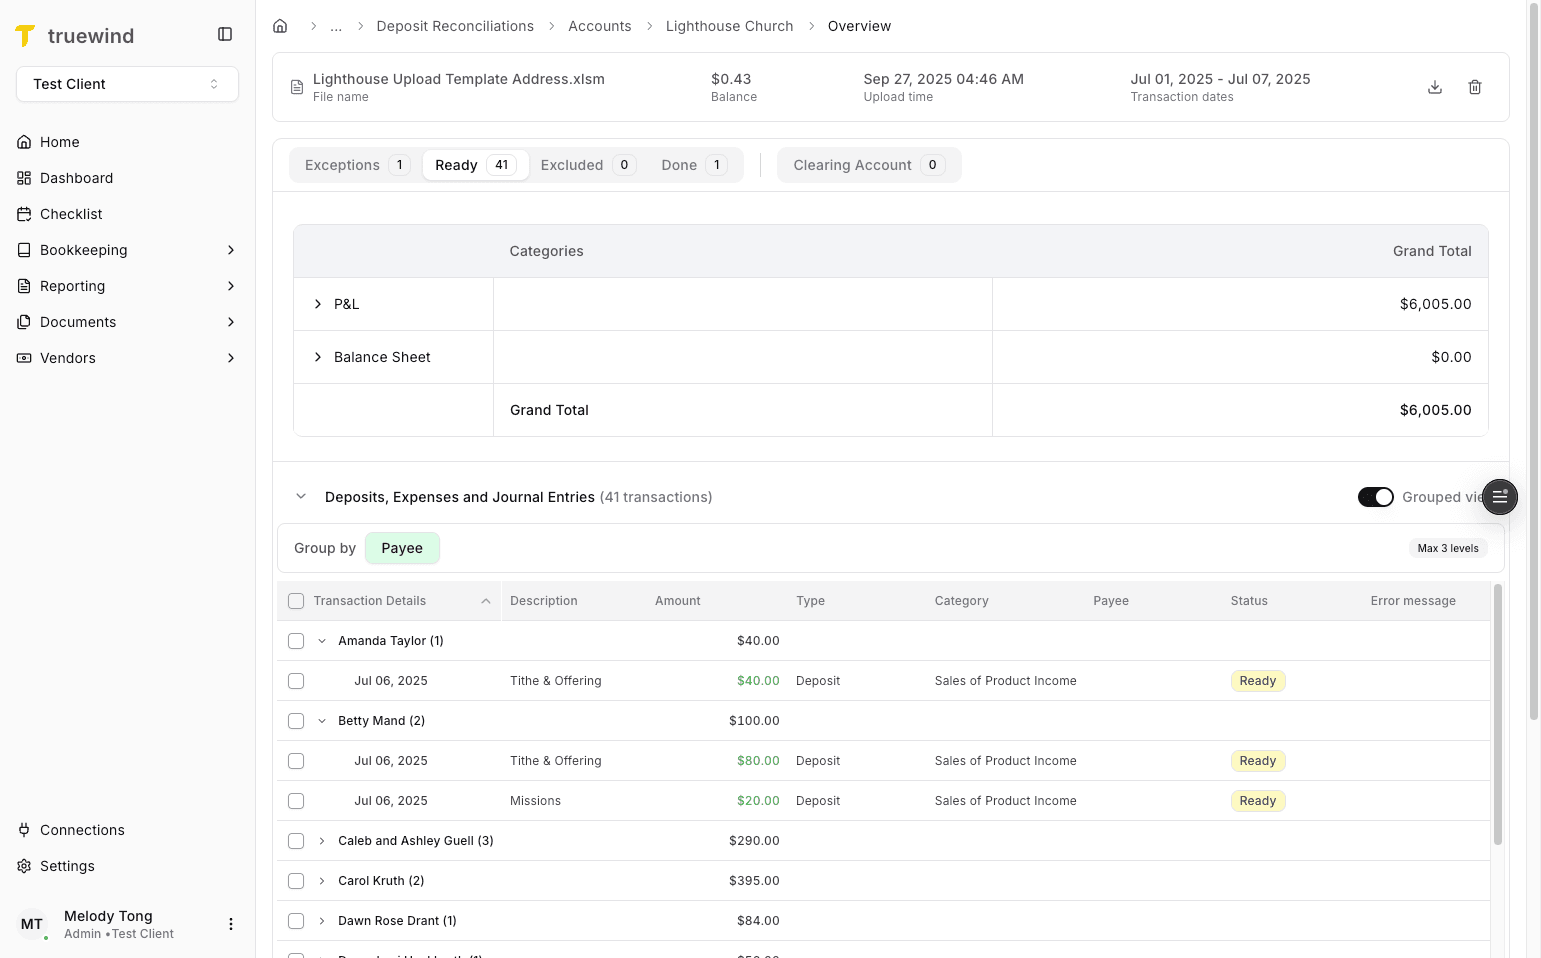
Use the grouped posting flow when you want to review all ready transactions together by payee.
Step 33
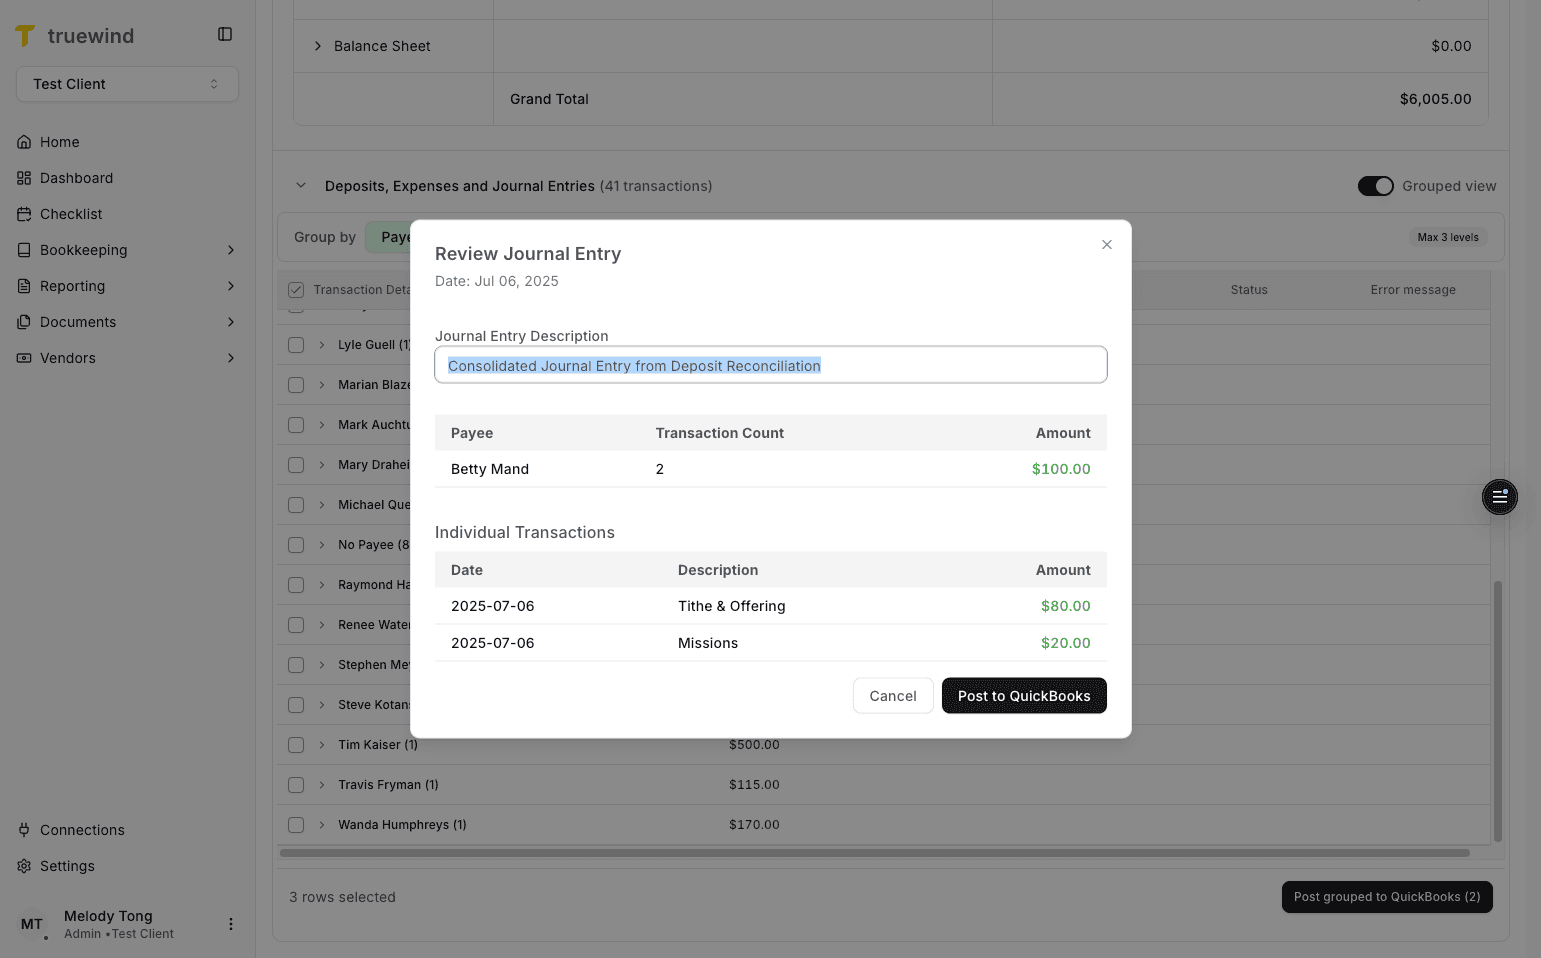
Review the transaction details before posting the grouped Journal Entry.
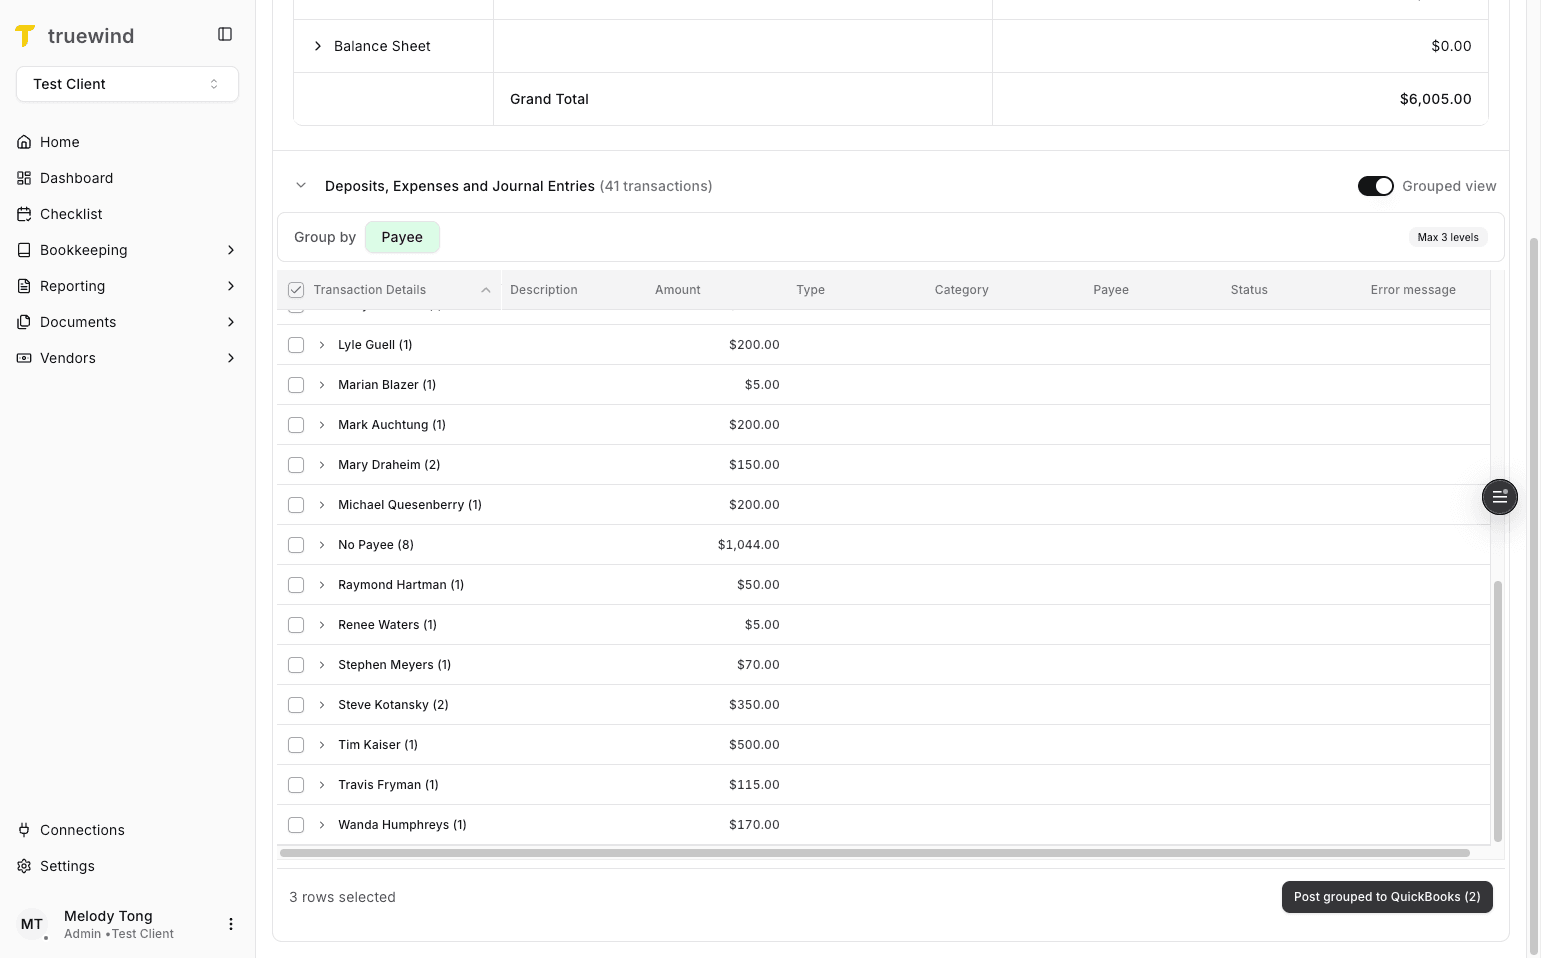
Step 34
Choose the rows that should be posted together in the grouped Journal Entry.
Step 35
Start the grouped posting flow when the selected rows should be combined in one ERP Journal Entry.
Step 36
Inspect the grouped Journal Entry before posting it to the ERP.
Step 37
Finish the grouped ERP post only after the Journal Entry review looks correct.
Step 38
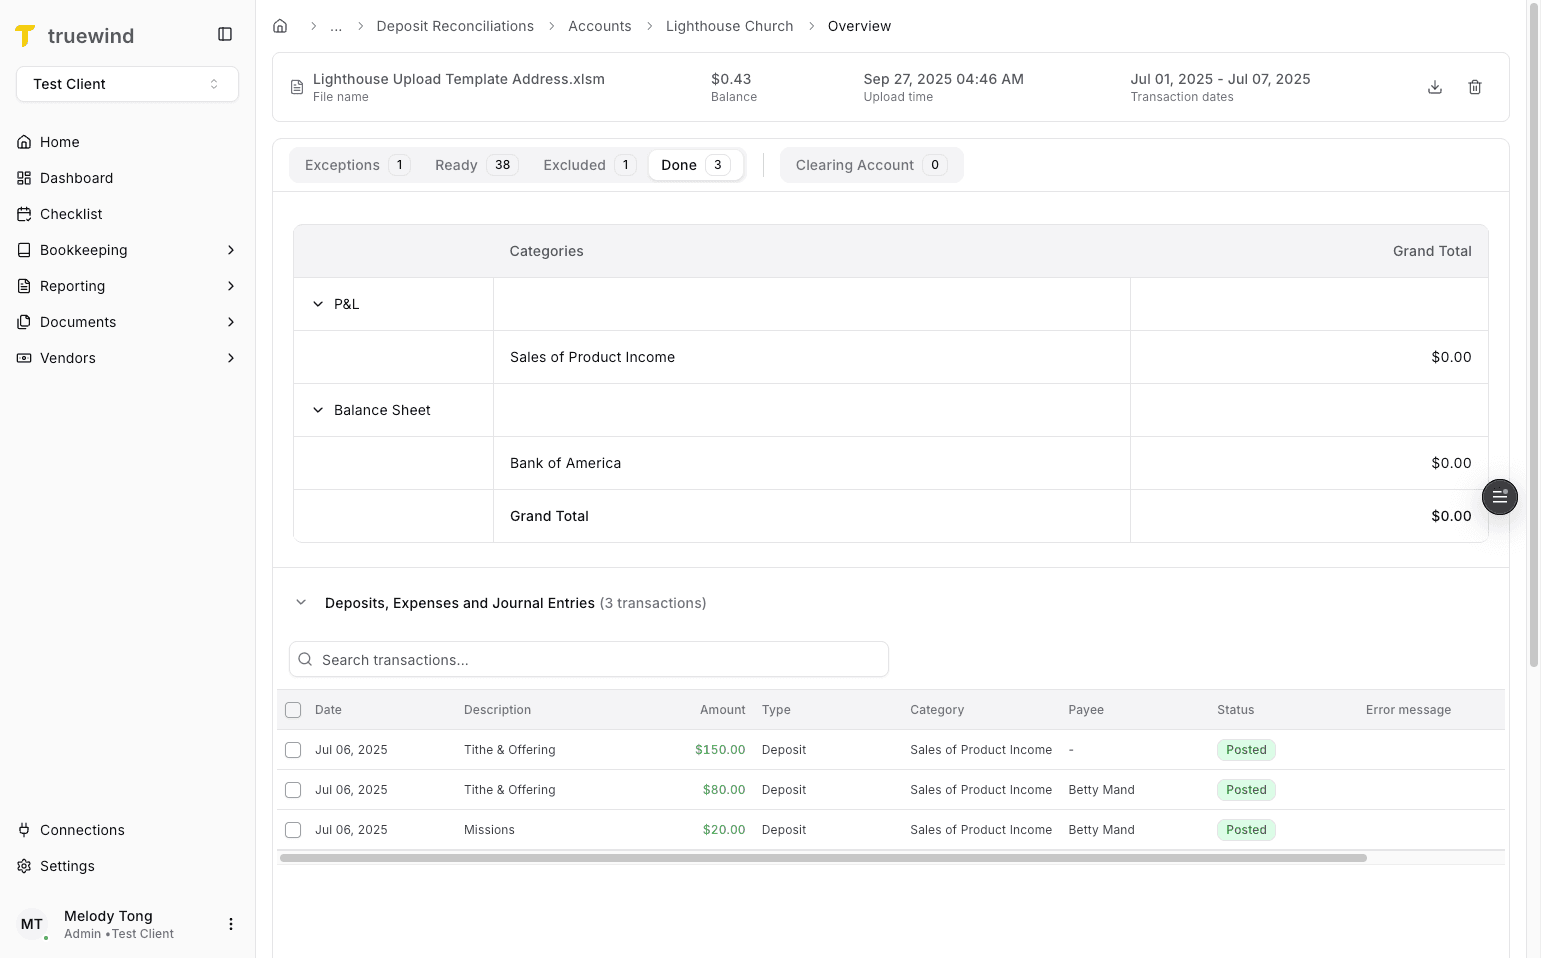
The Done tab contains all deposits that have already been posted or matched successfully.
Step 39
Deposit Reconciliation can create or match deposits, expenses, and Journal Entries depending on the selected workflow.
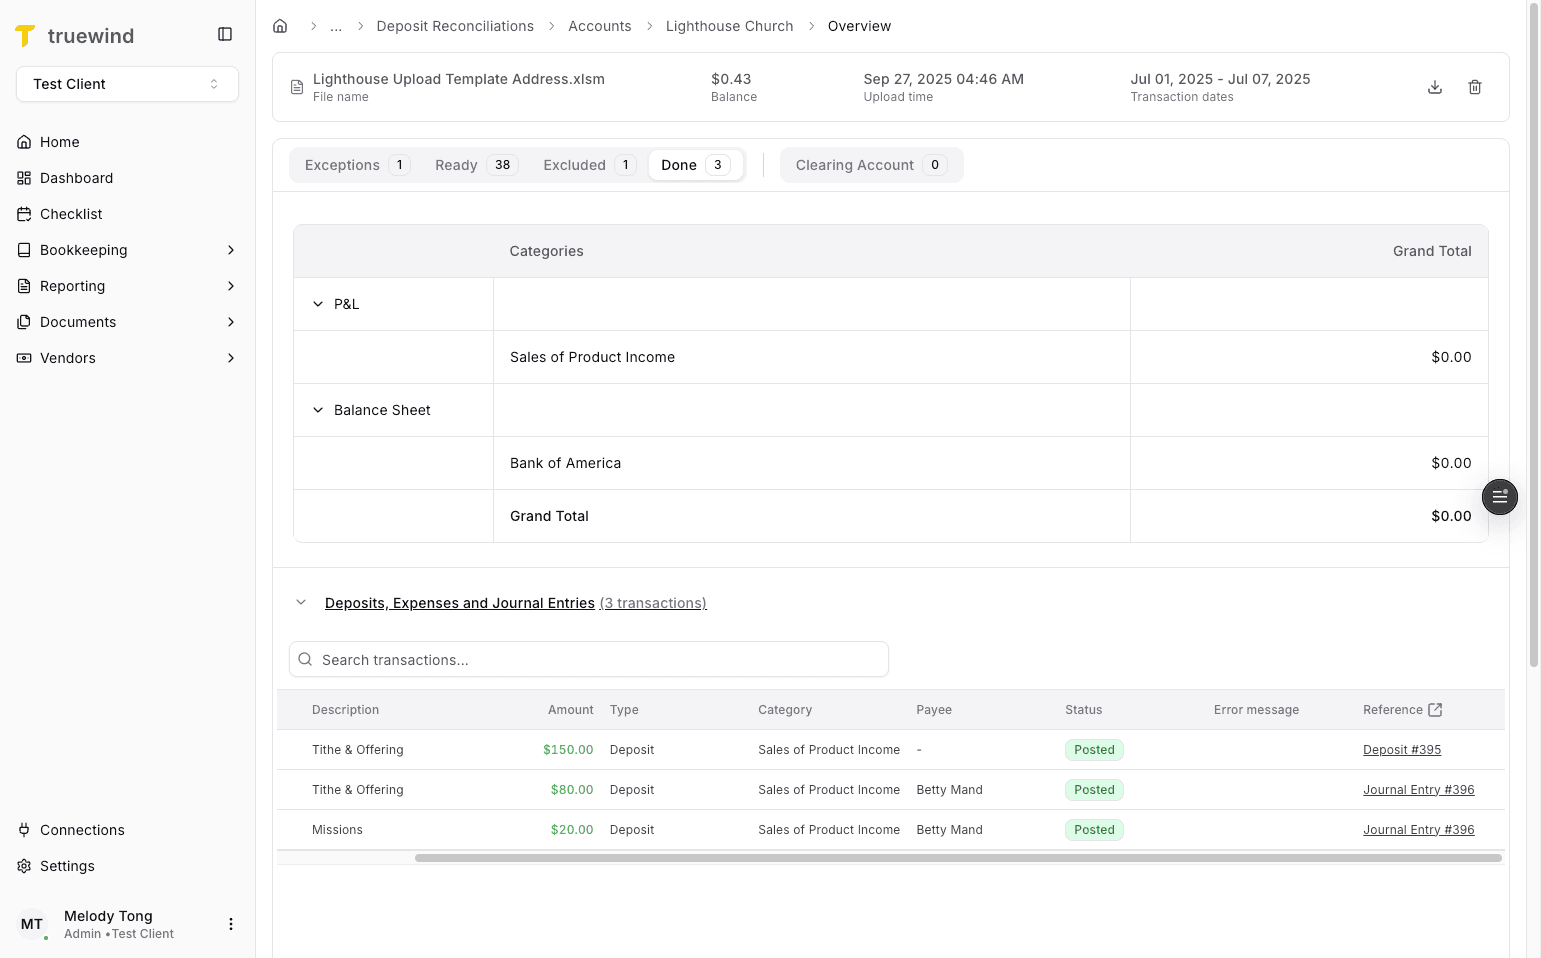
Step 40
Use the Posted view to inspect the finished ERP results for the imported file.
Step 41
Follow the reference link when you want to inspect the final ERP record directly.
Set up the clearing account first, because Deposit Reconciliation depends on that mapping before file upload and posting can proceed.
Common exceptions include unmapped categories, unmatched payees, and transfers that could not be matched to bank-account transactions.
Deposit Reconciliation can identify exceptions automatically, but some categories and payees still need manual mapping before posting.
The final posting or matching behavior depends on the mapped clearing account and the ERP configuration behind that account.
Review the import file first and resolve the listed exceptions before trying to post or match deposits.
Manually select an existing payee, or use Add Payee when the payee is new and should be created in the ERP with its contact details.
Was this helpful?
Need more help?
Ask for human help about this article and provide any feedback.