What to verify
Check the selected month and status first, because the same vendor can appear differently across periods depending on history, bills, and posting state.
Ask the support agent
Just ask a direct question or search related articles from the Knowledge Base.
Support Center / Vendors / Vendor Accruals
Review Vendor Accruals when you need to estimate, post, and reverse monthly vendor accruals, resulting in posted accrual and reversal Journal Entries for the selected vendors.
Step 1
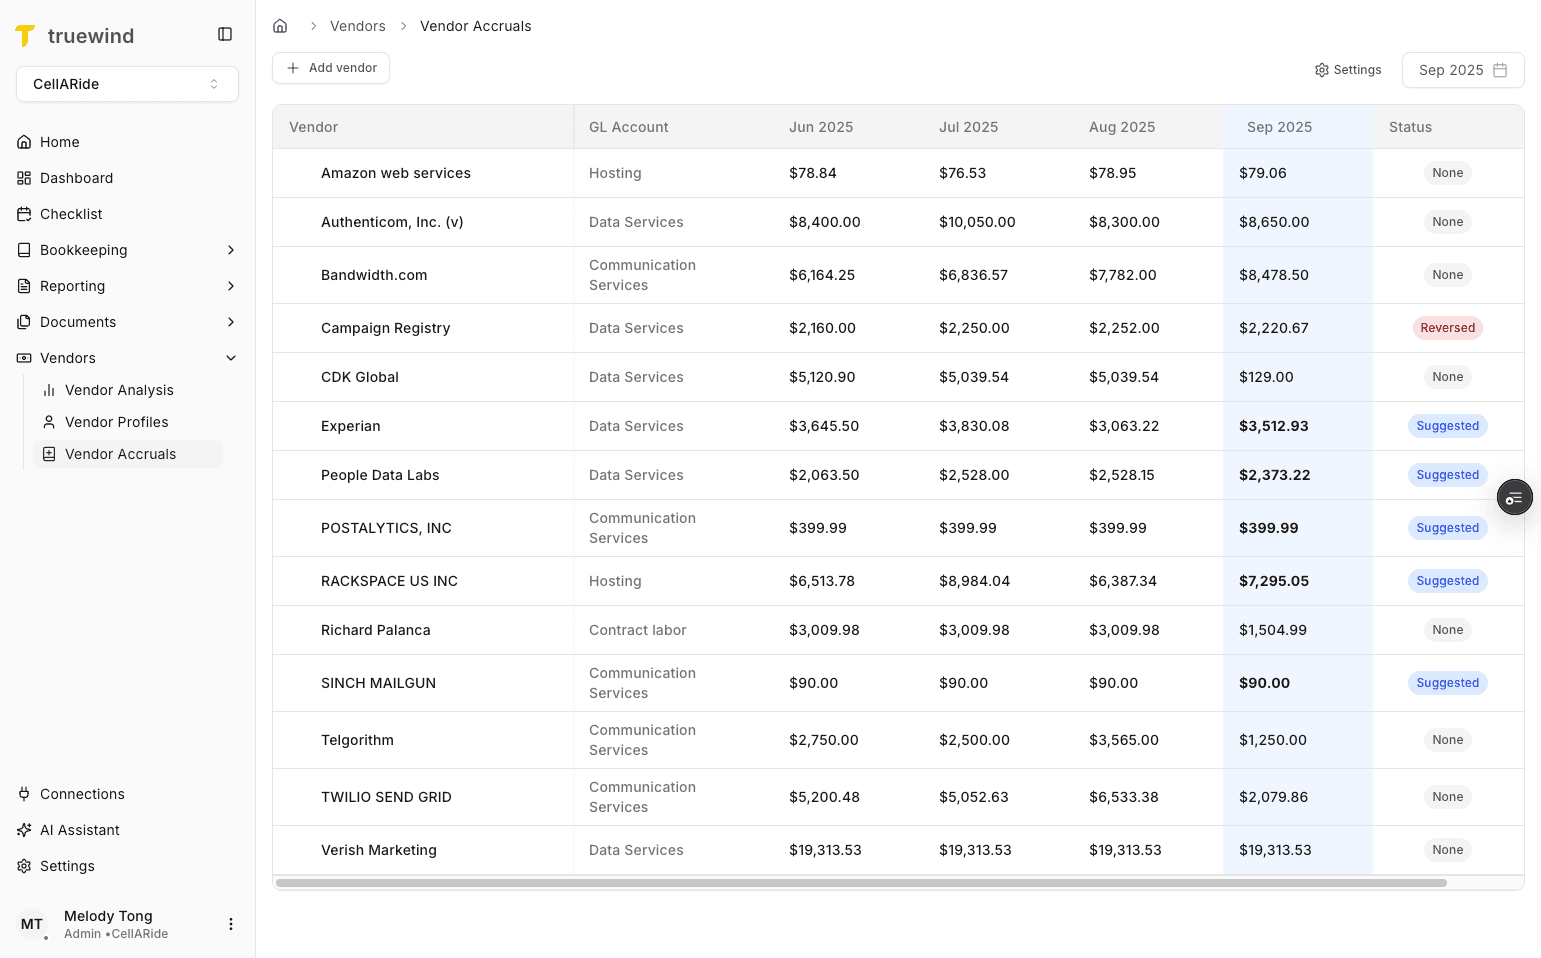
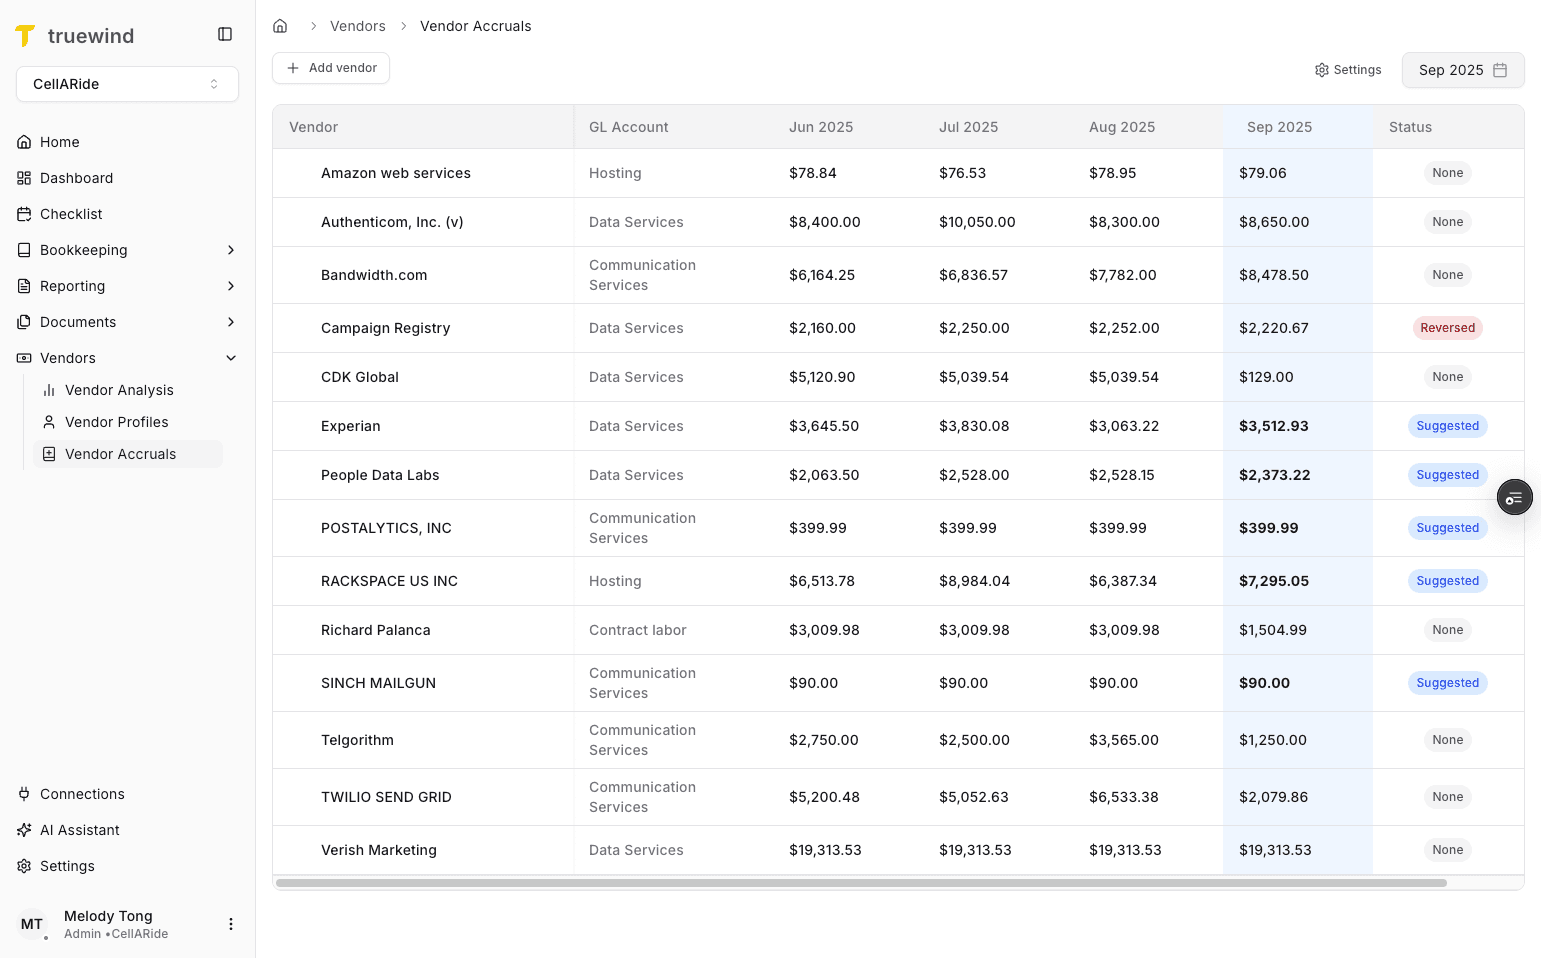
Start in Truewind on Vendors > Vendor Accruals so the monthly accrual table and settings are visible.
Step 2
The table compares the current month with the prior three months so you can spot consistency and change by vendor.

Step 3
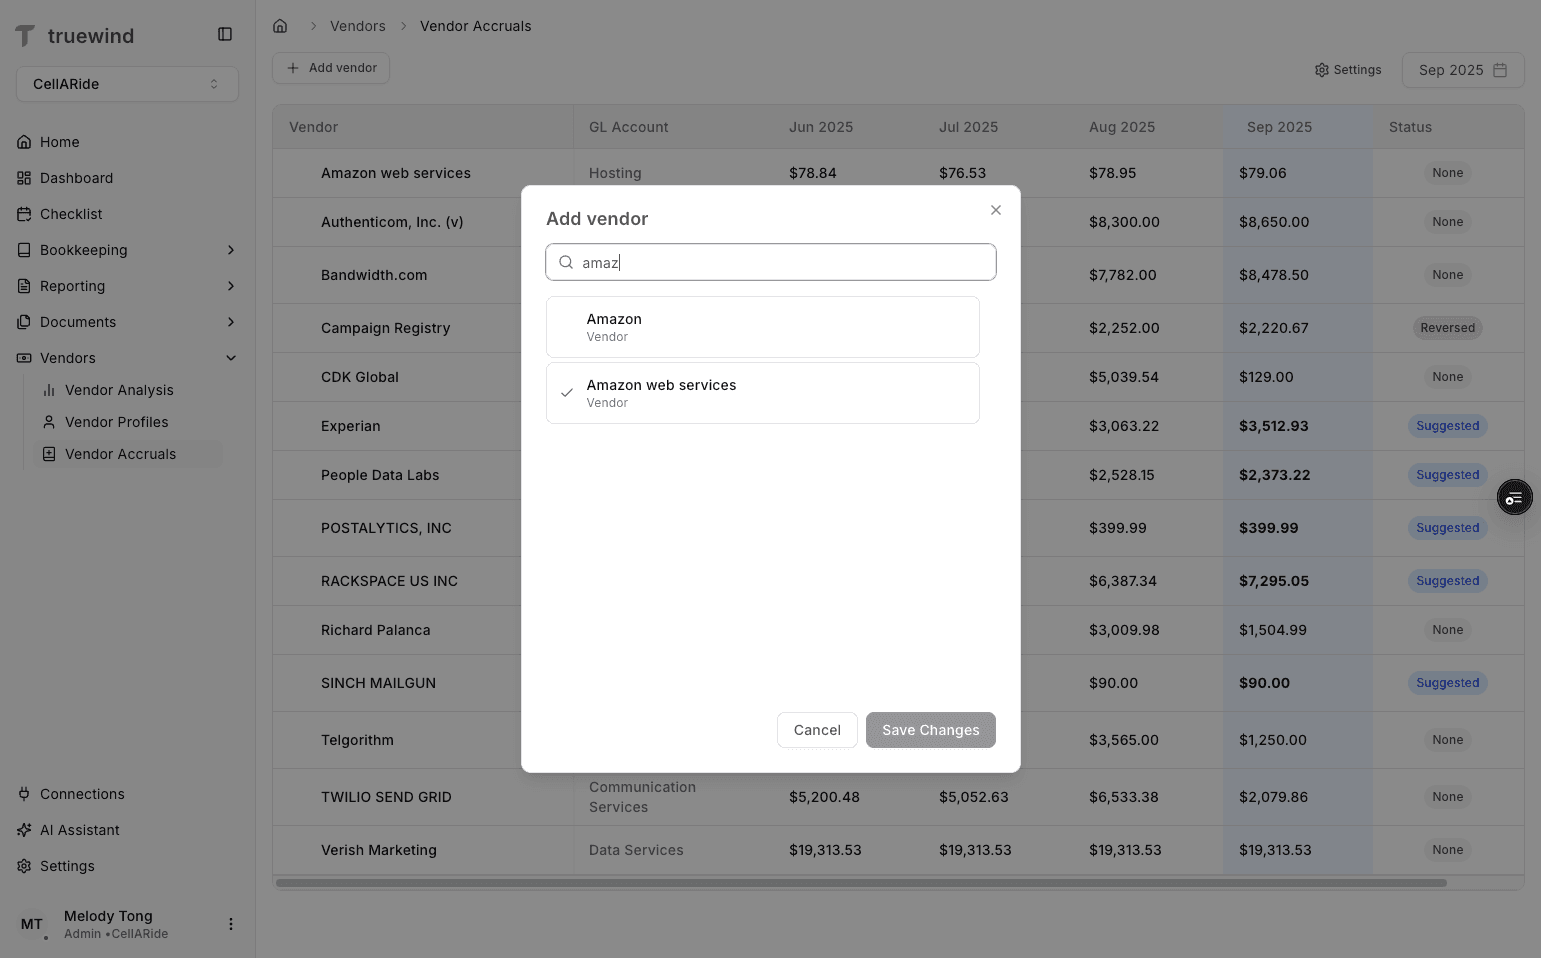
If this is the first time you are using Vendor Accruals, add the vendors you want Truewind to track before expecting any data in the table.

Step 4
Choose the vendors you want to monitor each month so their balances can be used for accrual suggestions.
Step 5
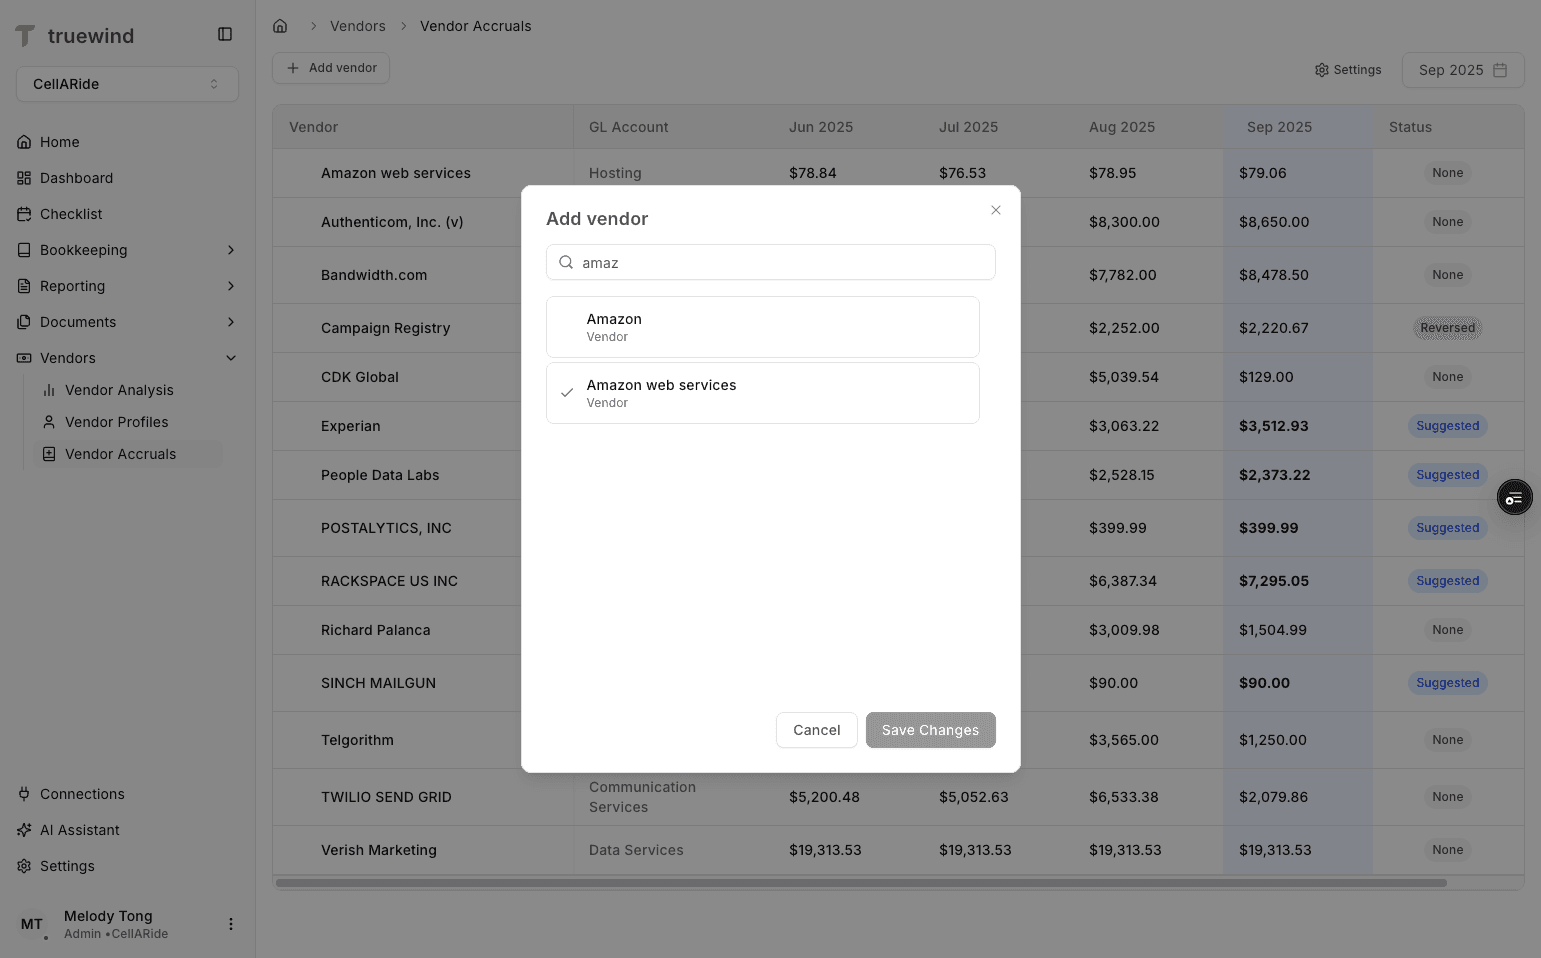
Save the vendor list before you return to the monthly table so the tracked vendor set is updated.
Step 6
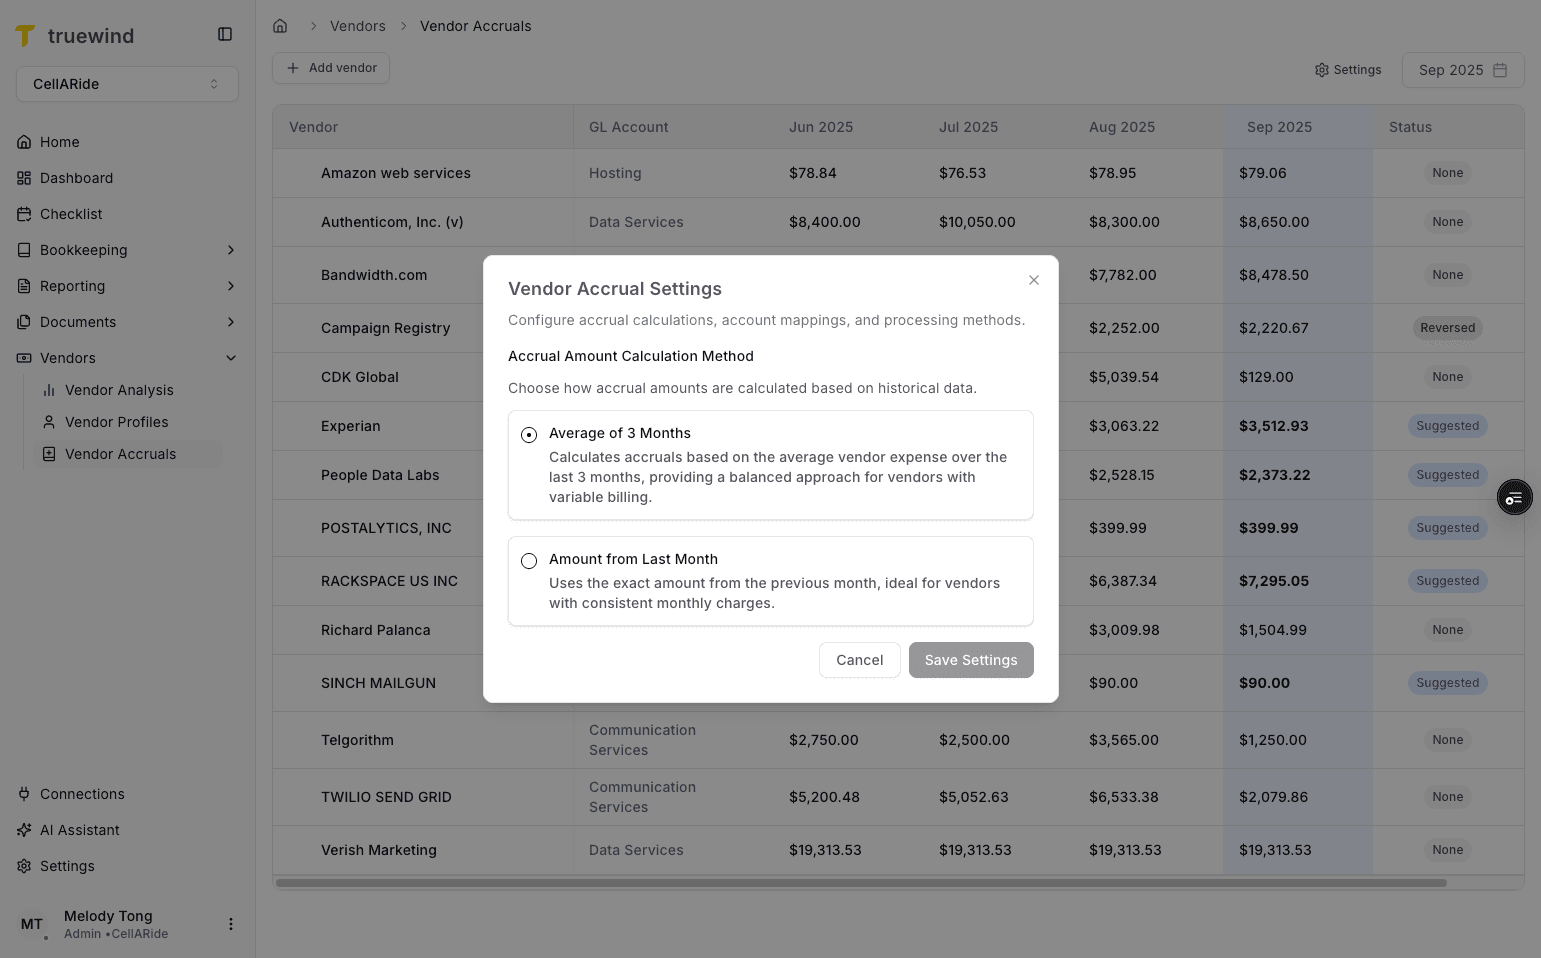
Vendor Accrual settings control how the suggested accrual amount is calculated, so confirm the estimation logic before posting anything.

Step 7
Use the settings panel when you need to adjust how Vendor Accruals estimates the monthly amount.
Step 8
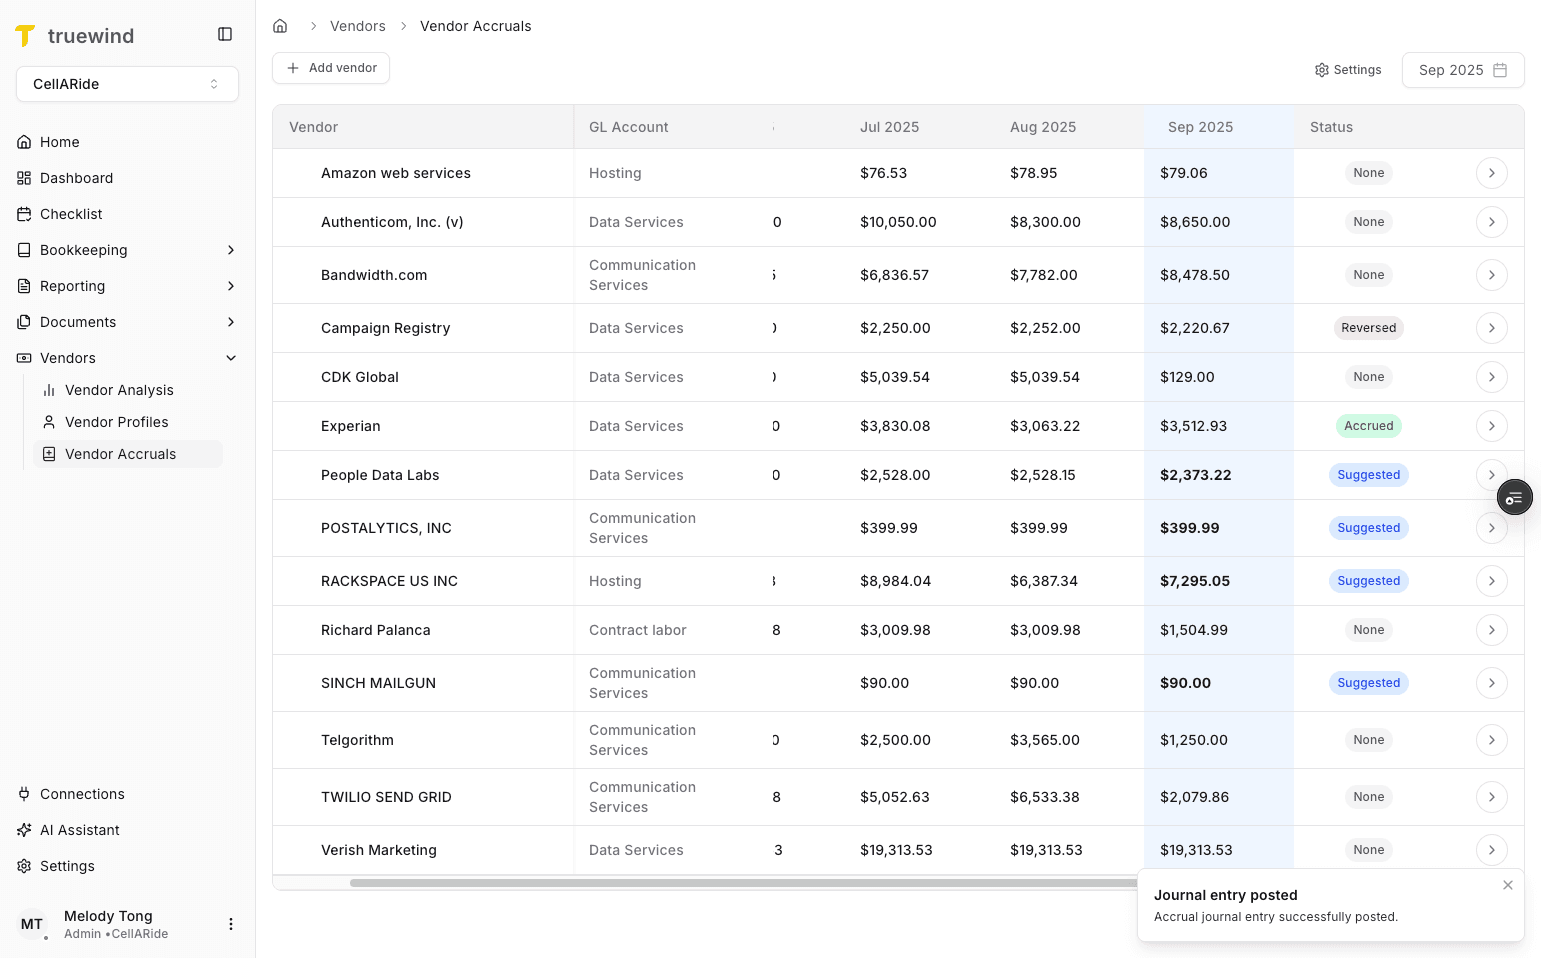
Select the month you are preparing the books for before reviewing suggested accruals or posting Journal Entries.
Step 9
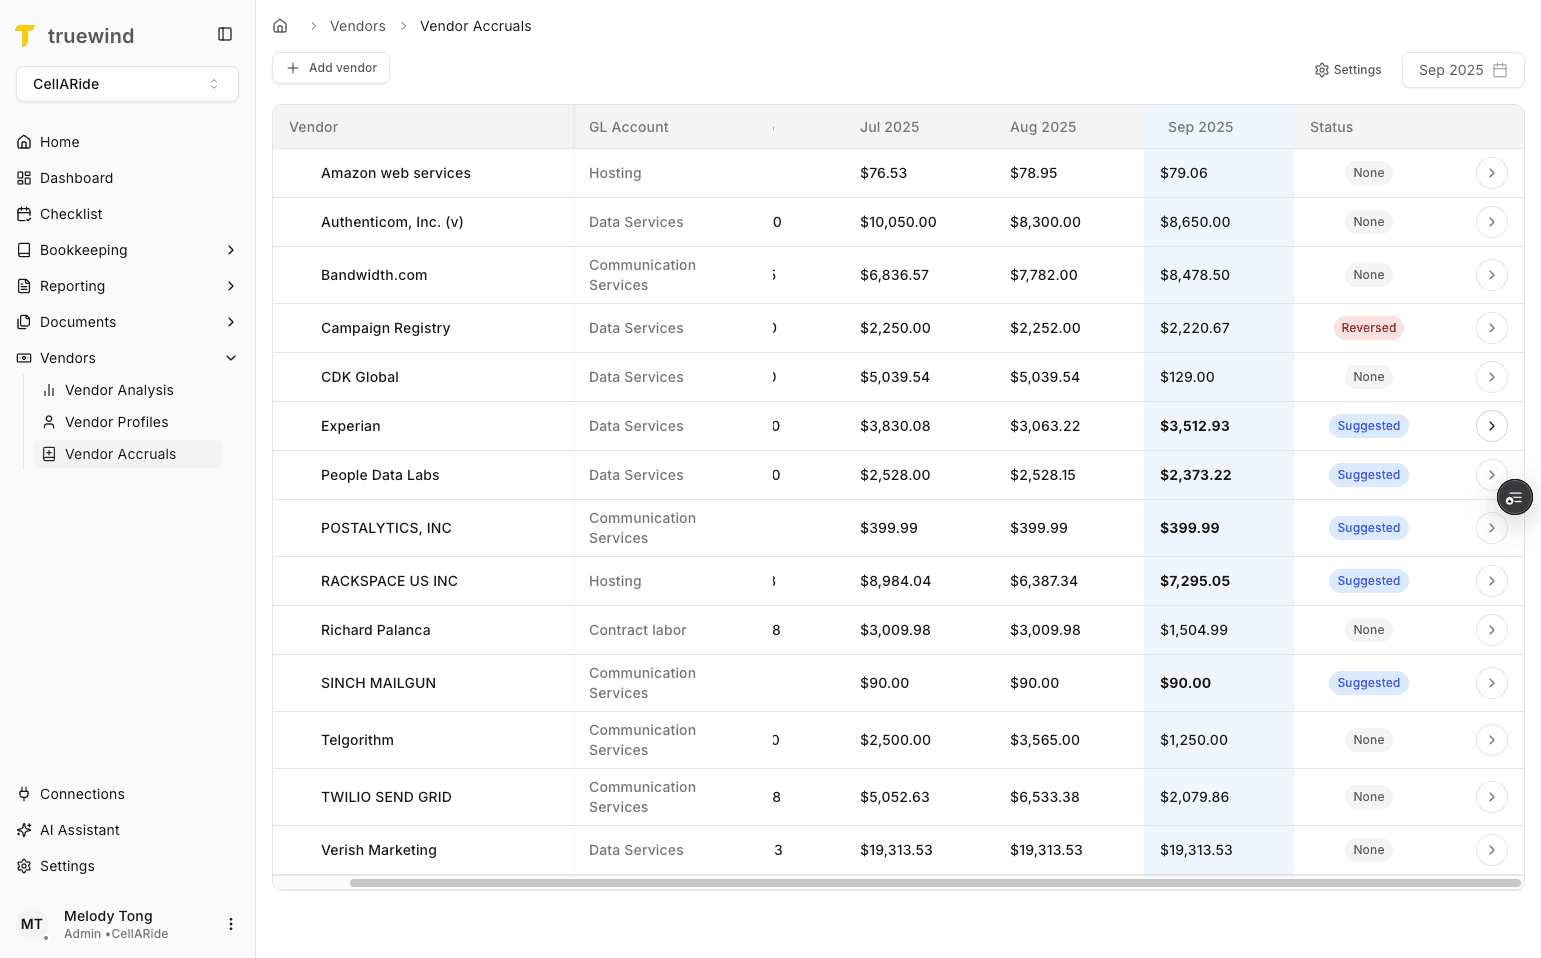
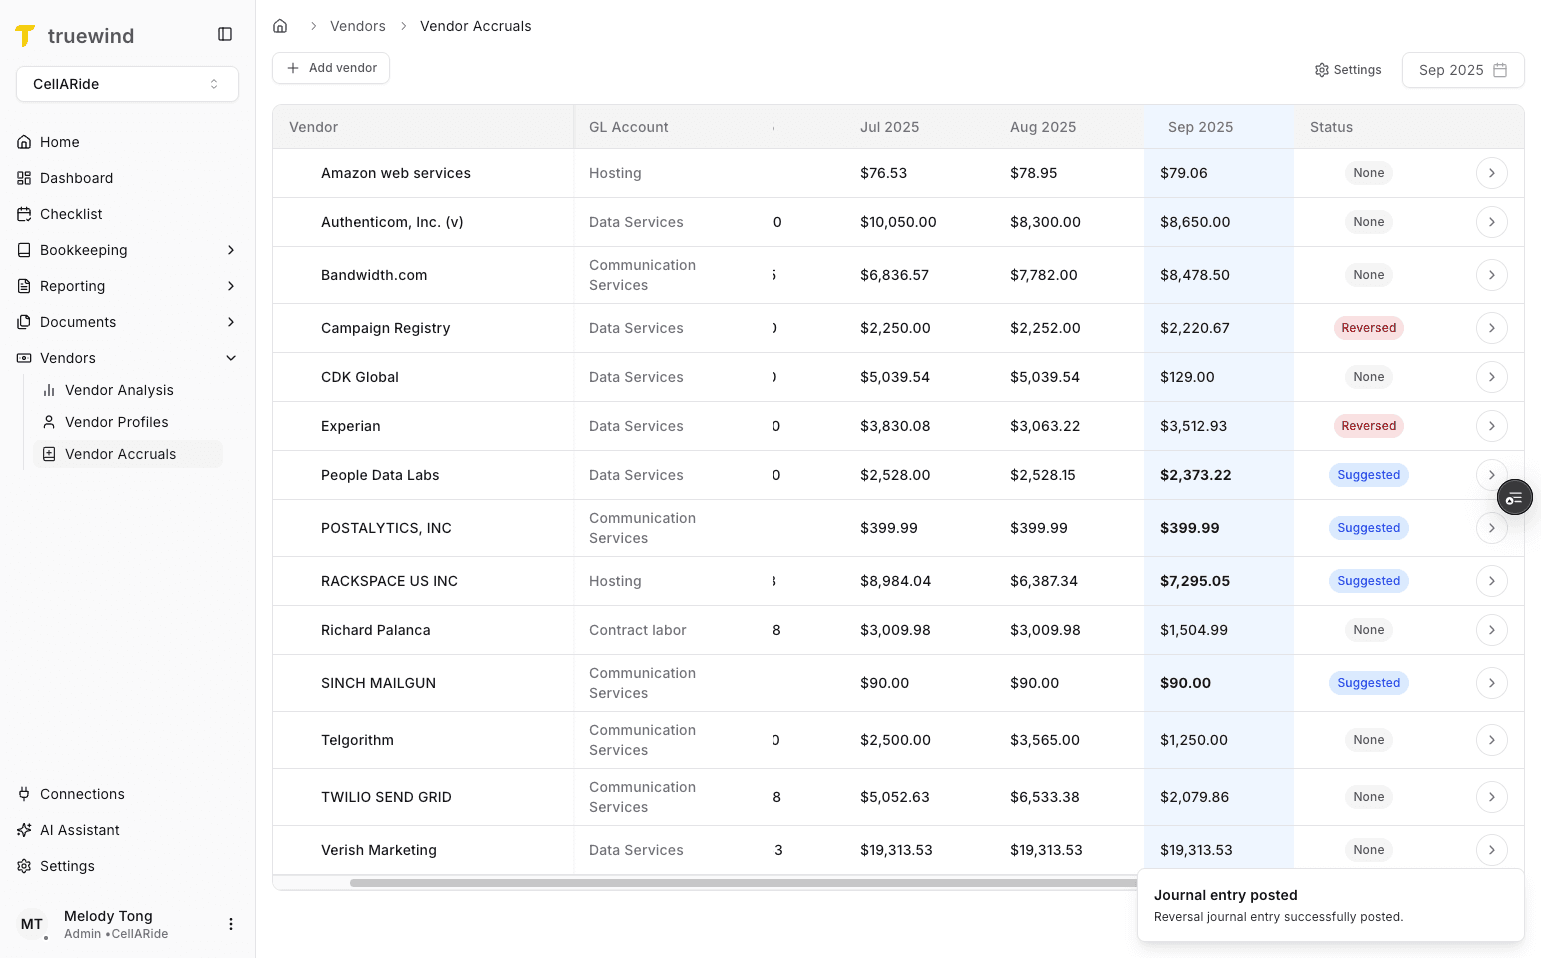
The status tells you whether a vendor is Suggested, Accrued, or Reversed, which determines what action is available next.

Step 10
Suggested rows are the vendors Truewind believes need an accrual because the current month has a zero balance.

Step 11
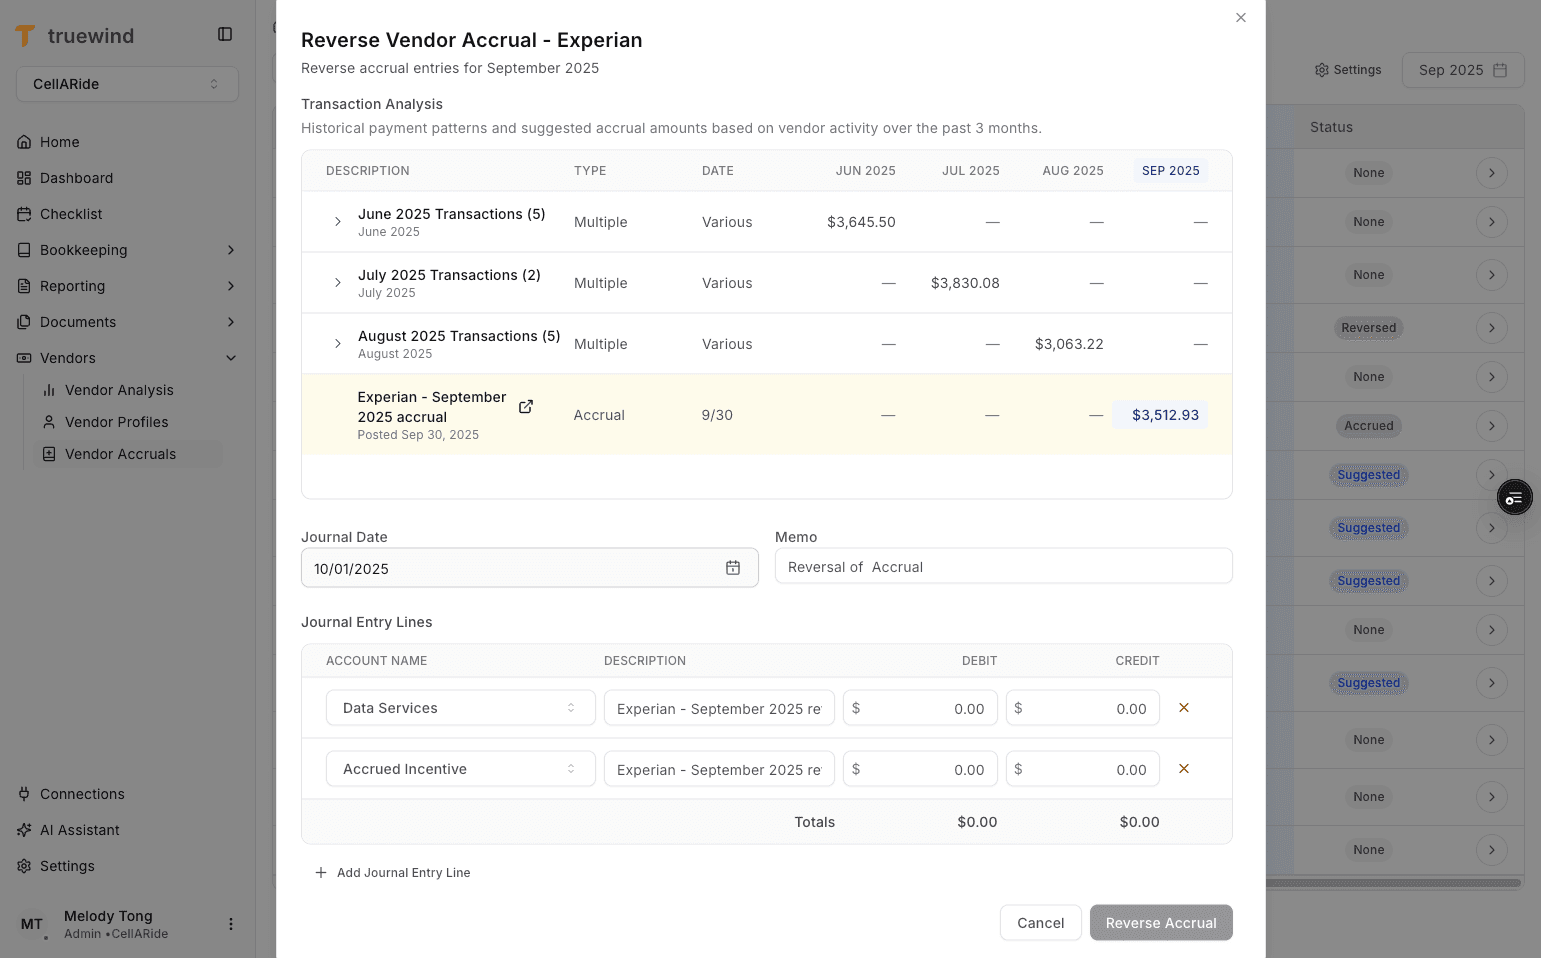
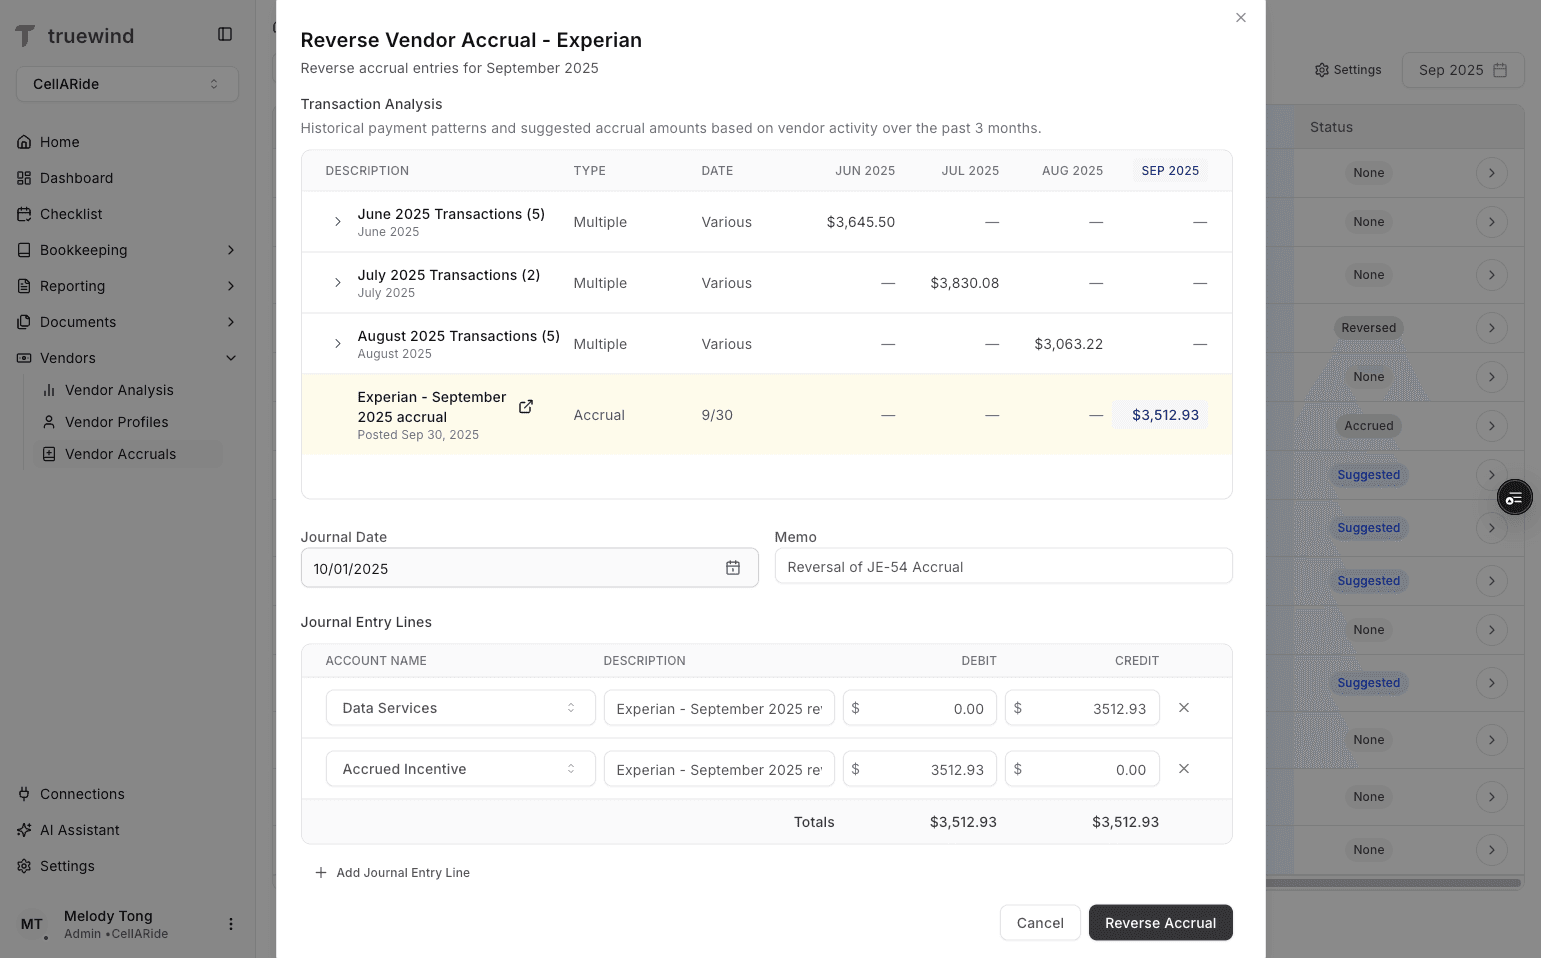
Open the vendor detail view to inspect transaction history and the drafted accrual entry before posting.
Step 12
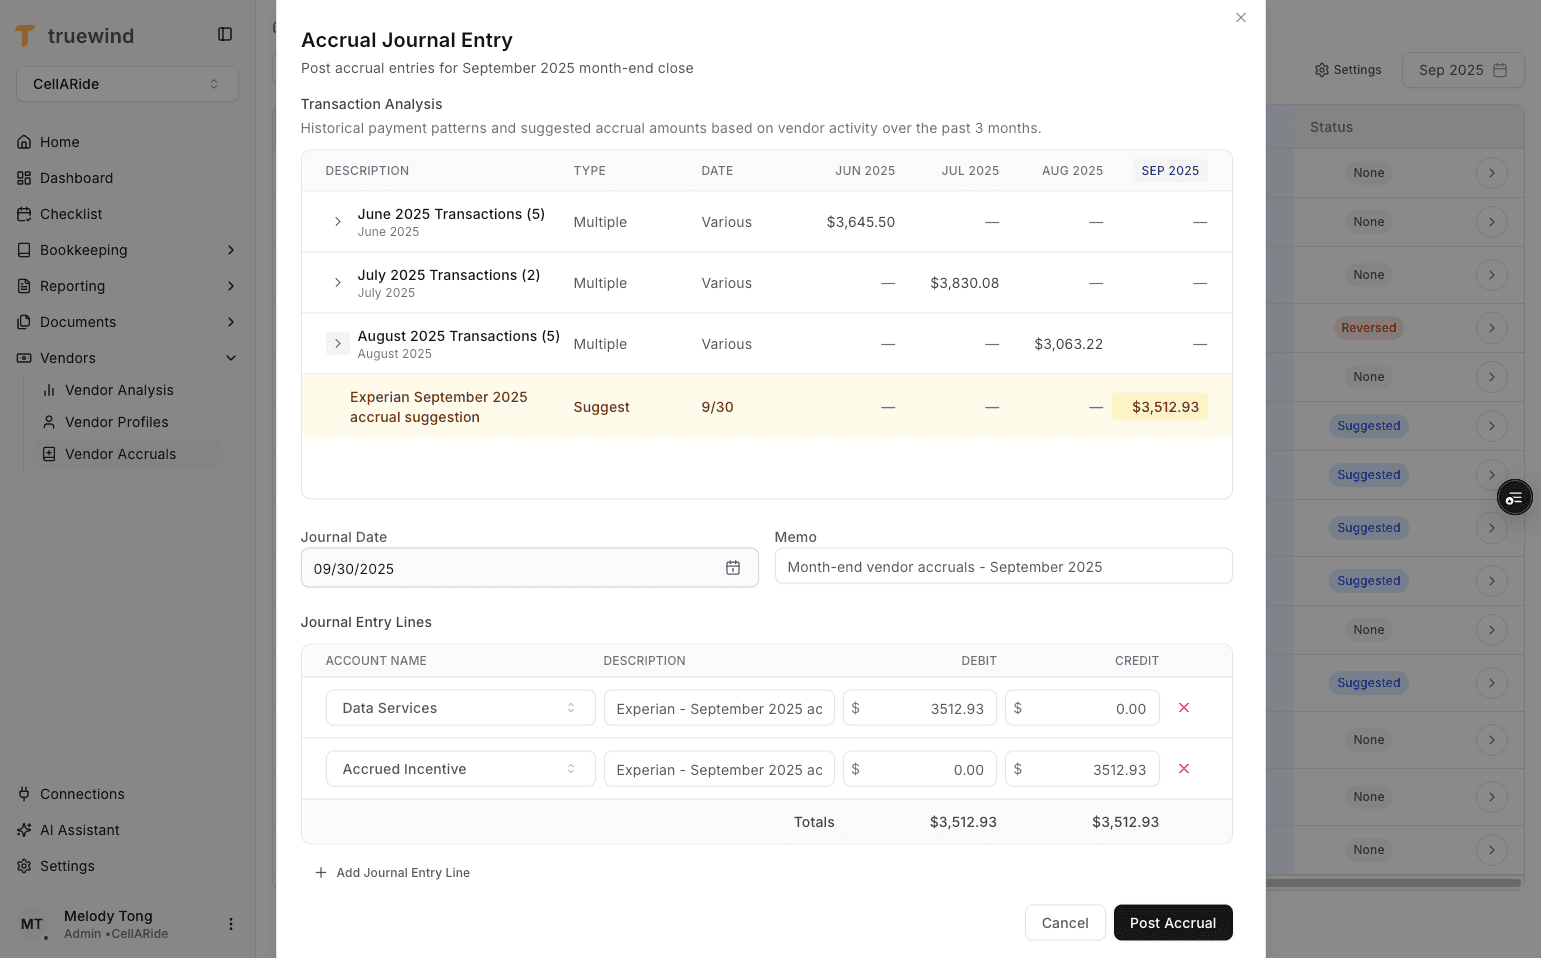
The pop-up shows the prior-month pivot table and the drafted accrual Journal Entry together so you can validate the recommendation.

Step 13
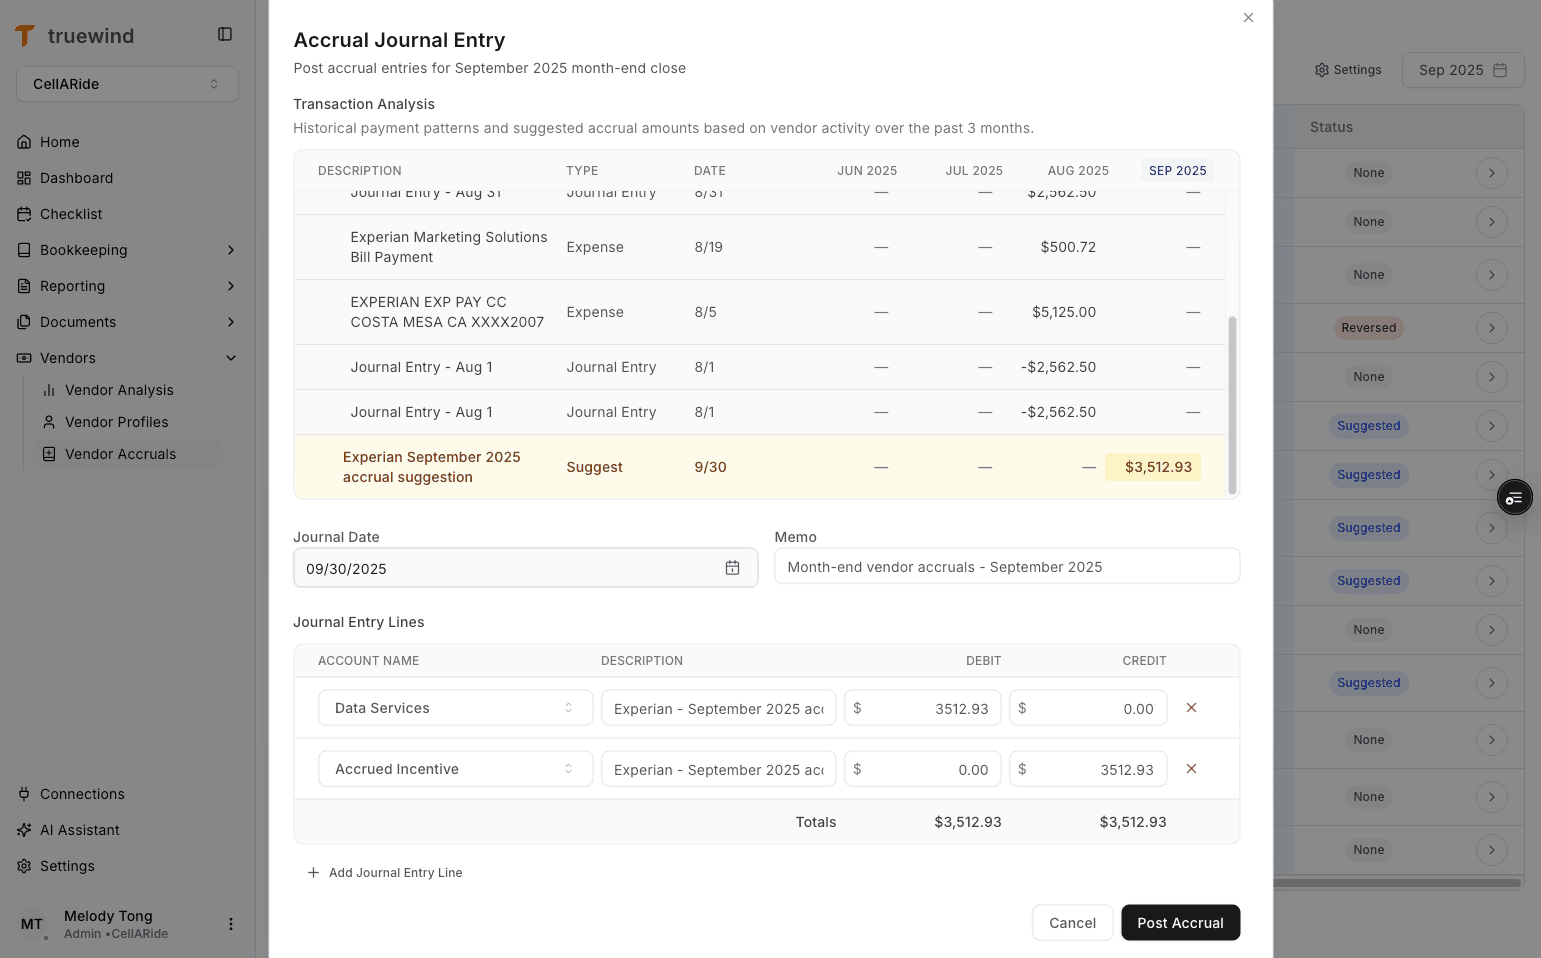
Use the month dropdown to inspect the underlying transactions that make up the selected month's amount.
Step 14
Review the current-month estimate before posting so you understand the amount Truewind is proposing to accrue.
Step 15
Confirm the expense account and accrued-expense account before posting the drafted Journal Entry to the ERP.

Step 16
Post the accrual only after the amount and accounts look correct, because this creates the Journal Entry in the ERP.
Step 17
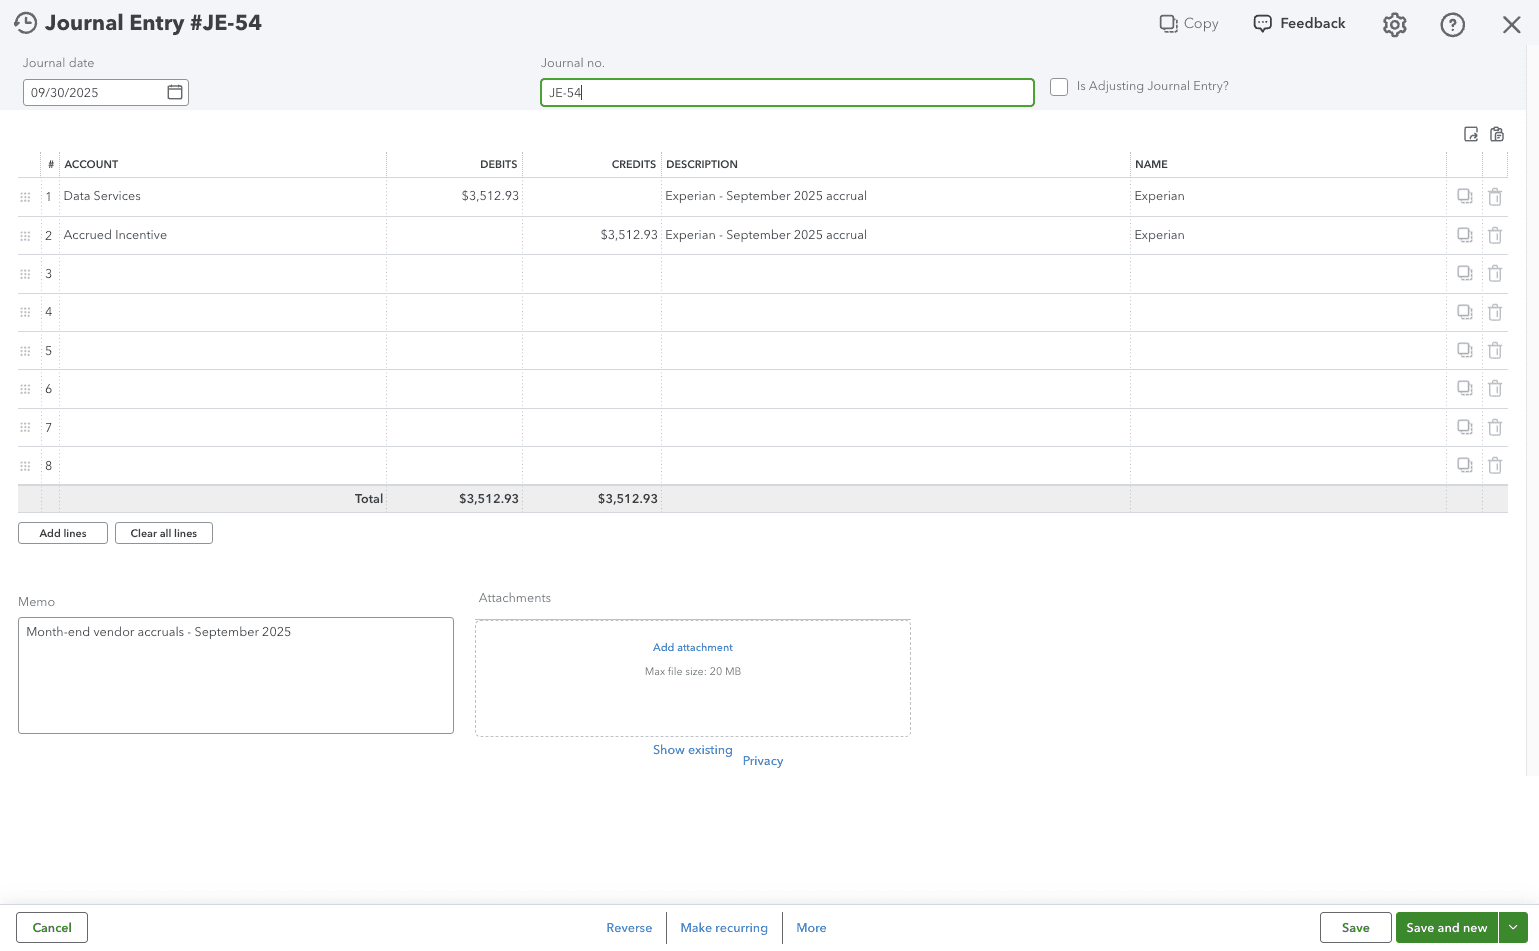
After posting, the status should change to Accrued to show that the accrual Journal Entry now exists in the ERP.

Step 18
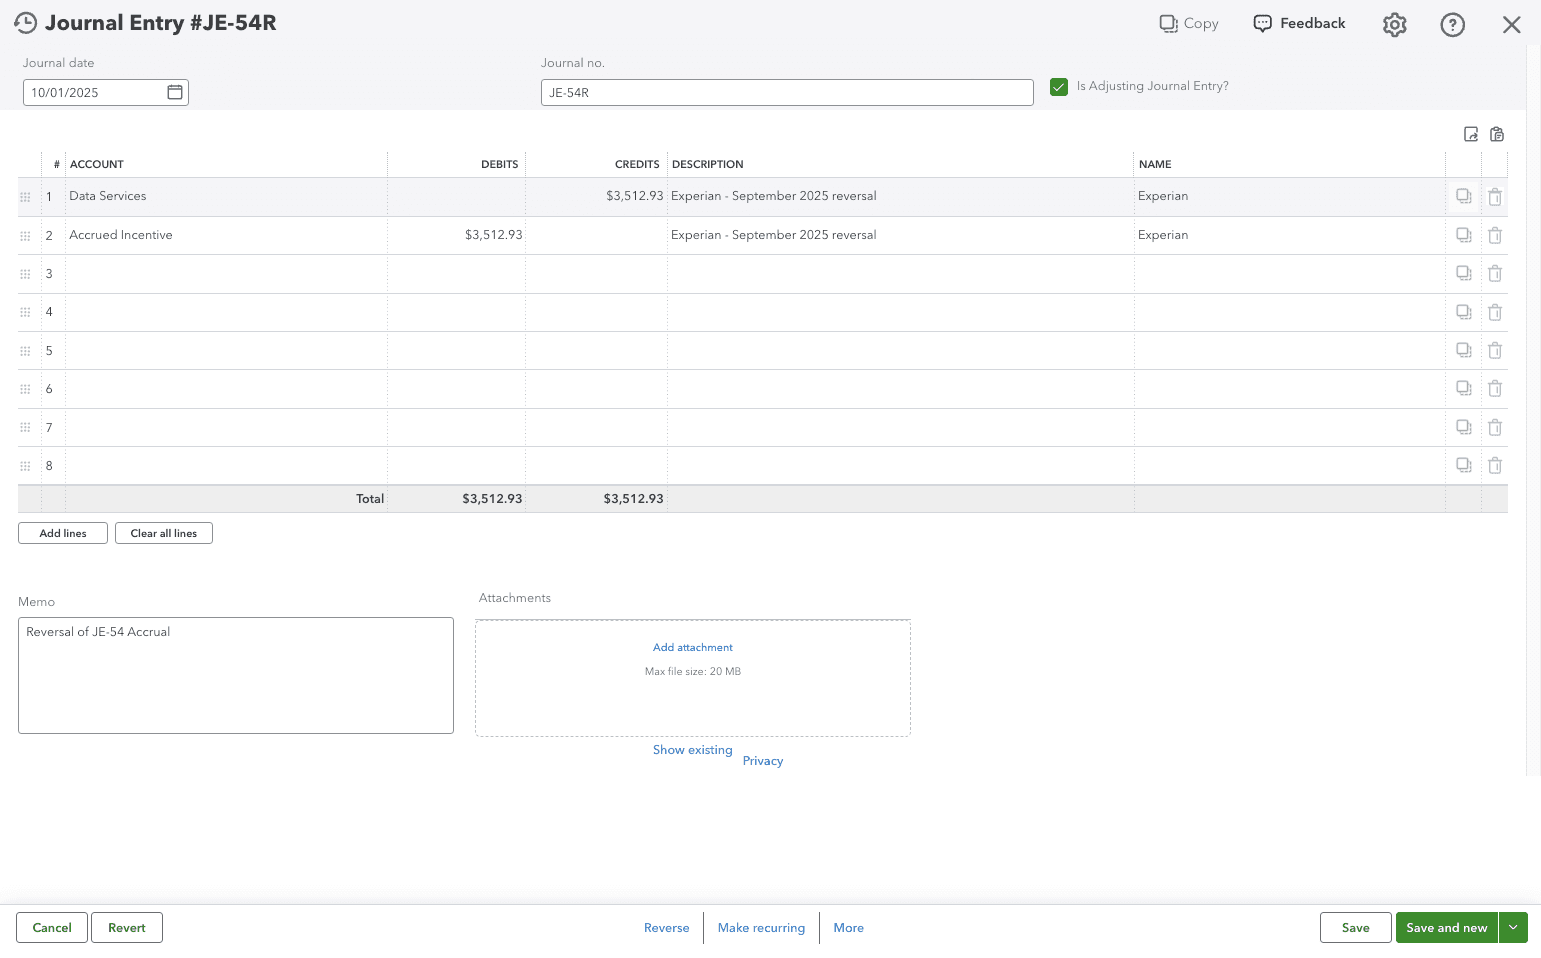
Use the ERP link from the pivot table to verify the posted Journal Entry directly in the accounting system.
Step 19
Confirm the posted accrual looks correct in the ERP before you leave the vendor detail view.
Step 20
Once the bill arrives, return to the vendor detail view and review the drafted reversal before posting it.
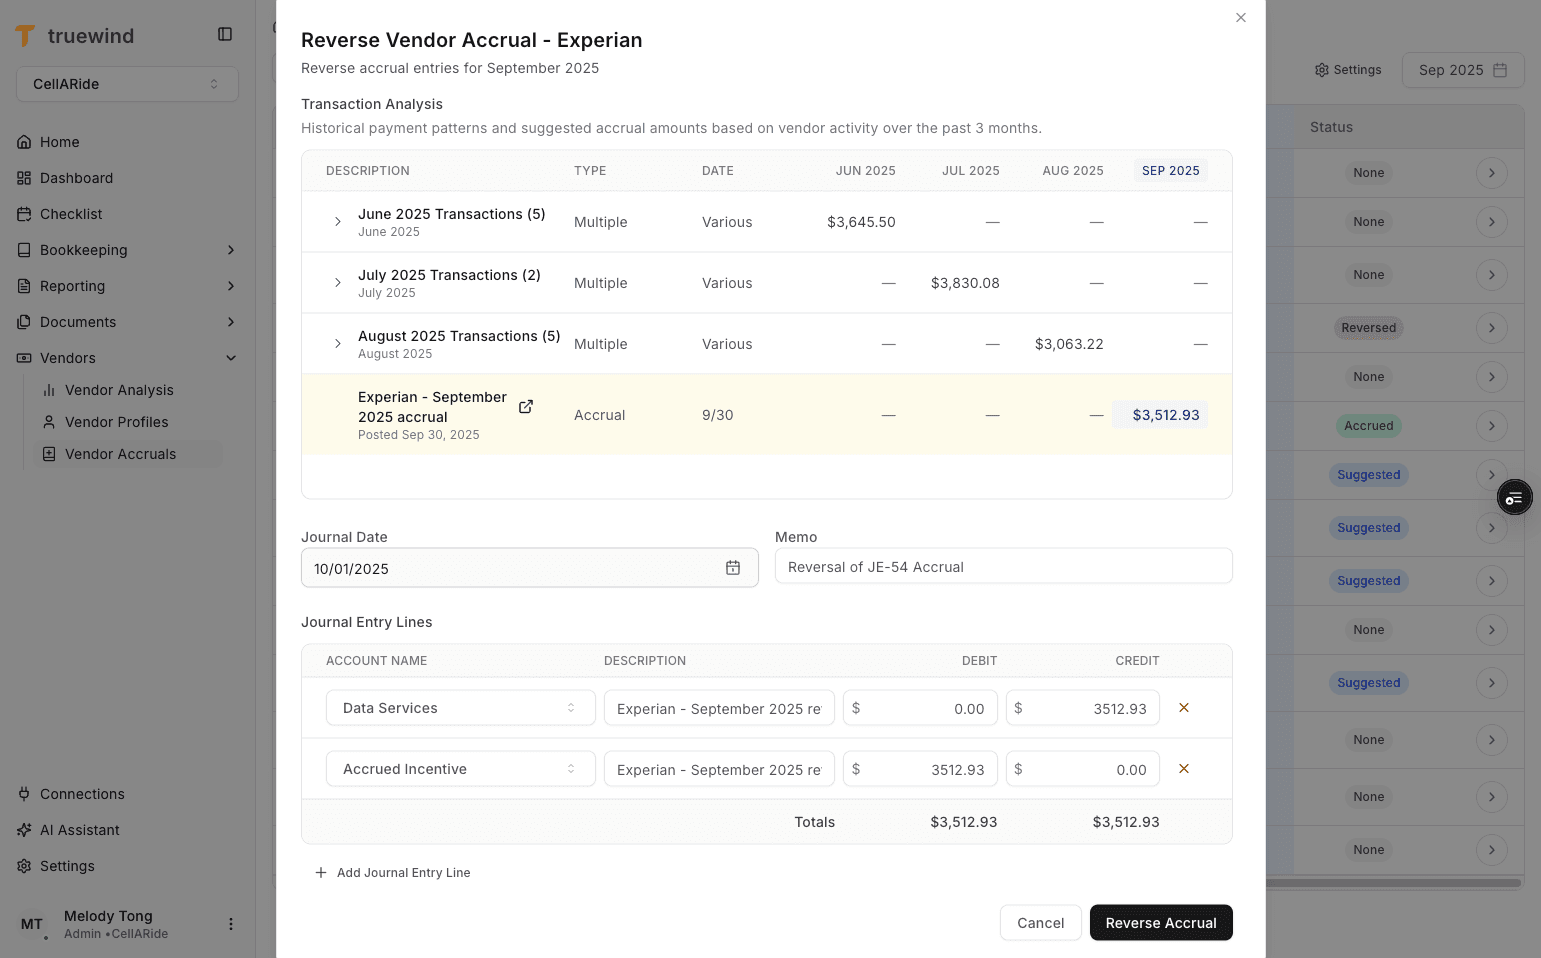
Step 21
Post the reversal when you are ready to unwind the accrual in the ERP for the received bill.
Step 22
The row should change to Reversed after the reversal Journal Entry posts to the ERP.
Step 23
Open the ERP result one final time to confirm the reversal posted exactly as expected.
Check the selected month and status first, because the same vendor can appear differently across periods depending on history, bills, and posting state.
Suggested means the vendor has a zero balance in the current month and Truewind is proposing an accrual amount based on prior-month history.
Post the reversal after the bill arrives and you are ready to reverse the accrued amount for that vendor.
Vendor Accruals relies on prior-month activity, so first-time or sparse vendors may need more manual review before posting.
If a vendor is not in the tracked vendor list, Vendor Accruals will not include it in the monthly table or estimate it automatically.
Use Add Vendor first, select your top vendors, and save the selection so the monthly grid can load data for those vendors.
Open View transactions, inspect the prior-month pivot table, and confirm the selected estimation setting before posting the accrual.
Was this helpful?
Need more help?
Ask for human help about this article and provide any feedback.