What this workflow does
This workflow creates both the accrual and reversal Journal Entries for a selected accrued-expense row from the Accrued Expenses Identification view.
Ask the support agent
Just ask a direct question or search related articles from the Knowledge Base.
Support Center / Accrued Expenses / Overview
Create an accrued expense when a month-end cost needs both an accrual and a reversal entry, resulting in posted accrual and reversal Journal Entries for the selected expense.
Step 1
Start in Truewind on Bookkeeping so you can navigate into Accrued Expenses.
Step 2
This opens the Accrued Expenses feature and loads the current posting workflow.

Step 3
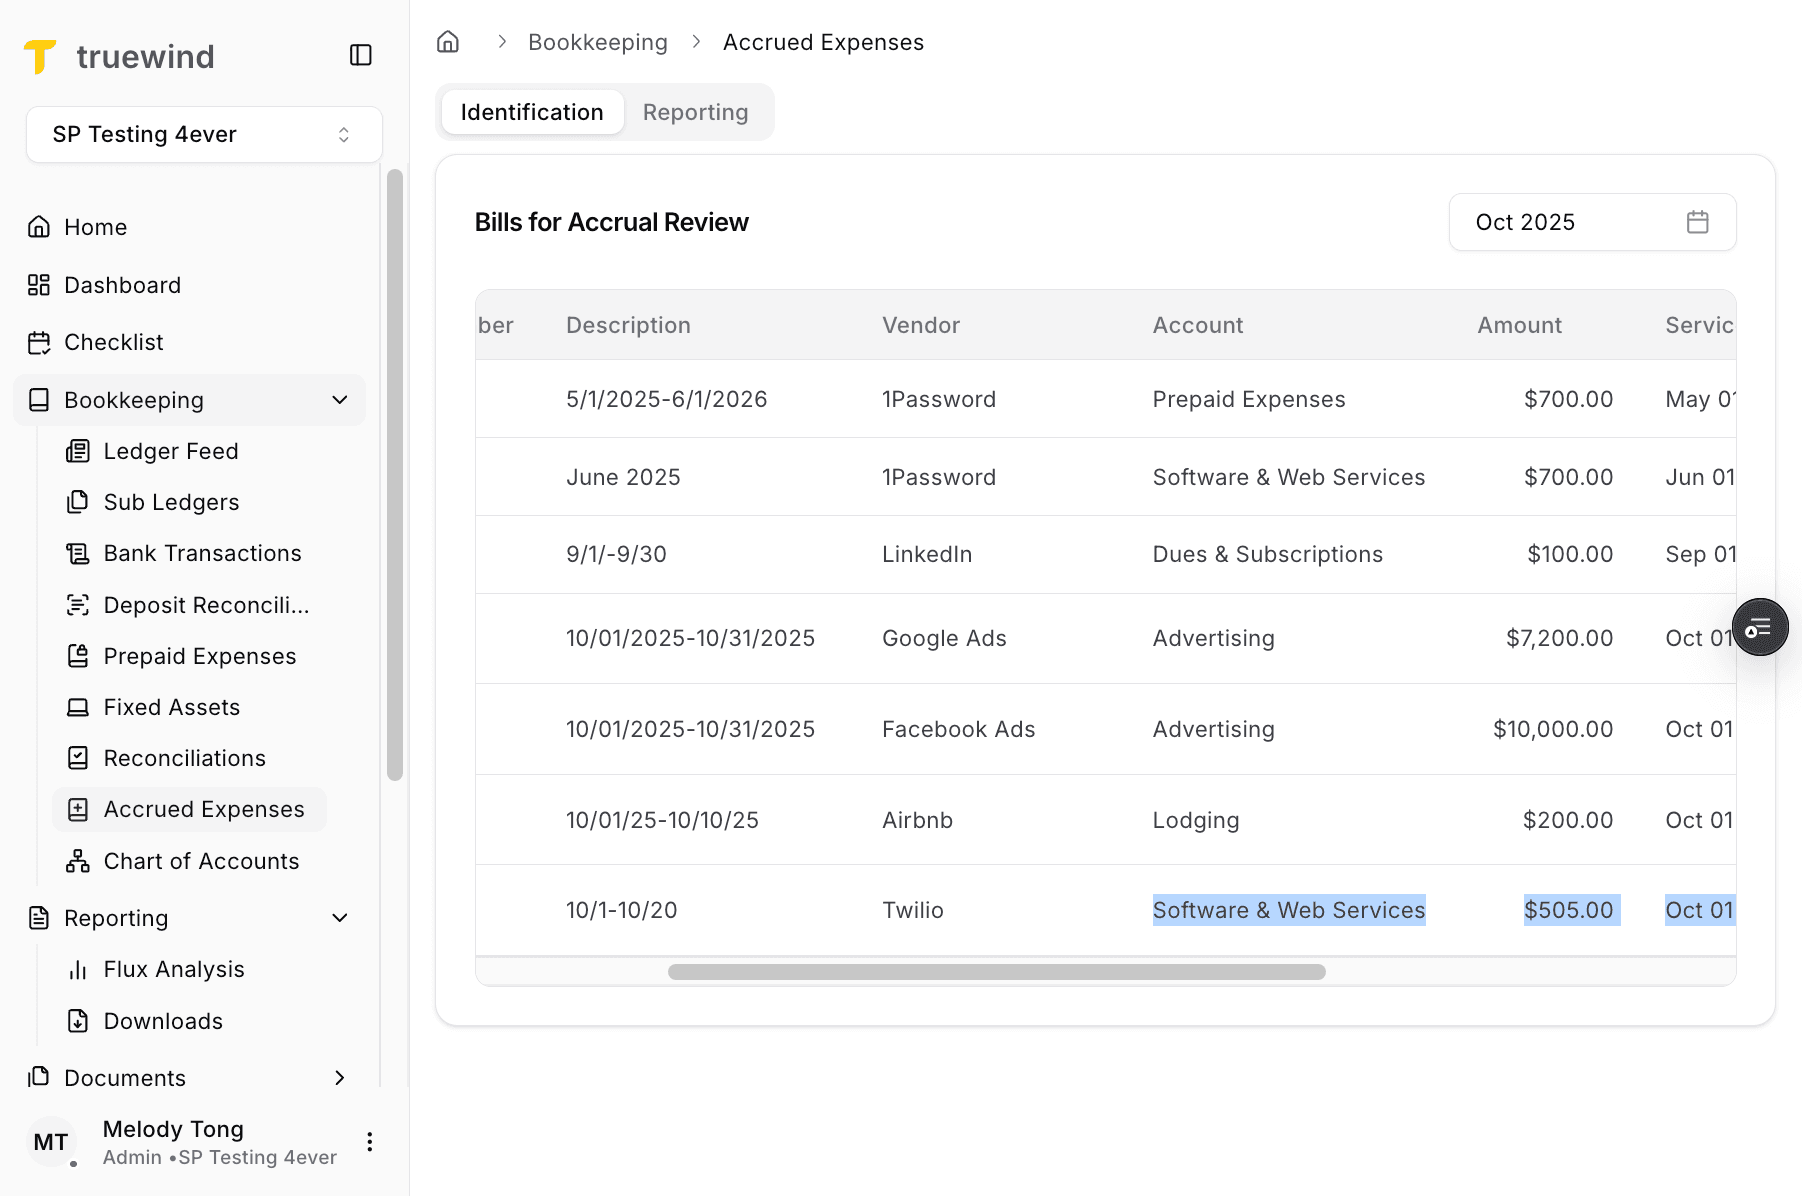
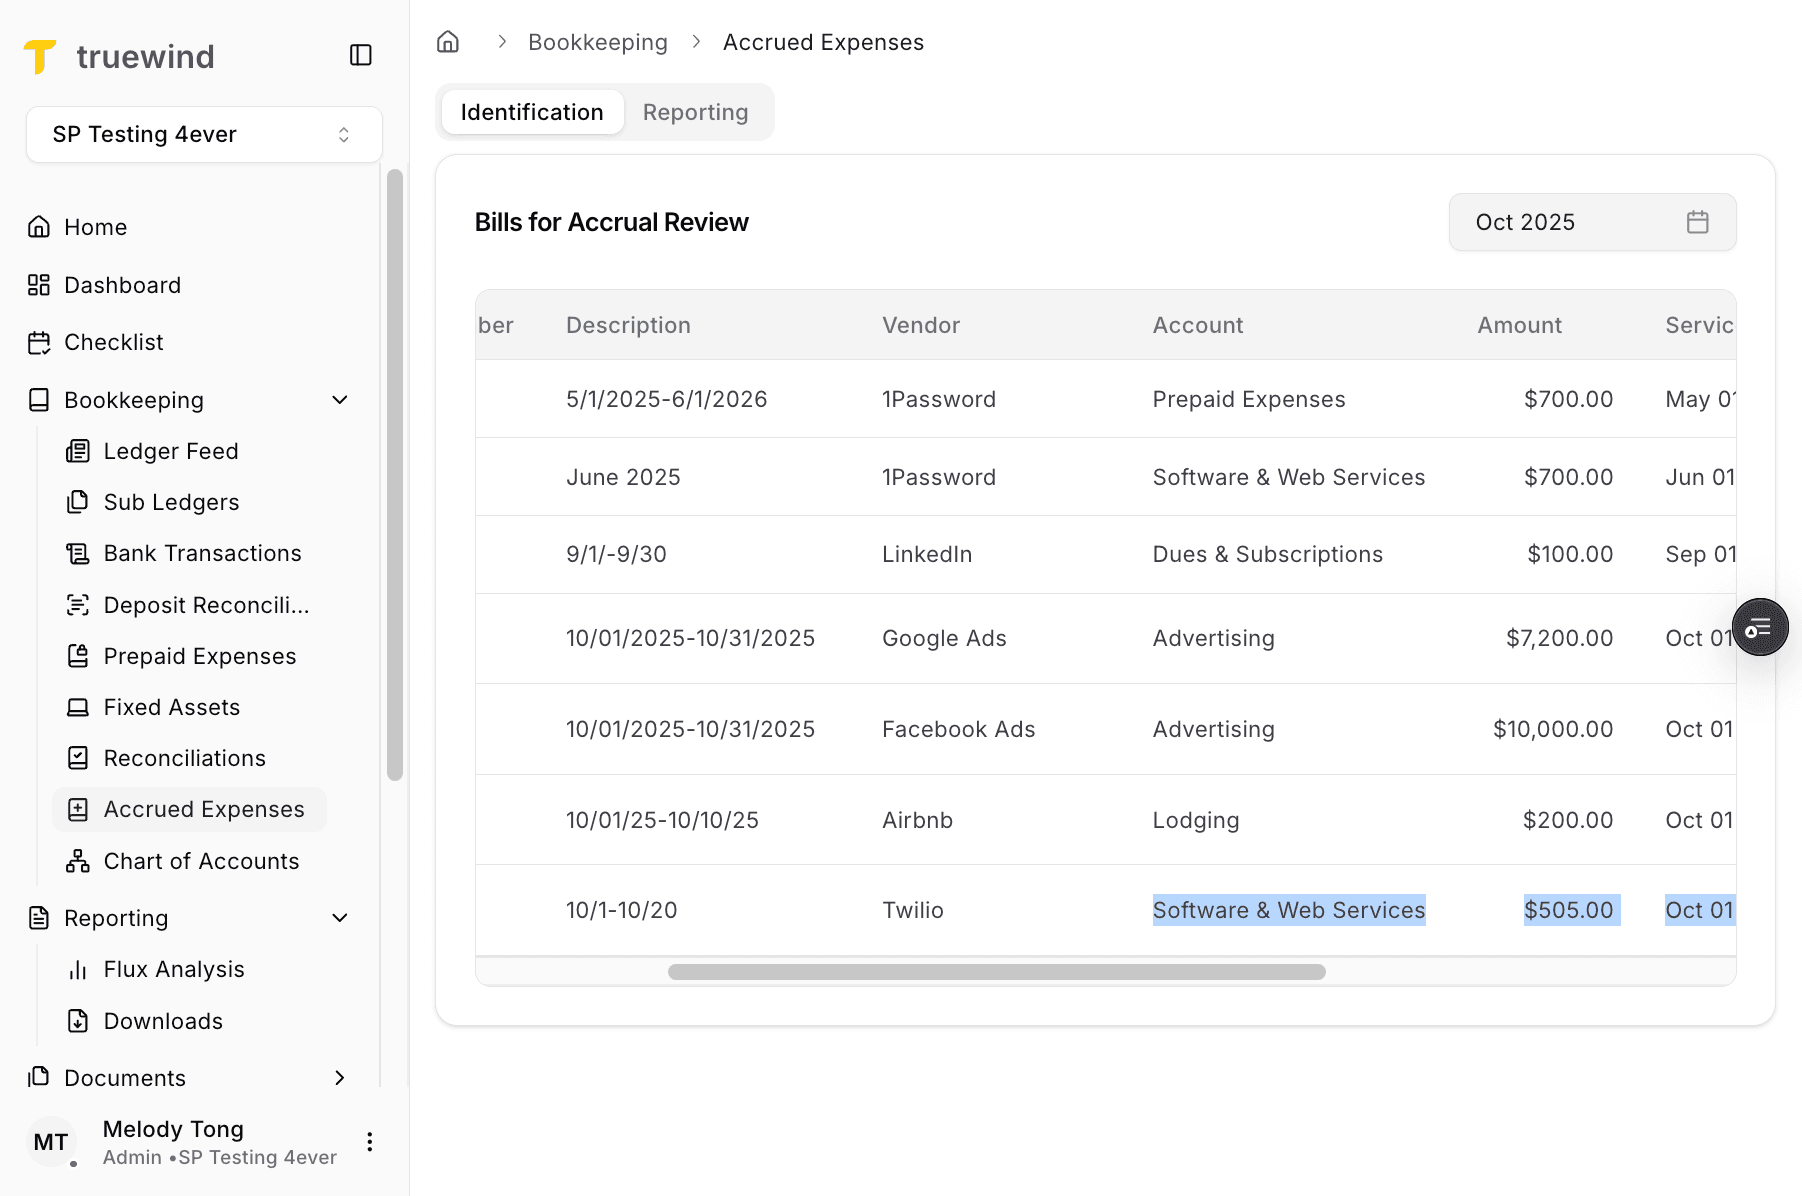
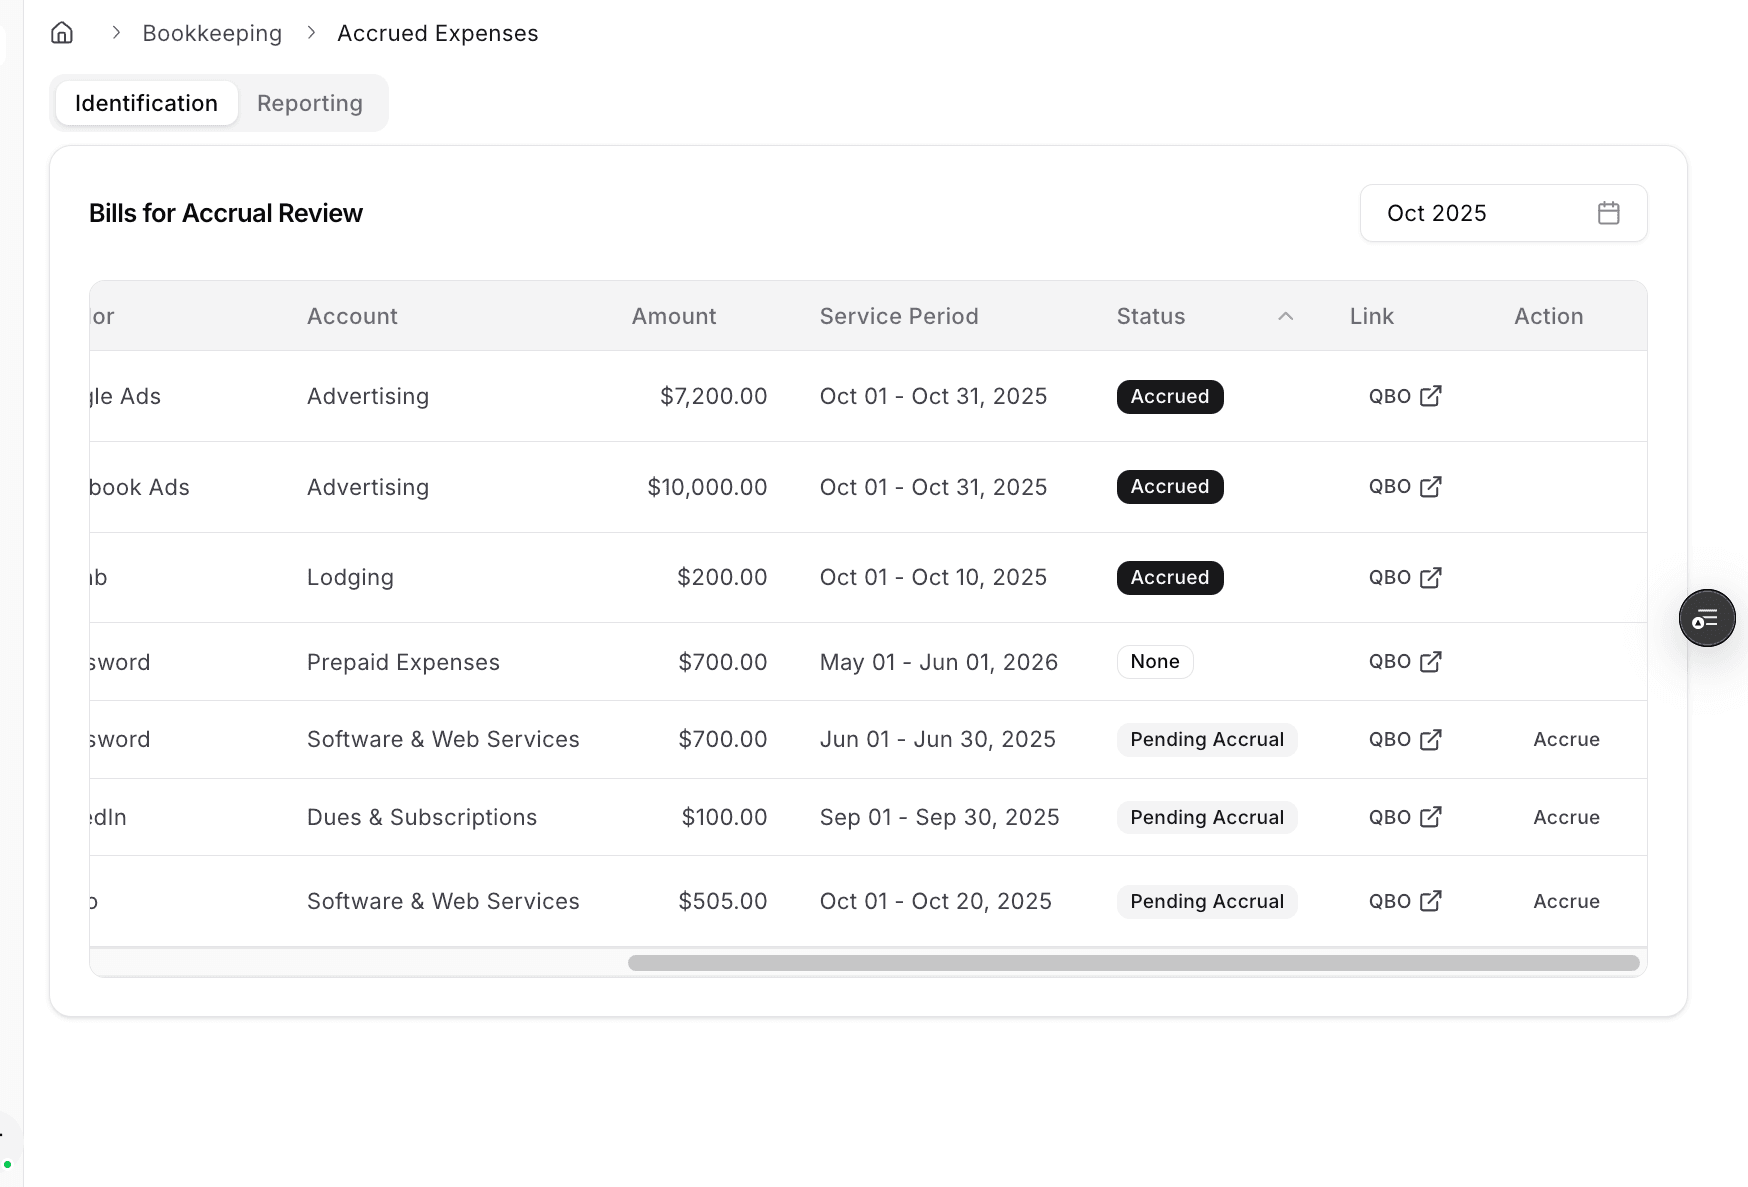
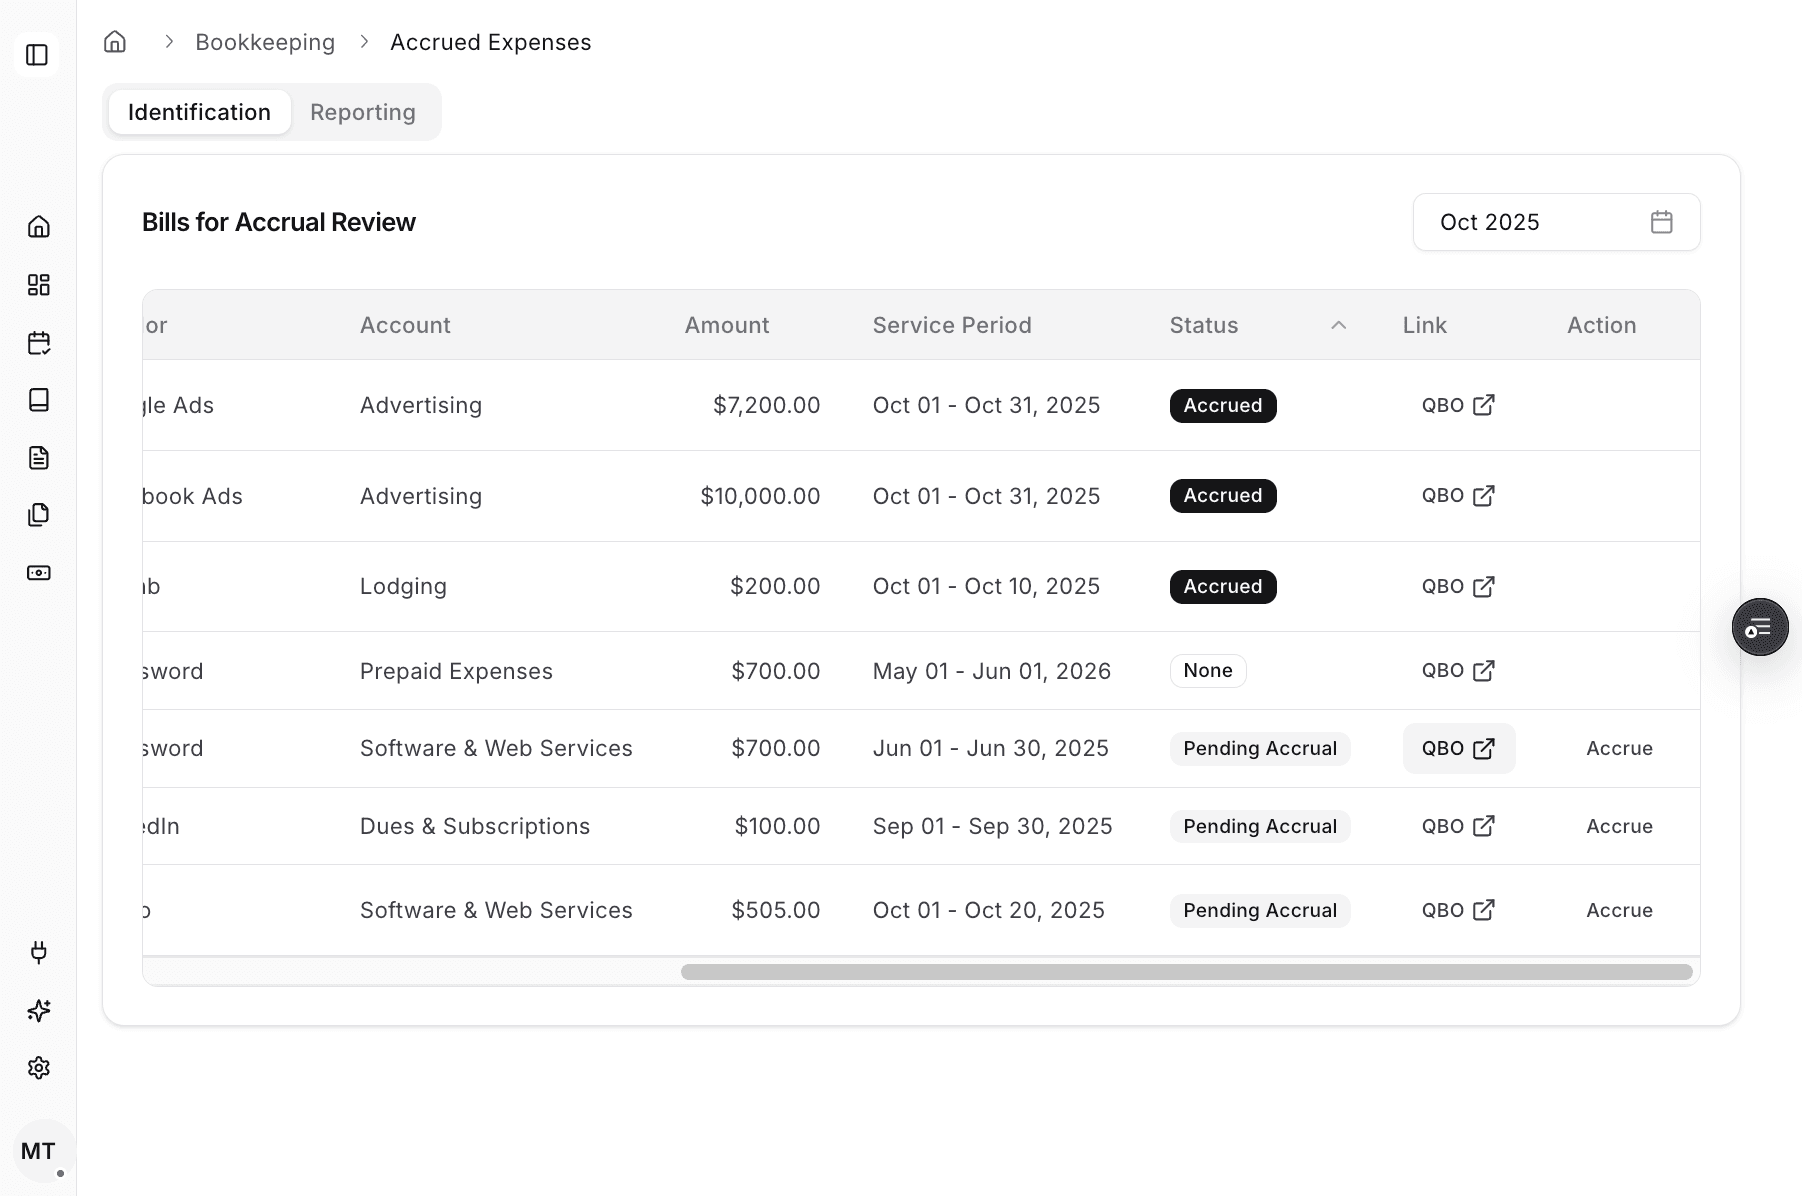
Use Identification to review the rows available for accrual posting.

Step 4
Select the accounting month before reviewing rows, because the posting list changes with the selected period.
Step 5
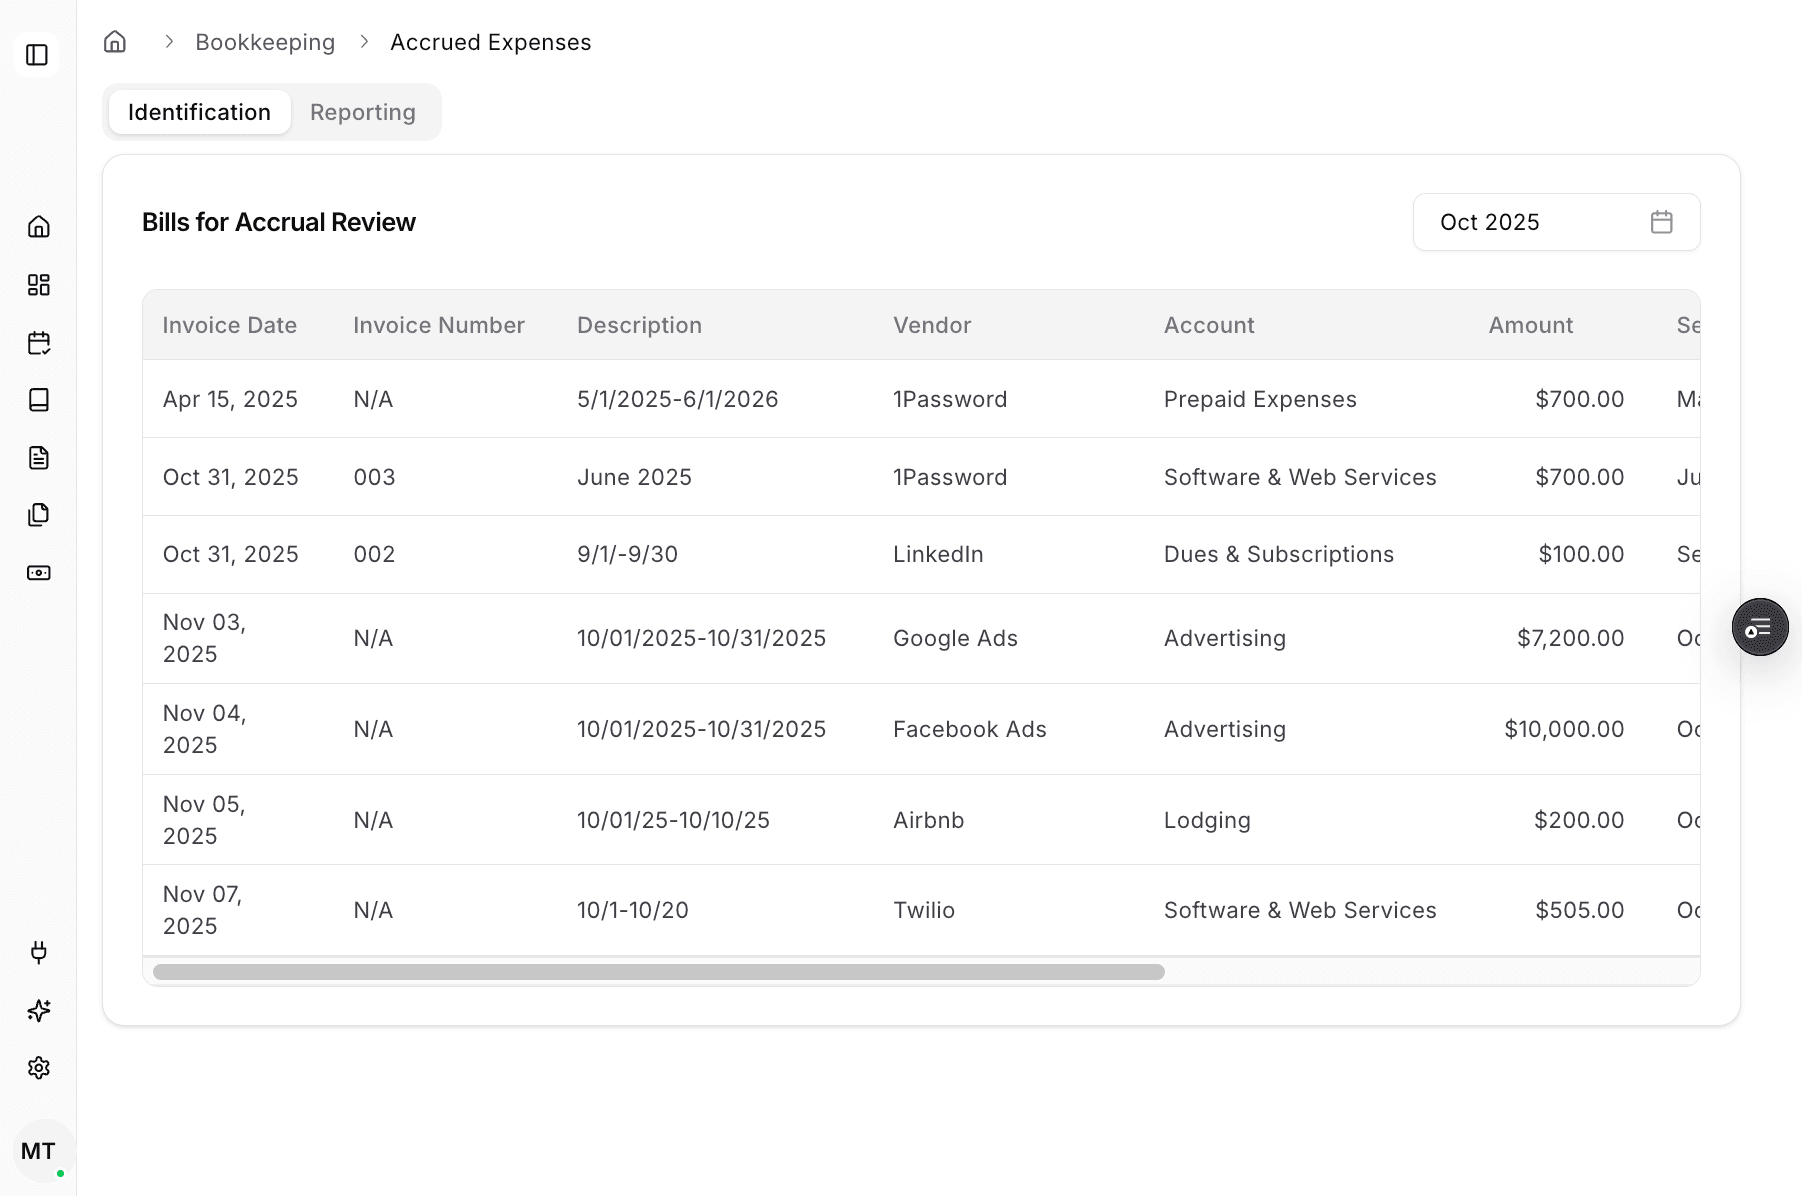
The Identification table is where you choose the row that should produce the accrual and reversal entries.
Step 6
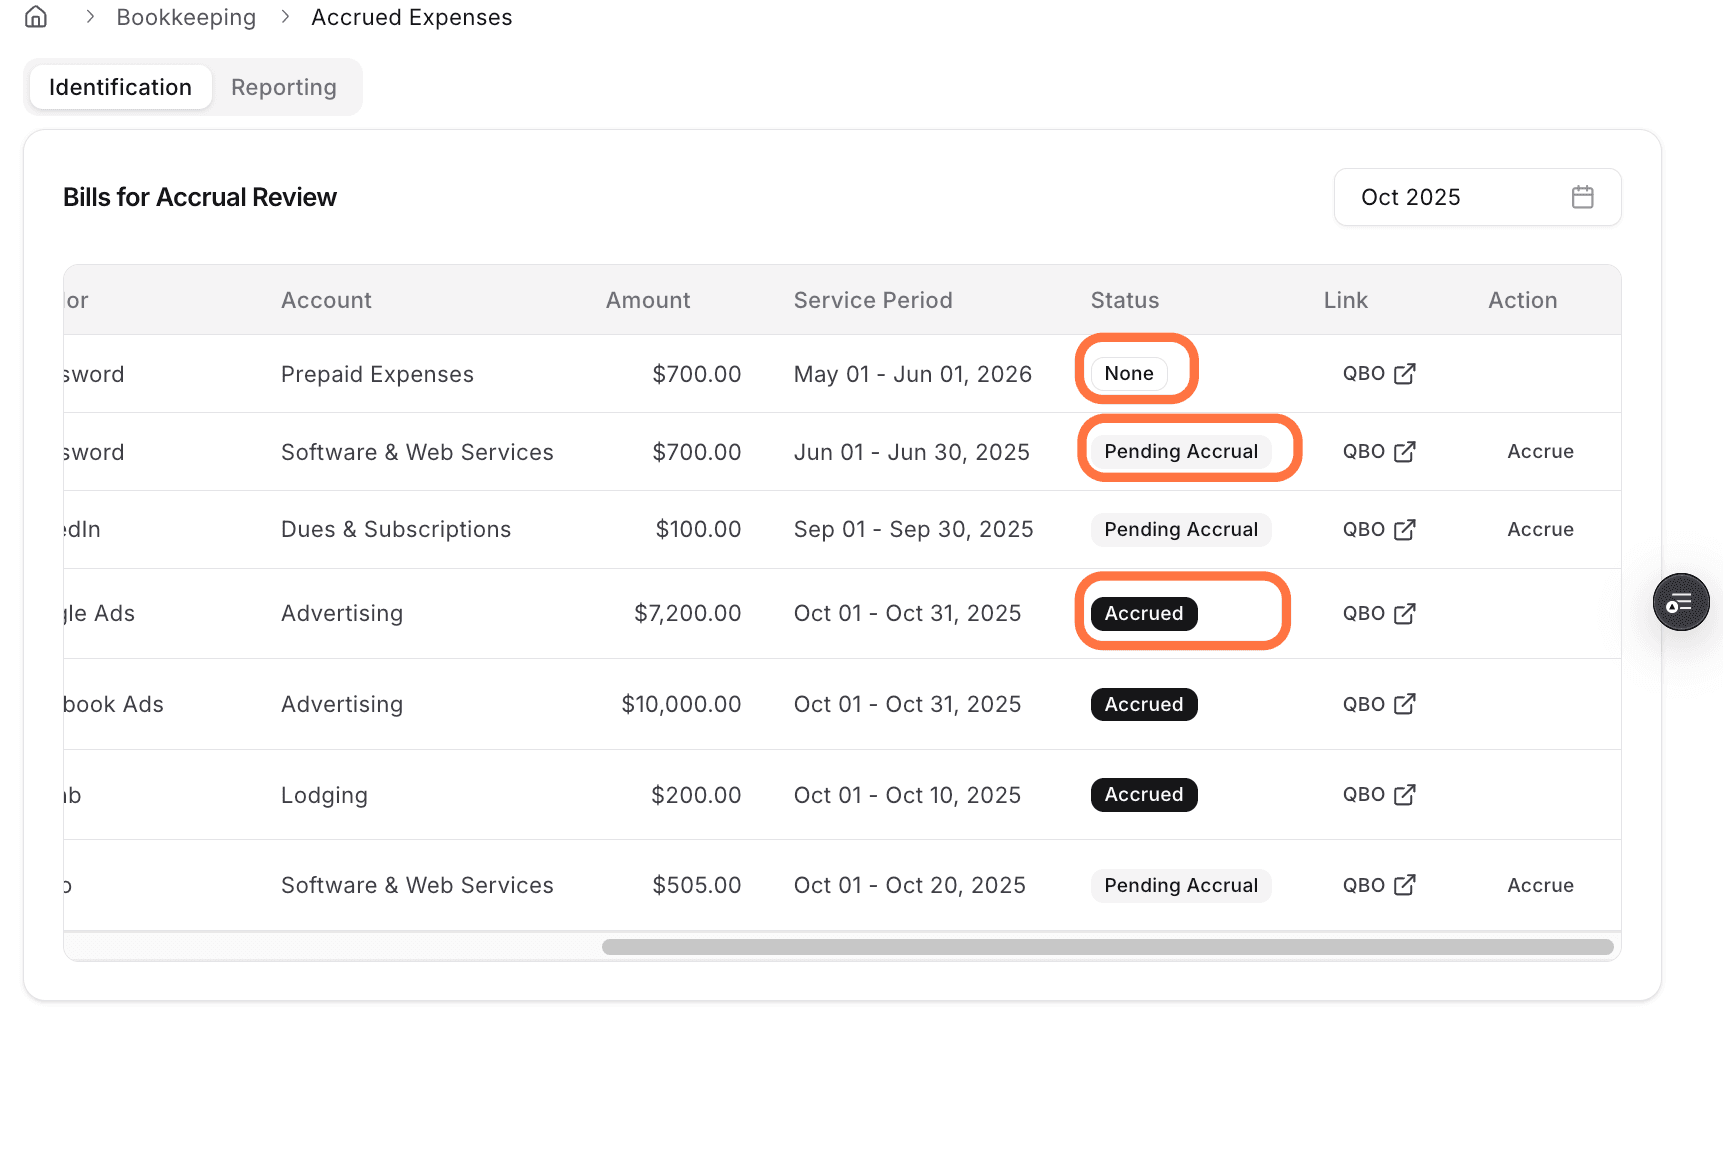
The status helps you understand whether the row is still pending or has already been accrued.
Step 7
The ERP link column is where you verify the posted result after the entries are created.
Step 8
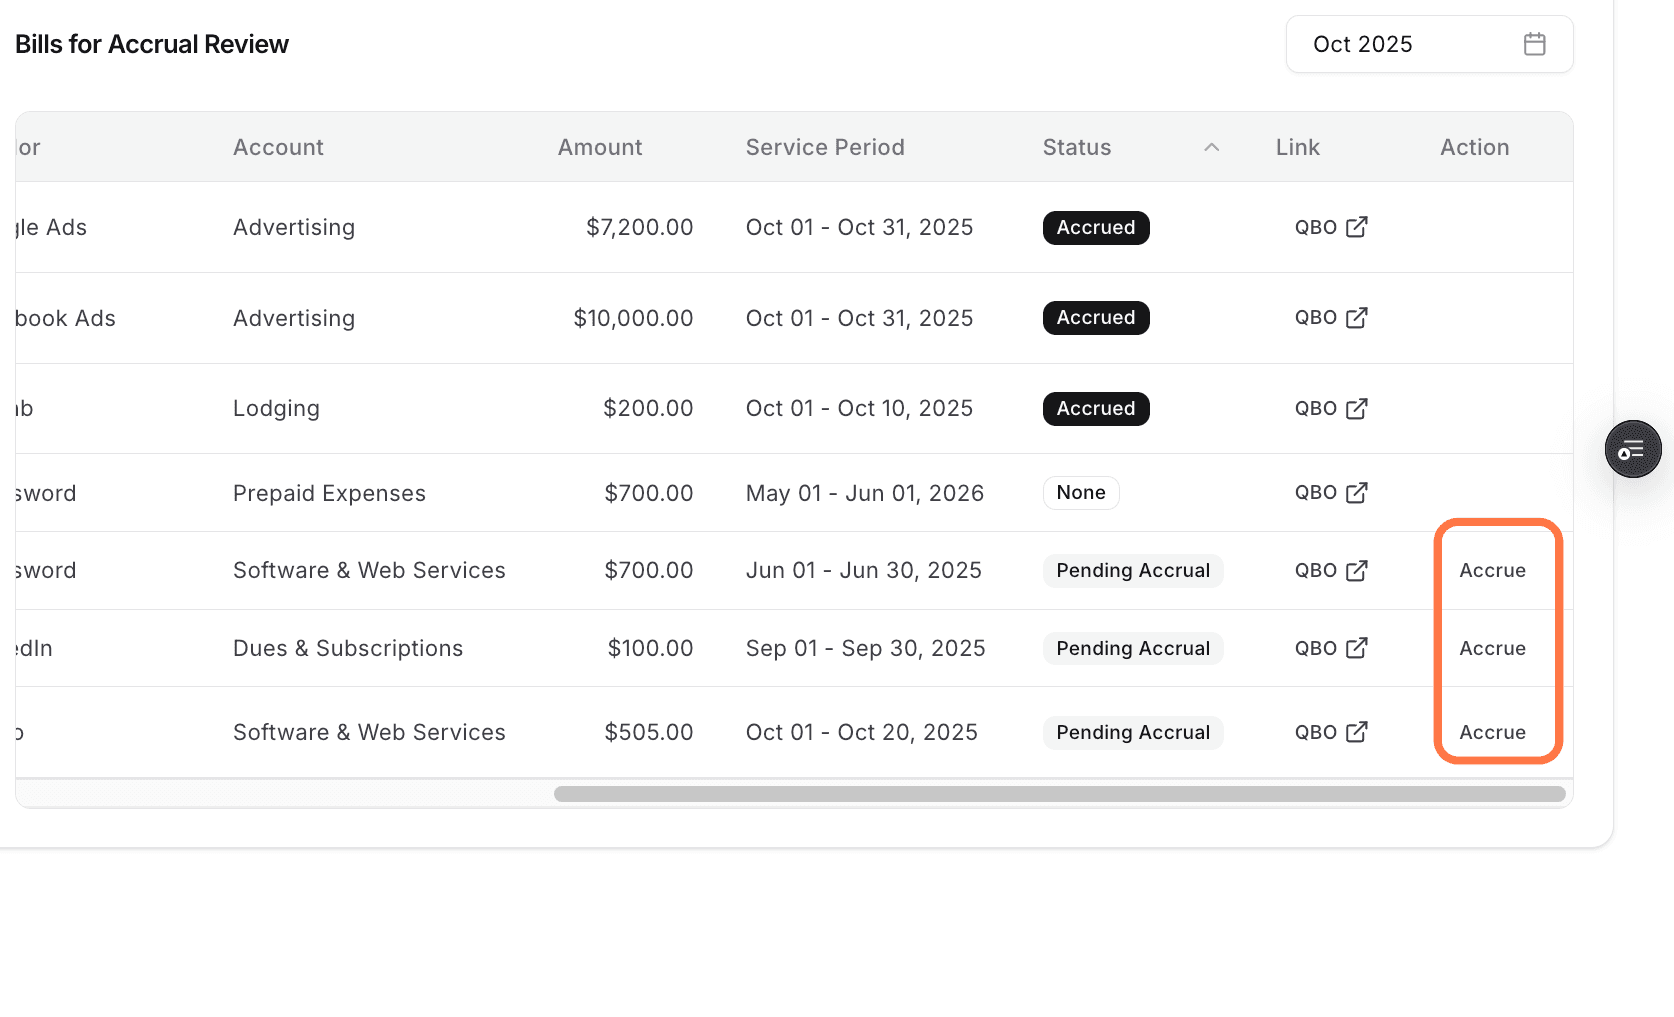
The row actions are where you start the posting flow for the selected accrued expense.
Step 9
Open the posting workflow for the row you want to accrue before reviewing the drafted entries.
Step 10
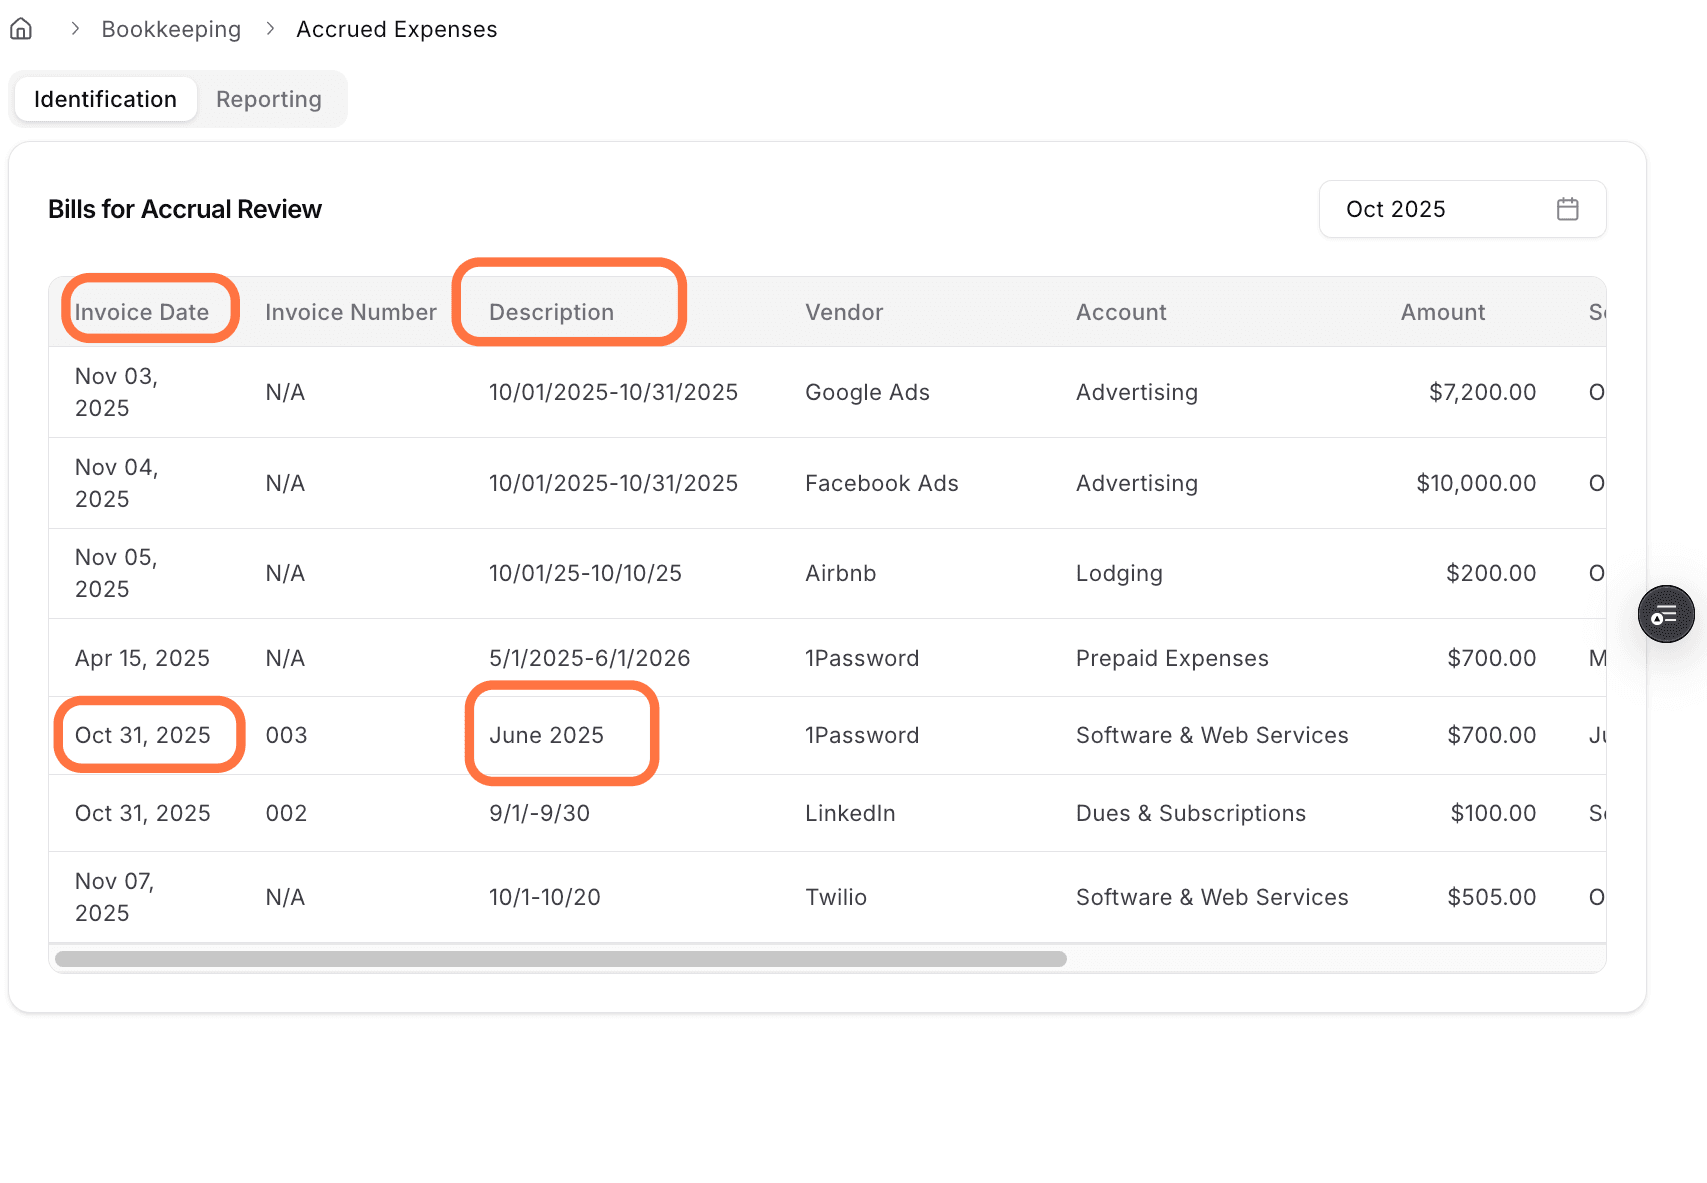
Truewind converts the selected month into a specific service period, so confirm the dates before posting.
Step 11
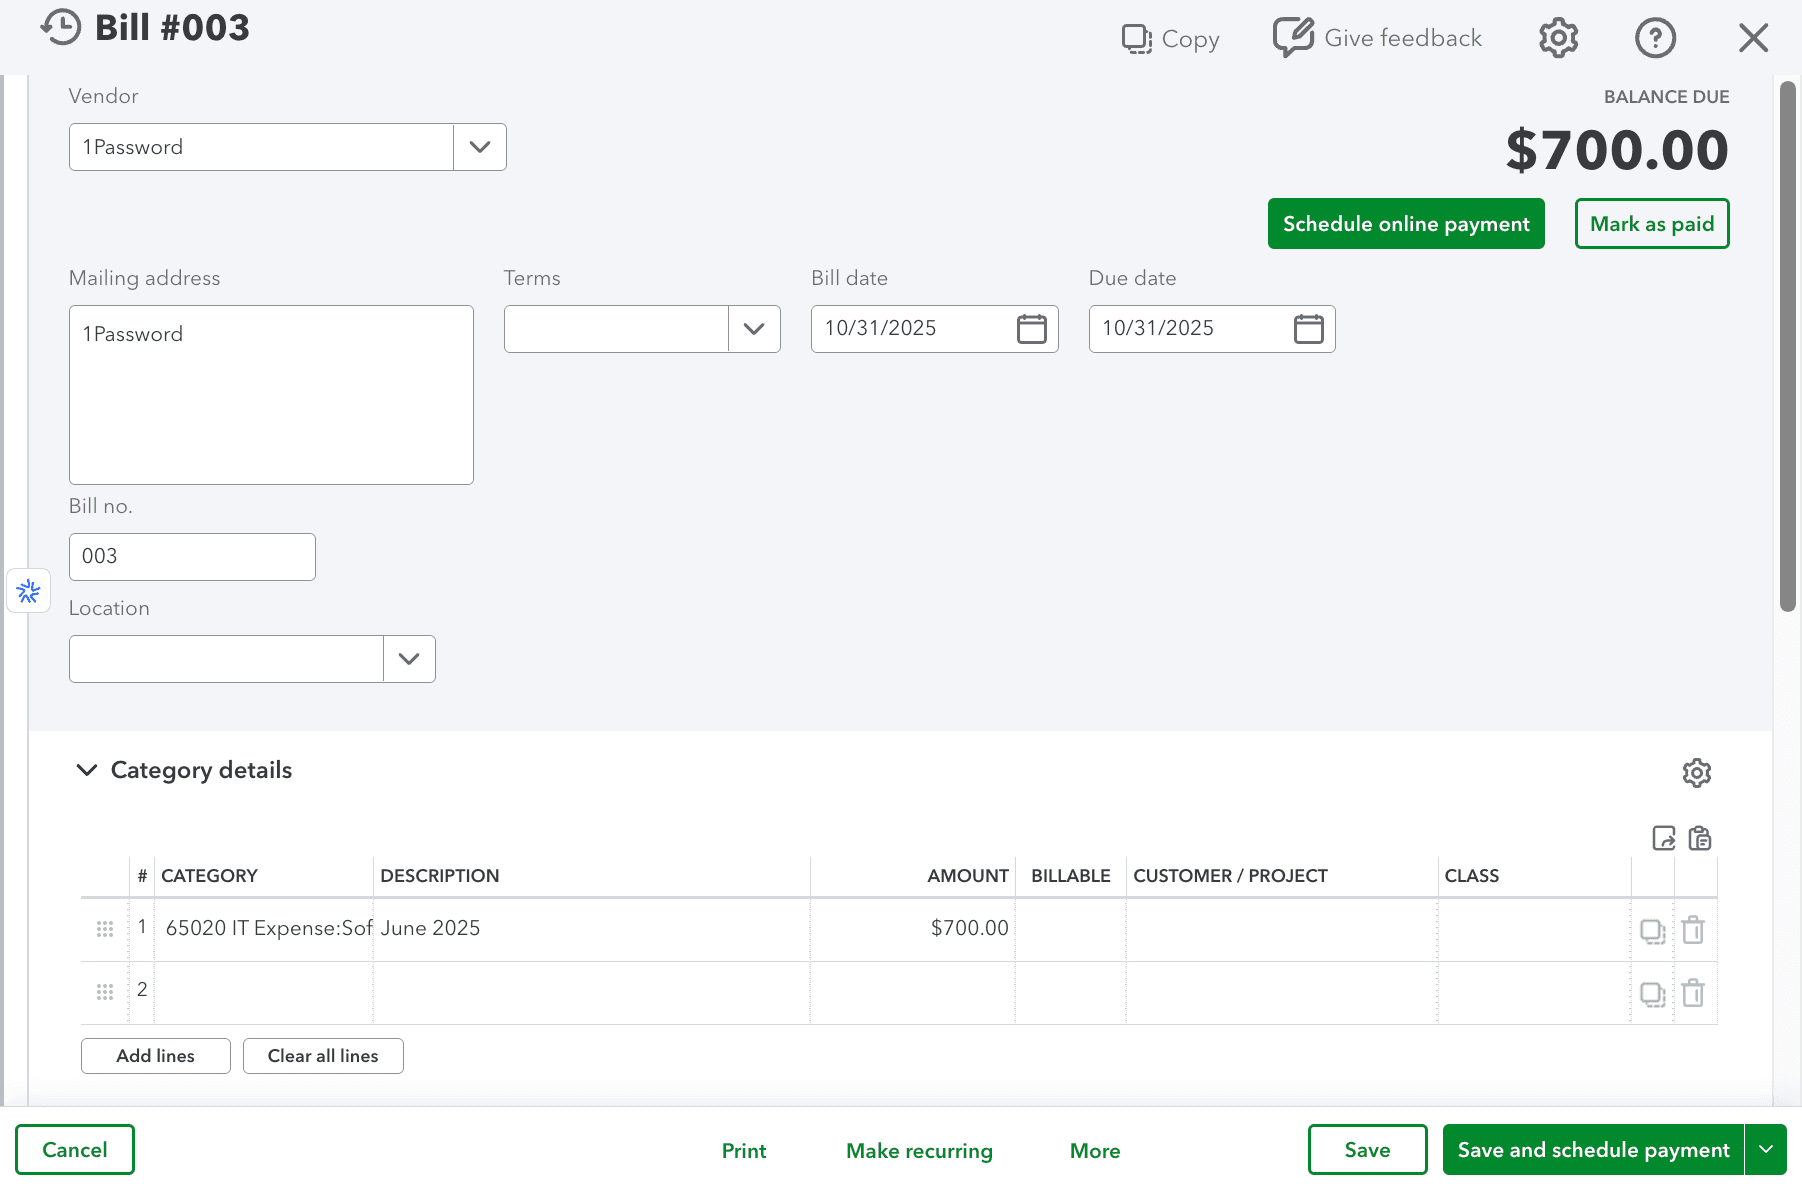
Use the ERP link when you want to compare the in-product draft with the accounting-system result.
Step 12
Category details show the accounting context for the row before you post the entries.
Step 13
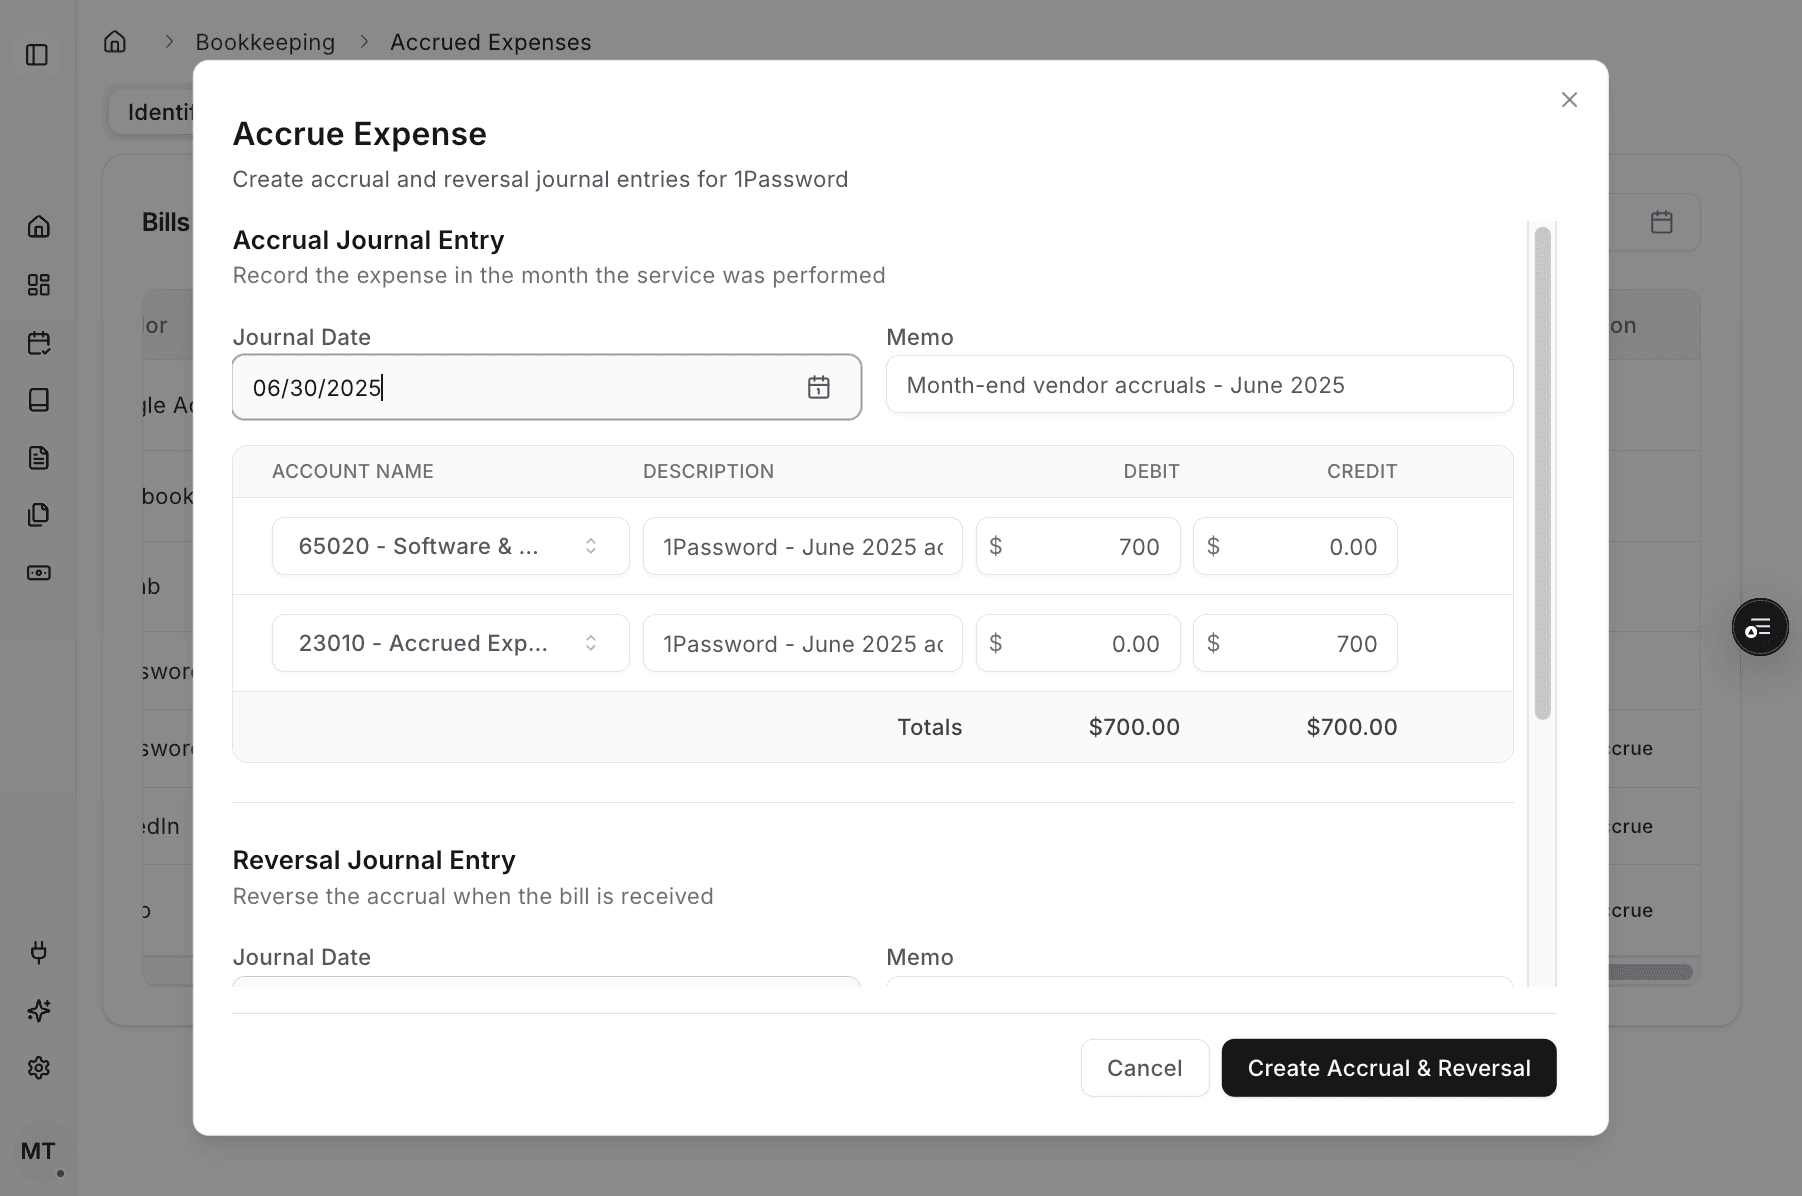
This opens the drafted accrual and reversal entries for review before posting.

Step 14
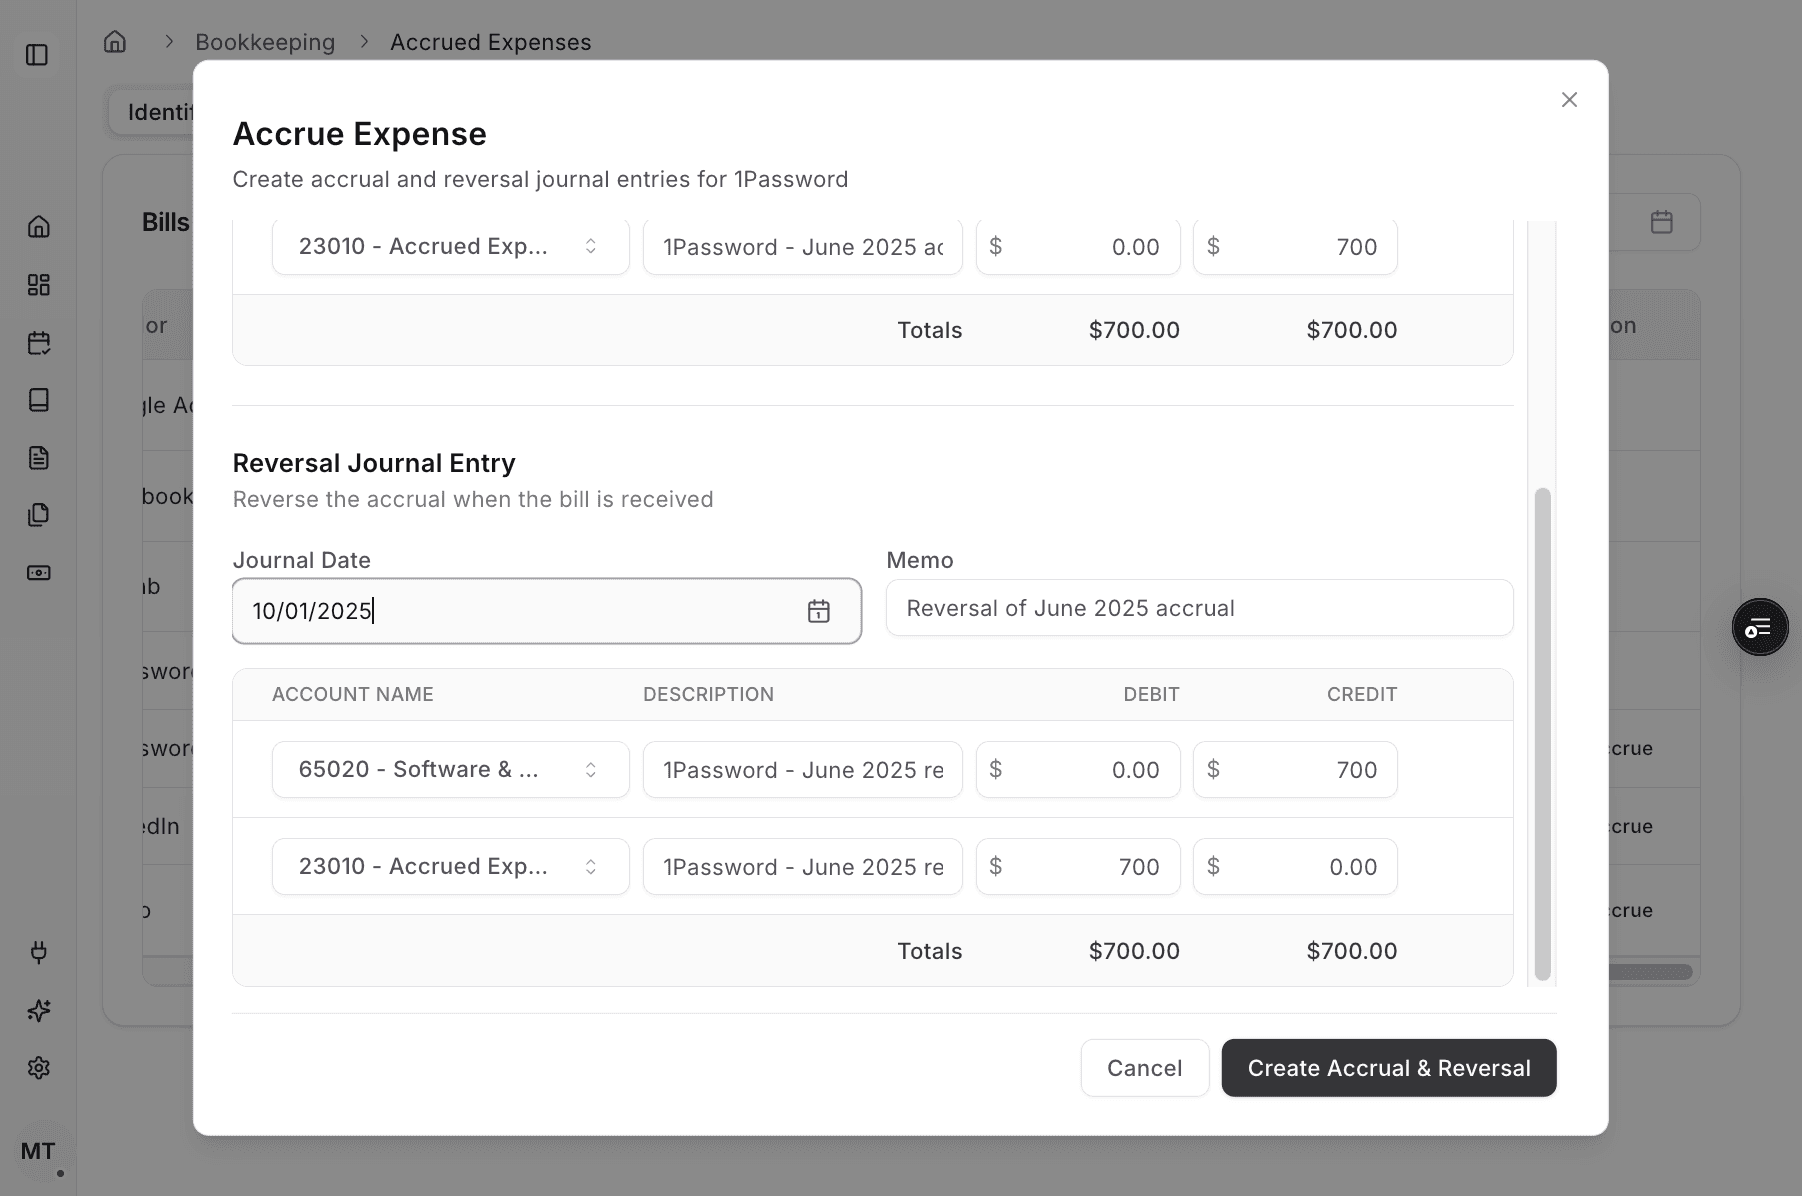
Confirm the auto-generated accrual entry fields before creating the ERP posting.
Step 15
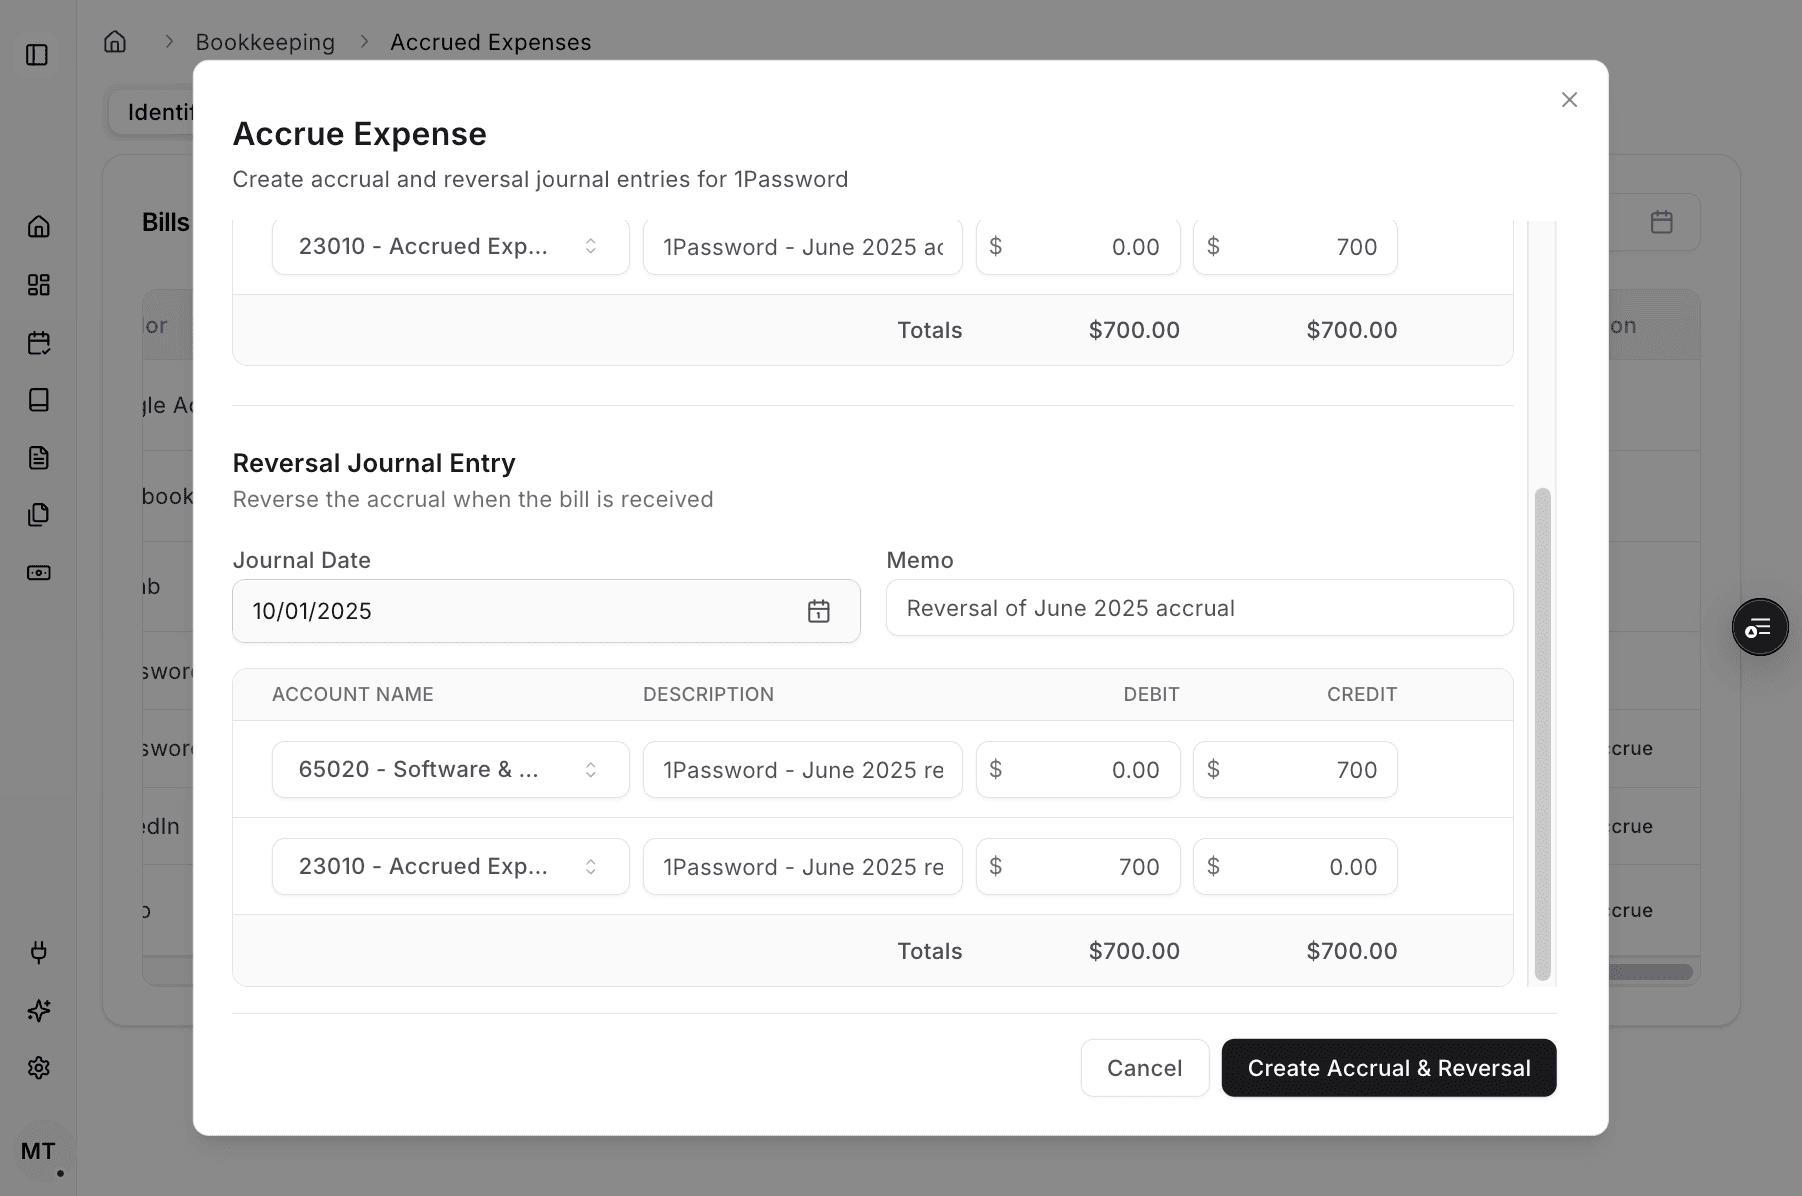
Confirm the reversal draft too, because both entries are posted together from this workflow.
Step 16
Post both Journal Entries only after the accrual and reversal drafts look correct.
Step 17
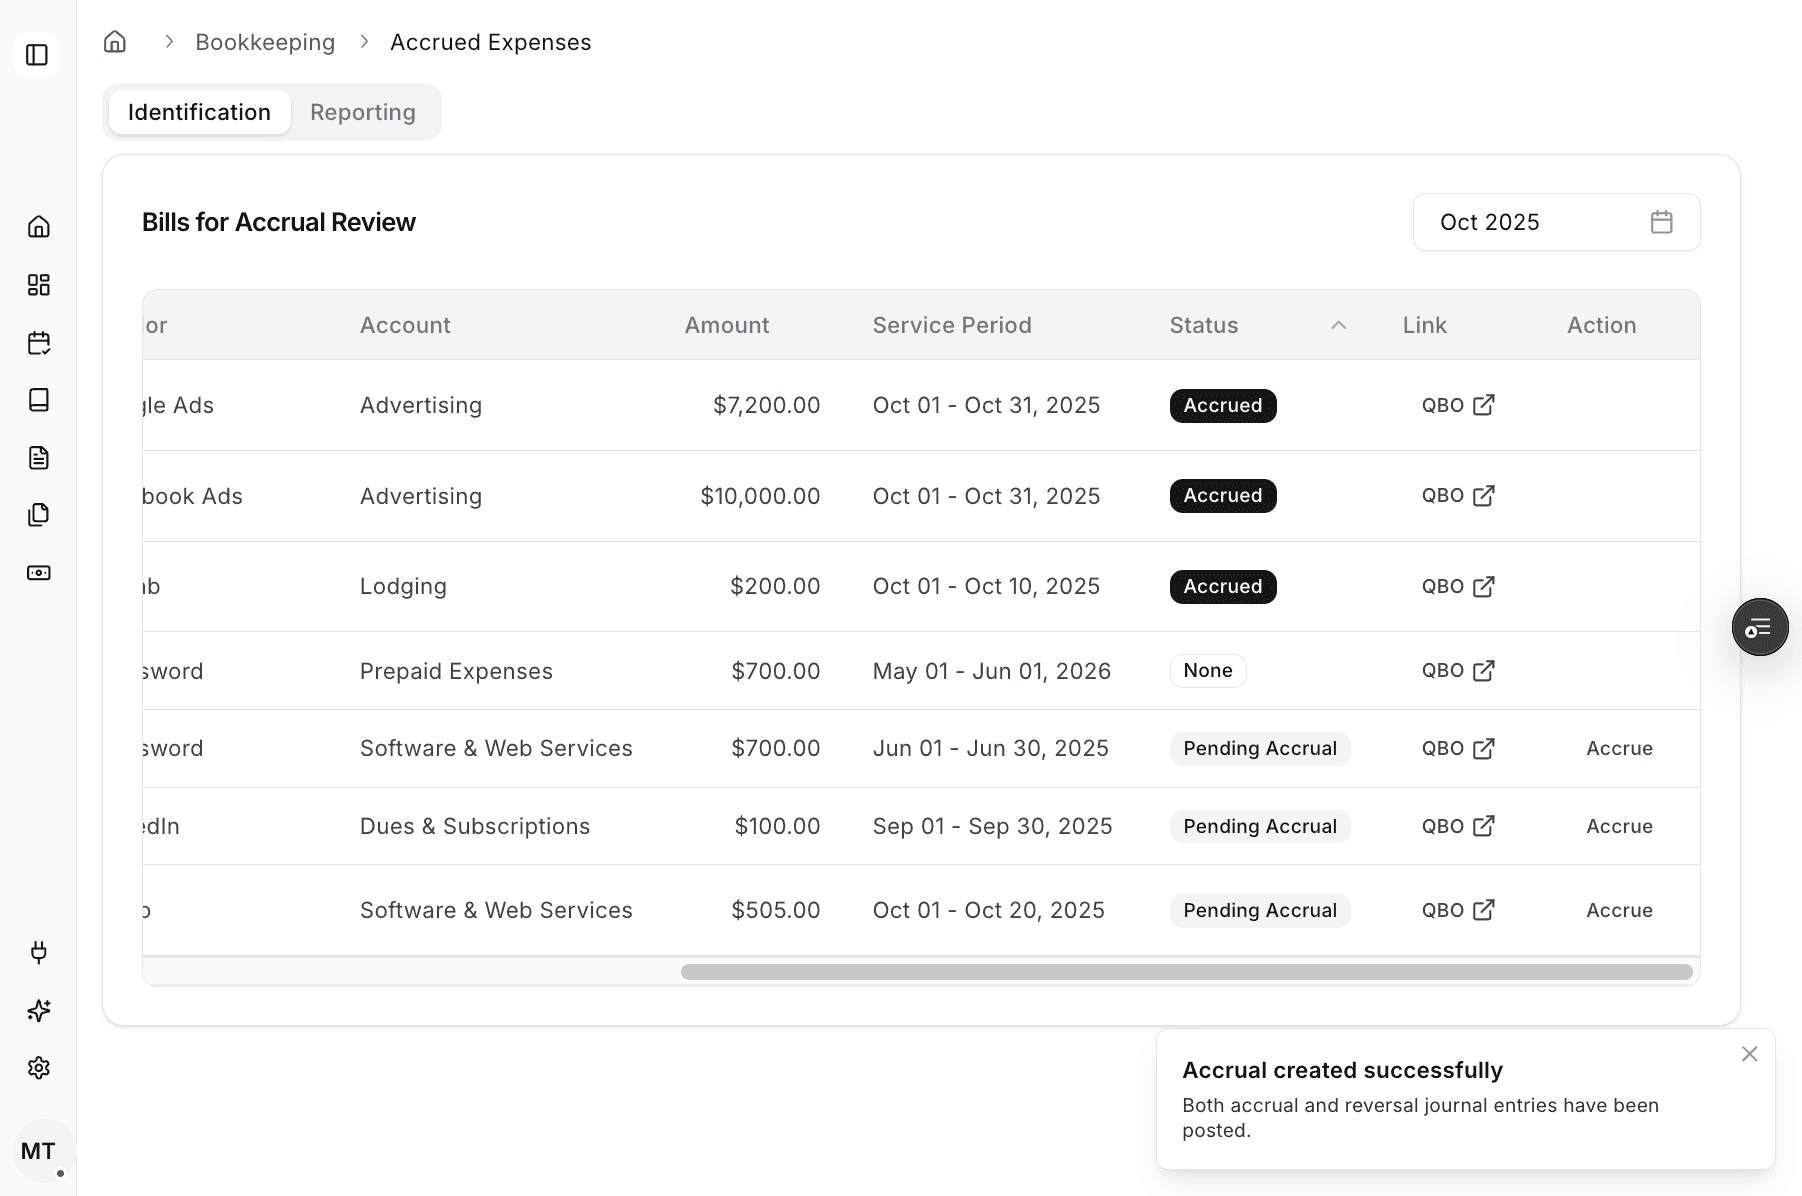
Wait for the success confirmation so you know the entries were posted.
Step 18
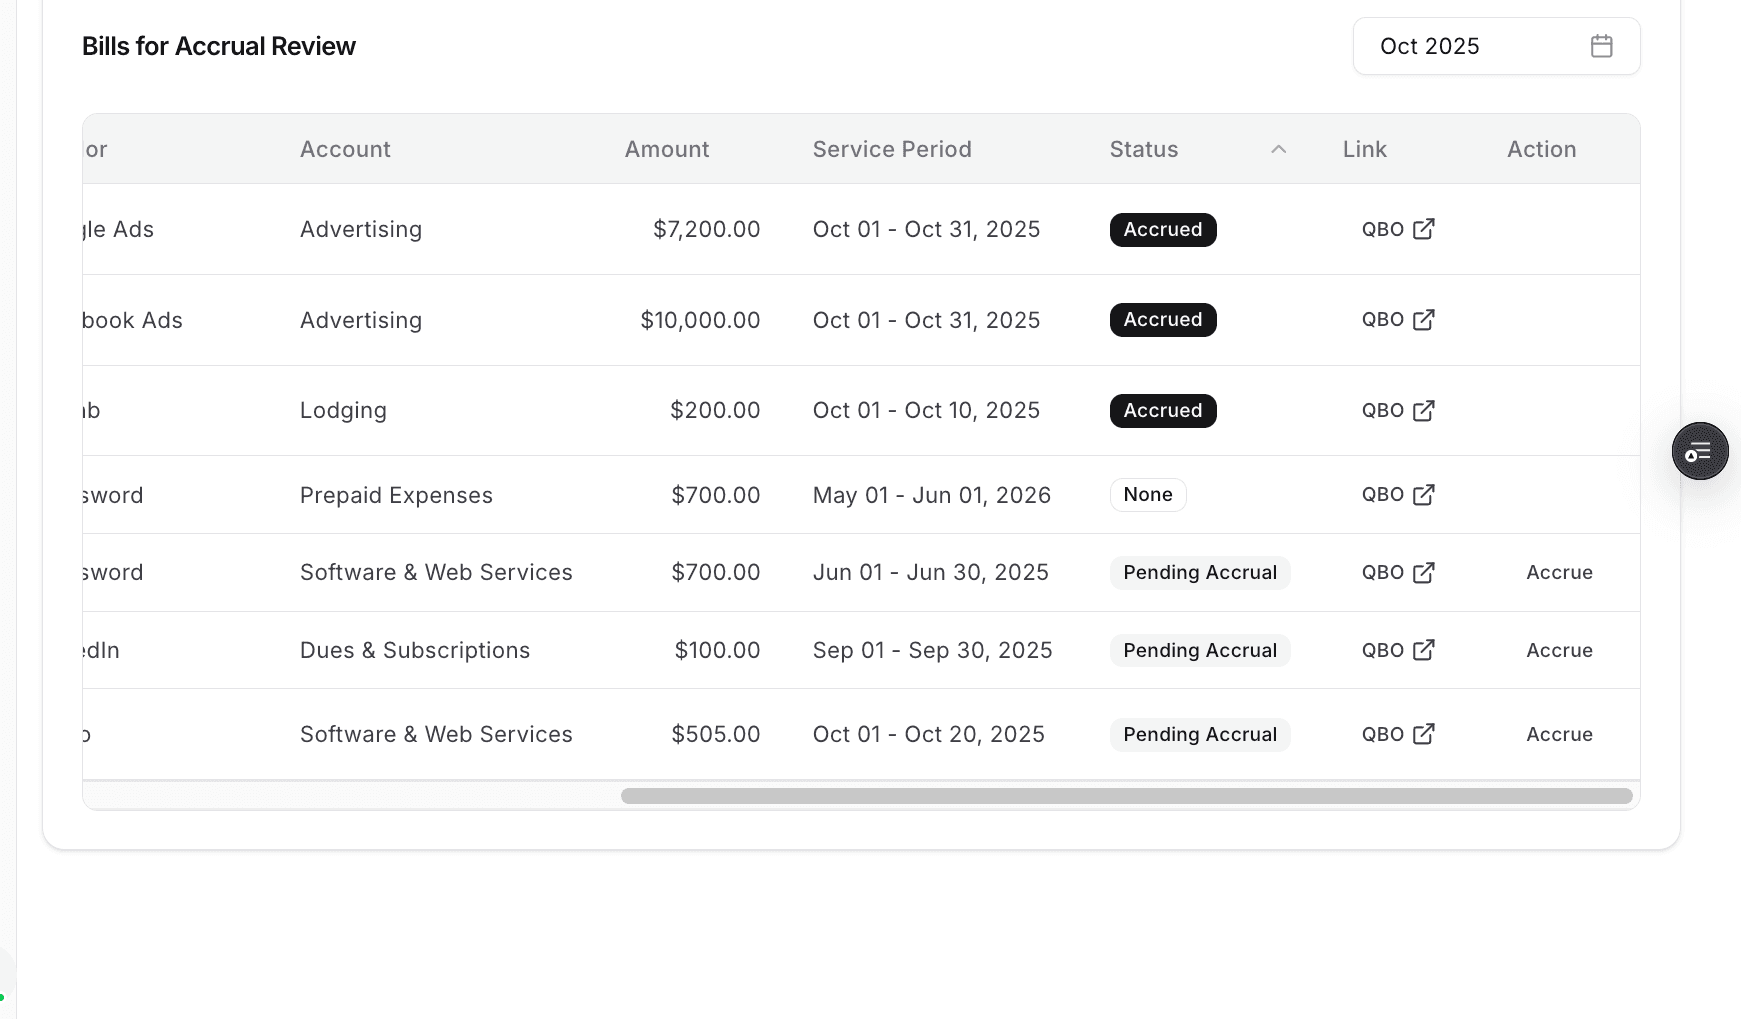
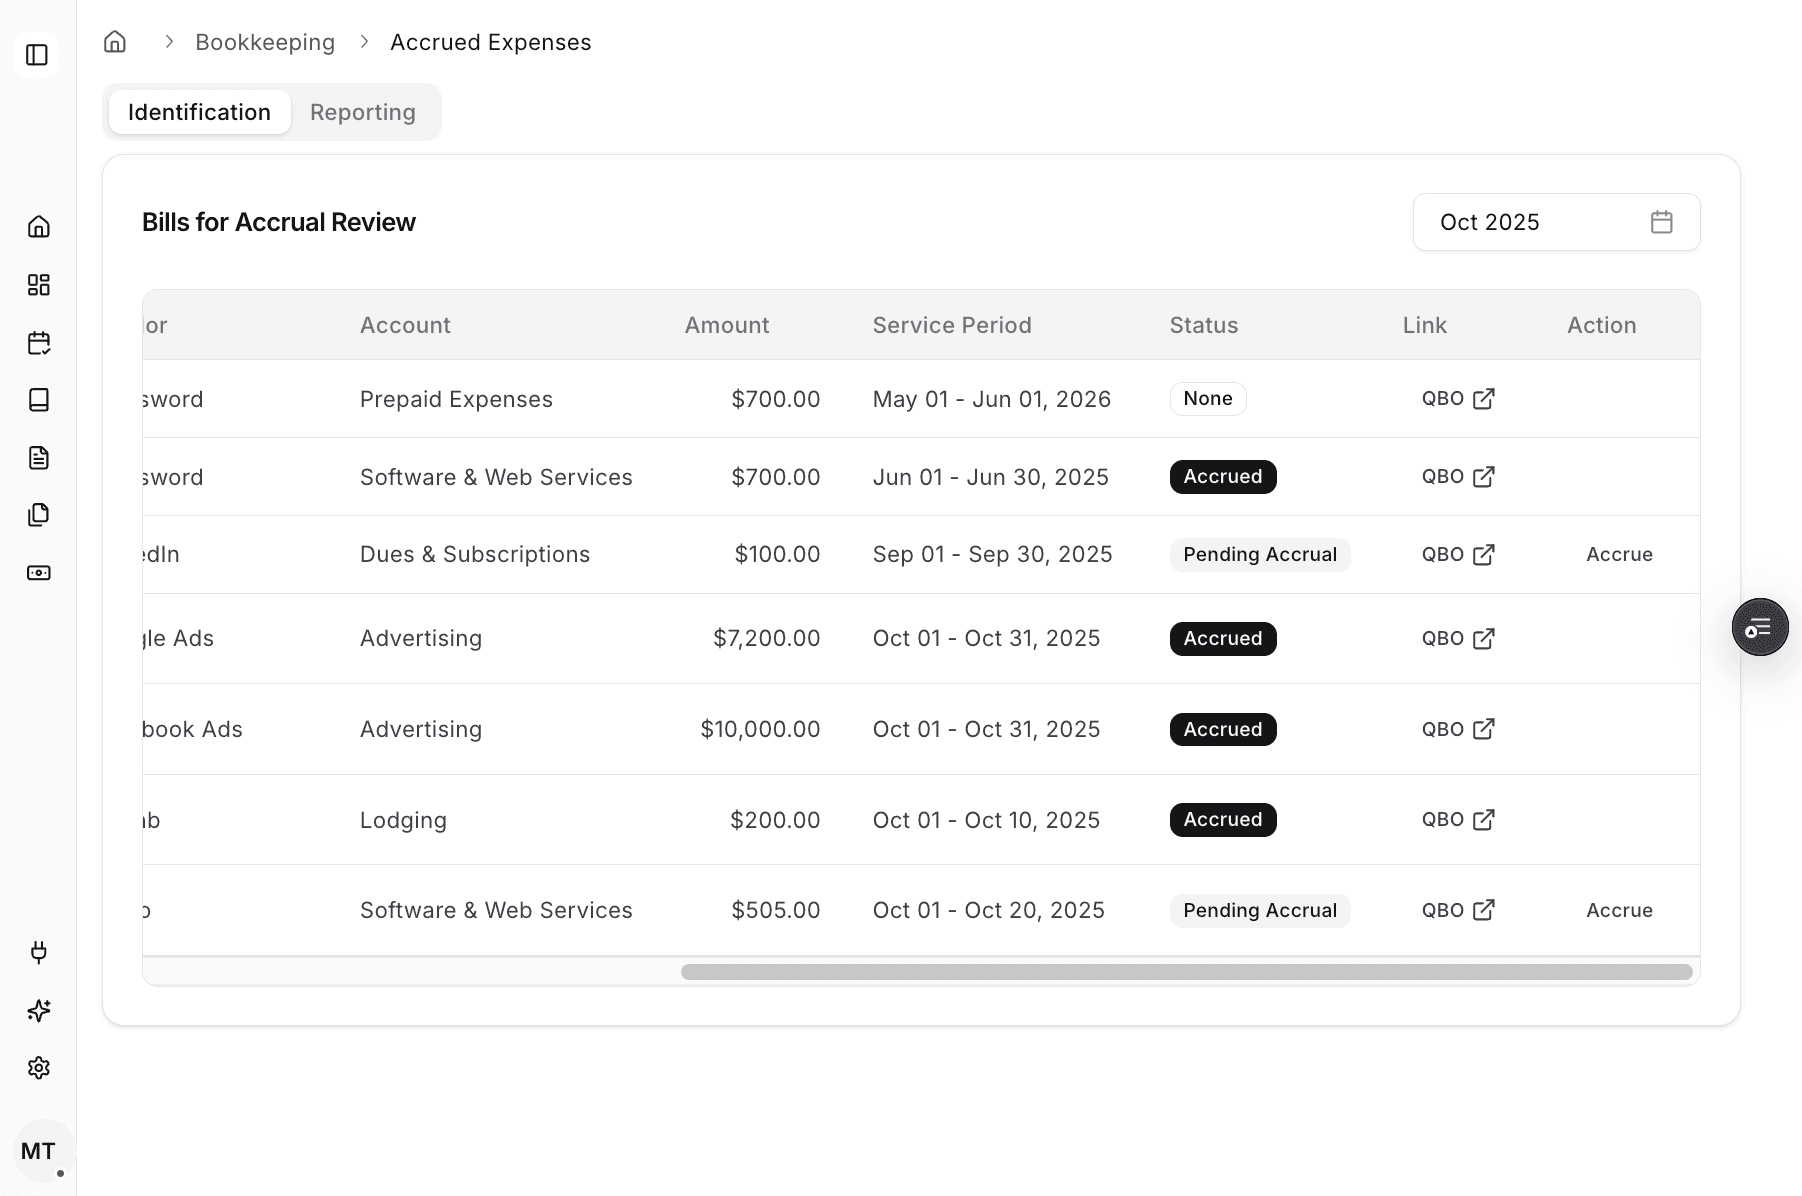
The row status should change from Pending Accrual to Accrued after the Journal Entries are created.
Step 19
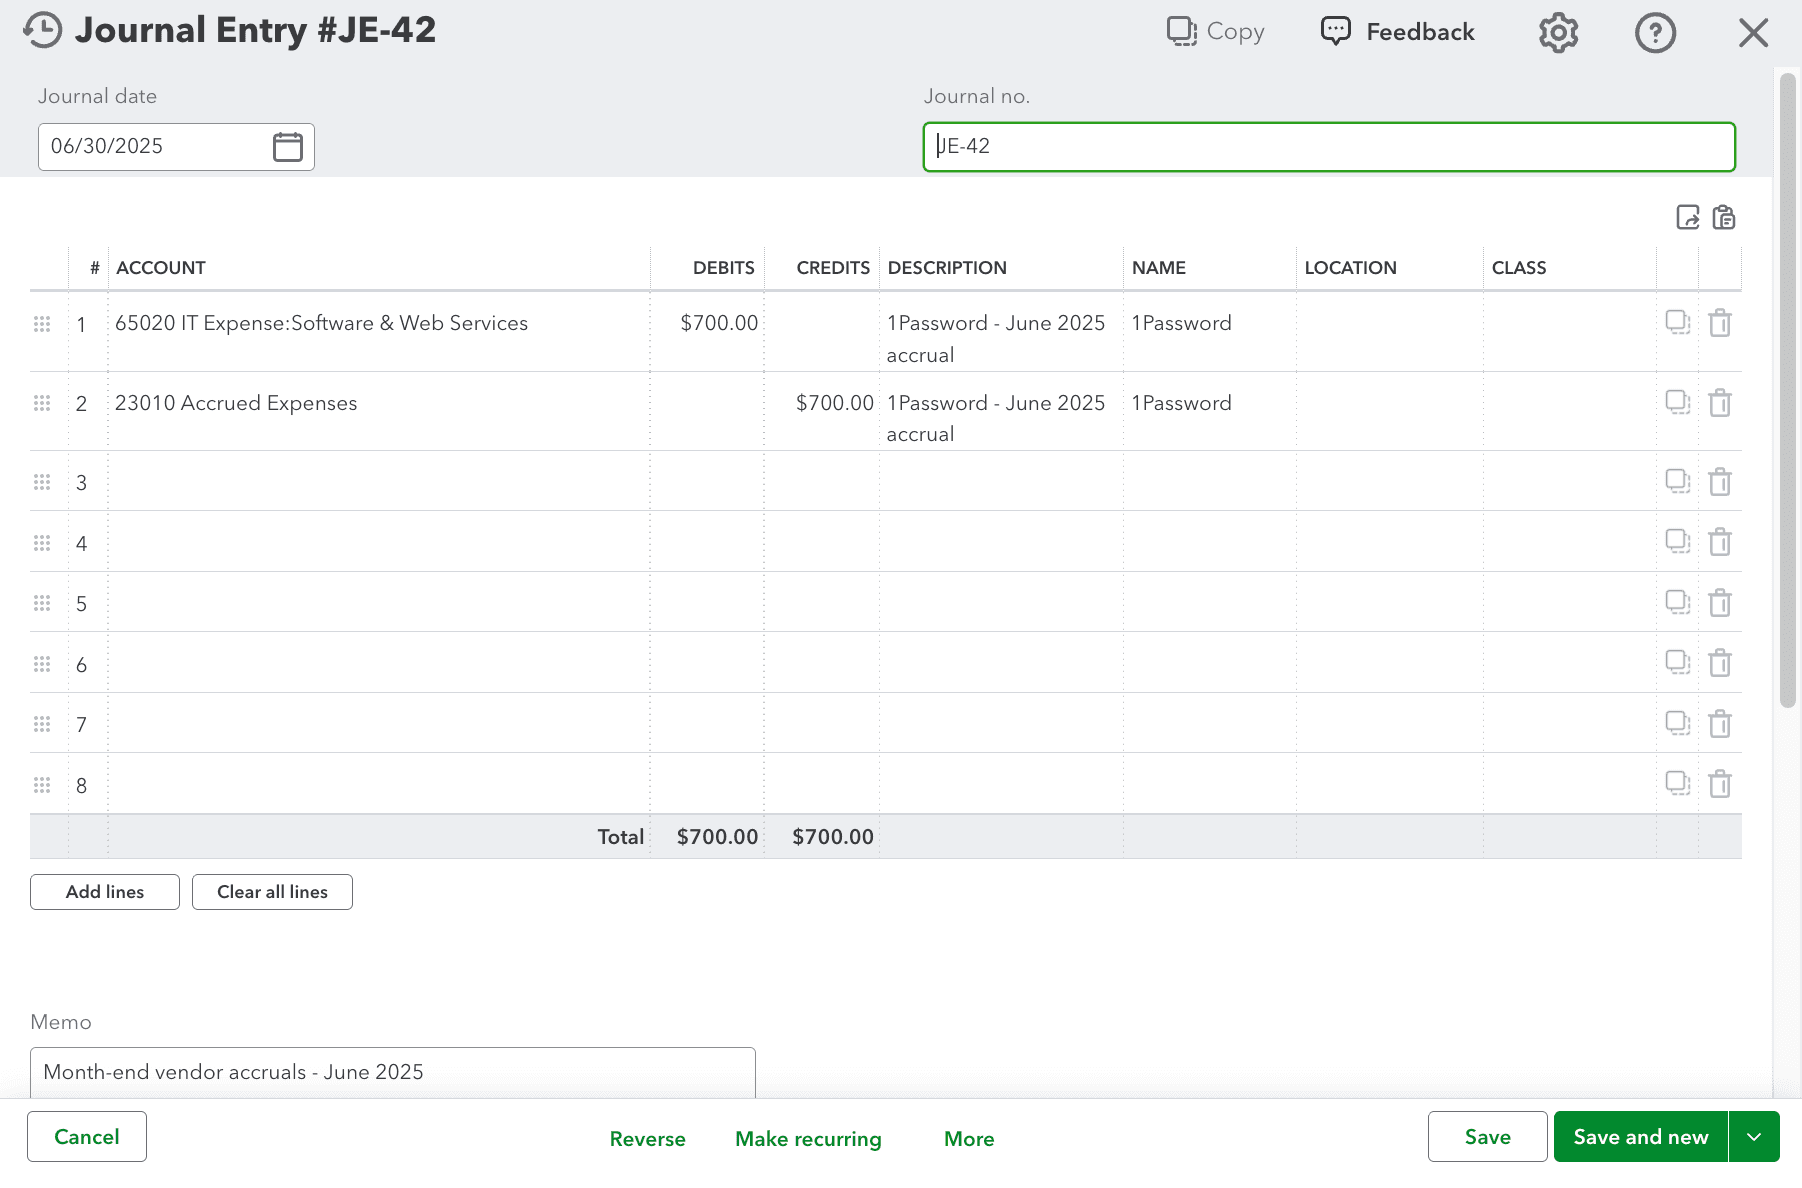
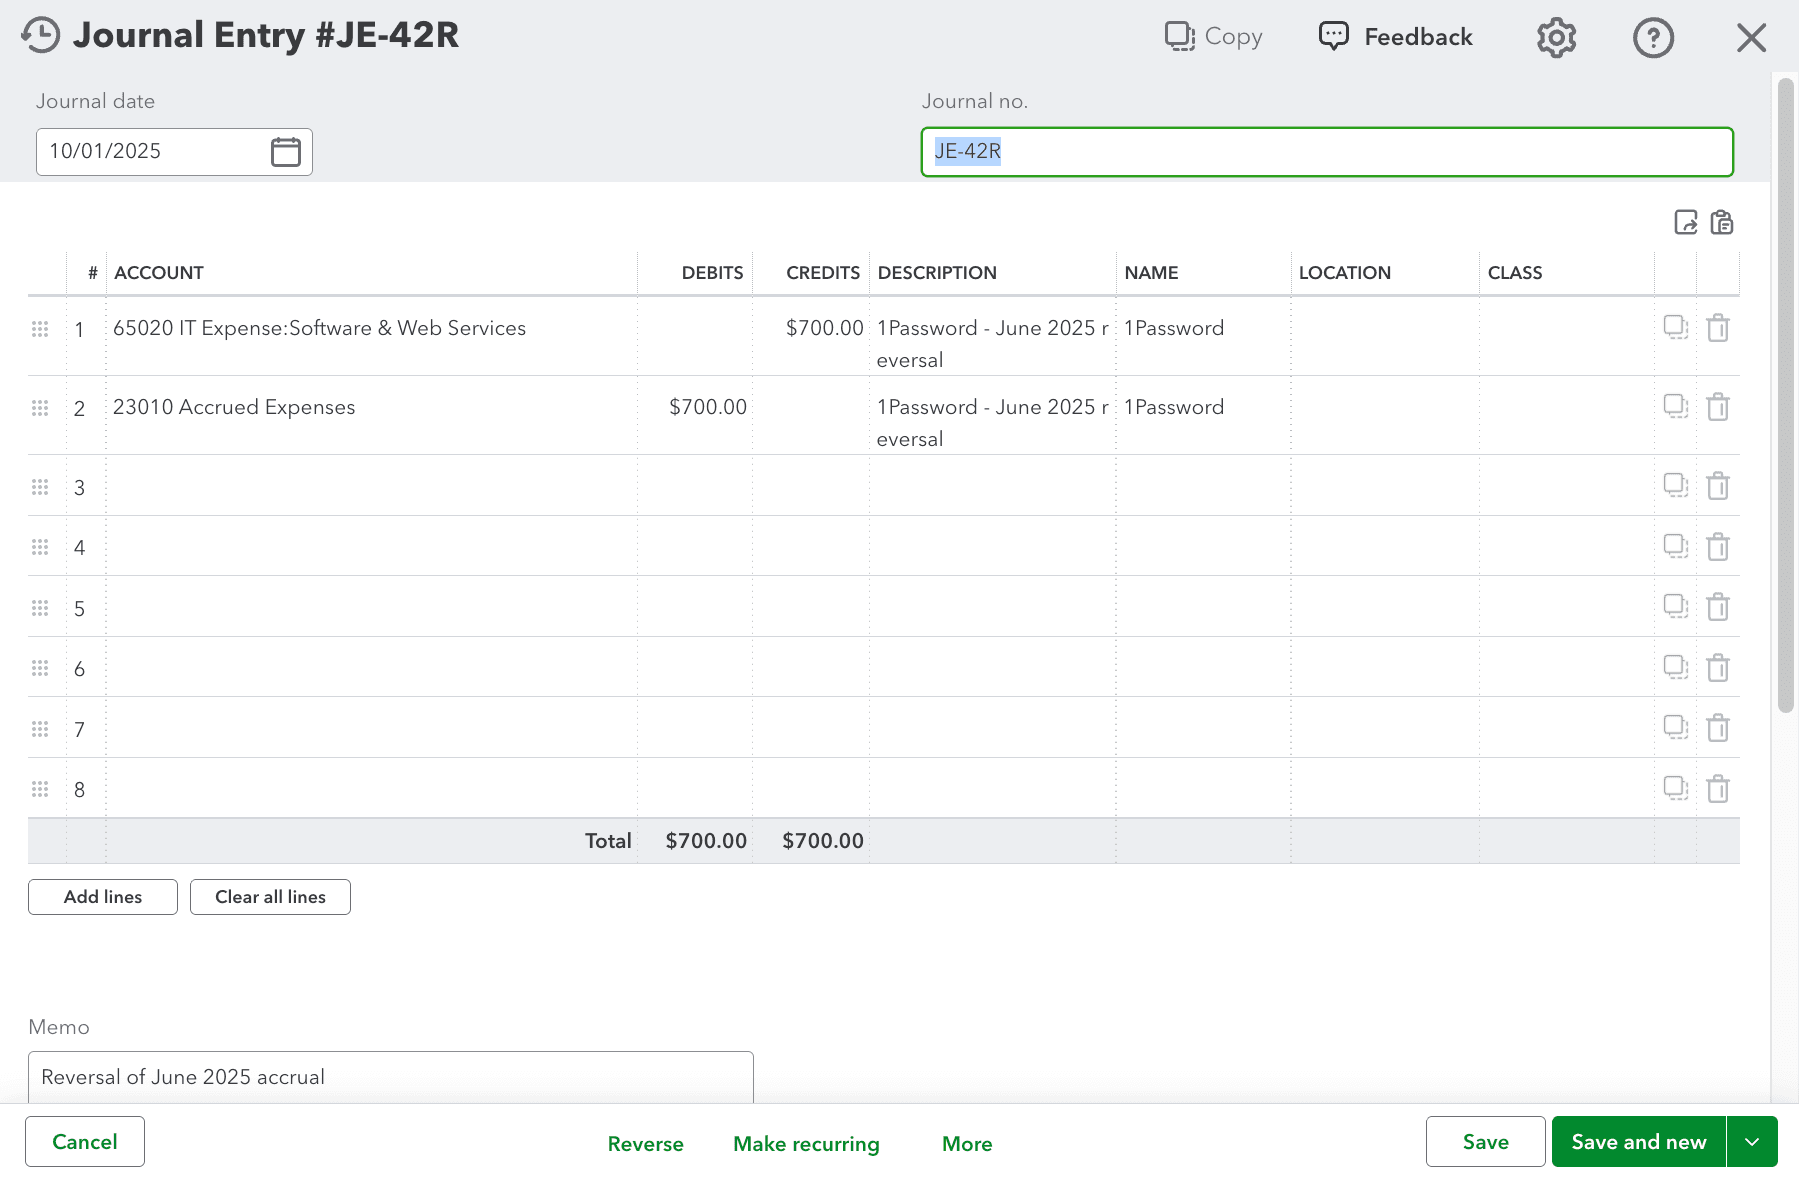
Open the ERP result and confirm the accrual Journal Entry posted with the expected values.
Step 20
Check the ERP one final time so you can verify the reversal Journal Entry posted correctly too.
This workflow creates both the accrual and reversal Journal Entries for a selected accrued-expense row from the Accrued Expenses Identification view.
Start from the Identification tab, select the month, and use the row actions for the expense you want to accrue.
The workflow drafts and posts both an accrual Journal Entry and a reversal Journal Entry.
The Identification list and posting state are month-specific, so make sure you are working in the correct accounting month before posting.
Even though the fields are auto-generated, you should still review the posted accrual and reversal Journal Entries in the ERP.
Check the selected month first, then review the Status, Link, and Action columns in Identification to locate the right row.
Use the ERP link and the posted-entry review steps to confirm both the accrual and reversal Journal Entries in the accounting system.
Was this helpful?
Need more help?
Ask for human help about this article and provide any feedback.